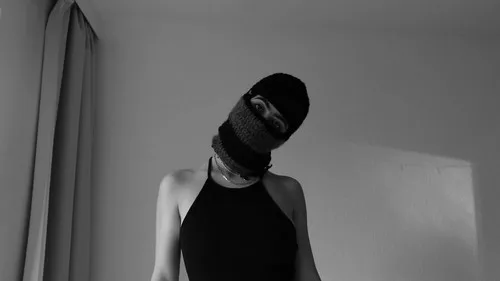
Made and counted by Wren —

Top-down balaclava pattern with eye slit for beginners

Worsted-weight balaclava worked top-down from a 12-stitch crown to a shaped eye slit.

Top-down balaclava pattern with eye slit for beginners
IntermediateLevel
4-6 hoursTime
WorstedYarn
Jump to the pattern

About this pattern

A top-down balaclava worked in double crochet rounds, starting with 12 stitches in the crown and increasing by 6 stitches per round for about 5 rounds until the piece measures temple to temple. The body then works straight for about 7 rounds before an eye slit is formed by chaining and skipping roughly 22 stitches. Two yarn colors mark the crown-to-body transition; finishing is a single step of cutting yarn and weaving in ends.

This balaclava starts at the crown and works outward in the round, so fit is set before the face opening exists. Round 1 places 12 stitches, round 2 brings that to 18, and increases continue for about 5 rounds until the circle spans temple to temple. From there the body is worked straight for about 7 rounds before a chained-and-skipped section opens the eye slit. Two colors, shown here as black and grey, mark the transition between crown and body without changing the stitch pattern. You can personalize the balaclava by choosing different yarn colors, making it striped, or keeping it simple with a solid shade.
The pattern

Written out round by round

Materials

  • Worsted weight yarn in two colors (black and grey used in example)
  • Crochet hook suitable for yarn weight
  • Stitch markers
  • Scissors and yarn needle

Abbreviations

  • ch = chain
  • dc = double crochet
  • sl st = slip stitch
  • DC2tog = yarn over, insert hook into next stitch, yarn over, pull through (3 loops), yarn over, pull through 2 loops, yarn over, insert hook into next stitch, yarn over, pull through (4 loops), yarn over, pull through 2 loops, yarn over, pull through all remaining loops

The Crown (Increasing)

Round 1Make a slip stitch; Chain 4; Slip stitch into first chain to form a circle; Chain 3 (counts as first DC); Place 11 DC into circle for a total of 12 stitches; Slip stitch into top of first chain 3 to close. (12)
Round 2Chain 3 (counts as first DC); In next stitch place 2 DC; Repeat 1 DC then 2 DC in next stitch all around; Total of 18 stitches; Slip stitch to close and chain 3. (18)Continue increasing in the same way until crown circle reaches temple to temple.Stop increasing after about 5 rounds or when size fits.

The Body (Straight Crochet)

Round 1Work 1 DC in every stitch around with no increases.Continue rounds until reaching above eyebrows where slit begins.About 7 rounds worked before starting eye slit.

The Eye Slit

Round 1Place stitch markers to mark slit width; Work DC until first marker; Chain the number of stitches marked to skip (about 22 chains); Skip same number of stitches on body; Continue with DC into next stitch after skipped section; Complete round with DC in each stitch and slip stitch to join.
Round 2Work 1 DC into every chain stitch of slit and DC across rest of round.

The Neck and Finishing

Round 1Continue DC rounds until reaching desired neck length.
Round 2Optional decrease row Optional decrease row to tighten neck by working 5 DC then DC2tog repeated around.
Round 3Work straight DC rows until balaclava reaches desired length.

Assembly

Step 1Cut yarn and weave in all ends.

Tester's notes

12 stitches close round 1; recount before starting round 2 so the 6-stitch increase per round stays accurate.

5 rounds of increasing is a guideline, not a fixed stop point — keep trying the crown on and stop only when it reaches temple to temple.

7 rounds of straight body is the reference point before the eye slit; measure against eyebrow height on the wearer rather than counting rounds blindly if sizing differs.

22 chains forms the eye slit gap — place stitch markers before chaining so the skip matches the chain count exactly on both sides.

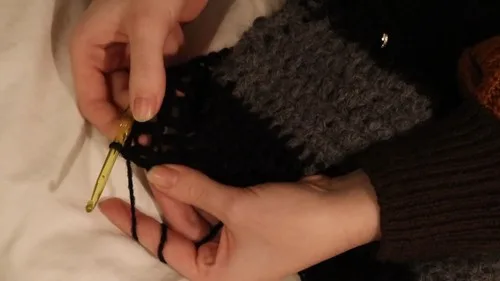
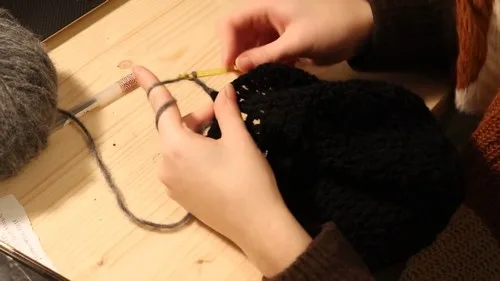
Work in progress

Top-down balaclava pattern with eye slit for beginners — photo 2
Top-down balaclava pattern with eye slit for beginners — photo 3

At a glance

Rounds8
Parts4
LevelIntermediate
Time4-6 hours
YarnWorsted

Gauge check

After round 2, lay the 18-stitch crown flat and check that it sits without cupping or rippling at the edge.

If the fabric cups, the hook is too small for the yarn; if it ripples, the hook is too large — swap sizes before continuing the increase rounds.

Stitch-count checkpoints

  • The Crown (Increasing) · Round 1: 12 sts
  • The Crown (Increasing) · Round 2: 18 sts

If something looks wrong

The crown cups like a bowl instead of lying flat.
Increases are landing in the same spot every round instead of staggering. Offset the 2-DC increase stitch by one position each round so increases spiral rather than stack.
The balaclava is tight across the forehead and jaw.
Increasing stopped before the crown actually reached temple to temple, likely cut short at round 5 by count rather than by fit. Add one more increase round and re-check against the head.
The eye slit edges pucker or pull inward.
The chain count skipped on the opposite side does not match the number of chains made, so the two edges of the gap are different lengths. Recount the 22 chains and the skipped stitches so both sides match before closing the round.
The eye slit sits too high or too low on the face.
The body was not worked for enough rounds before starting the slit, so it lands above or below eyebrow level. Try the piece on after every round once past round 5 of the body section and place stitch markers at eye level before starting the slit round.

Yarn substitutions

Cotton, worsted weightLess stretch than the acrylic used in the sample, so the crown may need an extra increase round to reach the same temple-to-temple fit; stiffer fabric holds the eye slit shape without rolling.
Acrylic, worsted weightMatches the sample yarn weight directly — same hook, same stitch counts, same 5-round crown and 7-round body should produce the same size.
Wool-blend, worsted weightMore give than acrylic, so the piece may fit slightly larger at the same round counts; go down one hook size if the crown measures past temple to temple before round 5 is finished.
FAQs

Questions

How do you know when to stop increasing the crown?

Stop when the flat crown circle, measured temple to temple on the wearer, matches the head width — not at a fixed round number. The pattern increases for about 5 rounds as a starting point, but trying the piece on after round 4 and round 5 catches a too-small or too-large fit before the body starts.

How wide should the eye slit be?

The sample uses about 22 chains for the skipped section, which sets the gap width. Place stitch markers before chaining so the skip on the opposite side of the round matches that same count.

Can the two colors be swapped for the crown and body sections?

Yes — the pattern uses black and grey as an example only, and the color break can happen at any round boundary, including right at the crown-to-body transition after round 2. Changing color on the last stitch of a round keeps the join at a consistent seam line.

One at a time —

Get the next pattern

Tested round by round before it is sent. No spam.