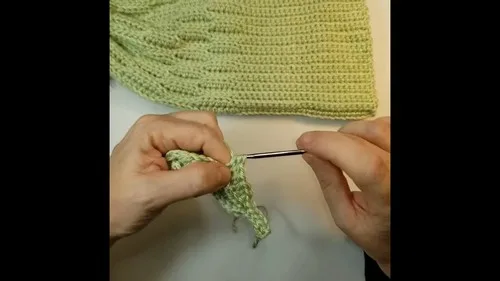
Made and counted by Wren —

Cozy Crochet Honeycomb Beanie Pattern For Winter Style

Crochet a cozy honeycomb beanie with a textured BLO stitch pattern and ribbed brim. Beginner-friendly, one skein, perfect for winter warmth and gifting.

Cozy Crochet Honeycomb Beanie Pattern For Winter Style
IntermediateLevel
4-6 HoursTime
4.25 mmHook
AranYarn
Jump to the pattern

At a glance

Chain 56 stitches to set up both the ribbed brim section and the honeycomb body section in one long foundation.

Work 26 single crochet stitches across part of the chain to form the beginning of the ribbed brim.

Mark the 26th stitch so you always know exactly where the brim ends and the honeycomb section begins.

Skip the last 6 chains, then build the honeycomb texture using alternating groups of half double crochets and slip stitches.

Turn your work and repeat the honeycomb sequence, this time working every stitch strictly in the back loop only.

Continue alternating BLO honeycomb rows while also working the brim rows in back loop only for that ribbed texture.

Finish each brim row with a single crochet through both loops of the final stitch to stabilize the edge.

Once you reach your finished length, seam the long strip together to form the rounded beanie shape.

About this pattern

This Honeycomb Beanie is built from a single clever strip of stitches that gets folded and seamed into a beanie shape, giving you a gorgeous textured honeycomb pattern without any complicated shaping. It's the kind of project that looks far more intricate than it actually is, making it perfect for crocheters who want to impress without wrestling with tricky increases or amigurumi-style shaping. If you love the look of woven or knit honeycomb texture but want an easy, approachable crochet version, this beanie was made for you.

The magic here is all in the back loop only (BLO) technique, which is what creates that raised, honeycomb ridge effect running through the crown of the hat. You'll alternate half double crochets and slip stitches worked strictly in the back loops, which builds visual texture while keeping the fabric stretchy and warm. This is a great confidence-building project for advancing beginners or an easy, relaxing weekend project for intermediate crocheters — expect somewhere between 4 and 6 hours total, including seaming.

The finished beanie measures 19 to 20.5 inches laid flat, giving you a generous, adult-sized fit with a snug ribbed brim that hugs the head comfortably. The honeycomb texture gives it a cozy, cabin-chic look that pairs beautifully with Aran weight yarn's soft, substantial drape. Made in a rich neutral or a bold winter color, this beanie makes a thoughtful handmade gift for anyone on your list who appreciates texture, warmth, and a little extra craftsmanship in their winter wardrobe.

Variations

This beanie is incredibly fun to customize once you've got the honeycomb rhythm down. For a bold colorblock look, work the 26-stitch brim section in a contrasting color from the honeycomb body — try a cream brim with a deep forest green or burgundy body using Heartland in different colorways for that rustic, cabin-inspired feel. If you want a slouchier fit, add a couple extra repeats of the honeycomb pattern before starting your decreases, which will add length and drape without changing your foundational chain count. For a smaller size, such as a teen or petite adult fit, consider working with a smaller 4.25mm hook consistently and slightly looser tension rather than changing stitch counts, since altering the 26-brim or 30-body chain numbers will affect how the honeycomb pattern lines up. Yarn substitutions work beautifully here too — try Wool-Ease or Brava Worsted-Aran blends if you want a more budget-friendly option, or a chunky alpaca blend for an extra plush, luxurious beanie. For a seasonal twist, work the honeycomb sections in alternating warm autumn tones like rust, mustard, and olive for a cozy fall accessory, or keep it monochrome in soft grays and creams for a minimalist, gender-neutral gift. You could also add a small pompom or faux fur trim to the top seam for extra flair, or leave it clean and simple for an everyday, grab-and-go winter hat. However you style it, this honeycomb structure is endlessly adaptable to your personal aesthetic.

I adore this pattern because it tricks everyone into thinking you spent hours plotting out a complicated stitch chart, when really the honeycomb effect comes from a simple, repeatable rhythm of HDC and slip stitches worked in the back loop only. There's something so satisfying about watching that ridged texture emerge row after row — it genuinely looks like little honeycomb cells forming across the fabric. I also love that this beanie starts as a long strip rather than working in the round, which means no fussing with stitch markers for increases or worrying about your hat turning into a cone. The ribbed 26-stitch brim worked in BLO gives you that classic, stretchy beanie band we all crave in winter accessories, and finishing the last stitch through both loops keeps the edge nice and stable. It's a wonderfully meditative make once you get into the groove of the honeycomb repeat, and I love that one skein of Aran weight yarn is all you need. This is the kind of pattern I keep coming back to every fall.
Common mistakes

  • Working into both loops instead of back loop only (BLO) during the honeycomb section.Slow down and consciously check that you're inserting your hook only under the back loop for every HDC and slip stitch in this section — the honeycomb texture completely relies on this technique, so double-check your first few stitches of each row.
  • Losing track of the marked 26th stitch that separates the brim from the honeycomb body.Use a brightly colored stitch marker and leave it in place until you've completed several rows, referring back to it every time you start a new row so you always know where the brim ends and the honeycomb pattern begins.
  • Miscounting the 6 HDC and 6 slip stitch repeats in the honeycomb pattern, causing the texture to shift out of alignment.Count out loud or use small locking stitch markers every 6 stitches as you work each repeat, removing them as you complete the row to keep your pattern perfectly aligned.
  • Forgetting to skip the last 6 chains before turning, which throws off the overall stitch count.Lay your chain out flat and count from both ends before your first row, physically marking where the skipped chains begin so you don't accidentally work into them.
  • Working the final brim stitch in BLO instead of through both loops as instructed.Treat the last stitch of the brim row as a deliberate exception — pause at the end of each brim row and consciously insert your hook through both loops for that last SC to reinforce the edge.
  • Using a yarn or hook combination that's too loose, resulting in a floppy beanie that won't hold its shape.Stick with the recommended 4.25mm to 5mm hook range and Aran weight yarn, and if your gauge feels loose, size down half a millimeter for a denser, more structured fabric.

The pattern

Written out round by round

Materials

Yarn

  • Aran weight yarn (Lion Brand Heartland, Channel Islands), one skein

Hook

  • 4.25 mm (4.5 mm or 5 mm also suitable)

Notions

  • Stitch marker, sewing needle

Finished Width

  • 19–20.5 inches laid flat (72–80 rows)

Abbreviations

  • st = stitch
  • sl st = slip stitch
  • sc = single crochet
  • hdc = half double crochet
  • blo = back loops only

Main Pattern

  1. Round 1Chain 1 and turn. Work 26 SC for brim. Mark the 26th stitch. For honeycomb section: 6 HDC, 6 SL ST, 6 HDC, 6 SL ST.Skip last 6 chains.Chain 1 and turn.
  2. Round 2Work all honeycomb stitches in BLO. 6 SL ST BLO, 6 HDC BLO, 6 SL ST BLO, 6 HDC BLO.Brim: 25 SC BLO, last SC through both loops.Chain 1 and turn.For Row 3 Brim: 26 SC BLO.Honeycomb: 6 SL ST BLO, 6 HDC BLO, 6 SL ST BLO, 6 HDC BLO.Work into skipped 6 foundation chains with 6 SL ST.Chain 1 and turn.
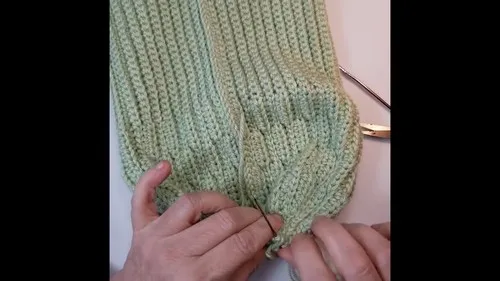
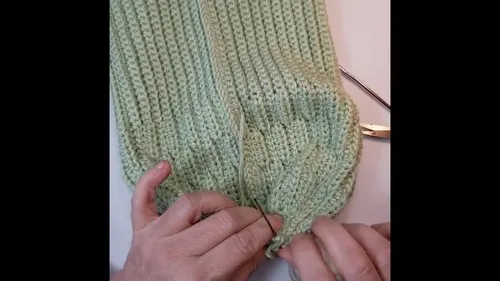
  3. Round 4Honeycomb: 6 SL ST BLO, 6 HDC BLO, 6 SL ST BLO, 6 HDC BLO. Brim: 25 SC BLO, last SC through both loops.Chain 1 and turn.Repeat Rows 1–4 Continue pattern until work measures 19–20.5 inches wide, ending on Row 4.Assembly and Finishing Turn inside out and slip stitch side edges together.Fasten off, leaving a 2-foot yarn tail.Thread needle and weave through top edge stitches.Pull tightly to cinch the top closed.Weave in ends and turn right side out.

Assembly

Step 1

Turn inside out and slip stitch side edges together.

Step 2

Fasten off, leaving a 2-foot yarn tail.

Step 3

Thread needle and weave through top edge stitches.

Step 4

Pull tightly to cinch the top closed.

Step 5

Weave in ends and turn right side out.

Step 6

Add a pom pom if desired.

Important notes

💡 Stick to a 4.25mm hook for a snugger, more structured beanie, or size up to 5mm if you prefer a looser, drapier fabric — just be consistent throughout to keep your honeycomb texture even.

💡 Always double-check you're working in the back loop only during the honeycomb rows; even one row worked through both loops will create a visible flat patch that breaks the pattern's texture.

💡 Keep your stitch marker on the 26th stitch until the brim and honeycomb sections are both complete and seamed, since it's easy to lose your place between rows.

💡 Block your finished beanie lightly with steam or a gentle wet block to help the honeycomb ridges pop and the brim relax into a comfortable, rounded shape.

💡 Since this pattern uses only one skein, keep an eye on your remaining yarn as you approach the final rows so you have enough left for a secure seam.

💡 Use a sewing needle and matching yarn tail to seam the strip into a beanie shape, working small, even stitches along the edge for a nearly invisible finish.

More photos

Cozy Crochet Honeycomb Beanie Pattern For Winter Style — photo 2
Cozy Crochet Honeycomb Beanie Pattern For Winter Style — photo 3
FAQs

Frequently asked questions

What yarn weight and amount do I need for this beanie?

You'll need one skein of Aran weight yarn, such as Heartland in the Channel Islands colorway. This is a wonderfully economical, single-skein project perfect for using up a favorite skein in your stash.

What size hat does this pattern make?

The finished beanie measures 19 to 20.5 inches laid flat, which translates to roughly 72 to 80 rows of fabric. This gives a generous, comfortable adult fit for most head sizes.

What does BLO mean and why is it used so much in this pattern?

BLO stands for back loop only, meaning you insert your hook under just the back loop of the stitch rather than both loops. It's the key technique that creates the raised honeycomb texture in the crown and the ribbed effect in the brim.

Do I need to be an advanced crocheter to make this beanie?

Not at all — this pattern is rated intermediate mainly because of the back loop only technique and keeping track of the honeycomb repeats. If you're comfortable with basic stitches and can count carefully, you'll be able to complete this beanie confidently.

Can I use a different hook size than what's recommended?

Yes, the pattern is flexible with 4.25mm, 4.5mm, or 5mm hooks depending on your desired fabric density. Just remember that a larger hook will create a looser, drapier beanie while a smaller hook gives a denser, warmer fabric.

One at a time —

Get the next pattern

Tested round by round before it is sent. No spam.