Made and counted by Wren —

How to Crochet a Novi Fedora Hat

Learn how to crochet the cozy Novi Fedora Hat with an ear-covering band, shaped crown, and easy stitches perfect for chilly days ahead.

IntermediateLevel
4-6 HoursTime
5.5 mmHook
WorstedYarn
Jump to the pattern

At a glance

Start by crocheting the band, working it in rounds to create the ear-covering foundation of the hat.

Keep your tension even here since the band determines how snug the finished fedora will feel.

Transition into the body of the hat, working additional rounds that build height and volume above the band.

Continue steadily through the body rounds until the hat reaches the depth needed before crown shaping begins.

Move into the crown shaping rounds, working gradual decreases to curve the top into a smooth, rounded dome.

Check the shape periodically as you decrease to keep the crown symmetrical and evenly rounded.

Fasten off and weave in all loose ends securely with a tapestry needle for a clean finish.

Optionally attach a pom-pom to the crown's center for a playful, finished look.

About this pattern

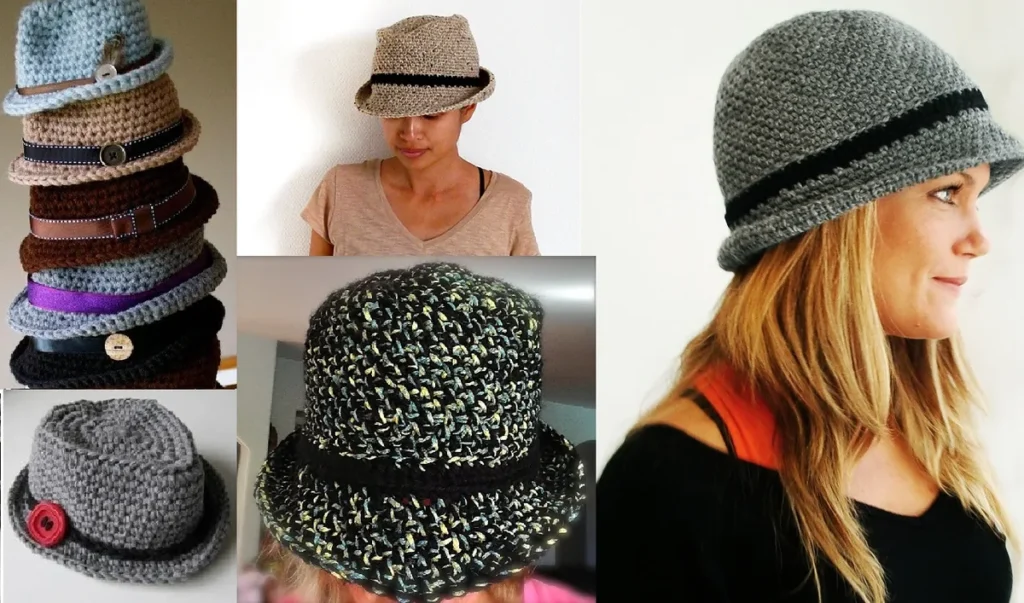
The Novi Hat is a crocheted take on the classic fedora, designed with a wide band that comfortably covers your ears while still looking polished and put-together. It's the kind of hat that works just as well running errands on a cold morning as it does dressing up a casual outfit. Perfect for crocheters who want a project that's both functional and fashion-forward, this hat proves that handmade accessories can be just as stylish as anything from a boutique shelf.

This pattern moves through three clear stages: building the band, growing the body, and shaping the crown, giving you a satisfying sense of progress with every round. Worked in worsted weight yarn with a 5.5mm hook, the stitches come together quickly, making this an approachable project for confident beginners and a fast, enjoyable make for intermediate crocheters. Expect to spend somewhere between four and six cozy hours to complete it, depending on your gauge and how often you pause for coffee breaks.

Once finished, you'll have a substantial, warm fedora with a structured crown and a snug, ear-covering band that holds its shape beautifully. The fabric feels thick and cushiony thanks to the worsted weight yarn, while the optional pom-pom on top adds a playful, finished touch. Whether you keep it for yourself or wrap it up for someone special, the Novi Hat makes a thoughtful, wearable gift that says 'handmade with care' in every stitch.

Variations

One of the best things about the Novi Hat is how endlessly customizable it is. For a bold, modern look, try color-blocking the band in a deep mustard or rust while keeping the body and crown in oatmeal or charcoal gray — it instantly gives the hat a designer feel. If you want something softer and more neutral, work the entire hat in a chunky alpaca-blend yarn like Wool-Ease Thick & Quick for extra warmth and a slightly fuzzier finish, though you'll want to size up your hook to 6.5mm to keep the fabric from getting too dense. Wool and wool-blend yarns like Cascade 220 or Brava Worsted from Knit Picks also work beautifully here, giving the hat more structure and a cozier hand-feel than acrylic. To adjust the fit, add or subtract a few stitches evenly around the band before starting the body — a tighter band gives a snugger, more athletic look, while a looser band creates a slouchier vibe. For gifting, consider skipping the pom-pom entirely for a sleeker, more masculine fedora, or swap it for a chunky faux fur pom in a contrasting shade for extra personality. Seasonal color palettes are also fun here: try cream and sage for a spring-inspired version, or classic black and burgundy for a moodier, autumn-ready hat. If you're making this for a child, simply reduce your starting stitch count proportionally in the band and body rounds to bring the circumference down to a kid-sized fit, keeping the same shaping logic for the crown. However you customize it, the three-part construction stays reliable, so feel free to experiment with color and yarn without worrying about the overall shape falling apart.

I adore this pattern because it walks you through building a hat in a way that actually makes sense — you start with the band, the part that keeps your ears toasty, and then watch the body grow round by round before the crown shapes itself into that classic fedora silhouette. There's something so satisfying about working with a 5.5mm hook and worsted weight yarn; the stitches are big enough to see your progress fast, but still detailed enough to feel like a real accomplishment. I love that the band doubles as both structure and function, so you're not just making something pretty, you're making something genuinely useful for cold weather. And don't skip the pom-pom step — sewing that little flourish onto the crown is my favorite part, it's the moment the hat goes from 'nice project' to 'I want to wear this everywhere.' This is a pattern I keep coming back to because it's quick enough for a weekend but polished enough to wear proudly.
Common mistakes

  • Starting the band too loosely, causingCheck your gauge before beginning and consider dropping to a smaller hook if your stitches feel loose; the band needs firm, even tension to support the rest of the hat.
  • Losing track of round countsPlace a stitch marker at the start of each round and move it up every time you complete one, especially during the transition between Step 1 and Step 2.
  • Rushing the crown shaping and ending upWork the crown decreases slowly and check the hat's shape against your head or a hat form periodically to make sure the decreases are distributed evenly.
  • Using a yarn weight lighterStick with a true worsted weight (size 4) yarn as specified, and if you want extra structure, choose a wool or wool-blend fiber over a very soft acrylic.
  • Sewing the pom-pom on off-centerBefore stitching, lay the hat flat and fold it in half to find the true center of the crown, then mark that spot with a scrap of yarn before attaching the pom-pom.
  • Leaving yarn ends unwovenWeave in every end securely with a tapestry needle, running it through several stitches in different directions before trimming for a durable finish.

The pattern

Written out round by round

Materials

Yarn

  • Worsted weight yarn (size 4) works well for this pattern. Choose a soft, warm fiber like wool or acrylic.

Crochet Hook

  • Use a 5.5mm (I-9) hook for a snug and cozy fit.

Tapestry Needle

  • For weaving in ends.

Scissors

  • For cutting yarn.

Optional

  • A faux fur pom-pom or yarn pom-pom for decoration.

Abbreviations

  • sc = single crochet
  • hdc = half double crochet
  • blo = back loops only
  • FPdc = front post double crochet
  • BPdc = back post double crochet
  • hdc2tog = half double crochet 2 together

Step 1: Create the Band

The Novi Hat starts with a ribbed band that adds structure and elasticity to the hat.

Foundation Chain : Begin by chaining 10 (or more, depending on how wide you want the brim of the hat to be).

  1. Row 1Single crochet (sc) in the second chain from the hook and in each chain across. Turn your work.
  2. Row 2Chain 1, single crochet in the back loops only (BLO) across the row. This creates the ribbed texture for the band. Turn your work.Repeat: Continue crocheting rows of single crochet in the back loops only until the band fits comfortably around your head. The band should stretch slightly to ensure a snug fit.Join the Band: Once the band reaches the desired length, slip stitch the two ends together to form a ring. This will be the base of your hat.

Step 2: Start the Body of the Hat

  1. Set-Up RoundSet-Up Round: Chain 1, work single crochets evenly around the top edge of the band. The number of stitches should be a multiple of 4 to maintain the pattern. Slip stitch to join the round.
  2. Round 1Begin the texture pattern by chaining 2. Work half-double crochets (hdc) into each stitch around. Slip stitch to join.
  3. Round 2(Texture Round): Chain 1, and alternate between front post double crochet (fpdc) and back post double crochet (bpdc) around the hat. This creates the textured ribbed effect. Slip stitch to join.Continue the Pattern: Repeat the textured pattern for several rounds, alternating between fpdc and bpdc stitches to build the body of the hat. Continue until the hat reaches the desired length, usually around 7-8 inches from the band."The unique texture of the Novi Hat comes from the combination of front and back post stitches, giving it a cozy, ribbed appearance that stands out in the crowd."

Step 3: Shape the Crown

Decrease Rounds : To shape the top of the hat, begin decreasing the number of stitches in each round.

  1. Round 1Chain 2, and work 1 hdc in the next 2 stitches, then hdc2tog (half-double crochet 2 together) in the next stitch. Repeat around the hat.
  2. Round 2Work 1 hdc in the next stitch, hdc2tog in the following stitch. Continue around.Continue Decreasing: Keep decreasing until only a few stitches remain at the top of the hat. Fasten off, leaving a long tail.Close the Top: Thread the yarn tail through a tapestry needle and weave it through the remaining stitches. Pull tightly to close the top of the hat. Secure the yarn and weave in any loose ends.

Step 4: Add the Pom-Pom (Optional)

Attach a Pom-Pom : If you'd like, attach a faux fur pom-pom or make a yarn pom-pom to sew onto the top of the hat for extra flair.

Secure the Pom-Pom : Use your tapestry needle to securely sew the pom-pom onto the top of the hat. Weave in all remaining ends.

Important notes

💡 Choose a worsted weight wool or wool-blend yarn if you want a warmer, more structured fedora; acrylic works well too but will feel a bit lighter and less rigid.

💡 Place a stitch marker at the beginning of each round, especially during the crown shaping in Step 3, so you never lose track of your decrease placement.

💡 Try the band on as you go, if possible, to check the fit around your head before moving into the body rounds — it's much easier to adjust early than after the hat is finished.

💡 Save your yarn tail from the crown for sewing on the pom-pom later, so you don't have to add extra yarn just for attaching the finishing touch.

💡 Block your finished hat lightly over a bowl or hat form to help the crown hold its shape and give the brim a crisp, professional finish.

FAQs

Frequently asked questions

What size hook and yarn does the Novi Hat pattern use?

The pattern calls for a 5.5mm (I-9) crochet hook paired with worsted weight (size 4) yarn. This combination gives the hat a snug, cozy fit with enough structure to hold the fedora shape.

Is the Novi Hat a good project for confident beginners?

Yes, it's rated intermediate but the three clear stages — band, body, and crown — make it approachable if you're comfortable with basic increases and consistent round counting. If you've made a beanie before, you'll likely find this pattern manageable.

Do I have to add a pom-pom to the top of the hat?

No, the pom-pom is entirely optional and purely decorative. You can leave the crown plain for a sleeker look, or add a faux fur or yarn pom-pom for extra flair, whichever suits your style.

How long does it typically take to finish this hat?

Most crocheters complete the Novi Hat in about four to six hours, though this varies based on your personal gauge and experience level. It's a great project to work on over a weekend or a couple of relaxed evenings.

One at a time —

Get the next pattern

Tested round by round before it is sent. No spam.