Made and counted by Wren —

How to crochet a chenille capybara bag

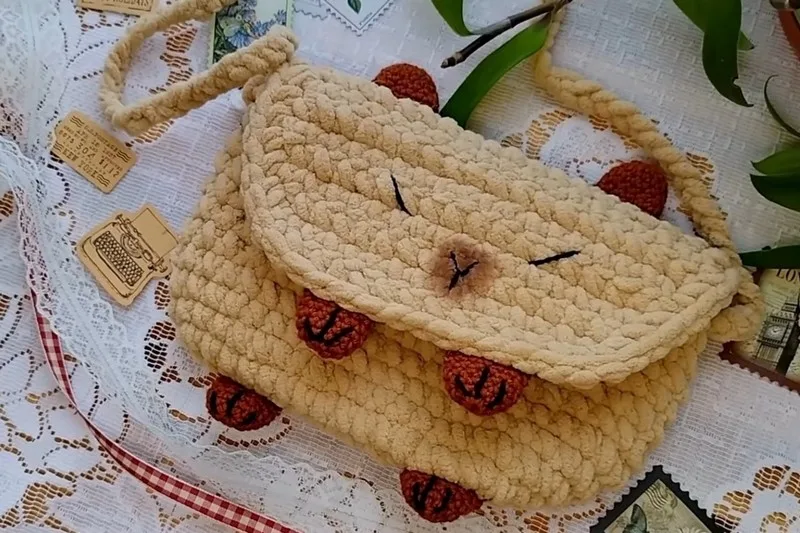
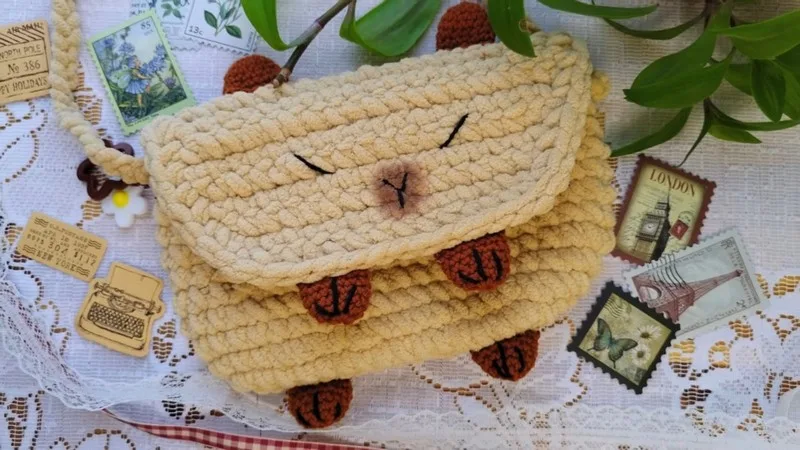
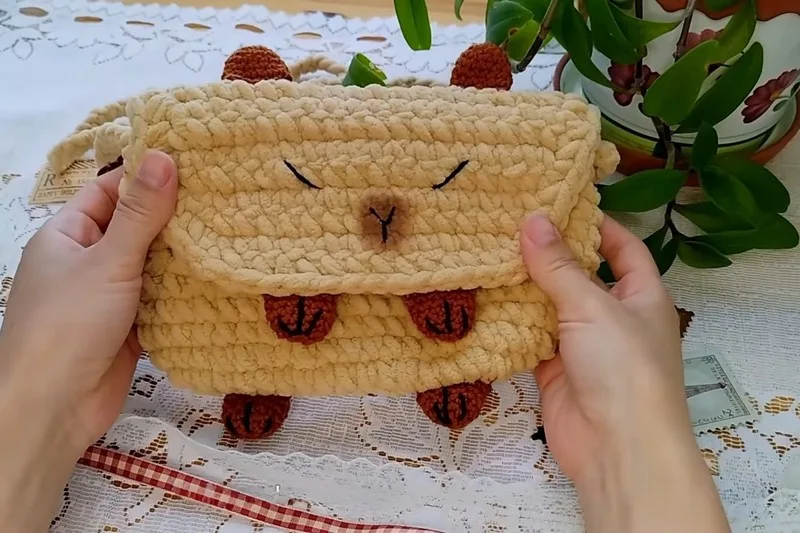
8 mm hook, chenille yarn: makes an oval-base capybara bag with dark-brown ears, hands, and feet.

How to crochet a chenille capybara bag
IntermediateLevel
6-9 hoursTime
8 mmHook
Super BulkyYarn
Jump to the pattern

About this pattern

This pattern makes a chenille amigurumi bag shaped like a capybara, built from a 36-stitch oval base, an 11-row main panel that decreases from 19 to 14 stitches, and six small pieces — two hands, two feet, two ears — crocheted at 3.5 mm in cotton yarn. An 8 mm hook handles the chenille body. Facial features and the strap attach after the bag is fully assembled.

This bag builds from a 36-stitch oval base worked in continuous rounds, then shifts to a flat panel worked back and forth for the main body. The Main Pattern holds steady at 19 stitches for six rows before decreasing one stitch per row from Row 7 through Row 11, ending at 14 stitches. Six small pieces — two hands, two feet, and two ears — are worked separately at 3.5 mm with cotton yarn. The chenille body uses an 8 mm hook throughout; the 36-stitch base count is the number to verify before moving on.
The pattern

Written out round by round

Materials

Chenille Yarn

  • Light brown, for bag body and cap

Cotton Yarn

  • Dark brown, for hands, feet, and ears

Hooks

  • 8 mm (for chenille yarn)
  • 3.5 mm (for cotton yarn)
  • Scissors
  • Yarn needle
  • Stitch markers (recommended)
  • Black cotton yarn or embroidery thread (for face details)
  • Pins (for marking face placement)
  • Embroidery needle

Optional

  • Brown makeup powder or blush (for nose)
  • Silicone glue (for reinforcement)

Abbreviations

  • ch = chain
  • st = stitch
  • sts = stitches
  • sl st = slip stitch
  • sc = single crochet
  • inc = increase (2 sc in the same stitch)
  • dec = decrease (sc2tog; single crochet 2 together)
  • mr = magic ring (magic circle)
  • RS/WS = right side / wrong side

Bag Base (Oval)

(Yarn: Chenille, 8 mm hook)

Ch 15.

Round 1In 2nd ch from hook: 3 sc in the same st (for rounded end). Sc in next 12 ch. In last ch: 6 sc (turn the work, now working on the opposite side of foundation chain).Sc in next 12 ch.In final stitch (the starting chain): 3 sc (completing the oval).Sl st to first sc to join. (Total: 36 sts).
Round 2Ch 1. Increase in stitches 1, 3, 17, 19, 21, and 35: Inc (2 sc in one st) on indicated sts; sc in others.Use stitch markers for these increases.Sl st to join. (Total: 42 sts).
Rounds 3–11Ch 1, sc in each st around (42). Sl st to join each round.

Bag Flap/Cap

(Chenille, 8 mm hook)

Attach yarn to one edge of bag.

Row 1Ch 1, sc in next 19 sts. (Attach securely to bag edge.)
Rows 2–6Ch 1, turn, sc in 19.
Row 7Ch 1, turn, sc in 18 (start in 2nd st, decrease by 1 at the start).Rows 8–11: Repeat, decreasing one st at the start of each row, until you have 14 sts in Row 11.Fasten off, weave in tail.

Hands, Feet, and Ears (Make 6: 2 each for hands, feet, and ears)

(Cotton yarn, 3.5 mm hook)

Round 1MR, 6 sc (6).(6)
Round 26 inc (12).(12)
Round 3(sc, inc) x6 (18).(18)
Rounds 4–5Sc in each st (18).(18)
Round 6(sc, dec) x6 (12)
Round 7Sc in each st (12)Flatten the piece, fold in half and sc across 6 sts to close.Fasten off, leave tail for sewing.Repeat to make 6 pieces.Attach two for hands on the upper part of the bag, two for feet at bottom corners, two for ears at top edges. Sew on gently and evenly.

Strap

(Chenille, 8 mm hook)

Ch 120 (or adjust to desired length).

Test the chain, adjust length as needed.

Attach each end to the sides of the bag opening with sturdy stitching (or sl st).

Edging

Work 1 round of sc evenly along the edge of the flap (cap), using light brown chenille yarn, to neaten and stabilize the flap.

Face Embroidery

(Black cotton yarn or embroidery thread, embroidery needle)

Use pins to mark desired positions of eyes and nose.

Embroider small oval/round or sleepy eyes, and a tiny "Y"-shaped or inverted-triangle nose between them.

Optional: use a touch of brown makeup powder or blush on the nose for a cute highlight.

Assembly

Step 1Crochet the Bag Base (Oval) and continue directly into the Body (Rounds 3–11) without fastening off, working in continuous rounds and marking the start of each round with a stitch marker.
Step 2Attach the Strap to both sides of the bag opening with sturdy stitching or a slip stitch.
Step 3Work the Bag Flap/Cap (Rows 1–11) along the top edge of the bag, then finish its edge with a round of sc using light brown chenille yarn.
Step 4Pin and embroider the eyes and nose (Face Embroidery), then sew on the two hands, two feet, and two ears.
Step 5Hide and secure all yarn ends inside the bag; optionally reinforce the strap and other attachments with a dab of invisible fabric glue for extra security.

Tester's notes

3.5 mm hook and cotton yarn are for the six small pieces only — two hands, two feet, two ears — not for the bag body.

Mark the start of every round with a stitch marker on the Bag Base and any other continuous-round section; without it, the 36-stitch total is easy to lose track of.

Keep tension even across the Main Pattern's decrease rows (Row 7 through Row 11) — stitch count drops from 19 to 14 over five rows, and loose stitches there show as a visibly uneven edge.

No stuffing goes into any part of this pattern, bag body included — it's a functional bag, not a stuffed toy, so skip fiberfill entirely.

Work in continuous rounds throughout the Bag Base and Body (Rounds 1–11) unless the pattern says otherwise; the bag is assembled first, and the strap and facial features are added last.

Avoid pulling chenille yarn too tightly — it can thin out and distort the stitch count. Stretch your hands frequently, since working with an 8 mm hook and thick yarn can be tiring.

Personalize your capybara: embroider cheeks, add a tiny crown, or other adornments once the bag is fully assembled.

Work in progress

How to crochet a chenille capybara bag — photo 2
How to crochet a chenille capybara bag — photo 3

At a glance

Rounds12
Parts6
LevelIntermediate
Time6-9 hours
Hook8 mm
YarnSuper Bulky

Gauge check

After Round 1 of the Bag Base, count stitches around the oval — the total should read 36; a lower count usually means an increase point was skipped, a higher count means an extra stitch crept into one of the 12-stitch straight sections.

If the oval buckles or won't sit flat once the count checks out at 36, tension is uneven rather than miscounted — rip back and work the increases and straight stitches at the same tightness.

Stitch-count checkpoints

  • Hands, Feet, and Ears (Make 6: 2 each for hands, feet, and ears) · Round 2: 12 sts
  • Hands, Feet, and Ears (Make 6: 2 each for hands, feet, and ears) · Rounds 4–5: 18 sts
  • Hands, Feet, and Ears (Make 6: 2 each for hands, feet, and ears) · Round 7: 12 sts

If something looks wrong

The oval base cups or won't lie flat after Round 1.
Stitch count is off the required 36, or the increase points (3 sc, 6 sc) went into the wrong stitch. Recount all the way around and rework either end so both increase clusters land exactly where the pattern places them.
The top edge of the Main Pattern
The decrease rows (Row 7 through Row 11) weren't started at the second stitch, so the stitch count didn't drop evenly from 19 to 14. Undo back to Row 6 and confirm each decrease row starts one stitch further in.
Hands, feet, or ears come out oversized compared to the bag.
The 8 mm hook was used instead of the 3.5 mm hook for these pieces. Rework them with the 3.5 mm hook and cotton yarn as specified.
Eyes or nose end up crooked once embroidered.
Stitching started before placement was confirmed. Pin the eyes and nose in position first, check spacing, then embroider with the black cotton yarn or embroidery thread.

Yarn substitutions

Cotton, worsted weightProduces a smaller, denser bag than the chenille original — expect the 36-stitch oval base to measure noticeably smaller. Drop the hook from 8 mm to roughly 5 mm–5.5 mm to keep stitches closed; no stuffing needed either way.
Acrylic chenille, bulky weightClosest match to the pattern as written — similar pile and drape. Check the 36-stitch oval against the original before continuing; hook size may need to shift half a size up or down depending on the specific yarn's thickness.
Velvet-style polyester, worsted weightGives a smoother, less textured surface than chenille and a lighter overall bag. This yarn typically needs a smaller hook than 8 mm — closer to 5 mm–6 mm — to prevent visible gaps between stitches.
FAQs

Questions

Why does the oval base use two different stitch counts at each end (3 sc and 6 sc)?

The chain has two ends, and each gets worked twice as the round passes through it — once entering, once closing. Splitting the increases this way (3 sc + 3 sc at one end, 6 sc at the other) keeps both curves symmetrical while landing on exactly 36 stitches total.

Why are the hands, feet, and ears all worked from the same instructions?

All three pairs start identically — magic ring, 6 sc, then increase to 18 stitches over Round 2 and Round 3 — because they're the same size piece with different final finishing. Working all six from one round count keeps the pattern efficient and the pieces uniform.

Is the strap length fixed?

The pattern gives no fixed round or row count for the strap, so length is left to preference. Attach it after the bag body and Main Pattern are fully assembled, following the same chenille yarn and 8 mm hook used for the body.

One at a time —

Get the next pattern

Tested round by round before it is sent. No spam.