Made and counted by Wren —

Crochet envelope clutch with a spiral bobble flap

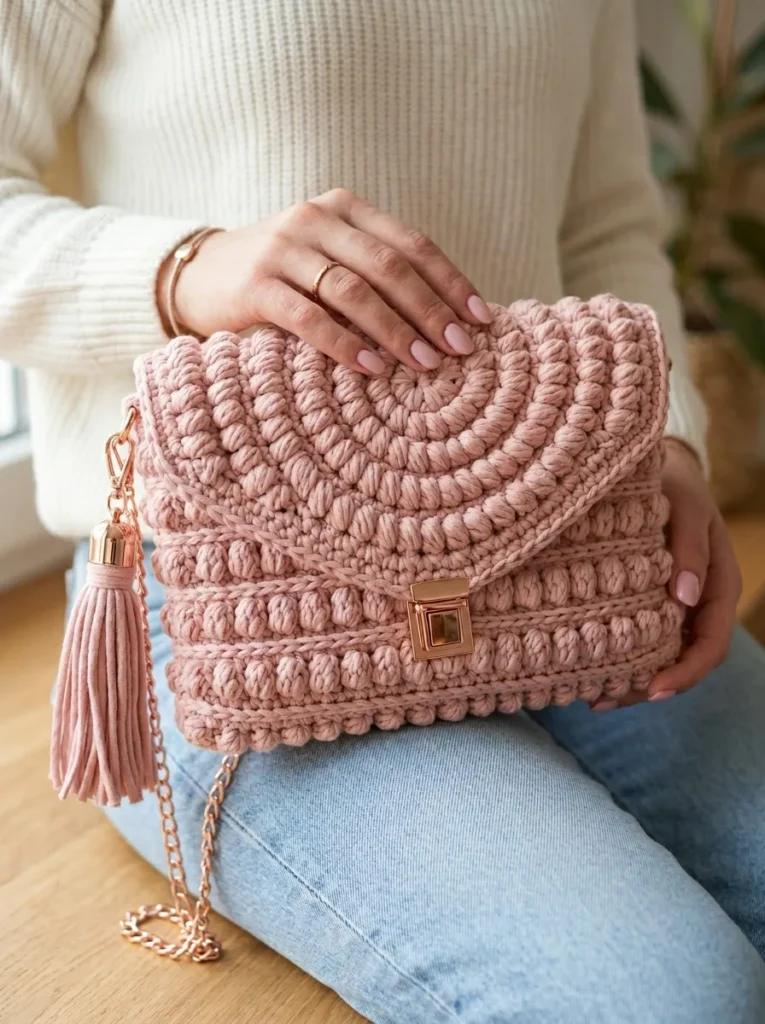
8mm/9mm hook, bulky yarn: crochet an envelope clutch with a spiral bobble flap and gold twist lock clasp.

Crochet envelope clutch with a spiral bobble flap
IntermediateLevel
4-6 hoursTime
8 mmHook
BulkyYarn
Jump to the pattern

About this pattern

An envelope-style clutch made from a bobble-textured body panel folded into a tube with two side gussets, closed by a round Spiral Flap crocheted from a magic ring over 12 rounds until it matches the bag's 10-inch width. Materials run 200 to 250 grams of bulky yarn worked on an 8mm or 9mm hook, finished with a gold twist lock clasp and 45-inch chain strap. Skill level: intermediate.

This envelope clutch builds from three pieces: a bobble-textured Bag Body worked in rows from a 26-chain foundation (25 stitches across), two Side Gussets that seam the body into a tube, and a 12-round Spiral Flap worked in rounds from a magic ring until its diameter matches the bag's 10-inch width. The body panel runs to about 14 inches before folding, leaving front, bottom, and back in one piece. A gold twist lock clasp and 45-inch chain strap finish the hardware.
The pattern

Written out round by round

Materials

Weight

  • Bulky (Category 5) or T-shirt yarn/ribbon yarn

Fiber

  • Cotton or cotton blend recommended for structure

Color

  • Blush pink, dusty rose, or any color you love

Amount

  • Approximately 200 to 250 grams (2 to 3 skeins depending on brand)
  • The yarn in the image appears to be a tube-style cotton yarn or T-shirt yarn. This type of yarn creates the chunky, defined stitches you see. Brands like Hoooked Zpagetti, Yarn Art Maccrame Cord, or Bobilon work beautifully for bags like this.

Size

  • 8mm or 9mm (US L/11 or M/13)
  • Adjust based on your yarn and desired fabric density. You want a firm fabric that holds its shape.

Notions

  • Twist lock clasp (also called turn lock or bag lock), gold finish
  • Chain strap with lobster clasps, approximately 45 inches (115 cm)
  • Tassel cap and connector hardware, gold finish
  • Tapestry needle for weaving ends
  • Scissors
  • Stitch markers (optional but helpful)

Abbreviations

  • ch = Chain. Wrap yarn over hook, pull through loop on hook. This creates the foundation for your work.
  • sl st = Slip stitch. Insert hook, yarn over, pull through stitch and loop on hook in one motion. Used to join rounds or move across stitches invisibly.
  • sc = Single crochet. Insert hook into stitch, yarn over and pull up a loop (2 loops on hook), yarn over and pull through both loops. A short, tight stitch.
  • dc = Double crochet. Yarn over, insert hook into stitch, yarn over and pull up a loop (3 loops on hook), yarn over and pull through 2 loops, yarn over and pull through remaining 2 loops. A taller stitch.
  • bob = Bobble stitch. This creates those puffy raised bumps. Work 5 double crochets into the same stitch but stop each one before the final pull-through, leaving all loops on your hook. You will have 6 loops total. Yarn over once more and pull through all 6 loops at once. The bobble pops out on the opposite side of your work.
  • inc = Increase. Work 2 stitches into the same stitch.
  • sk = Skip. Miss the indicated stitch and work into the next one.

The Bag Body

The body is a simple rectangle worked back and forth in rows with alternating texture rows.

Repeat Rows 2 through 5 for pattern. This staggers your bobbles so they do not stack directly on top of each other, creating that lovely textured grid.

Continue until body measures approximately 14 inches long. This allows for the front, bottom fold, and back of the bag.

End on a plain sc row. Fasten off, leaving a long tail for seaming.

Foundation: Ch 26.

Round 1Wrong Side Sc in 2nd ch from hook and in each ch across. (25 sts)
Round 2Right Side, Bobble Row Ch 1, turn. Sc in first st. *Bob in next st, sc in next st.* Repeat from * to * across. (25 sts, 12 bobbles)
Round 3Ch 1, turn. Sc in each st across. (25 sts)
Round 4Ch 1, turn. Sc in first 2 sts. *Bob in next st, sc in next st.* Repeat from * to * to last st, sc in last st. (25 sts, 11 bobbles)
Round 5Ch 1, turn. Sc in each st across. (25 sts)

Side Gussets

Make 2

The gussets create the depth of the bag.

The gusset should measure approximately 2 inches wide and 6 inches tall to match the body height.

Fasten off, leaving a tail for seaming.

Foundation: Ch 6.

Round 1Sc in 2nd ch from hook and in each ch across. (5 sts)
Round 2through 16: Ch 1, turn. Sc in each st across. (5 sts)

The Spiral Flap

This is where the magic happens. The flap is worked in a spiral from the center outward, then shaped into a half-circle.

Continue this pattern, adding one more sc between increases each round and placing bobbles in a consistent spiral line. The bobbles will naturally curve outward from the center, creating those beautiful radiating lines.

Work until the circle measures approximately 10 inches in diameter (matching the bag width).

Once your circle is the right size, you will work back and forth in rows to create the straight edge that attaches to the bag.

Fasten off, leaving a very long tail for attaching to the bag.

Foundation: Make a magic ring.

Round 1Ch 1. Work 6 sc into the ring. Pull ring closed. Do not join. Place a stitch marker in the first stitch and move it up each round. (6 sts)
Round 2Work 2 sc in each st around. (12 sts)
Round 3*Sc in next st, bob in next st.* Repeat around. (12 sts, 6 bobbles)
Round 4*Sc in next st, 2 sc in next st.* Repeat around. (18 sts)
Round 5*Sc in next 2 sts, bob in next st.* Repeat around. (18 sts, 6 bobbles)
Round 6*Sc in next 2 sts, 2 sc in next st.* Repeat around. (24 sts)
Round 7*Sc in next 3 sts, bob in next st.* Repeat around. (24 sts, 6 bobbles)
Round 8*Sc in next 3 sts, 2 sc in next st.* Repeat around. (30 sts)
Round 9*Sc in next 4 sts, bob in next st.* Repeat around. (30 sts, 6 bobbles)
Row 1Shaping the Half-Circle Sl st across 15 sts to reach the halfway point. Ch 1, turn. Sc across remaining sts. (approximately 30 sts, depending on your round count)
Rows 2–4Ch 1, turn. Sc in each st across.

Assembly

Step 1Assembling the Bag Body: Fold the body rectangle so the short ends meet, creating a tube. The fold becomes the bottom of the bag.
Step 2Position one gusset along each open side.
Step 3Using the tapestry needle and yarn tails, whip stitch or single crochet the gussets to the body sides. Keep stitches tight and even.
Step 4Weave in all ends securely.
Step 5You now have a structured rectangular pouch. Set it aside.
Step 6Attaching the Flap: Position the flap straight edge along the back top edge of the bag body, wrong sides facing.
Step 7Whip stitch firmly across, catching both layers with each stitch.
Step 8The curved portion of the flap should fold over the front of the bag.
Step 9Adding Hardware - Twist Lock Clasp: Position the decorative front plate centered on the bag front, about 1 inch down from the top edge.
Step 10Mark where the prongs will go through the fabric.
Step 11Use scissors to carefully create small holes.
Step 12Push prongs through, add backing plate, and bend prongs flat.
Step 13Position the turn mechanism on the flap to align with the clasp. Repeat the process.

Tester's notes

8mm and 9mm are both listed; start with the smaller hook, since the Side Gussets rely on a tight 5-stitch width to hold the bag's shape.

A stitch marker belongs in the first stitch of Round 1 of the Spiral Flap and needs to move up every round, since those rounds are not joined.

25 stitches must stay constant across all 6 rounds of the Bag Body; a drift in count during the bobble rows signals a missed stitch, not a design feature.

200 to 250 grams covers 2 to 3 skeins depending on brand; buy toward the higher amount when working with t-shirt yarn, which uses up length faster than standard cotton.

No stuffing is called for anywhere in this pattern; the gold twist lock clasp and 45-inch chain strap are the only hardware needed to finish the bag.

Skill Level: Intermediate. You should be comfortable with basic stitches and reading crochet pattern instructions. The bobble stitch might be new to you, and that is completely fine.

If you have never crocheted before, make a few dishcloths or scarves first just to get your tension consistent before starting this pattern.

Finished Measurements (approximate): Width 10 inches (25 cm); Height (body only) 6 inches (15 cm); Height (with flap closed) 8 inches (20 cm); Depth 2 inches (5 cm). Finished size may vary depending on tension and hook size.

Gauge: 8 sc and 8 rows in single crochet = 4 inches (10 cm) square.

Gauge matters because you want the bag to match the finished dimensions. If your stitches are too loose, the bag will be floppy. Too tight and it will be stiff and smaller than expected.

Bobble Stitch (detailed technique): Yarn over, insert hook into the stitch; yarn over, pull up a loop (3 loops on hook); yarn over, pull through 2 loops (2 loops on hook) - this is one unfinished dc. Repeat 4 more times in the same stitch until you have 6 loops on your hook. Yarn over and pull through all 6 loops at once. Chain 1 to secure the bobble (optional, but helps lock the shape). The bobble naturally pops toward the back of your work; when working rows, the bobbles show on the right side.

Work in progress

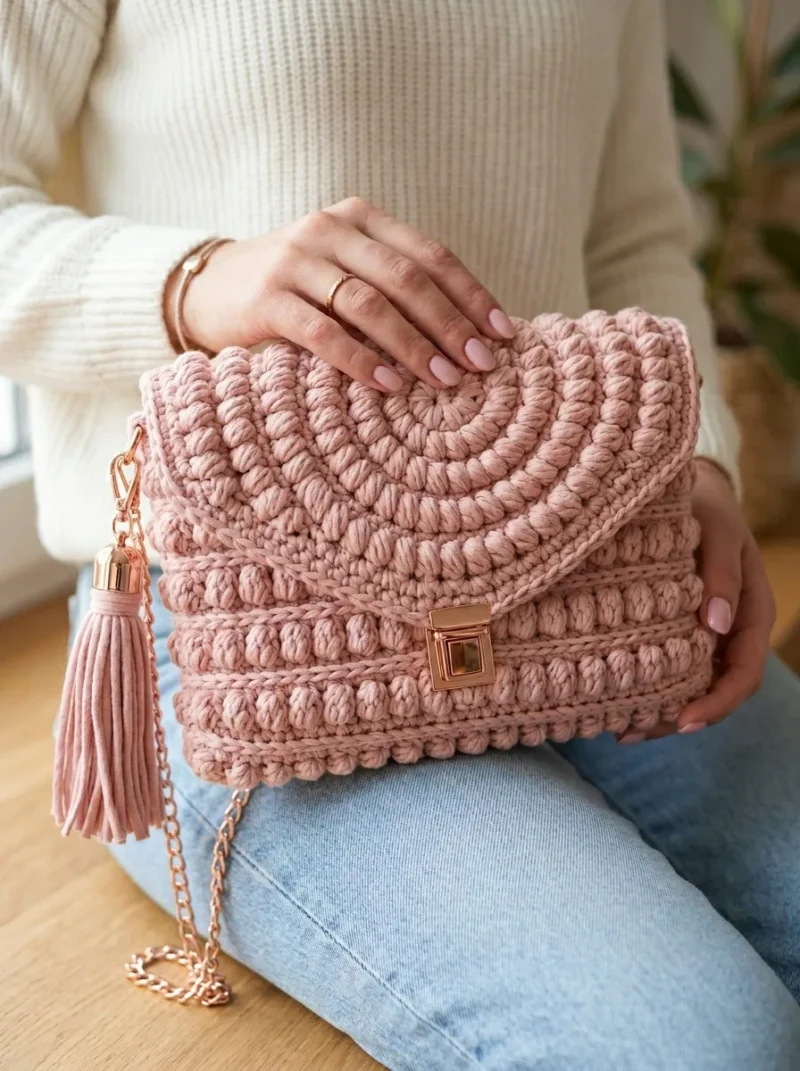
Crochet envelope clutch with a spiral bobble flap — photo 2
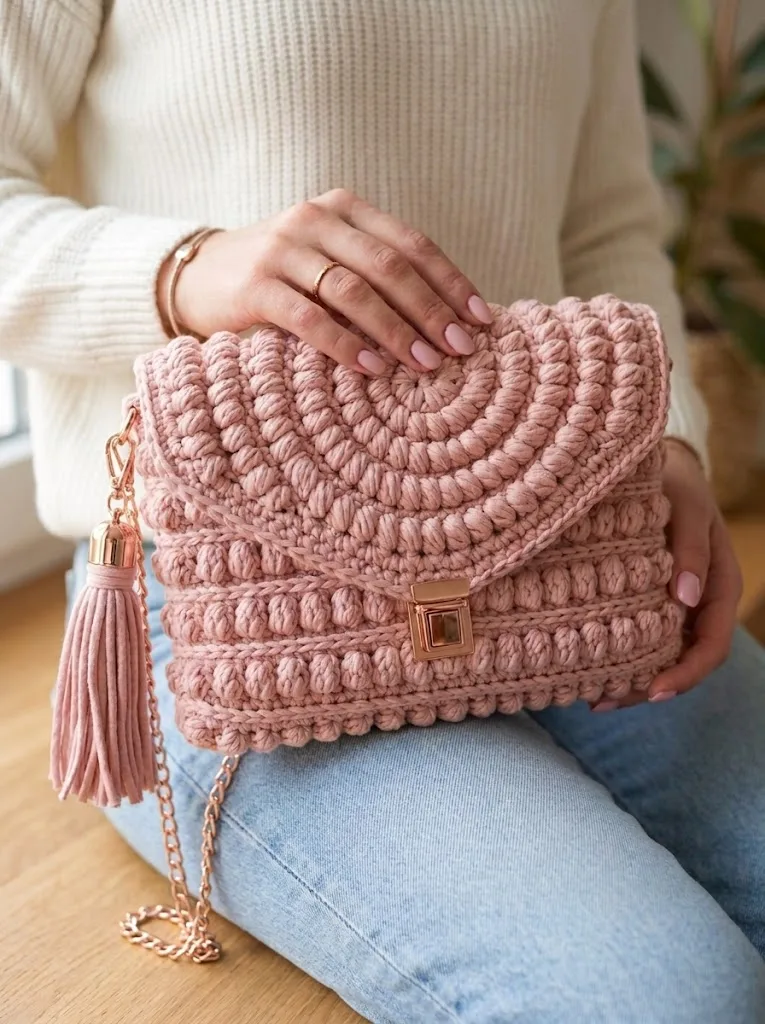
Crochet envelope clutch with a spiral bobble flap — photo 3

At a glance

Rounds18
Parts3
LevelIntermediate
Time4-6 hours
Hook8 mm
YarnBulky

Gauge check

After Row 1 of a Side Gusset, the 5 single crochet stitches should measure close to 2 inches across, since that width stays fixed for all 16 rows.

Stitch-count checkpoints

  • The Bag Body · Round 1: 25 sts
  • The Bag Body · Round 3: 25 sts
  • The Bag Body · Round 5: 25 sts
  • Side Gussets · Round 1: 5 sts
  • Side Gussets · Round 2: 5 sts
  • The Spiral Flap · Round 1: 6 sts

If something looks wrong

The Bag Body panel curls at the edges
Bobble rows pull tighter than the plain sc rows between them, so the 14-inch panel needs blocking flat before it gets folded and seamed.
The Spiral Flap cups like a bowl
A missed increase breaks the expected count (6, 12, 18 stitches per round); check each round against its stated count before working the next one.
The Side Gussets end up shorter or taller than the Bag Body.
Measure against the body's finished height instead of counting rows; stop each gusset at about 6 inches tall to match, not at a fixed row number.

Yarn substitutions

Wool-blend bulky, same category 5 weightSofter drape than the cotton the pattern recommends; the clutch loses some structural hold, so a fabric or craft-foam liner helps the shape stay crisp. Hook size stays at 8mm/9mm.
Cotton rope or macrame cord, roughly 5-6mm thickStiffer fabric than the listed cotton, giving the body and gussets more rigidity without a liner. The 8mm hook option may need to be dropped in favor of 9mm for this heavier cord.
Worsted weight cotton held doubleApproximates the bulky gauge using two strands together; total yardage needed runs above the 200 to 250 gram range stated for single-strand bulky. Hook stays at 8mm or 9mm.
FAQs

Questions

Can the finished width change from 10 inches?

Width is set by where the Spiral Flap diameter meets the folded Bag Body, which runs about 14 inches before folding. Resizing means adjusting the 26-chain foundation and reworking the flap rounds until the new diameter matches the new body width, while the Side Gusset width stays at 2 inches.

Does the hardware have to be gold, or can the clasp and strap be swapped?

The pattern specifies a gold-finish twist lock clasp and a 45-inch chain strap, but any twist lock or turn lock clasp sized for the bag's opening works in another finish. The opening itself is set by the 25-stitch body width, so hardware needs to fit that span.

One at a time —

Get the next pattern

Tested round by round before it is sent. No spam.