Made and counted by Wren —

Stylish Crochet Panama Hat for Girls: A Sweet Summer Pattern

Crochet a stylish Panama hat for girls with this easy pattern featuring a flared brim, ribbon trim, and a classic summer silhouette kids love.

Beginner-IntermediateLevel
3-5 HoursTime
3.5 mmHook
DK/Light WorstedYarn
Jump to the pattern

At a glance

Begin the crown by working single crochet rounds evenly, without increasing, to build up the top of the hat.

Keep working even rounds until the crown reaches about 4-5 inches tall, checking the fit against the child's head.

Transition into the brim by starting a 1 sc, 2 sc increase round to begin the outward flare.

Repeat the increase pattern every few rounds, such as every third round, to widen the brim gradually.

Continue increasing until the brim reaches your desired width and lies flat rather than cupping.

Finish the brim edge with a decorative crab stitch or picot stitch for a neat, polished border.

Thread a ribbon around the crown base and secure it by sewing or tying it into a bow.

About this pattern

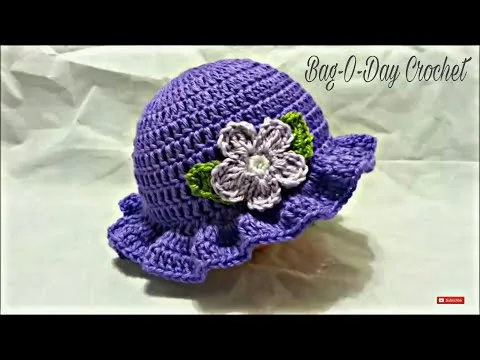
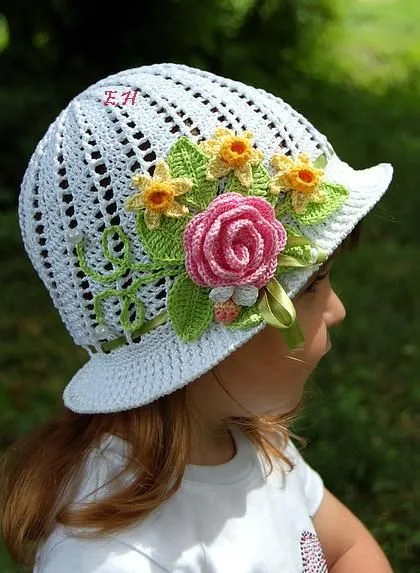
This crochet Panama hat for girls brings a touch of vintage charm to a child's summer wardrobe. With its neatly worked crown and flared, sun-shading brim, it captures that classic Panama silhouette in a soft, handmade fabric. What makes it special is how customizable it is — you can keep it simple in single crochet or dress it up with texture changes, then finish it off with a ribbon for a feminine, boutique-worthy look. It's perfect for little ones who need cute sun protection at the beach, the park, or a summer garden party.

The finished hat sits with a soft, structured crown about 4-5 inches tall, opening into a wide, floppy brim that gives real sun coverage without feeling stiff or scratchy. Worked in a breathable cotton or linen-blend yarn, it feels light and comfortable against a child's head even on hot days. Tied off with a ribbon around the crown base, it has that polished, ready-to-wear look — making it a wonderful handmade gift for a birthday, a beach trip, or just because.

Variations

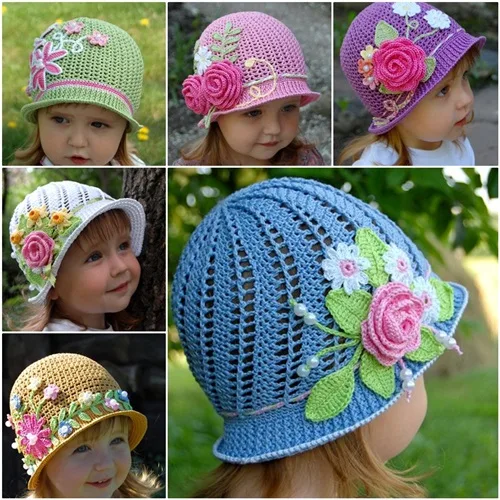
There's so much room to make this hat your own! Try using multiple colors to create stripes or color blocks as you work around the crown and brim. Sew small crocheted flowers or appliqués onto the brim for a playful, girly look. You can also adjust the number of rounds in the crown and body to custom-fit different head sizes — work fewer even rounds for a toddler, or add a round or two for an older child.

I adore how this Panama hat feels both classic and totally customizable. Starting with those even rounds of single crochet to build the crown gives you a nice meditative rhythm — perfect for porch crocheting. Then the fun really begins when you start increasing for the brim; watching that flat, fedora-style flare take shape round by round is so satisfying. I love that you get to choose your own texture story too — stick with sc for a tailored classic look, or throw in some hdc or dc rounds for a bit of visual interest. And the ribbon finish? That's the detail that turns a simple hat into something that looks like it came from a little boutique. Tying a grosgrain bow around the crown base takes five minutes but makes the whole project feel finished and gift-ready. It's a pattern that rewards patience during the increase rounds with a genuinely wearable, adorable result — the kind of thing that gets stopped-on-the-street compliments at the farmers market.
Common mistakes

  • Losing track of round countsPlace a stitch marker at the start of each round and move it up every time, then jot down a tally as you go so you always know exactly how many even rounds you've completed.
  • Increasing too early or too lateDouble-check that your crown has reached the full 4-5 inch height before starting the 1 sc, 2 sc increase round, and use a contrasting stitch marker to flag the exact round where increasing begins.
  • Working the brim increases too farStick closely to the every-third-round increase guideline for a classic flat Panama flare, and lay the hat flat on a table periodically to check it's staying open rather than cupping.
  • Choosing a yarn that's too heavyStick with a lightweight DK or light worsted cotton or linen blend as specified — it gives the brim just enough body to hold shape while staying soft against sensitive skin.
  • Attaching the ribbon too tightly aroundThread the ribbon loosely through the stitches at the crown base and tie the bow with a bit of give, or use a few loose tacking stitches instead of a tight wrap so the hat still stretches comfortably.

The pattern

Written out round by round

Materials

Yarn

  • Use a lightweight, breathable yarn such as cotton or linen (typically DK or light worsted weight).

Crochet hook

  • A size suitable for your yarn (usually 3.5 mm - 4.5 mm).

Stitch markers

  • To keep track of your rounds.

Yarn needle

  • For weaving in ends.

Scissors

  • For cutting the yarn.
  • Ribbon or decorative band (optional): To add a stylish finishing touch.

Abbreviations

  • st = stitch
  • sl st = slip stitch
  • sc = single crochet
  • hdc = half-double crochet
  • dc = double crochet

1. Start with the Crown

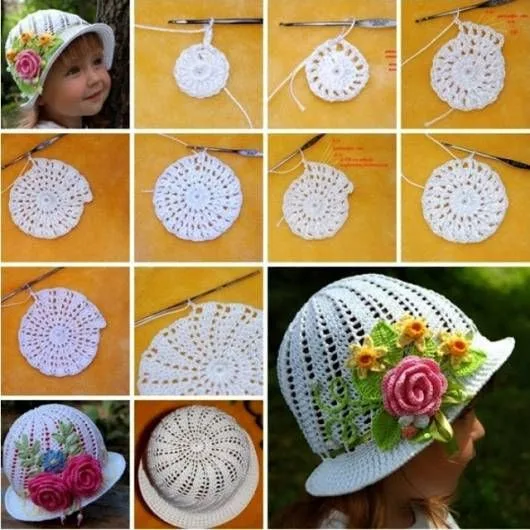
Magic Ring : Begin with a magic ring (or chain 4 and join with a slip stitch to form a ring).

  1. Round 1Work 6 single crochets (sc) into the ring, pull tight, and slip stitch (sl st) to join.
  2. Round 2Work 2 sc in each stitch around (12 sc).(12)
  3. Round 31 sc in the first stitch, 2 sc in the next stitch ; repeat around (18 sc).Continue Increasing Continue increasing: Keep increasing in the same pattern until the crown reaches the desired diameter. Typically, for a child-sized hat, you’ll need about 5-6 rounds of increases. (18)

2. Shape the Body

  1. Work EvenWork even: Crochet 1 sc in each stitch around without increasing. Continue this for several rounds until the hat reaches the height needed for the head (usually 4-5 inches for a child).
  2. Add TextureAdd texture: You can switch to a half-double crochet (hdc) or double crochet (dc) stitch for variety or keep it in single crochet for a classic look.

3. Create the Brim

  1. Start IncreasingStart increasing: To create the Panama-style brim, begin increasing again. Work 1 sc in the first stitch, 2 sc in the next around.

Continue Increasing Continue increasing : Depending on how wide you want the brim, you can repeat this increase every few rounds (e.g., every third round) to maintain the flare of the brim.

  1. Finish EdgeFinish with an edge: You can add a decorative edge by working a crab stitch (reverse single crochet) or picot stitch around the brim for extra flair.

4. Customize with a Ribbon

  1. Add RibbonAdd a ribbon or band: Once the hat is complete, thread a ribbon or decorative band around the base of the crown for a polished, feminine touch.
  2. Secure ItSecure it: You can sew the ribbon in place or simply tie it in a bow for a cute accent.

Important notes

💡 Use a hook in the 3.5mm-4.5mm range that matches your chosen cotton or linen yarn — too small a hook will make the brim stiff, while too large will make it floppy and lose its shape.

💡 Place a stitch marker at the beginning of every round from the very first stitch — with no defined round count given for the crown, this is your best tool for staying accurate.

💡 Measure your work against the child's head as you go — aim for roughly 4-5 inches of crown height before starting the brim increases, adjusting for a snug but comfortable fit.

💡 Choose a lightweight, breathable cotton or linen yarn since this hat will likely be worn in warm weather — scratchy or heavy yarns will be uncomfortable against a child's skin and won't drape as nicely.

💡 Save your ribbon or decorative band for last — attach it only after weaving in all your ends and blocking the hat lightly, so it sits smoothly around a clean, finished crown.

More photos

Stylish Crochet Panama Hat for Girls: A Sweet Summer Pattern — photo 2
Stylish Crochet Panama Hat for Girls: A Sweet Summer Pattern — photo 3
Stylish Crochet Panama Hat for Girls: A Sweet Summer Pattern — photo 4
FAQs

Frequently asked questions

What size hook and yarn work best for this Panama hat?

A 3.5mm to 4.5mm hook paired with a DK or light worsted weight cotton or linen yarn gives the best combination of structure and softness. Cotton is especially nice because it holds the brim's shape while staying breathable for warm-weather wear.

How do I know when to stop working even rounds and start the brim?

Measure the crown height as you go and stop the even rounds once it reaches about 4-5 inches, which fits most children's heads comfortably. You can always try the hat on the child's head periodically to check the fit before moving to the brim increases.

Can I make the brim wider or narrower than the pattern suggests?

Yes, the brim width is fully adjustable by changing how often you repeat the increase round. Increasing every second round creates a dramatically wider brim, while spacing increases further apart keeps it narrower and closer to the head.

What's the best way to attach the ribbon at the end?

Thread a ribbon or decorative band through the stitches at the base of the crown, then either sew it in place with a few discreet stitches or simply tie it into a bow. Keep it loose enough that the hat still stretches comfortably onto a child's head.

One at a time —

Get the next pattern

Tested round by round before it is sent. No spam.