Made and counted by Wren —

Crochet Market Tote: Eco-Friendly Mesh Shopping Bag Pattern

Learn to crochet a sturdy eco-friendly market tote with this mesh shopping bag pattern featuring reinforced handles and a durable cotton base.

IntermediateLevel
4-6 HoursTime
5 mmHook
WorstedYarn
Jump to the pattern

About this pattern

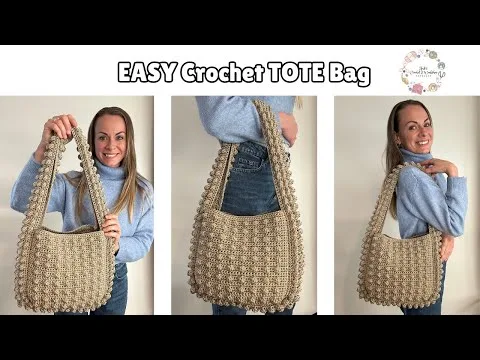
This crochet market tote is the ultimate blend of function and handmade charm — a sturdy, mesh-bodied shopping bag built to carry everything from farmers market produce to library books. What makes it special is the smart construction: a solid crocheted base that won't sag under weight, an airy mesh body that stretches to fit your haul, and reinforced handles that won't stretch out or snap. It's perfect for eco-conscious crocheters ready to ditch plastic bags for something they made with their own two hands, and it's a wonderful gift for anyone who loves a useful, planet-friendly present.

You'll work through a clear progression: starting with a foundation chain, building the Bag Base, constructing the Mesh Bag Body round by round, then finishing with Handle Placement and Reinforcing Handle Stitches for extra strength. The techniques are approachable for confident beginners but especially satisfying for intermediate crocheters who enjoy tracking rounds and customizing height. Expect to spend a relaxed evening or two on this project — roughly 4 to 6 hours total, depending on how tall you make the body and how quickly you crochet.

The finished tote is generously sized for real grocery hauls, with a flexible mesh body that expands under weight and a firm, worked base that keeps everything upright. Made in sturdy cotton, it has a natural, textural look that feels both rustic and polished — equally at home slung over your shoulder at a farmers market or folded into a purse for spontaneous errands. It's a fantastic housewarming or hostess gift, and honestly, one of those patterns you'll end up making again and again once friends start asking for their own.

Variations

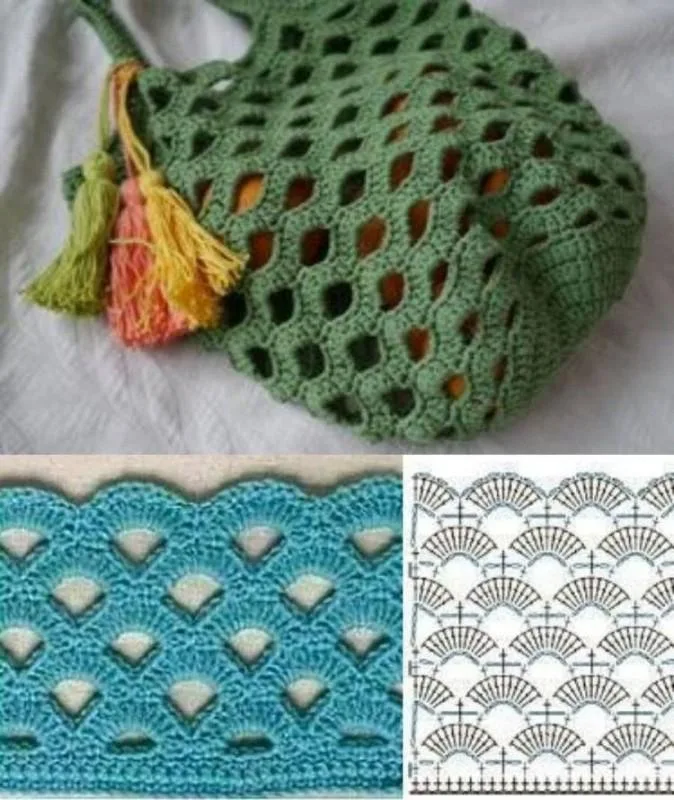
This pattern is incredibly easy to make your own! For a bold farmers market look, try alternating stripes every 4-6 rounds in sunny yellow and terracotta mercerized cotton — 24/7 Cotton or Hobbii Amigo Cotton both work beautifully and hold their shape wonderfully. Want a beach-ready version? Work the entire body in a soft seafoam or coral, then add a single round of shell stitches just below the handles for a decorative wave-like trim. For gifting, consider monogramming: crochet a small motif or use waste-canvas cross-stitch on the base once finished for a personal touch. Size modifications are simple — for a compact produce bag, reduce your Foundation Chain by roughly 20% and stop the Mesh Bag Body a few rounds early (aim for 200-300 yards total instead of the standard 400-500). For an oversized beach or laundry tote, add 10-15 extra stitches to your foundation chain and work 4-6 additional mesh rounds before starting the handles, budgeting 600-700 yards. If you love texture, swap a few mesh rounds for a linen or hemp blend yarn to add sophisticated visual contrast and extra durability — just note it'll be pricier per skein. Holiday version? Work the final round in red and green stripes and add a single crocheted holly leaf motif near one handle. You could also experiment with a two-tone handle: crochet the Handle Placement rounds in a contrasting color so the straps pop against the mesh body — a small change that makes a huge style statement.

I adore this pattern because it's genuinely useful — not just pretty. There's something deeply satisfying about working the Foundation Chain into a solid Bag Base and watching it transform into an expandable Mesh Bag Body that grows with every round. The mesh pattern has this wonderful rhythm to it, easy to memorize after the first couple rounds, which makes it perfect for crocheting while watching TV or chatting with friends. What really sets this tote apart is the handle construction: Handle Placement is thoughtfully positioned for balance, and the Reinforcing Handle Stitches step means your straps won't stretch into sad, saggy noodles after one trip to the grocery store. I also love that it's a genuine sustainability win — every time I sling my cotton tote over my shoulder instead of grabbing a plastic bag, I feel a little proud. Plus, cotton yarn is endlessly customizable, so this pattern becomes a canvas for color-blocking, stripes, or classic neutral elegance depending on your mood.
Common mistakes

  • Starting the Foundation ChainKeep consistent tension on your chain and use a hook one size smaller than your body hook if needed. Lay the base flat every few rounds to check it's staying even before moving to the Mesh Bag Body.
  • Losing track of round counts inPlace a stitch marker at the start of every round and jot down a tally after each one. Since the mesh pattern repeats, it's easy to lose your place — a simple row counter app or paper tally saves major frustration.
  • Skipping the Reinforcing HandleNever skip reinforcement — unreinforced handles will stretch dramatically under grocery weight within weeks. Work the reinforcing round or extra single crochet layer exactly as instructed, even if it feels redundant.
  • Choosing a hook size that's too largeStick to the recommended 5mm-5.5mm hook range. If your fabric feels loose or stretchy after a test swatch, size down to 4.5mm to tighten up the structure while keeping the mesh openwork look.
  • Misjudging Handle Placement, resultingMeasure and mark both handle positions symmetrically before attaching, using the bag's center point as your reference. Fold the bag in half to double-check both marks line up before you crochet the handles in place.
  • Using non-cotton or cheap acrylic yarnCotton is specifically recommended because it's washable, strong, and holds shape. If substituting, choose another plant-based fiber like hemp or linen blend rather than acrylic, which will stretch and lose structure over time.

The pattern

Written out round by round

Materials

  • Using your own yarn can save money. You can make many bags for the cost of a few store-bought ones. Plus, there's joy in using something you made yourself.
  • Yarn selection is crucial for your market bag. The right yarn affects the bag's strength, weight, and ease of cleaning. Different yarns have unique qualities, so it's important to choose wisely.
  • Cotton yarn is the best choice for market bags. It's strong, washable, and natural. Cotton makes a sturdy fabric that gets softer with each wash.
  • Mercerized cotton is even stronger. It's treated to be more durable and shiny. These yarns keep their shape and color well, even after many washes.
  • Unmercerized cotton has a natural look and absorbs well. It's a bit less durable but still great for a tote. Cotton blends add strength but are less eco-friendly.
  • Hemp or linen blends offer unique textures and durability. Hemp bags get softer over time, while linen bags have a sophisticated look. These options are more expensive but last longer.
  • Worsted weight cotton is ideal for most crocheters. It's strong enough for groceries but not too thick. Aran weight is also good for a sturdier bag.
  • For a standard bag, you'll need 400-500 yards of worsted weight cotton. Larger bags need 600-700 yards. Compact bags require 200-300 yards. Buying extra yarn is always a good idea.
  • Remember, the size of your bag affects yarn needs. Bags with tighter stitches use more yarn. Always check the yarn label for yardage per skein.
  • Your hook size affects the bag's tightness and structure. For worsted weight cotton, use a 5mm or 5.5mm hook. This size makes a firm fabric that's not too stretchy.
  • Hook size depends on yarn weight and your crochet tension. If you crochet loosely, use a smaller hook. If you crochet tightly, use a larger one. A small swatch helps you find the right hook size.
  • Ergonomic hooks reduce hand fatigue. If you're buying new hooks, look for ones with comfortable handles. Good hooks prevent yarn splitting and make stitches even.
  • A blunt yarn needle is essential for weaving in ends. Choose one that fits your yarn but doesn't leave holes. Metal needles with bent tips make weaving easier.
  • Sharp fabric scissors are needed for cutting yarn. A measuring tape helps you check your bag's size. Some crocheters use blocking mats and pins, but they're not essential.
  • Stitch markers help you keep track of rounds and patterns. They prevent counting mistakes that can mess up your project.

Abbreviations

  • ch = chain
  • st = stitch
  • sl st = slip stitch
  • sc = single crochet
  • hdc = half double crochet
  • dc = double crochet
  • inc = increase
  • fo = finish off

Step 1: Creating the Bag Base

The bag's base is key for its strength and shape. A good base supports heavy loads and prevents sagging. Start with the right tension to make sure your bag lasts.

Foundation Chain

Start with a foundation chain of 40 stitches for a medium bag. This chain is the bag's bottom edge. Keep your tension right, not too tight, to make the next row easier.

Count your chains carefully. For a bigger bag, add chains in sets of 4. For a smaller one, subtract the same amount.

Test your tension by stretching the chain. It should be flexible but not too loose. This flexibility helps with stitching later.

Working the First Few Rounds

Join the foundation chain into a ring with a slip stitch. Use a stitch marker to mark the start of each round. This helps as you build up.

  1. Round 1Chain 1, then single crochet in each chain around. Join with a slip stitch to the first single crochet. You should have 40 stitches.
  2. Round 2Chain 1, single crochet in each stitch around. This makes a sturdy base that won't stretch.Keep working even rounds of single crochet for 3-4 more rounds. This solid base keeps items from poking through. It's like making a crochet plastic bag holder , but for the bottom.

Step 2: Constructing the Mesh Bag Body

The mesh pattern makes the bag stretchy and attractive. It's great for carrying different sizes of items. The mesh also adds visual interest and keeps the bag light.

Basic Mesh Stitch Pattern

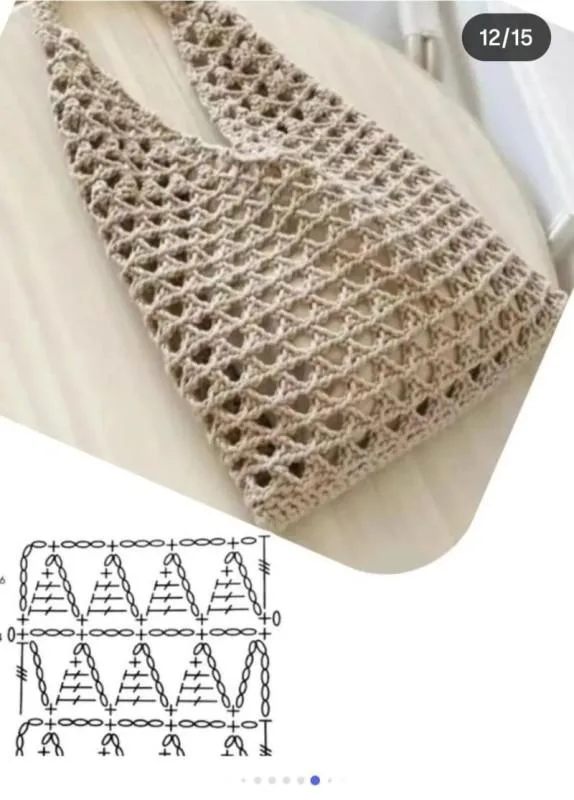
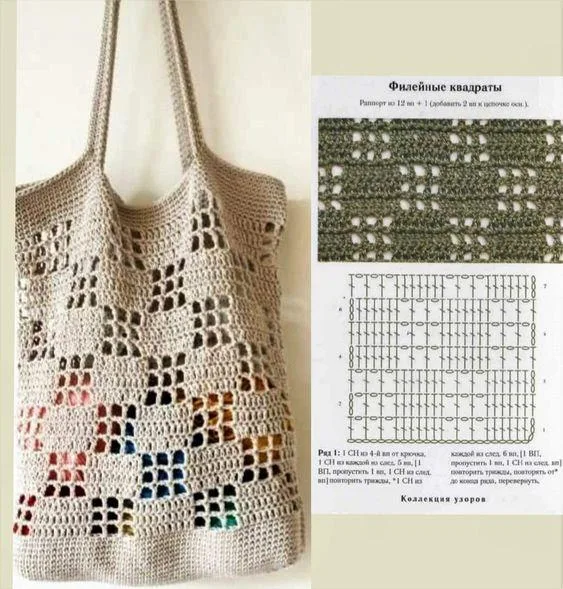
The mesh stitch pattern uses chains and double crochets for an open weave. This mix gives flexibility and strength. Here's how to do it for these mesh shopping bag instructions:

  1. Round 1of mesh: Chain 3 (counts as first double crochet), skip 1 stitch, *double crochet in next stitch, chain 1, skip 1 stitch*. Repeat from * to * around. Join with slip stitch to top of beginning chain-3.
  2. Round 2Chain 3, *double crochet in next double crochet, chain 1*. Repeat around. The chain spaces from the previous round align with the new ones.This creates a consistent mesh pattern. Each row locks into the last, making a stable fabric. The mesh lets you see what's inside and stretches well.

Increasing for Bag Shape

Add increases every few rounds for a flared shape. Work 2 double crochets in the same stitch at evenly spaced intervals. This makes the bag hold more.

Add 4-6 increases per round for a subtle shape. Place increases at different points each round to avoid visible lines. Mark your increases with stitch markers to keep track.

If you want straight sides, just work even without increases. Straight-sided bags look modern and stack well when empty.

Determining Your Desired Height

Measure your bag as you go to get the right size. For a standard farmer's market tote , aim for 10-12 inches tall. This size fits produce and packaged goods well.

For quick trips, 8 inches is good. For big grocery hauls, 14-16 inches is better. Stop when your bag reaches your preferred height.

The mesh will stretch a bit with use. So, stop about half an inch shorter than your target height.

Step 3: Crafting Strong Handles

Handles are crucial for a bag's function. They distribute weight evenly and prevent shoulder strain. Spend extra time on this part for durability.

Handle Placement

Divide your bag's opening into quarters with stitch markers. Handles should be centered on opposite sides for balanced weight distribution . Each handle should span 8-10 stitches for comfort.

Place handles about 2-3 inches from the center on each side. This prevents them from slipping off your shoulder. Mark the exact stitches where each handle will attach.

Test the placement by holding the bag. Adjust markers if handles feel too close together or too far apart.

Reinforcing Handle Stitches

Create handles by chaining 25-30 stitches for the desired length. Skip the marked handle section and attach the chain to the other side with a slip stitch. This forms a loop.

Reinforce by working 2-3 rows of single crochet around the chain loop. Each row adds strength. Work tightly to prevent stretching under heavy loads.

For extra durability, double your yarn when crocheting handles. This makes handles that can hold 15-20 pounds without stretching. Or, work handles in half double crochet for a denser fabric.

Assembly

Step 1

Proper finishing makes your grocery tote crochet pattern look professional and last long. After your final handle row, cut the yarn leaving a 6-inch tail. Pull the tail through the last loop and tighten.

Step 2

Thread the tail onto a yarn needle. Weave it through several stitches on the wrong side of the fabric, changing direction once or twice. This prevents ends from coming loose during washing.

Step 3

Trim excess yarn close to the fabric, leaving about 1/4 inch. Repeat this for all yarn ends. Check each end by tugging gently to ensure it's secure.

Step 4

For a polished finish, block your completed bag. Wet it thoroughly, gently squeeze out excess water, and shape it to desired dimensions. Allow it to air dry completely before first use.

Important notes

💡 Use a 5mm or 5.5mm hook with worsted weight cotton for the ideal balance of firmness and drape — too small and the fabric gets stiff, too large and your mesh loses stability.

💡 Budget 400-500 yards of cotton for a standard-sized tote, 600-700 yards for an oversized version, and 200-300 yards for a compact produce bag — always buy one extra skein just in case.

💡 Mercerized cotton is worth the splurge for handles specifically, since its added strength and shine hold up beautifully to the stress of repeated Handle Placement and carrying weight.

💡 Place a stitch marker at the beginning of every round during the Mesh Bag Body construction — the repetitive pattern makes it very easy to lose track of where each round starts.

💡 Test your gauge with a small swatch before diving into the Foundation Chain; loose crocheters should size down their hook, while tight crocheters should size up to match the pattern's intended firmness.

💡 Use a blunt, bent-tip yarn needle to weave in ends invisibly along the mesh structure — cotton fibers are prone to showing sloppy weaving, so take extra care tucking tails into the stitch bodies.

More photos

Crochet Market Tote: Eco-Friendly Mesh Shopping Bag Pattern — photo 2
Crochet Market Tote: Eco-Friendly Mesh Shopping Bag Pattern — photo 3
Crochet Market Tote: Eco-Friendly Mesh Shopping Bag Pattern — photo 4
FAQs

Frequently asked questions

What size hook works best for this market tote?

A 5mm or 5.5mm hook is ideal for worsted weight cotton, creating a firm fabric that isn't overly stretchy. Adjust up or down slightly based on your personal tension after testing a small swatch.

How much yarn do I need to complete this pattern?

A standard-sized tote requires about 400-500 yards of worsted weight cotton, while larger bags need 600-700 yards and compact versions need only 200-300 yards. It's always smart to buy an extra skein since tighter stitching uses more yarn.

Can I use acrylic yarn instead of cotton?

Cotton is strongly recommended because it's washable, sturdy, and naturally holds the bag's structure over time. Acrylic will stretch under grocery weight and won't give you the same firm, market-ready fabric.

Why do I need to reinforce the handles separately?

The Reinforcing Handle Stitches step adds critical extra strength so your straps can support heavy loads like groceries without stretching or snapping. Skipping this step is one of the most common causes of handle failure down the road.

How do I make the bag bigger or smaller than the pattern default?

a smaller produce bag, shorten your Foundation Chain by about 20% and work fewer rounds of the Mesh Bag Body, using roughly 200-300 yards total. For an oversized tote, add 10-15 extra foundation stitches and work several additional mesh rounds, planning for 600-700 yards.

One at a time —

Get the next pattern

Tested round by round before it is sent. No spam.