Made and counted by Wren —

Crochet Cupcake Pattern: A Sweet Amigurumi Tutorial

Learn to crochet an adorable cupcake with this easy amigurumi pattern featuring a textured base and simple assembly—perfect for gifts and decor.

Beginner-FriendlyLevel
2-3 HoursTime
WorstedYarn
Jump to the pattern

About this pattern

This crochet cupcake pattern turns a simple ball of yarn into the sweetest little treat you'll ever make without turning on an oven. Starting with a basic liner base worked in four tidy rounds, this pattern captures all the charm of a real cupcake wrapper in stitches. It's the kind of project that makes people smile the moment they see it, whether displayed on a shelf, tucked into a gift bag, or repurposed as a functional pincushion for your sewing table.

The technique here centers on working the base liner in the round, building up structure through four carefully shaped rounds before moving into the assembly phase where the pieces come together into a finished cupcake. This is a wonderfully approachable project for beginners who've mastered single crochet and basic increases, while still offering enough interest to keep experienced crocheters engaged. Most makers finish a single cupcake in an afternoon, making it an ideal weekend project or a satisfying one-sitting make.

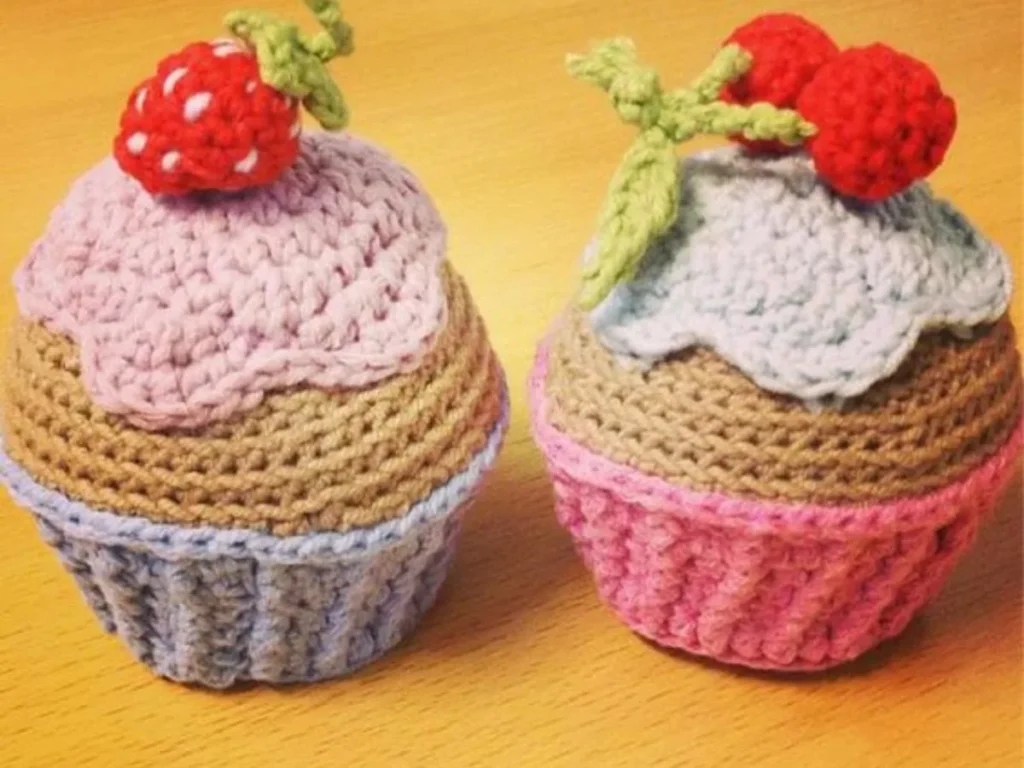
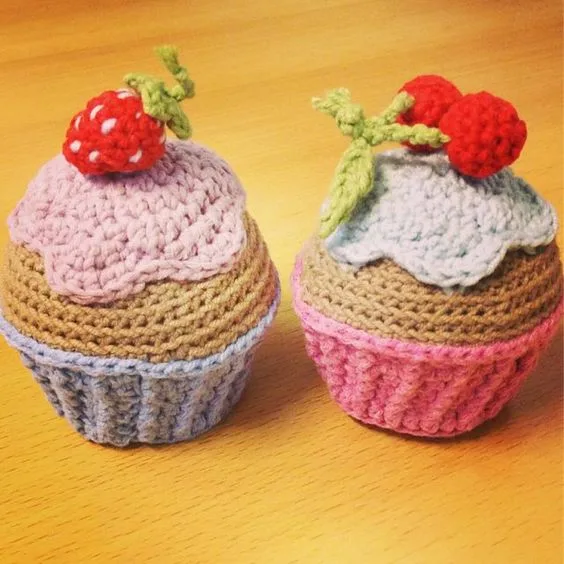
The finished cupcake sits at a charming, palm-sized scale—big enough to make a statement but small enough to tuck into a stocking, lunch bag, or gift box. The liner's rounded, ribbed texture mimics the pleated look of a real cupcake wrapper, giving it that instant visual recognition everyone loves. Whether you stuff it plush and soft for a toy, keep it firm for a pincushion, or add a hanging loop for an ornament, this little cupcake is guaranteed to bring a smile to whoever receives it.
Variations

There's something so satisfying about watching a flat little magic ring transform into a rounded cupcake liner right in your hands! I love how the four rounds of the base build up that classic pleated cupcake shape—each round adds just enough structure that you can actually see and feel the form taking shape as you go. It's quick enough that you won't lose steam partway through, but detailed enough that it doesn't feel like a boring beginner project. Once you move into assembling the pieces, that's when the magic really happens: suddenly you're holding an honest-to-goodness tiny cupcake instead of a pile of crochet parts. I especially love how versatile this pattern is—the same base works whether you're making a decorative accent, a squishy toy for a little one, or a practical pincushion for your craft space. It's endlessly giftable, ridiculously cute, and doesn't demand a huge yarn stash or a long weekend to complete. If you want a project that delivers big smiles for relatively little time invested, this is it.

Common mistakes

  • Starting the magic ring too looselyPull the tail firmly after your first round of single crochets and give it an extra tug before weaving in—check that the center closes completely before moving on to round two.
  • Losing track of stitch countsPlace a stitch marker at the start of each round and count your stitches before joining—if your liner starts flaring unevenly, frog back to the last accurate round and recount.
  • Working the four base roundsRelax your tension slightly on rounds 2-4, or size up your hook by 0.5mm if your gauge tends to run tight—the liner should have a little give when you press on it.
  • Skipping a clear transition pointFasten off with a long tail after completing all four rounds of the liner so you have plenty of yarn for seaming during assembly, rather than trying to continue directly into joining.
  • Not weighing the two halves beforeLay your finished pieces side by side before assembly to compare size and shape, and adjust stuffing amounts evenly on both sides as you seam them together.
  • Rushing the seaming during assemblyUse a whip stitch with a matching yarn color and take small, even bites of both layers, checking every few stitches that the seam is fully closed before moving forward.

The pattern

Written out round by round

Materials

  • Worsted weight yarn
  • Crochet hook (size to suit your yarn)
  • Tapestry needle (for sewing the frosting to the base)
  • Fiberfill stuffing
  • Small amount of red yarn, or a red pom-pom, for the cherry
  • Colorful yarn, beads, or sequins for sprinkles (optional)

Abbreviations

  • sc = single crochet
  • inc = increase
  • dc = double crochet

Step 1: Crochet the Cupcake Base (Liner)

Start with a Magic Ring : Make a magic ring and work 6 single crochet (sc) stitches into it. Pull tight to close.

Increase Rounds :

  1. Round 1Work 2 sc in each stitch around (12 stitches).(12)
  2. Round 2(1 sc, inc) around (18 stitches).(18)
  3. Round 3(2 sc, inc) around (24 stitches).(24)

Create the Liner Shape :

  1. Round 4-7Work 1 sc in each stitch around to build height for the liner.

Step 2: Crochet the Cupcake Frosting

Magic Ring : Begin with a magic ring, working 6 sc into it.

Increase Rounds :

  1. Round 1Work 2 sc in each stitch around (12 stitches).(12)
  2. Round 2(1 sc, inc) around (18 stitches).(18)
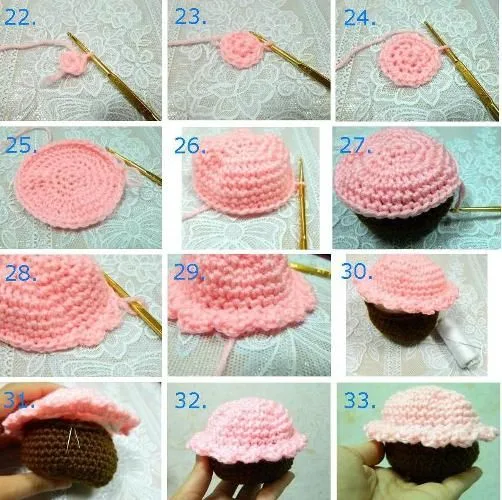
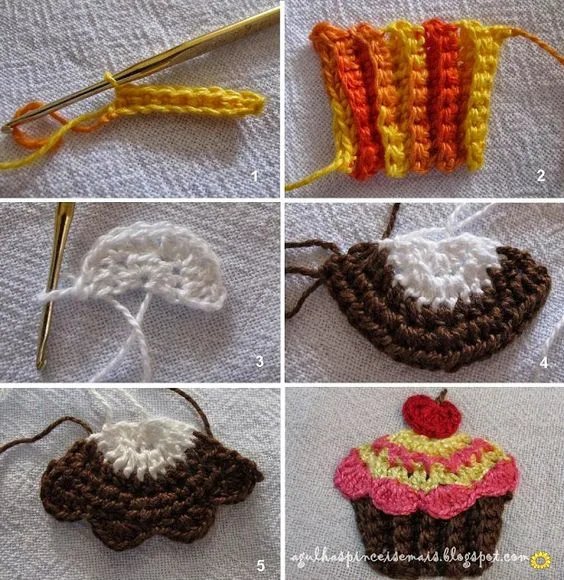
  3. Round 3(2 sc, inc) around (24 stitches).Add a Ruffle Effect: Work a round of shell stitches or use double crochet (dc) stitches to make the frosting look more decorative and fluffy.(24)

Step 3: Assemble the Cupcake

Stuff the Cupcake : Use fiberfill stuffing to add shape to the cupcake base and frosting.

Sew Together : Attach the frosting to the base using a tapestry needle, sewing around the edges to ensure it’s secure.

Step 4: Decorate the Cupcake

Add a Cherry : Make a small red pom-pom or crochet a tiny red circle to represent a cherry and sew it on top.

Sprinkles : Use colorful yarn to embroider small “sprinkles” on the frosting, or add beads or sequins for a playful look.

Important notes

💡 Use a hook one size smaller than the yarn label recommends—amigurumi projects like this cupcake need a tight gauge so stuffing doesn't peek through the stitches.

💡 Place a stitch marker in the first stitch of every round through all four base rounds; it's easy to lose your place when the ribbed pattern starts looking similar round to round.

💡 Stuff firmly but don't overstuff—you want the liner to hold its rounded shape without stretching the stitches so much that gaps appear between them.

💡 If you're making this as a pincushion rather than a toy, skip standard polyester fiberfill and use crushed walnut shells or sand-filled fabric pouches inside for weight and pin-sharpening benefits.

💡 Weave in ends as you complete each piece rather than saving them all for the end—it's much easier to secure tails before the two components are joined together.

💡 Block your finished liner gently by steaming it lightly on a low setting if the rounds look uneven after the increase rounds; this helps the cupcake shape sit smoothly.

More photos

Crochet Cupcake Pattern: A Sweet Amigurumi Tutorial — photo 2
Crochet Cupcake Pattern: A Sweet Amigurumi Tutorial — photo 3
Crochet Cupcake Pattern: A Sweet Amigurumi Tutorial — photo 4
FAQs

Frequently asked questions

What size hook works best for this crochet cupcake pattern?

A 3.5mm to 4mm hook paired with worsted weight yarn gives the tightest, most polished stitch definition for this pattern. If your gauge tends to run loose, size down slightly so stuffing doesn't show through the finished liner.

Can I make this cupcake without stuffing it, for use as a coaster or applique?

Yes, you can skip the stuffing entirely and simply seam the piece flat during assembly for a decorative applique or coaster-style finish. Just be aware the piece will lay flatter and lose some of its dimensional cupcake shape without fiberfill.

How long does it take to crochet one cupcake from start to finish?

Most crocheters complete the four base rounds and assembly step in about 2 to 3 hours, making this a great single-sitting or weekend project. Beginners newer to amigurumi shaping may want to budget a bit more time for the increase rounds.

What's the best way to attach a hanging loop if I want to use this as an ornament?

Simply chain 8-10 stitches with matching yarn, slip stitch to form a loop, and secure it to the top of the assembled cupcake with a few small stitches before weaving in the end. Choose a sturdy yarn like cotton blend for the loop so it holds weight without stretching.

Can I use cotton yarn instead of acrylic for this pattern?

Absolutely, cotton yarn like Lily Sugar'n Cream works beautifully and gives crisper stitch definition, which is especially nice for the ribbed liner texture. Keep in mind cotton has less give than acrylic, so you may want to stuff slightly less firmly to avoid stretching the stitches.

One at a time —

Get the next pattern

Tested round by round before it is sent. No spam.