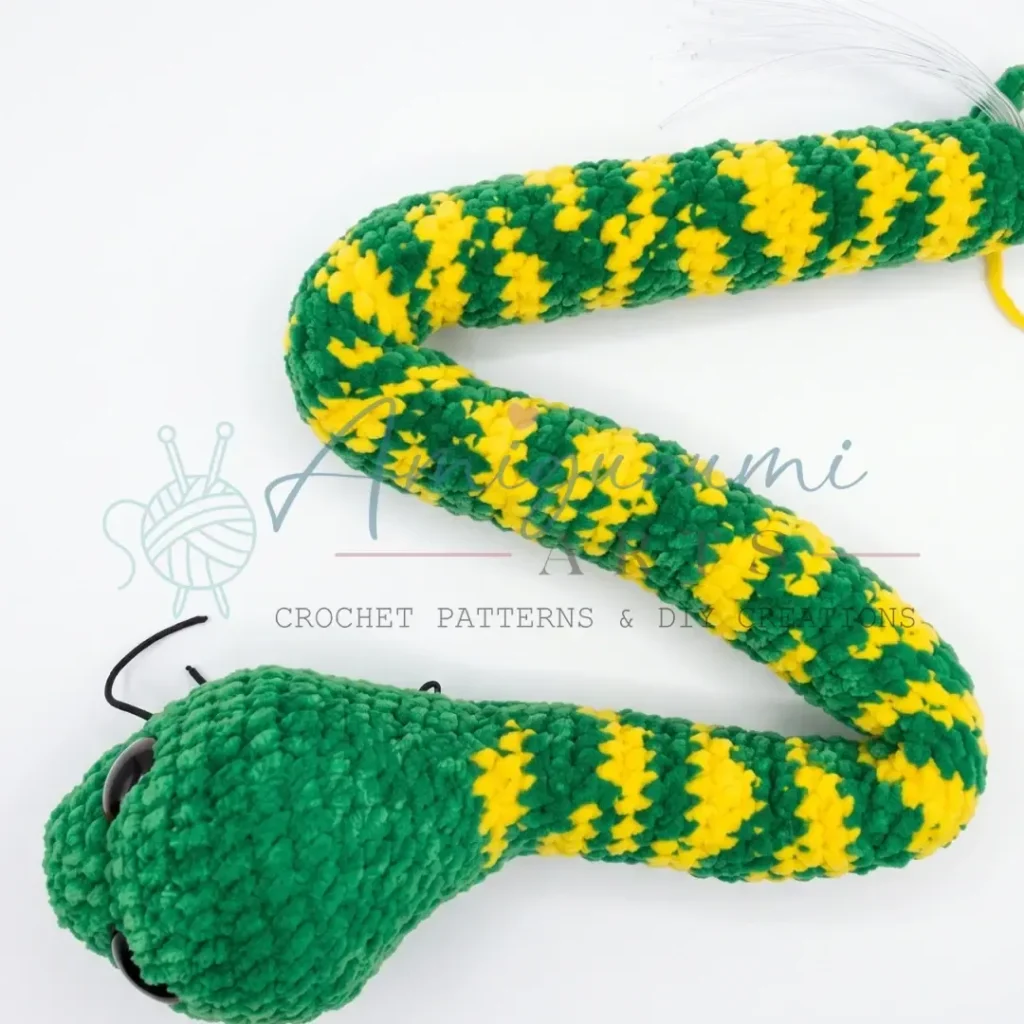
Made and counted by Wren —

Poseable 80 cm Snake Amigurumi With Wire Armature

4.0 mm hook, worsted-weight plush yarn — crochet an 80 cm poseable snake amigurumi with wire armature.

Poseable 80 cm Snake Amigurumi With Wire Armature
IntermediateLevel
8-12 hoursTime
4.0 mmHook
WorstedYarn
Jump to the pattern

About this pattern

An 80 cm poseable snake amigurumi built from a 13-round head, a body worked straight through rounds 18–97 in continuous sc, and a 21-round tapered tail. A 2 mm wire armature, inserted after round 17, lets the finished piece hold curves. Materials: 100 g main-color plush yarn, 30–50 g contrast, 4.0 mm hook, 20 mm safety eyes, and fiberfill stuffing throughout.

This snake amigurumi starts with a 5-chain foundation that spirals into a 13-round head, then continues without joining into a single long body tube worked in continuous rounds 18 through 97 — roughly 80 rounds — before 21 rounds of paired decreases taper the tail. A 2 mm aluminum wire, inserted after round 17, runs through the full body so the finished 80 cm length holds a pose. Every round uses the same 4.0 mm hook and plush worsted-weight yarn, with stuffing added continuously as the spiral grows.
The pattern

Written out round by round

Materials

  • Yarn (Main Color): Plush yarn, approximately 100 g (120 m / 100 g weight)
  • Yarn (Contrast Color): Plush yarn, approximately 30–50 g (same weight)

Hook

  • US G-6 / 4.0 mm

Safety Eyes

  • 20 mm trapezoid-style safety eyes, 1 pair

Stuffing

  • Polyester fiberfill or hollowfiber stuffing

Wire Armature

  • Aluminum wire, 2 mm diameter, 1.5–2 m length
  • Stitch Markers
  • Yarn Needle / Tapestry Needle
  • Scissors
  • Black thread or thin yarn for facial detail embroidery

Abbreviations

  • ch = Chain
  • dec = Invisible Decrease (insert hook into front loops of next 2 sts, pull up a loop, yarn over and draw through all 3 loops)
  • hdc = Half Double Crochet
  • inc = Increase (2 sc in same stitch)
  • MR = Magic Ring
  • sc = Single Crochet
  • sl st = Slip Stitch

Head

Begin from a foundation chain, then continue in a continuous spiral.

Foundation: Ch 5.

Round 1Starting in the 2nd ch from hook, sc in next 3 ch, 3 sc in last ch (corner), then working back along the other side of the chain: sc in next 2 ch, inc in first ch. (10)
Round 2Inc, sc in next 2 sts, inc 3 times, sc in next 2 sts, inc 2 times. (16)
Round 3Sc, inc, sc in next 2 sts, sc, inc repeat 3 times, sc in next 2 sts, sc, inc repeat 2 times. (22)
Round 4Sc in next 12 sts, sl st in next 6 sts, sc in next 4 sts. (22)
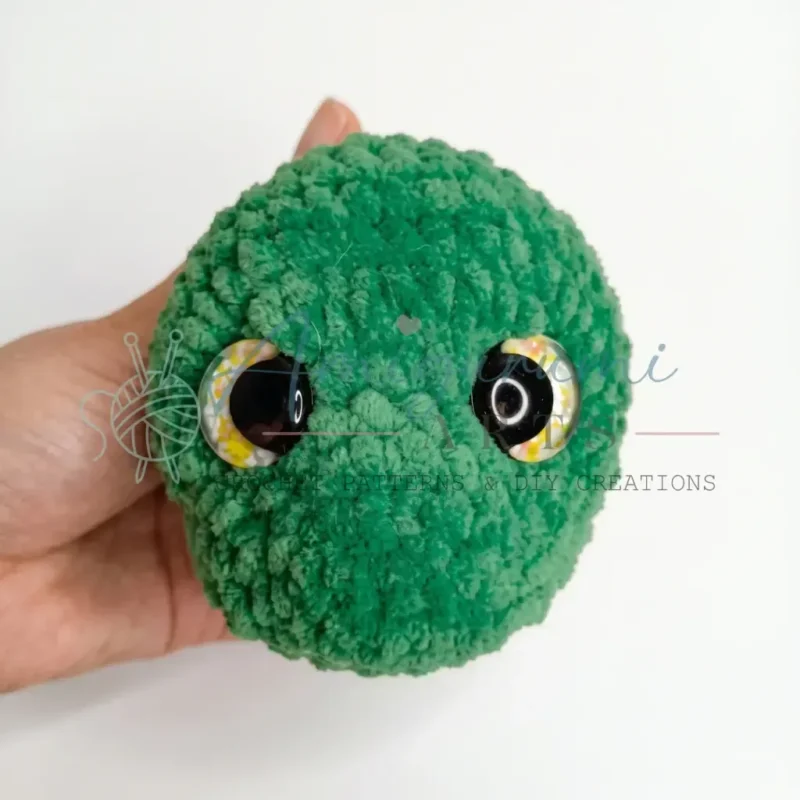
Round 5Inc, sc in next 6 sts, inc, sc in next 4 sts, inc 7 times, sc in next 3 sts. (31)Insert safety eyes at Round 5 — place one eye after the first increase and one eye before the last increase of this round.
Round 6Sc in next 14 sts, hdc, inc in same st as hdc repeat 7 times, sc in next 3 sts. (38)
Rounds 7–11Sc in each st around. (38) Work these 5 rounds even.
Round 12Sc in next 12 sts, sc, dec repeat 8 times, sc in next 2 sts. (30)The decreases in Rnd 12 fall across the top of the head.
Round 13Sc in each st around. (30)
Round 14Sc in next 3 sts, dec repeat 6 times. (24)
Round 15Sc in each st around. (24)
Round 16Sc in next 11 sts, sc in next 2 sts, dec repeat 3 times, sc. (21)The decreases in Rnds 16 and 17 fall across the top of the head.
Round 17Sc in next 11 sts, sc, dec repeat 3 times, sc. (18)

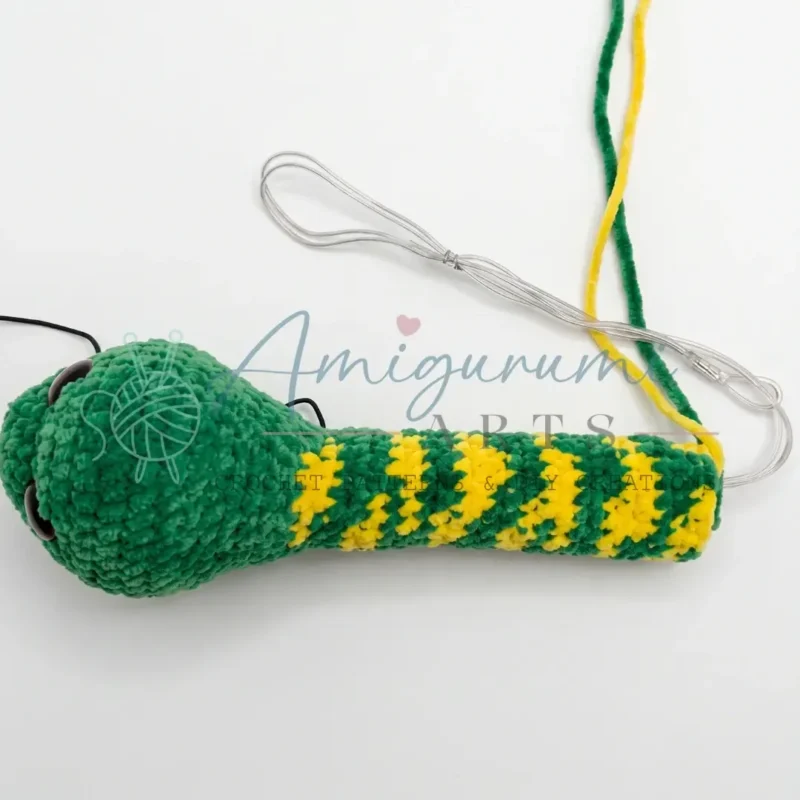
Before continuing, prepare and insert the wire armature, then stuff the head firmly with fiberfill. If you are adding a contrast color for the body, join it now. You will continue directly into the body in the next round.

Body

Continue in a continuous spiral from the head. The body is worked in sc throughout. You may introduce color changes for a jacquard effect at any point — work color changes as desired across these rounds.

Rounds 18–97Sc in each st around. (18) Work approximately 80 rounds for an 80 cm snake, or adjust to your preferred length.Continue stuffing as you work, feeding fiberfill and positioning the wire armature as you go. Stuff a little at a time rather than all at once: every 15–20 rounds, pause and push fiberfill down around the wire from the open end, aiming for an even, sausage-like density along the full length.(18)

Tail

Try to position each decrease stitch along the snake’s belly.

Round 98Dec, sc in next 16 sts. (17)
Round 99Sc in each st around. (17)
Round 100Dec, sc in next 15 sts. (16)
Round 101Sc in each st around. (16)
Round 102Dec, sc in next 14 sts. (15)
Round 103Sc in each st around. (15)
Round 104Dec, sc in next 13 sts. (14)
Round 105Sc in each st around. (14)
Round 106Dec, sc in next 12 sts. (13)
Round 107Sc in each st around. (13)
Round 108Dec, sc in next 11 sts. (12)
Round 109Sc in each st around. (12)
Round 110Dec, sc in next 10 sts. (11)
Round 111Sc in each st around. (11)
Round 112Dec, sc in next 9 sts. (10)
Round 113Sc in each st around. (10)
Round 114Dec, sc in next 8 sts. (9)
Round 115Sc in each st around. (9)
Round 116Dec, sc in next 7 sts. (8)
Round 117Sc in each st around. (8)
Round 118Dec 4 times. (4)Pull the yarn through the remaining 4 stitches to close the tail opening tightly. Weave in the end securely.

Assembly

Step 1After completing Round 17, insert the aluminum wire armature through the head and down through the full length of the body before closing the tail. Bend both ends of the wire to prevent them from poking through the fabric.
Step 2Stuff the head firmly before continuing to the body rounds, ensuring the snout area is well-shaped.
Step 3Continue adding fiberfill as you work the body rounds, packing it evenly around the wire. Avoid overstuffing — the body should feel firm but not stretched.
Step 4After closing the tail at Round 118, weave the yarn tail inward and secure it.
Step 5Using black thread or fine dark yarn, embroider the facial details onto the snout — nostrils, a smile line, or a forked tongue, according to your preference. Use the embroidery needle to pull the thread through cleanly and knot it off on the inside.
Step 6Weave in all remaining yarn ends.

Tester's notes

4.0 mm hook stays the same for every round of head, body, and tail — no hook changes anywhere in the pattern.

2 mm aluminum wire, cut to 1.5–2 m, goes in after Round 17 and runs the full body length; bend both ends before closing the tail so they cannot poke through.

Mark the start of each round with a stitch marker, since the head, body, and tail are all worked in a continuous spiral with no joining rounds.

Color changes across rounds 18–97 are optional, not fixed to a specific round — place them wherever a jacquard effect in the contrast-color plush yarn is wanted.

Stuff the head firmly before moving into the body rounds, then keep adding fiberfill evenly around the wire through rounds 18–97; stop before the body feels stretched rather than firm.

This pattern is written in US crochet terminology.

Plush (chenille-style) yarn can hide individual stitches, especially on decrease rounds — count every round before moving on, and if you lose count, run a length of contrast thread through the current round's stitches as a lifeline before continuing.

Work in progress

Poseable 80 cm Snake Amigurumi With Wire Armature — photo 2
Poseable 80 cm Snake Amigurumi With Wire Armature — photo 3

At a glance

Rounds35
Parts3
LevelIntermediate
Time8-12 hours
Hook4.0 mm
YarnWorsted

Gauge check

Gauge is not critical for this pattern, but check stitch counts after Round 3 — 22 stitches — to confirm tension matches the chart before continuing.

If the fabric lets stuffing show through between stitches, drop to a smaller hook and redo the first few rounds until the sc fabric stays dense.

Stitch-count checkpoints

  • Head · Round 4: 22 sts
  • Head · Round 13: 30 sts
  • Head · Round 17: 18 sts
  • Body · Rounds 18–97: 18 sts
  • Tail · Round 104: 14 sts
  • Tail · Round 111: 11 sts

If something looks wrong

The snout looks flat or uneven instead of rounded.
Round 17 is the last head round before the wire goes in; stuff the head firmly at this stage, since loose fill here flattens the snout permanently once the body rounds continue.
A wire tip pokes through the fabric at the head or tail end.
The wire was not bent back after insertion; bend a small loop at each end of the 2 mm wire immediately after threading it through in the assembly step, before closing either end, so the tip stays fully inside the plush and never near the surface.
The body looks stretched or the
Too much fiberfill was packed in during rounds 18–97; back off stuffing until the tube feels firm but the stitches close back together, not pulled open.
The decrease line spirals around the
Decreases were not kept on the same side each round; place a stitch marker at the belly before Round 98 and align every dec with it through the remaining tail rounds.
Gaps show between stitches once the piece is stuffed.
Plush yarn hides loose stitches until stuffing pushes them apart; keep tension tight and work each sc snugly around the hook — if you can see daylight through the fabric when holding it up to a light source, go down a hook size.

Yarn substitutions

Smooth acrylic, worsted weight (approx. 120 m/100 g)Drops the plush pile, so stitch definition sharpens and color changes across the body rounds show as crisp bands instead of blended fades; hook stays at 4.0 mm.
Cotton-blend, worsted weightProduces a stiffer fabric that holds the coiled shape with less help from the 2 mm wire, but needs slightly less stuffing to avoid a stretched look; keep the same 4.0 mm hook.
Bulky-weight chenilleCovers the same 80 cm length in fewer rounds since each stitch is larger; move up to a 5.0–5.5 mm hook and expect stitch definition to blur further, which hides color-change lines rather than sharpening them.
FAQs

Questions

Can the body be made shorter or longer than 80 cm?

Yes. Rounds 18–97 (about 80 rounds) set the 80 cm length in the written pattern, but that range is adjustable — stop or continue the plain sc rounds until the body reaches the preferred length before starting the Round 98 decreases.

Is the aluminum wire armature required for the pose to hold?

The wire armature is what makes this snake poseable and gives it its signature character — without it, the long body will flop and the shape will not hold. It goes in after Round 17, running the full length of the body, with both ends bent to keep them from poking through the stitches. If you are making this for a young child, you can omit the wire for safety reasons and simply stuff the body firmly with fiberfill — just be aware that the finished snake will be soft and floppy rather than poseable.

Can I substitute a different yarn for the plush yarn?

Yes, you can substitute any yarn of a similar weight (approximately 120 m per 100 g, which is roughly a worsted weight). Keep in mind that plush yarn creates the soft, velvety texture that makes this snake so appealing. A standard worsted or cotton yarn will produce a firmer, more structured fabric with visible stitch definition, which changes the look significantly. If you substitute, check your tension carefully and adjust your hook size as needed.

One at a time —

Get the next pattern

Tested round by round before it is sent. No spam.