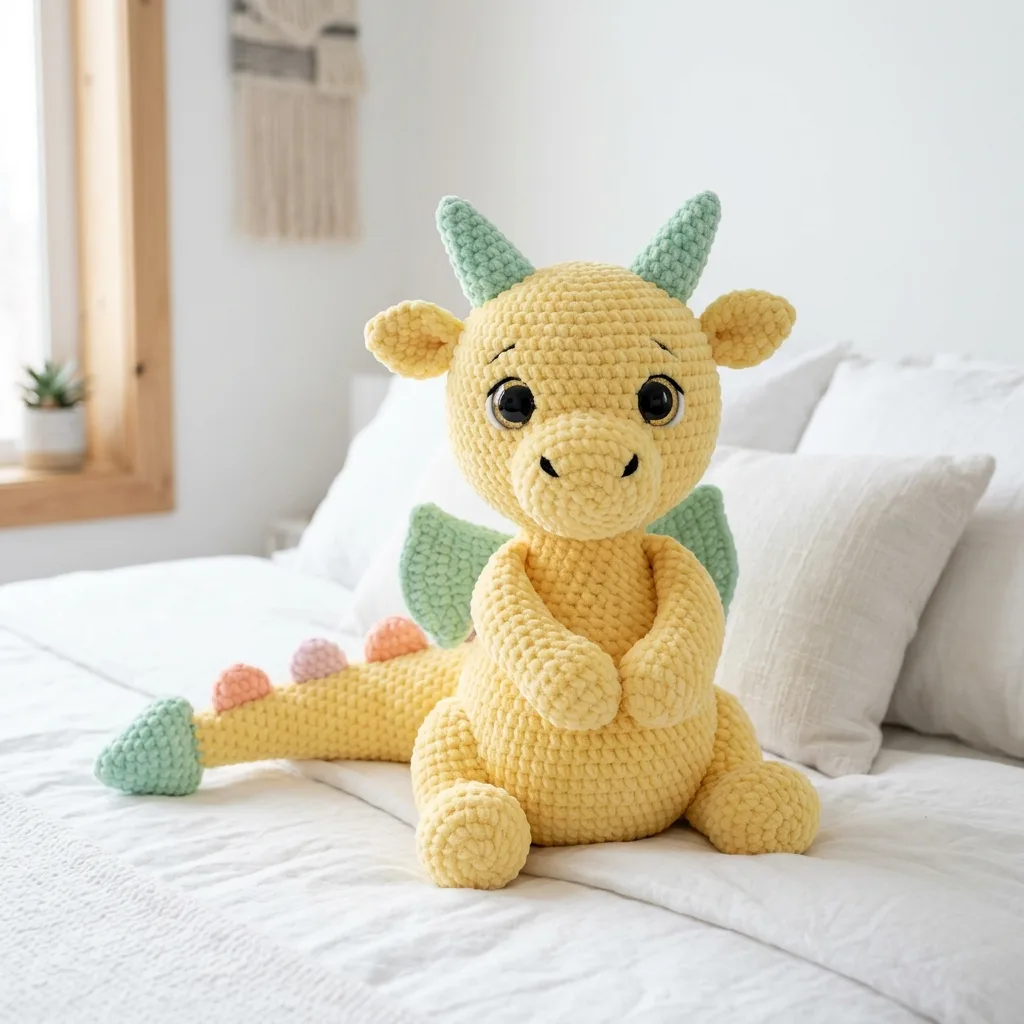
Made and counted by Wren —

Crochet a buttercream yellow dragon amigurumi plush

5.0mm hook, bulky chenille yarn: crochet a buttercream yellow dragon amigurumi plush.

Crochet a buttercream yellow dragon amigurumi plush
IntermediateLevel
6-9 hoursTime
5.0 mmHook
BulkyYarn
Jump to the pattern

About this pattern

This pattern makes a stuffed dragon amigurumi from six pieces — body, ears, horns, arms, wings, and tail — in bulky velvet or chenille yarn on a 5.0mm hook. The body runs 16 rounds; horns run 7, wings run 8, both in mint green. Yarn totals 200g yellow and 50g mint green, plus amounts of peach, pink, and lavender for tail spikes. Finishing uses 18mm safety eyes and embroidery floss.

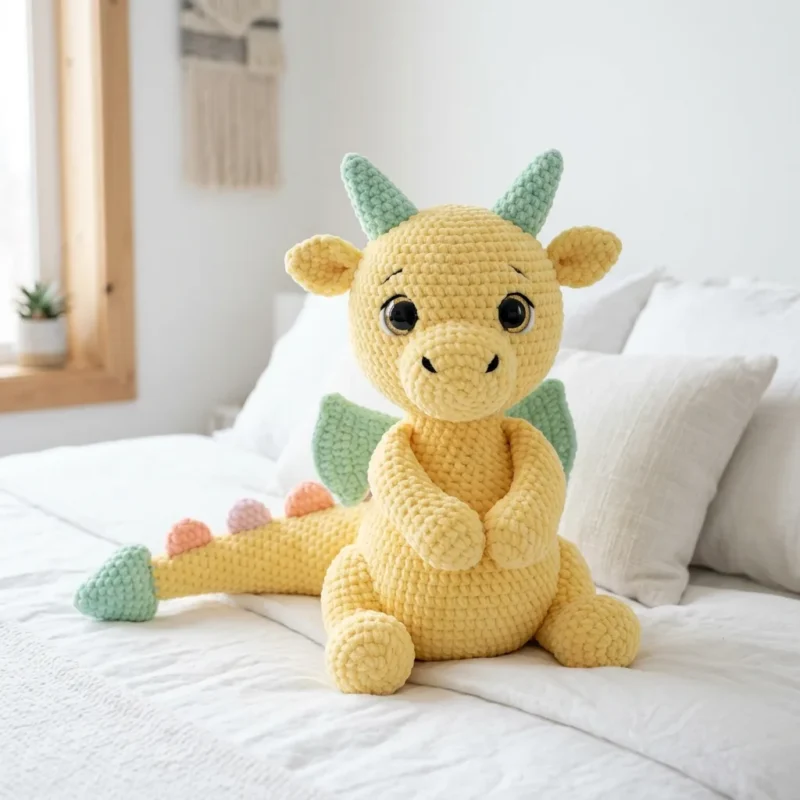
This amigurumi dragon is built from six separate crocheted pieces — body, ears (x2), horns (x2), arms (x2), wings (x2), and tail — each worked in continuous spiral rounds and seamed together at the end. The body carries the most rounds at 16, starting from a 6-stitch magic ring and expanding to 12, then 18 stitches before shaping continues. Horns and wings use mint green against the buttercream yellow body and arms, and the tail closes with peach, pink, and lavender spike accents. Six pieces, one color-blocked assembly.
The pattern

Written out round by round

Materials

Yarn

  • Buttercream yellow velvet/chenille yarn: approximately 200g (I recommend Bernat Blanket yarn or similar bulky weight chenille)
  • Mint green velvet/chenille yarn: approximately 50g
  • Small amounts of peach, pink, and lavender velvet yarn for tail spikes

Hook

  • 5.0mm crochet hook (adjust if needed to achieve tight stitches)

Notions

  • One pair of 18mm black safety eyes
  • Black embroidery floss for nose and mouth details
  • Polyester fiberfill stuffing
  • Stitch marker
  • Yarn needle
  • Scissors

Abbreviations

  • MR = Magic Ring: An adjustable loop that forms a tight center. You wrap yarn around your fingers, pull through a loop, then work your starting stitches into that ring before pulling it closed.
  • ch = Chain: The most basic crochet stitch. Yarn over, pull through the loop on your hook. One chain made.
  • sc = Single Crochet: Insert hook into stitch, yarn over and pull up a loop (two loops on hook), yarn over and pull through both loops.
  • inc = Increase: Work two single crochet stitches into one stitch. This adds one stitch to your count.
  • dec = Invisible Decrease: Insert hook through front loops only of the next two stitches, yarn over, pull through both front loops, yarn over, pull through both loops on hook. This creates a neater decrease than standard methods.
  • sl st = Slip Stitch: Insert hook, yarn over, pull through stitch and loop on hook in one motion.
  • FO = Fasten Off: Cut yarn and pull through final loop to secure.
  • BLO = Back Loop Only: Work into only the back loop of the stitch instead of both loops.

Body (Make 1 in Yellow)

Round 1MR, 6 sc into ring (6 sts)
Round 2Inc in each st around (12 sts)Step by step: Sc in each st around (6 sts) Sl st to next st. FO, leaving a tail. Do not stuff.
Round 3*Sc 1, inc* repeat around (18 sts)Step by step: Sc in each st around (18 sts) – 4 rounds; *Sc 1, dec* repeat around (12 sts).Sc in each st around (12 sts) – 8 rounds Sl st to next st. FO, leaving a long tail. Stuff foot portion firmly, upper leg lightly.
Round 4*Sc 2, inc* repeat around (24 sts)Sc in each st around (24 sts) – 4 rounds Sl st to next st. FO, leaving a long tail for sewing.Stuff lightly before attaching to head. The snout should be slightly rounded, not overstuffed.
Round 5*Sc 3, inc* repeat around (30 sts)
Round 6*Sc 4, inc* repeat around (36 sts)
Round 7*Sc 5, inc* repeat around (42 sts)Step by step: *Sc 6, inc* repeat around (48 sts).Sc in each st around (48 sts) – 10 rounds Insert safety eyes between rounds 12 and 13, approximately 10 stitches apart. The placement should be slightly lower than center to give that sweet, innocent look.Step by step: *Sc 6, dec* repeat around (42 sts).
Rounds 8–14Sc in each st around (42 sts) – 7 rounds total
Round 15*Sc 5, dec* repeat around (36 sts)Step by step: *Sc 4, dec* repeat around (30 sts) Stuff head firmly.
Round 16Sc in each st around (36 sts)
Round 17*Sc 4, dec* repeat around (30 sts)
Rounds 18–20Sc in each st around (30 sts) – 3 rounds Begin stuffing firmly at this point. Continue stuffing as you work.
Round 21*Sc 3, dec* repeat around (24 sts)
Rounds 22–24Sc in each st around (24 sts) – 3 rounds
Round 25*Sc 2, dec* repeat around (18 sts)Step by step: *Sc 1, dec* repeat around (12 sts) Add more stuffing if needed; Dec around (6 sts) FO. Use yarn needle to close remaining hole. Weave in end.
Rounds 26–27Sc in each st around (18 sts) – 2 rounds Sl st to next st. FO, leaving a long tail for sewing.

Ears (Make 2 in Yellow)

Round 1MR, 5 sc into ring (5 sts)
Round 2Inc in each st around (10 sts)
Round 3*Sc 1, inc* repeat around (15 sts)
Rounds 4–5Sc in each st around (15 sts) – 2 rounds Sl st to next st. FO, leaving a tail. Do not stuff. Flatten piece for sewing.

Horns (Make 2 in Mint Green)

Round 1MR, 4 sc into ring (4 sts)
Round 2*Sc 1, inc* repeat around (6 sts)
Round 3Sc in each st around (6 sts)
Round 4*Sc 2, inc* repeat around (8 sts)
Round 5Sc in each st around (8 sts)
Round 6*Sc 3, inc* repeat around (10 sts)
Rounds 7–8Sc in each st around (10 sts) – 2 rounds Sl st to next st. FO, leaving a tail. Stuff lightly.

Arms (Make 2 in Yellow)

Round 1MR, 6 sc into ring (6 sts)
Round 2Inc in each st around (12 sts)
Rounds 3–5Sc in each st around (12 sts) – 3 rounds
Round 6*Sc 1, dec* repeat around (8 sts)
Rounds 7–14Sc in each st around (8 sts) – 8 rounds Sl st to next st. FO, leaving a long tail. Stuff hand portion only, leave arm portion unstuffed for flexible posing.

Wings (Make 2 in Mint Green)

Round 1Ch 12, sc in 2nd ch from hook, sc across (11 sts)
Round 2Ch 1, turn, sc 2, inc, sc 5, inc, sc 2 (13 sts)
Round 3Ch 1, turn, sc across (13 sts)
Round 4Ch 1, turn, dec, sc 9, dec (11 sts)
Round 5Ch 1, turn, dec, sc 7, dec (9 sts)
Round 6Ch 1, turn, dec, sc 5, dec (7 sts)
Round 7Ch 1, turn, dec, sc 3, dec (5 sts)
Round 8Ch 1, turn, dec, sc 1, dec (3 sts) FO, leaving a long tail. Sc around entire wing edge to create a neat border. This step is optional but gives a more polished look.

Tail (Make 1 in Yellow with Mint Tip)

Round 1With mint green, MR, 4 sc into ring (4 sts)
Round 2Inc in each st around (8 sts)
Rounds 3–4Sc in each st around (8 sts) – 2 rounds
Round 5Change to yellow, sc in each st around (8 sts)
Rounds 6–20Sc in each st around (8 sts) – 15 rounds Sl st to next st. FO, leaving a long tail. Stuff lightly.

Assembly

Step 1Take your time with assembly. This is where your dragon comes to life.
Step 2Head to Body: Position head on top of body opening. Pin in place if helpful. Whip stitch around entire edge securely.
Step 3Snout: Center snout on lower half of face, below eyes. Sew in place. Using black embroidery floss, create two small nostrils and a curved smile line.
Step 4Ears: Attach ears to sides of head, slightly behind and above eye level. Angle them outward gently.
Step 5Horns: Position horns on top of head between ears, angled slightly backward. Sew firmly.
Step 6Arms: Attach arms to upper body sides, angled forward so hands can meet in front as shown.
Step 7Legs: Sew legs to bottom of body with feet pointing forward.
Step 8Wings: Attach wings to back of body, positioned between shoulders. Sew along flat edge only so wings can spread outward.
Step 9Tail: Sew tail to back bottom of body. Before closing completely, arrange tail spikes in a row along the top of tail and sew each in place.

Tester's notes

5.0mm hook is a starting point only — velvet and chenille yarns vary by brand, so size down if stitches show gaps, since a tight fabric matters more than matching the stated hook.

16 rounds make up the body alone, so mark the first stitch of every round with a stitch marker before starting Round 1; losing count on a piece this long means unraveling the whole section.

200g of buttercream yellow and 50g of mint green cover the body, ears, arms, and the horns/wings — weigh remaining yarn against those totals partway through to confirm there's enough for the tail and spike accents.

Color changes between the yellow body and mint green horns, wings, and tail tip happen at piece boundaries, not mid-round, so finish and fasten off one color completely before starting the next piece.

Stuff gradually through all 16 rounds of the body rather than filling it after Round 16 — velvet and chenille fabric stretches unevenly, and stuffing in increments keeps the shape consistent across ears, horns, arms, wings, and tail too.

Work in progress

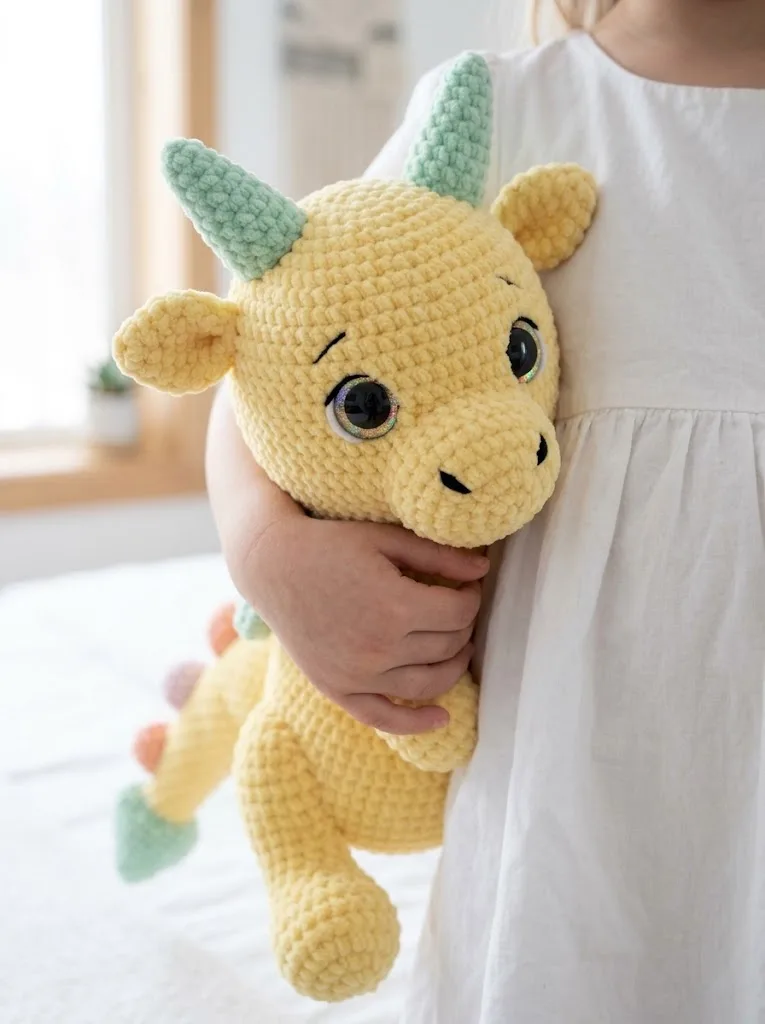
Crochet a buttercream yellow dragon amigurumi plush — photo 2
Crochet a buttercream yellow dragon amigurumi plush — photo 3

At a glance

Rounds45
Parts6
LevelIntermediate
Time6-9 hours
Hook5.0 mm
YarnBulky

Gauge check

After Round 2 of the Body, count stitches: the total should read 12 before moving into Round 3's increase row to 18.

If the count is off by even one stitch, stop and unravel back to the stitch marker rather than continuing, since a miscount here carries forward into the 16-round shaping that follows.

Stitch-count checkpoints

  • Body (Make 1 in Yellow) · Round 4: 24 sts
  • Body (Make 1 in Yellow) · Round 15: 36 sts
  • Body (Make 1 in Yellow) · Round 25: 18 sts
  • Ears (Make 2 in Yellow) · Round 1: 5 sts
  • Ears (Make 2 in Yellow) · Round 2: 10 sts
  • Ears (Make 2 in Yellow) · Round 3: 15 sts

If something looks wrong

The body looks lumpy or uneven even though the stitch count is right.
Velvet and chenille yarn hides tension differences, so lumps usually come from stuffing added in one large handful at the end instead of gradually across the 16 rounds — remove and redistribute fiberfill in smaller amounts as you go.
Horns or wings curl instead of holding their shape.
Mint green horns run 7 rounds and wings run 8, both short pieces that rely on firm stuffing to hold form — understuffing on a piece this small is the usual cause, so pack fiberfill in before closing the final round.
The ears or tail won't sit flat against the head or body after sewing.
The ears are flattened for sewing but the tail is worked in the round with a mint tip and spike accents — whip stitch slowly around the full edge and pin before sewing so the piece doesn't pucker at the seam.

Yarn substitutions

Acrylic worsted weight (non-chenille)Produces a smaller, less squishy dragon than the 200g/50g bulky velvet called for, since worsted is thinner — go up a hook size or two from 5.0mm to recover gauge, and expect visible stitch definition instead of the hidden-stitch look velvet gives.
Cotton-blend bulky weightHolds its shape with less give than velvet or chenille, so stuffed pieces like the body and horns look firmer and the fabric won't stretch to absorb stuffing lumps; stick close to the 5.0mm hook but stuff in smaller increments since cotton-blend fabric shows bulges more readily.
Polyester chenille from a different source (same bulky weight)Keeps the 200g/50g yardage and 5.0mm hook roughly accurate since the weight category matches, but fiber thickness and pile height vary enough to change finished size slightly — swatch the first few rounds of the body, through the 18-stitch round, before committing to the full 16 rounds.
FAQs

Questions

How much yarn does this dragon actually need?

Plan on about 200g of buttercream yellow for the body, ears, and arms, plus 50g of mint green for the horns, wings, and tail tip. Small leftover amounts of peach, pink, and lavender cover the tail spike accents, so full skeins aren't needed for those three colors.

Why does the pattern say not to stuff certain rounds yet?

Several sections, including parts of the body, are worked and fastened off before stuffing so the opening stays accessible for sewing to another part. Stuffing early in those spots makes the seam harder to close cleanly, so follow the stated stuffing points rather than filling as soon as a round closes.

Can stitch count be checked mid-round without finishing it?

Yes — stitch markers placed at the first stitch of each round make it possible to pause and count at any point, which matters most on longer pieces like the 16-round body. Recount against the nearest stated total (6, 12, or 18 stitches in the early body rounds) before continuing rather than waiting until the round is complete.

One at a time —

Get the next pattern

Tested round by round before it is sent. No spam.