Made and counted by Wren —

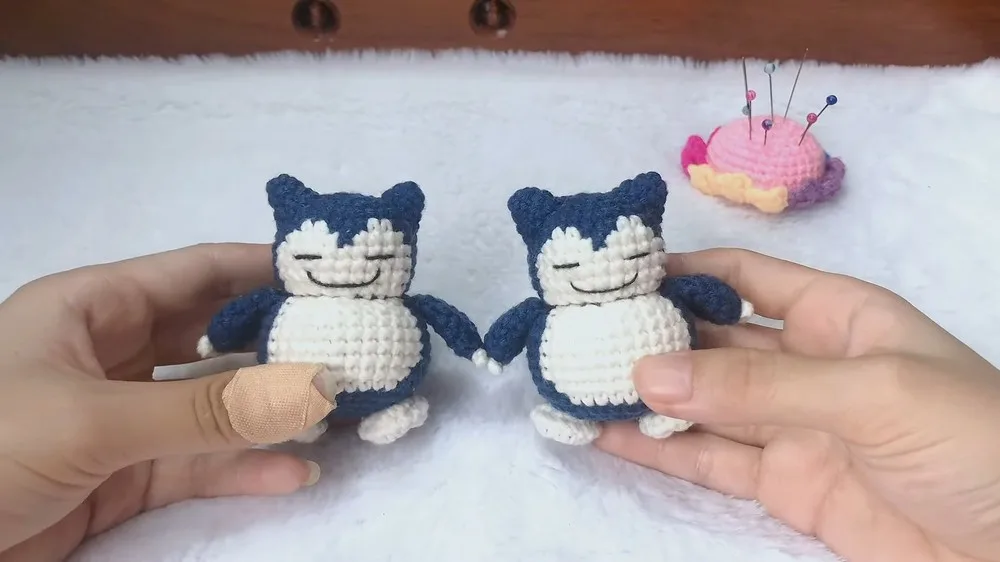
How to crochet a Snorlax amigurumi for beginners

Worsted-weight amigurumi pattern: crochet a four-part Snorlax figure with ears, arms, and paw.

How to crochet a Snorlax amigurumi for beginners
BeginnerLevel
3-5 hoursTime
Not specifiedYarn
Jump to the pattern

About this pattern

A beginner-level amigurumi Snorlax built from four separate parts — body, ears (make 2), arms (make 2), and paw (make 2) — each starting from a magic ring and worked in joined, turned rounds instead of a continuous spiral. The body opens with a 7-stitch ring and increases to shape the torso; arms start from a 6-stitch ring, decrease to a point, then sew flat and unstuffed. Hook size and yarn colors are not specified in the written instructions.

This Snorlax figure builds from four pattern parts — body, ears (make 2), arms (make 2), and paw (make 2) — each starting from a magic ring and worked in joined, turned rounds rather than a continuous spiral. The body opens with a 7-stitch magic ring and increases from there to set the torso, with color changes marking facial and belly details later. Arms start from a 6-stitch magic ring, decrease to a point, then sew flat and unstuffed, with claws embroidered in white yarn afterward. The number that matters most: four parts, seven total pieces once 'make 2' is applied, each worked separately before assembly.
The pattern

Written out round by round

Materials

  • The specific materials needed (yarn colors, hook size, etc.) are mentioned to be in the video description.

Abbreviations

  • st = stitch
  • sl st = slip stitch
  • sc = single crochet
  • inc = increase
  • dec = decrease

Ears (Make 2)

Start with a magic ring.

Step by step: Start with a magic ring.

Round 1SC 4 in magic ring. Pull ring closed and SL ST to first SC.INC in each stitch around. Follow instructions similar to body, with specific rounds for color changes to create facial details.Step by step: Fasten off, leave a tail for attaching to the body.
Round 2Chain 1, SC in first stitch and mark, INC in next stitch, SC in next stitch, INC in following stitch , SL ST to first SC.

In Round 3:

Repeat the pattern of SC 1, then INC, ending with a SL ST. Fasten off and leave a long tail for sewing. Make 2 ears.

Arms (Make 2)

Start with a magic ring.

Round 1SC 6 in magic ring. SL ST to first SC.
Round 2Chain 1, INC in each stitch around, SL ST to first SC. In Rounds 3-4: Chain 1, SC in each stitch around.
Round 5Chain 1, SC 2, DEC, repeat around.
Round 6SC 1, DEC, repeat around. Sew edges together, do not stuff. Embroider the claws with white yarn.

Body

Start with a magic ring.

Round 1SC 7 in magic ring, SL ST to first SC.
Round 2INC in each stitch around. Continue increasing in pattern for body shape, switching colors as indicated for details.After shaping the body, fasten off leaving a long tail for sewing.

Paw (Make 2)

Start with a magic ring in brown yarn.

Round 1SC 7 in magic ring, change to white yarn, SL ST to first SC. In Round 2: INC in each stitch around.
Round 3SC in each stitch around.
Round 4DEC in each stitch around. Fasten off, no stuffing needed.

Tester's notes

7-stitch magic ring opens the body — pull the tail fully closed before round 1 or a gap shows at center front.

6-stitch magic ring opens each arm (make 2); keep both stitch counts matching so the pair sits even once attached.

4-stitch magic ring opens each ear (make 2); the small start loses count fast, so mark the first stitch of every round.

4 pattern parts — body, ears, arms, paw — add up to 7 total pieces once the 'make 2' instructions are applied; recount before starting assembly.

No stuffing goes into the arms — sew that opening flat instead, then embroider the claws in white yarn after closing it.

Work in progress

How to crochet a Snorlax amigurumi for beginners — photo 2
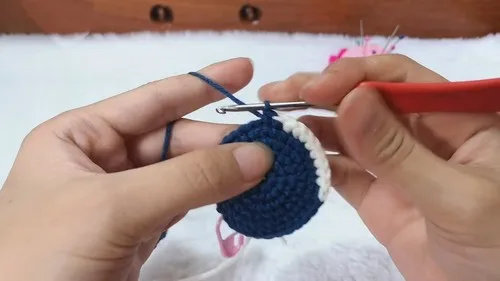
How to crochet a Snorlax amigurumi for beginners — photo 3

At a glance

Rounds11
Parts4
LevelBeginner
Time3-5 hours
YarnNot specified

Gauge check

After round 1 of the body (the 7-stitch magic ring, slip-stitched closed), the circle should sit flat on a table without cupping or rippling at the edge.

If it cups, drop down a hook size; if it ruffles or won't lie flat, go up a hook size and retry round 1 before continuing.

If something looks wrong

The body circle cups upward instead of lying flat after round 1.
Caused by tension too tight on the 7-stitch magic ring; loosen the first few stitches and check the ring is drawn fully closed, not puckered.
The two arms come out different sizes.
Each arm starts from its own 6-stitch magic ring, so a miscounted increase or decrease on one side throws off the match; count stitches at the end of every round before moving on.
Ear edges flare or ruffle instead of curving smoothly.
The 4-stitch start combined with INC in each stitch around increases fast; if the increase round feels loose, drop to a smaller hook for the ear pieces only.
Claw embroidery on the arms distorts the surrounding fabric.
White yarn embroidered after the arm is sewn flat can pull if worked too tight; keep slack equal to the working yarn, not pulled taut.

Yarn substitutions

Worsted-weight acrylicMatches the likely default weight; stitch counts (7, 6, 4) hold as given, and hook size stays as planned if gauge matches.
DK-weight cottonThe same 7-, 6-, and 4-stitch starts cover less area, giving a smaller finished Snorlax; drop to a smaller hook and expect firmer, less squishy fabric.
Bulky-weight yarnThe same low stitch counts stretch over more yarn, giving a larger figure; move up a hook size, and the body may need more fill to hold shape, while arms still sew flat unstuffed.
FAQs

Questions

Does the arm get stuffed before sewing it shut?

No. The pattern sews the arm opening flat instead of stuffing it, then adds white embroidered claws once the seam is closed.

Why does the body start with 7 stitches instead of 6?

The body opens on a 7-stitch magic ring, while the arms use 6 and the ears use 4. The wider body base sets up the shaping used for the torso in later rounds.

How many pieces need to be finished before assembly?

Seven pieces total: 1 body, 2 ears, 2 arms, and 2 paw pieces. Check all seven are complete and fastened off before sewing anything together.

One at a time —

Get the next pattern

Tested round by round before it is sent. No spam.