Made and counted by Wren —

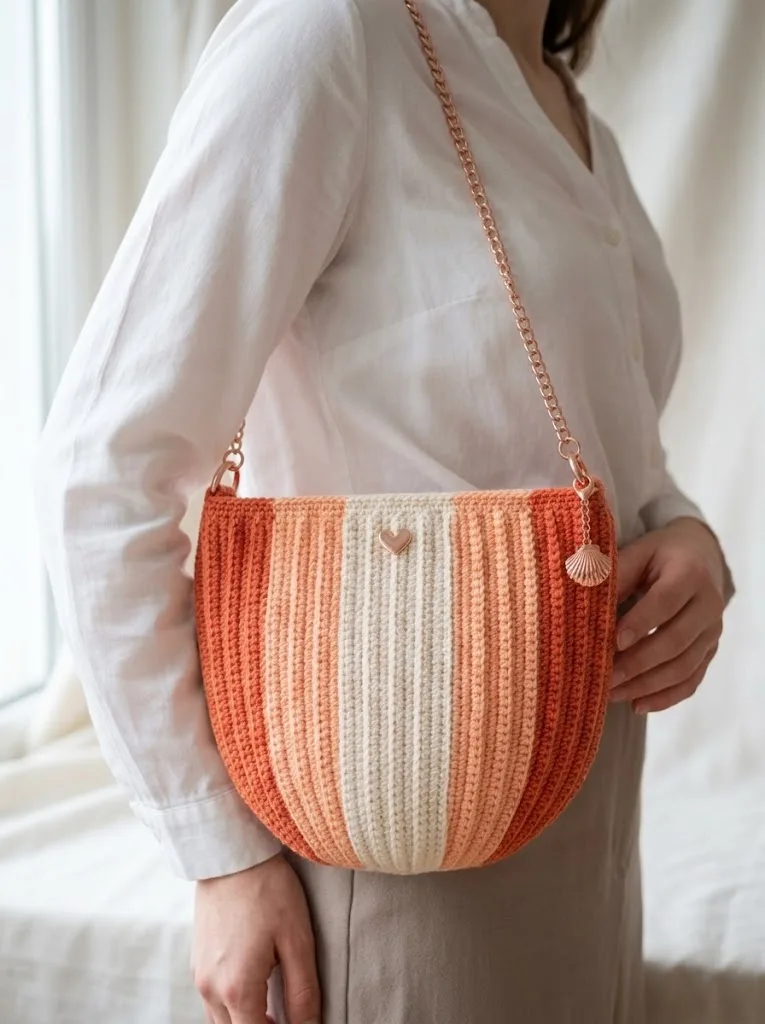
Crochet a coral sunset gradient chain purse with BLO ribbing

3.0mm hook, sport weight cotton: an oval-base crochet purse with BLO ribbing and four-color gradient body.

Crochet a coral sunset gradient chain purse with BLO ribbing
IntermediateLevel
6-8 hoursTime
3.0 mmHook
Sport (Fine, #2)Yarn
Jump to the pattern

About this pattern

A continuous-round oval base grows to 60 stitches, then shifts into back-loop-only ribbing striped across four cotton colors — terracotta, coral, peach, and cream. A 3.0mm hook holds the sport weight cotton dense enough for purse structure, and a 24-inch chain strap clips to two D-rings at the top edge. Skill level sits at advanced beginner to intermediate, with color changes and back-loop-only stitching as the main techniques.

The pattern

Written out round by round

Materials

Yarn

  • Sport weight cotton yarn (size 2 fine) in four colors

Color A

  • Terracotta or rust (approximately 80 yards)

Color B

  • Coral or salmon (approximately 40 yards)

Color C

  • Peach or blush (approximately 40 yards)

Color D

  • Cream or off-white (approximately 60 yards)

Hook

  • 3.0mm crochet hook (US size C/2 or D/3)
  • A smaller hook than usual for sport weight creates the dense, sturdy fabric you need for a bag. If your stitches look loose and floppy, go down a hook size.

Notions

  • Rose gold or gold chain strap (approximately 24 inches)
  • Two small D-rings or jump rings for strap attachment
  • Decorative charm (optional, I used a seashell)
  • Small heart or decorative pin (optional)
  • Tapestry needle
  • Stitch marker
  • Scissors

Abbreviations

  • ch = chain: Wrap yarn over hook, pull through loop on hook. This creates the foundation loops.
  • sl st = slip stitch: Insert hook, yarn over, pull through stitch and loop on hook in one motion. Used for joining and moving across stitches.
  • sc = single crochet: Insert hook into stitch, yarn over and pull up a loop (2 loops on hook), yarn over and pull through both loops. The most basic and commonly used stitch.
  • hdc = half double crochet: Yarn over, insert hook into stitch, yarn over and pull up a loop (3 loops on hook), yarn over and pull through all 3 loops. Slightly taller than single crochet.
  • inc = increase: Work 2 stitches into the same stitch. This adds one stitch to your count.
  • BLO = back loop only: Instead of inserting your hook under both loops at the top of a stitch, insert it under only the back loop (the one furthest from you). This creates the ribbed texture.
  • st(s) = stitch(es)
  • rnd(s) = round(s)

Part One: The Rounded Base

We begin at the very bottom center of the bag and work outward in an oval shape. This creates that lovely curved silhouette.

Using Color A (terracotta) and your 3.0mm hook: Foundation: Ch 15.

Round 1Starting in the 2nd ch from hook, sc in each of the next 13 ch. In the last ch, work 3 sc (this turns the corner). Now working along the opposite side of the foundation chain, sc in each of the next 12 ch. Work 2 sc in the last ch. Do not join. Place a stitch marker in the first stitch of the round and move it up as you work. (30 sts)
Round 2Inc in first st, sc in next 12 sts, inc in next 3 sts, sc in next 12 sts, inc in next 2 sts. (36 sts)
Round 3Sc in first st, inc in next st, sc in next 12 sts, (sc in next st, inc in next st) 3 times, sc in next 12 sts, (sc in next st, inc in next st) 2 times. (42 sts)
Round 4Sc in first 2 sts, inc in next st, sc in next 12 sts, (sc in next 2 sts, inc in next st) 3 times, sc in next 12 sts, (sc in next 2 sts, inc in next st) 2 times. (48 sts)
Round 5Sc in first 3 sts, inc in next st, sc in next 12 sts, (sc in next 3 sts, inc in next st) 3 times, sc in next 12 sts, (sc in next 3 sts, inc in next st) 2 times. (54 sts)
Round 6Sc in first 4 sts, inc in next st, sc in next 12 sts, (sc in next 4 sts, inc in next st) 3 times, sc in next 12 sts, (sc in next 4 sts, inc in next st) 2 times. (60 sts)

Your base should now measure approximately 5.5 inches long and 3 inches wide. It will look like a flat oval. Perfect.
Part Two: Building the Sides

Now we stop increasing and work straight up to create the bag walls. This is where the magic of the ribbing begins.

Round 7Working in BLO only for this entire round, sc in each st around. (60 sts) This single round of BLO creates a crisp edge where the base meets the sides. You will see a visible ridge form. This is exactly what we want.
Round 8through 12: Sc in both loops of each st around. (60 sts per round) Continue working in standard single crochet for 5 more rounds. The sides should start curving upward nicely.

Part Three: The Ribbed Body with Color Gradient

Here is where your bag transforms with that gorgeous ribbed texture and gradient coloring. We switch to BLO for the remainder of the bag body. This creates the vertical ribbing effect.

Color Placement Guide: The bag has 60 stitches around. We divide these into color sections: Stitches 1 to 15: Color A (terracotta)

Stitches 16 to 22: Color B (coral)

Stitches 23 to 38: Color D (cream, center panel)

Stitches 39 to 45: Color C (peach)

Stitches 46 to 60: Color A (terracotta)

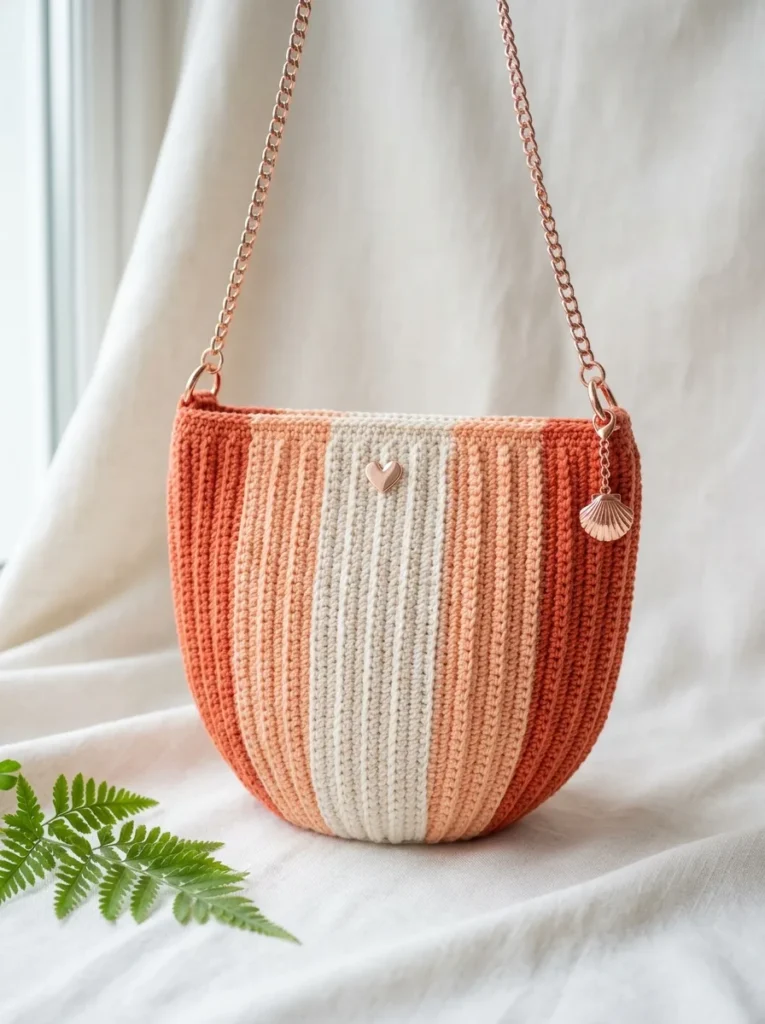
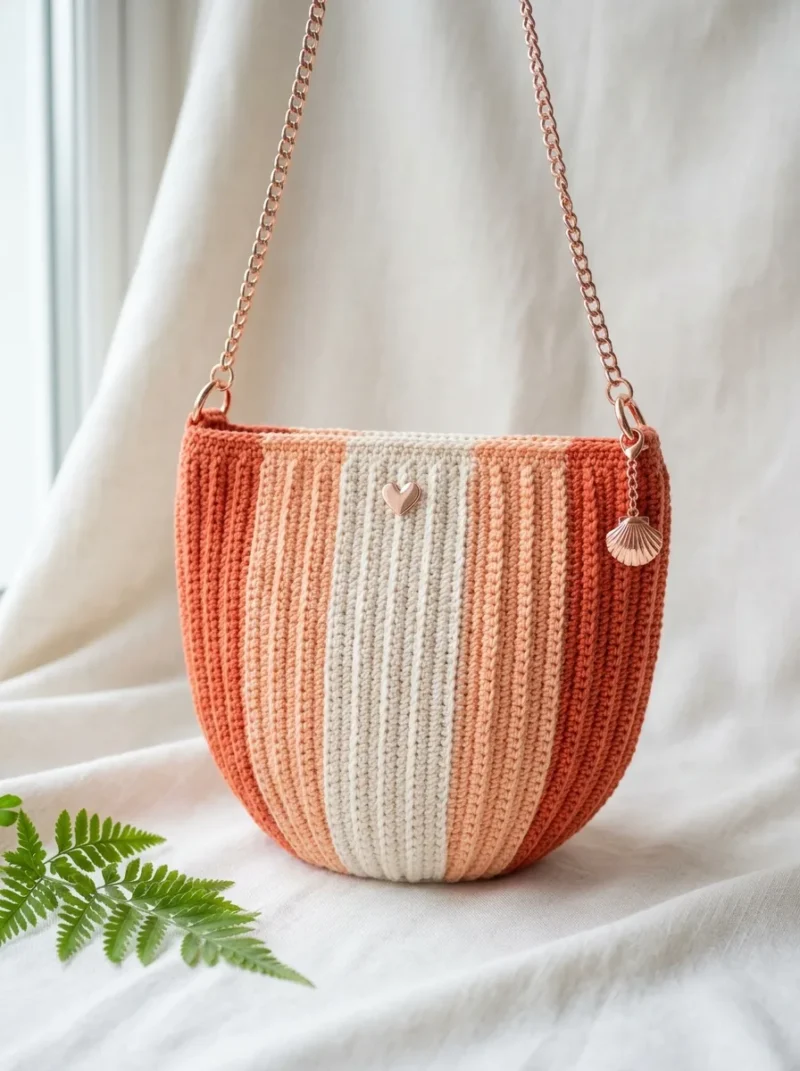
This creates the symmetrical gradient stripe pattern you see in the finished bag.

How to manage multiple colors:

You have two options here. You can carry the unused yarns along the inside of the bag (this works well for short color sections), or you can use separate small balls and pick them up as needed. I prefer carrying the yarn for this project because the sections are small enough that it does not create bulk.

Round 13through 35: Working in BLO throughout, sc in each st around, changing colors according to the placement guide above. (60 sts per round, 23 rounds total)Color change technique: When you reach the last stitch before a color change, work the sc until you have 2 loops on your hook. Drop the old color, pick up the new color, and pull it through both loops to complete the stitch. The new color is now active. Carry the old color loosely along the inside.At the end of Round 35, your bag body should measure approximately 5.5 to 6 inches tall from the base ridge.

Part Four: The Top Edge

We finish with a clean, sturdy edge that will support the strap hardware.

Round 36Still using your working colors in their sections, work in both loops (not BLO) for this round. Sc in each st around. (60 sts)
Round 37Repeat Round 36. Sc in each st around in both loops. (60 sts)
Round 38Final Round Sl st in each st around. Fasten off and weave in all ends securely.The slip stitch round creates a nice finished edge and slightly pulls the top inward for a polished look.

Assembly

Step 1Weave in all yarn tails. Use your tapestry needle to work ends through several stitches on the wrong side (inside) of the bag. Trim close.
Step 2Attach D-rings for the strap:
Step 3Locate the side points of your bag, directly above where the curved ends of the base are. Using a matching yarn color, attach yarn to the top edge at one side point.
Step 4Ch 8, sl st into the top edge 4 stitches away from where you started. This creates a small loop. Sl st along the loop to reinforce it, then fasten off.
Step 5Thread your D-ring onto this loop before closing it, or attach it after using a jump ring.
Step 6Repeat on the opposite side.
Step 7Attach the chain strap:
Step 8Open the end links of your chain and thread them through the D-rings. Close securely with pliers.
Step 9Optional embellishments:
Step 10I added a small gold seashell charm to one side for a summery touch, and a tiny heart pin near the center. These little details make the bag feel special but are completely optional.

Tester's notes

Round 1 sets 30 stitches; recount before Round 2, since a stitch gained or dropped here compounds through Rounds 2 and 3 (36, then 42 stitches).

3.0mm hook (US C/2 or D/3) runs smaller than standard for sport weight yarn; drop a size further if the fabric still looks loose after Round 1.

The stitch marker placed in the first stitch of Round 1 needs to move up every round, since the pattern works continuously with no join.

Part Three divides the 60-stitch round into color sections (15, 7, 16, and 7 stitches, with the remainder completing the round); mark the start of each block on the first color round so later gradient rounds stay aligned.

Work in progress

Crochet a coral sunset gradient chain purse with BLO ribbing — photo 2
Crochet a coral sunset gradient chain purse with BLO ribbing — photo 3

At a glance

Rounds12
Parts4
LevelIntermediate
Time6-8 hours
Hook3.0 mm
YarnSport (Fine, #2)

Gauge check

After Round 1, count stitches around the oval base before moving on — the pattern expects exactly 30.

If the count runs high or low, undo back to the last corner increase and rework it, since Rounds 2 and 3 build directly on that 30-stitch total to reach 36 and then 42.

Stitch-count checkpoints

  • Part One: The Rounded Base · Round 2: 36 sts
  • Part One: The Rounded Base · Round 4: 48 sts
  • Part One: The Rounded Base · Round 6: 60 sts
  • Part Four: The Top Edge · Round 36: 60 sts
  • Part Four: The Top Edge · Round 37: 60 sts

If something looks wrong

Base cups or domes instead of lying flat.
Round 1 through Round 3 stitch counts (30, 36, 42) are off, usually from a missed increase at a corner; recount each round before moving on and redo the increase sequence if the total doesn't match.
No visible ridge where the base meets the sides.
Round 7 was worked in both loops instead of back loop only; frog Round 7 and rework it in BLO so the front-loop ridge shows before starting Rounds 8 through 12.
Color blocks don't line up with the stitch ranges in the color placement guide.
Stitch count drifted from 60 somewhere in Rounds 8 through 12; recount a full round before starting Part Three and place markers at stitch 1, 16, 23, and 39 to track the sections (15, 7, 16, 7 stitches).
Strap loop twists or sits loose at the D-ring.
The ch-8 loop was slip-stitched into the top edge without reinforcement; slip stitch back along the loop a second time, as the steps direct, before fastening off.

Yarn substitutions

Mercerized cotton, sport weight (matches the pattern)Keeps the stitch definition and sheen the pattern assumes; swapping to regular, non-mercerized cotton at the same 3.0mm hook holds the 80/40/40/60-yard amounts close but gives a matte finish instead.
Worsted weight cottonThicker than the sport weight the pattern calls for, so stitches grow past the 60-stitch body count unless the hook drops to roughly 2.5mm; expect to use less total yardage but get a stiffer, less pliable fabric.
Fingering weight cotton or linen blendThinner than sport weight, so the 3.0mm hook produces a looser fabric; drop to a smaller hook, closer to 2.5mm, or add a round to Part Two to keep the bag sturdy enough to hold shape without a lining.
FAQs

Questions

Why does the pattern use a stitch marker instead of joining each round?

Parts One through Four work in continuous rounds with no slip-stitch join, so the marker placed in the first stitch of Round 1 is the only way to track where each round starts. Move it up one stitch at the start of every round to keep counts accurate.

Can the bag be made in a single color instead of the four-color gradient?

Yes; a single-color version is listed as an option for a minimalist look. Skip the color changes in Part Three and work all 60 stitches in one color, since the stitch counts and back-loop-only ribbing stay the same regardless of color.

Why size down to a 3.0mm hook for sport weight yarn?

Sport weight usually pairs with a larger hook, but this bag needs dense, sturdy fabric to hold its shape as a purse. Dropping to 3.0mm (US C/2 or D/3) tightens the stitches; if the fabric still looks floppy, go down another size.

One at a time —

Get the next pattern

Tested round by round before it is sent. No spam.