Made and counted by Wren —

Mint Green Fresh Stripe Purse Free Crochet Pattern

Crochet a mint green stripe purse with a ribbed BLO texture and gradient stripes. A free pattern perfect for confident beginners ready for a new challenge.

Mint Green Fresh Stripe Purse Free Crochet Pattern
IntermediateLevel
4-6 HoursTime
4.0 mmHook
WorstedYarn
Jump to the pattern

At a glance

Begin with the Base, working in the round to build the rounded bottom of the purse.

Move into the Body section, continuing in back loop only to start forming the vertical ribbed texture.

Work the single Main Pattern round, letting the gradient move from deep emerald into soft mint and cream.

Carry each unused color loosely along the top edge instead of cutting and rejoining it at every stripe.

Finish with the Upper Edge rounds to create a clean, defined opening at the top of the purse.

Optionally sew a simple cotton fabric lining and hand stitch it in just below the top edge.

Attach the metal D-rings and gold chain strap to complete your finished mint stripe purse.

About this pattern

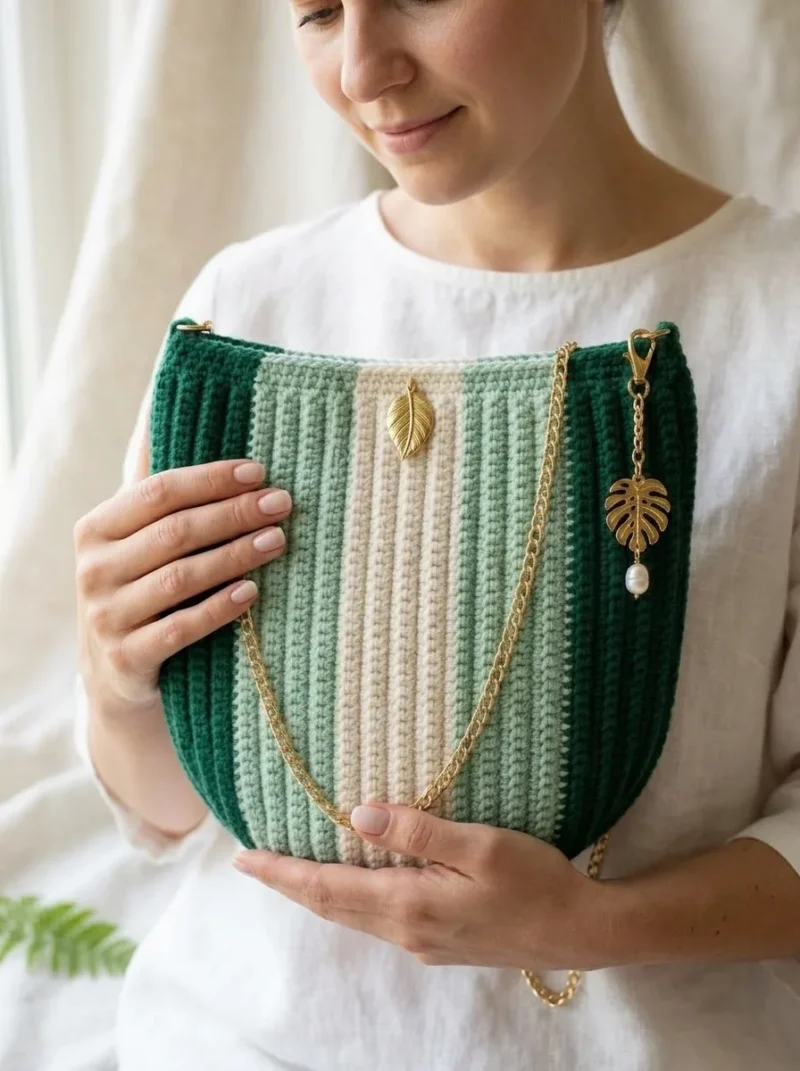
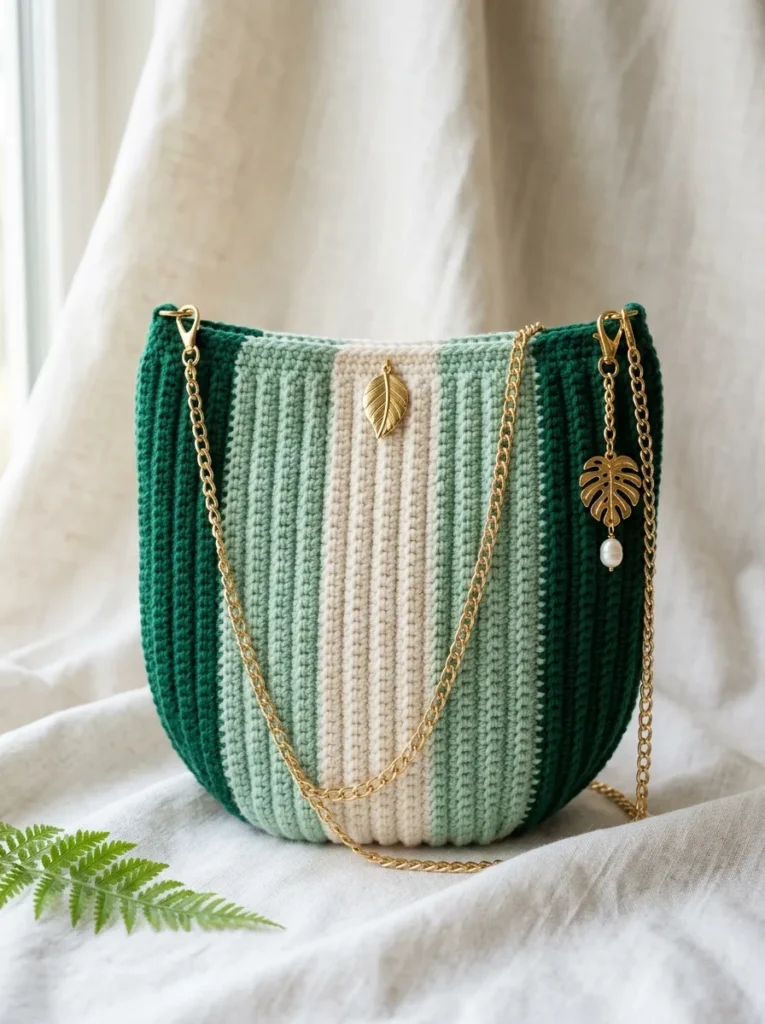
This Mint Green Fresh Stripe Purse is a small crochet bag with a big personality. Worked in back loop only stitches that create vertical rib lines when the panel is turned on its side, it has a texture that looks almost knitted rather than crocheted. The gradient stripe effect, flowing from deep emerald through soft mint into creamy white, gives it a fresh, sophisticated look. It's perfect for crocheters who want to make something they'll actually reach for every single day, not just admire on a shelf.

The key techniques here are back loop only stitching for the ribbed texture and clean color changes carried along the top edge rather than cut and rejoined. You'll build the piece through a Base worked in the round, a Body section, a Main Pattern row, and an Upper Edge finish. If you've completed a few dishcloths or a simple scarf, you already have the skills. Expect somewhere between four and six relaxed hours from first stitch to finished purse.

When it's done, you'll have a structured little bag with a lovely rounded bottom, roomy enough for a phone, wallet, keys, lip balm, and a small notebook. Add the gold chain strap and it instantly feels like something from a boutique shelf, not a craft table. With or without the optional cotton lining, it holds its shape beautifully thanks to the cotton yarn. It makes a genuinely giftable, wear-it-with-anything accessory for yourself or someone who deserves a handmade treasure.

Variations

This pattern is wonderfully easy to make your own once you understand the basic structure. For a completely different palette, try a sunset version with Color A in burnt orange, Color B in coral, and Color C in pale peach, or go moody with navy, slate blue, and silver gray for an evening bag feel. If you want a monochrome look, work all three color positions in varying shades of the same hue, like a deep forest green fading to sage and mint, so the ribbed texture becomes the star instead of the stripes. For yarn swaps, 24/7 Cotton and Lily Sugar'n Cream both work perfectly as written, but you could also try Hobby Lobby's I Love This Cotton Yarn or Paintbox Yarns Cotton DK for a slightly lighter drape, just remember to check your gauge since cotton brands vary in thickness. To make the purse smaller for a phone-only crossbody, work fewer stitches around in the Base rounds and repeat the Main Pattern round fewer times before starting the Upper Edge, keeping your stitch multiple consistent so the BLO ribs stay even. For a larger tote-style version, add stitches to your foundation round in multiples that match your color repeat, and simply add extra rounds to the Body before moving into the Main Pattern. Swap the gold chain for a woven fabric strap, leather cord, or even a thick crocheted chain in Color A for a more casual, everyday look. Seasonal ideas are easy too: try cream, soft pink, and sage for a spring version, or rust, mustard, and cream for a cozy autumn stripe purse. The structure is so adaptable that once you've made it once, you'll start dreaming up color combinations everywhere you look.

I designed this purse because I wanted a bag that didn't look homemade in the shy, unfinished way some crochet projects can. Working back loop only throughout is the secret here — it turns ordinary single crochet into a fabric with real vertical ribs once you flip the panel on its side, and that texture alone makes people stop and ask where you bought it. Carrying your colors up the edge instead of cutting them at every stripe change means fewer ends to weave in later, which honestly is my favorite kind of shortcut. Watching the gradient move from deep emerald through soft mint into cream as you work the Body and Main Pattern rounds is so satisfying, like watching a sunset happen in yarn. And clipping on that gold chain strap at the end? That's the moment this stops looking like a crochet swatch and starts looking like a purse you'd actually carry out the door. It's a small project with a big payoff, and I think you're going to love how proud you feel wearing it.
Common mistakes

  • Working into both loops instead of just the back loop, which flattens out the signature ribbed texture.Before each stitch, consciously look for the two loops that form the V and insert your hook only under the loop farthest from you. If you lose track mid-round, place a stitch marker at the start of the round as a visual reminder to check your loop placement.
  • Cutting the yarn at every color change instead of carrying it along the top edge as instructed.Keep all three colors attached and simply drop the unused ones to the back of your work, picking them up again loosely when needed. This keeps your project tidy, saves you a huge number of ends to weave in, and keeps the stripes from puckering.
  • Inconsistent tension between the Base, Body, and Upper Edge sections, causing the purse to flare or pull in unexpectedly.Keep your stitches even throughout by checking your gauge periodically against your starting rounds, and consider using the same hook grip and yarn tension habits you'd use for a gauge swatch. If you notice tightening near the end, take a short break and return with fresh hands.
  • Skipping stitch markers and losing track of where each round begins, especially through the Base and Body sections.Place a stitch marker in the first stitch of every round and move it up as you go, using your 2 to 3 markers to also flag any special stitch placement. This tiny habit prevents miscounted rounds that can throw off your stripe alignment.
  • Attaching the lining or the chain strap before checking that the purse shape has fully settled and blocked.Let your finished purse rest and, if needed, lightly steam or block it before sewing in the optional lining or attaching the D-rings and chain. This ensures the ribbed texture sits flat and the final shape matches what you intended.

The pattern

Written out round by round

Materials

  • Color A (Deep Emerald Green): Approximately 120 yards
  • Color B (Soft Mint Green): Approximately 80 yards
  • Color C (Cream or Ecru): Approximately 60 yards

Yarn suggestions

  • Lion Brand 24/7 Cotton, Lily Sugar’n Cream, or any smooth worsted weight cotton.
  • Size G/6 (4.0 mm) crochet hook for the main body
  • You may need to go up or down a size to match gauge
  • Tapestry needle for weaving ends
  • Stitch markers (2 to 3)
  • Scissors
  • Gold chain strap with lobster claw clasps (approximately 45 inches total length)
  • 2 metal D-rings or bag clips for attaching the chain

Optional

  • fabric for lining

Abbreviations

  • ch = chain: Yarn over, pull through the loop on your hook. This creates the foundation for your work.
  • sl st = slip stitch: Insert hook, yarn over, pull through both the stitch and the loop on your hook in one motion. Used for joining and moving across stitches.
  • sc = single crochet: Insert hook into the stitch, yarn over and pull up a loop (2 loops on hook), yarn over and pull through both loops. The most basic crochet stitch.
  • BLO = back loop only: Instead of inserting your hook under both loops of the stitch below, you only go through the back loop. This creates the ribbed texture.
  • st(s) = stitch(es)
  • rep = repeat

The Base

The base of this purse is an oval shape that forms the rounded bottom.

With Color A (Deep Emerald Green), ch 25.

  1. Round 1Sc in 2nd ch from hook and in each ch across to the last ch. In the last ch, work 3 sc. Now continue along the opposite side of the foundation chain, working 1 sc in each ch. In the final ch (where you started), work 2 sc. Join with sl st to first sc. (50 sts)
  2. Round 2Ch 1 (does not count as a stitch throughout). Sc in each st around, working 2 sc in each of the 3 corner stitches on both ends. Join with sl st. (56 sts)
  3. Round 3Ch 1. Sc in each st around, working 2 sc in the center stitch of each 3-stitch corner group on both ends. Join with sl st. (60 sts)
  4. Round 4Ch 1. Sc in each st around, continuing to increase at corners as established. Join with sl st. (64 sts)
  5. Round 5Ch 1. Sc in each st around without increases. Join with sl st. (64 sts) Place a stitch marker here. You have completed the base.

The Body

Now you will build the sides of the purse. This is where the magic happens and those vertical stripes appear.

  1. Round 6Ch 1. Working in BLO only, sc in each st around. Join with sl st. (64 sts) This round creates the sharp angle between the base and the sides.
  2. Round 7through 14: Ch 1. Sc in BLO of each st around. Join with sl st. (64 sts each round)(64)

You now have about 2 inches of the body completed in deep emerald green.

Main Pattern

  1. Round 15through 38: Continue working sc in BLO around, following the stripe color sequence above. Join with sl st at the end of each round. (64 sts each round)Take your time with the color changes. They get easier after the first few rounds. You are doing great.(64)

The Upper Edge

  1. Round 39through 42: With Color A only, ch 1. Sc in BLO of each st around. Join with sl st. (64 sts each round)(64)

This creates a clean emerald border at the top.

  1. Round 43(Final Round): Ch 1. Sc in both loops of each st around. Join with sl st. Fasten off. (64 sts)Working through both loops on this final round creates a finished, stable edge.

Assembly

Step 1

Weave in Ends: You will have quite a few yarn tails from the color changes. Thread each tail onto your tapestry needle and weave it through several stitches on the wrong side of the fabric. Weave in one direction for about an inch, then reverse and weave back. Trim closely.

Step 2

Blocking (Optional but Recommended): Wet your finished purse and gently squeeze out excess water. Shape it by hand, stuffing the inside with plastic bags or towels to hold the shape while drying. Allow to dry completely.

Step 3

Attaching Hardware: D-Rings or Bag Clips: Position your hardware at the top corners of the bag, about 1 inch from each side seam. You can attach them by crocheting a small loop through the top edge or by sewing securely with matching thread. Chain Strap: Clip your gold chain onto the D-rings or clips. Adjust the length to your preference. A longer chain allows crossbody wear. A shorter length works as a shoulder bag. Decorative Charms: These are completely optional but add such a lovely touch. Attach leaf charms and pearl dangles directly to the chain using small jump rings.

Important notes

💡 Use a Size G/6 (4.0 mm) hook for the main body, but don't be afraid to size up or down slightly if your gauge runs tight or loose with your chosen cotton yarn.

💡 Since you're working BLO throughout, take a moment before starting to physically identify the front loop versus the back loop on a swatch so your fingers learn the feel before you begin the real project.

💡 Keep your 2 to 3 stitch markers moving with you every round, one at the round start and extras at any special stitch positions, so you never have to guess where you left off.

💡 When carrying colors along the top edge, keep the floats loose rather than snug, since pulling too tight will cause the fabric to pucker or curl unexpectedly.

💡 If you choose to add the lining, cut your cotton fabric pieces slightly larger than your purse panels, sew around the sides and bottom, then hand stitch it in just below the top edge for a clean, professional finish.

💡 Attach your D-rings and gold chain strap only after the purse shape is fully complete and any lining is in place, so you can adjust placement for the most comfortable, balanced hang.

More photos

Mint Green Fresh Stripe Purse Free Crochet Pattern — photo 2
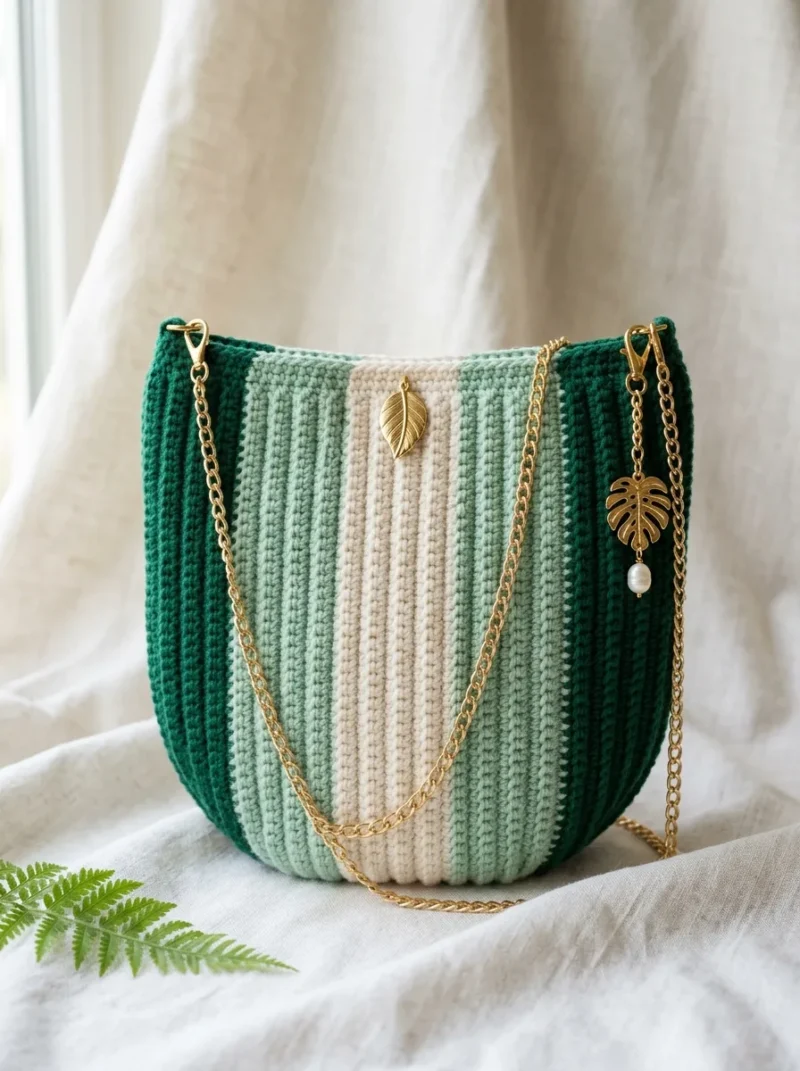
Mint Green Fresh Stripe Purse Free Crochet Pattern — photo 3
FAQs

Frequently asked questions

What does BLO mean and why does this pattern use it throughout?

BLO stands for back loop only, meaning you insert your hook under just the loop farthest from you instead of both loops. This purse uses it throughout because it creates raised, rib-like lines when the panel is turned sideways, giving the bag its signature textured look.

Do I really need to use cotton yarn, or can I substitute acrylic?

Cotton is recommended because it gives the purse structure and a lovely drape that helps it hold its shape as a bag. Acrylic will work in a pinch, but the finished purse may feel a bit softer and less structured than the cotton version.

Is the lining necessary to finish the purse?

No, the lining is completely optional and the purse looks beautiful without it. It simply adds a polished interior finish and helps protect the crochet fabric from everyday wear if you choose to include it.

What size purse will this pattern make, and what will it hold?

The finished purse has a rounded bottom and structured sides sized for everyday essentials like a phone, wallet, keys, lip balm, and a small notebook. It's designed as a compact, practical everyday bag rather than an oversized tote.

One at a time —

Get the next pattern

Tested round by round before it is sent. No spam.