Made and counted by Wren —

Angelic Crochet Angel Wings: Ethereal Pattern for Wearable Accessories

Learn to crochet ethereal angel wings with lacy stitches, picot edging, and delicate shaping for a whimsical, wearable accessory or costume piece.

IntermediateLevel
4-6 HoursTime
Light WorstedYarn
Jump to the pattern

At a glance

Begin with a foundation chain that establishes the base length for your wing shape.

Work the first shaping round to start building the wing's curved silhouette.

Continue through the second shaping round, letting the double crochets widen the form.

Complete the third shaping round to finish the wing's overall outline.

Repeat the entire wing shape from the foundation chain to create the second matching wing.

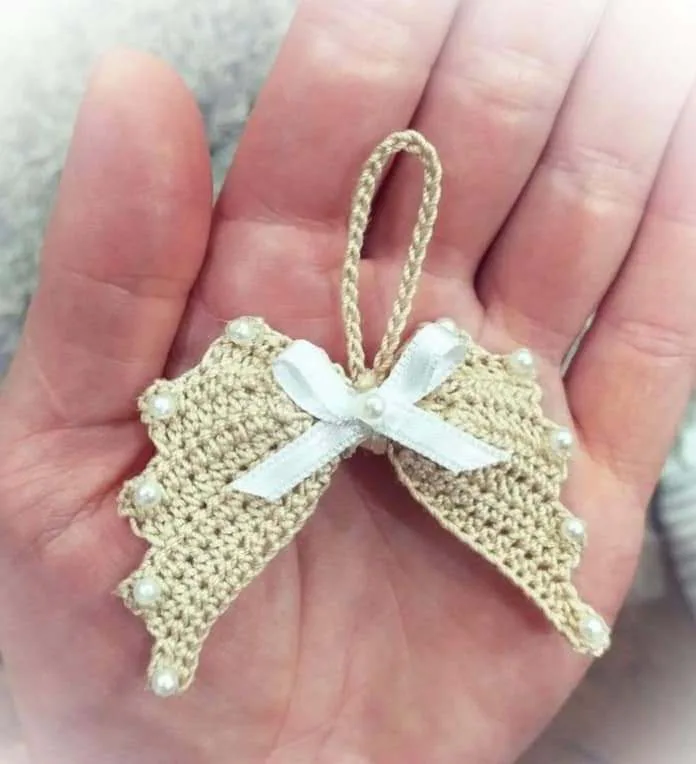
Add picot edging and any beads or sequins during the final touches step.

Weave in all loose ends and lightly block both wings so the shape sits flat.

Assemble the two wings onto your chosen base, following the four assembly steps to finish.

About this pattern

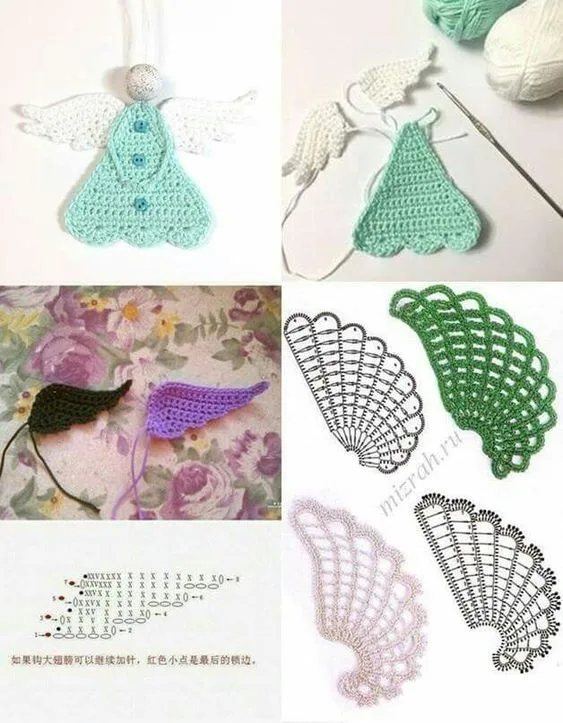
This angel wings pattern transforms simple chains and double crochets into a pair of airy, feather-like accessories that feel truly magical. What makes this design special is the lacy, open construction that mimics the delicate texture of real feathers, using picot edgings to add graceful detail along every curve. It's perfect for crocheters who want to make a statement piece for costumes, photo shoots, dance recitals, or simply as a whimsical addition to a handmade wardrobe.

The pattern relies on a handful of key techniques: foundation chains, double crochet shaping to build the wing silhouette, and picot stitches for that signature feathery edge. Because the wing shape develops over just a few rounds before repeating for the second wing, this project moves along quickly once you get the rhythm down. Expect to spend somewhere between four and six hours total, making it a satisfying weekend project for confident beginners or intermediate stitchers.

The finished wings have a soft, cloud-like drape thanks to the lightweight yarn and open stitch pattern, giving them a delicate, floaty look rather than a stiff or bulky feel. They're sized to be worn as an accessory, whether attached to a costume, a headband harness, or worn on their own for a dramatic effect. With optional beads or sequins added during the final touches, these wings also make a beautiful handmade gift for a dancer, performer, or anyone who loves celestial-inspired style.

Variations

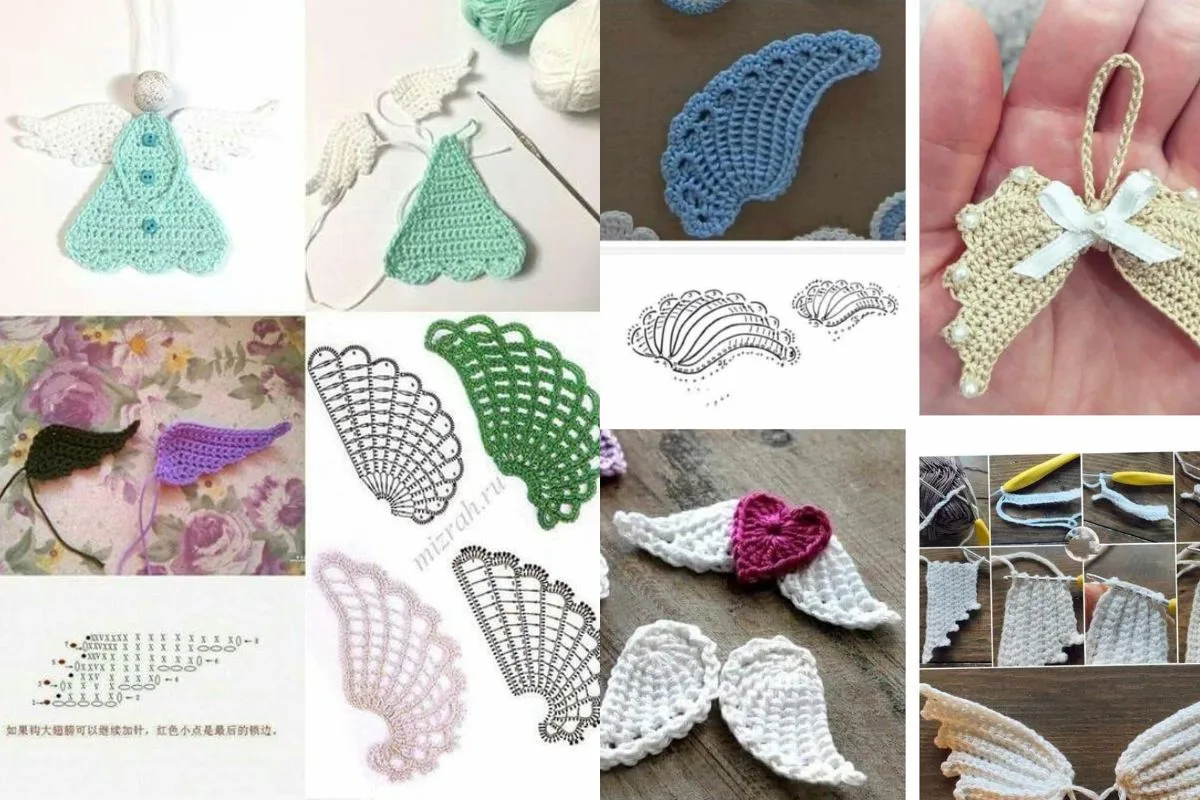
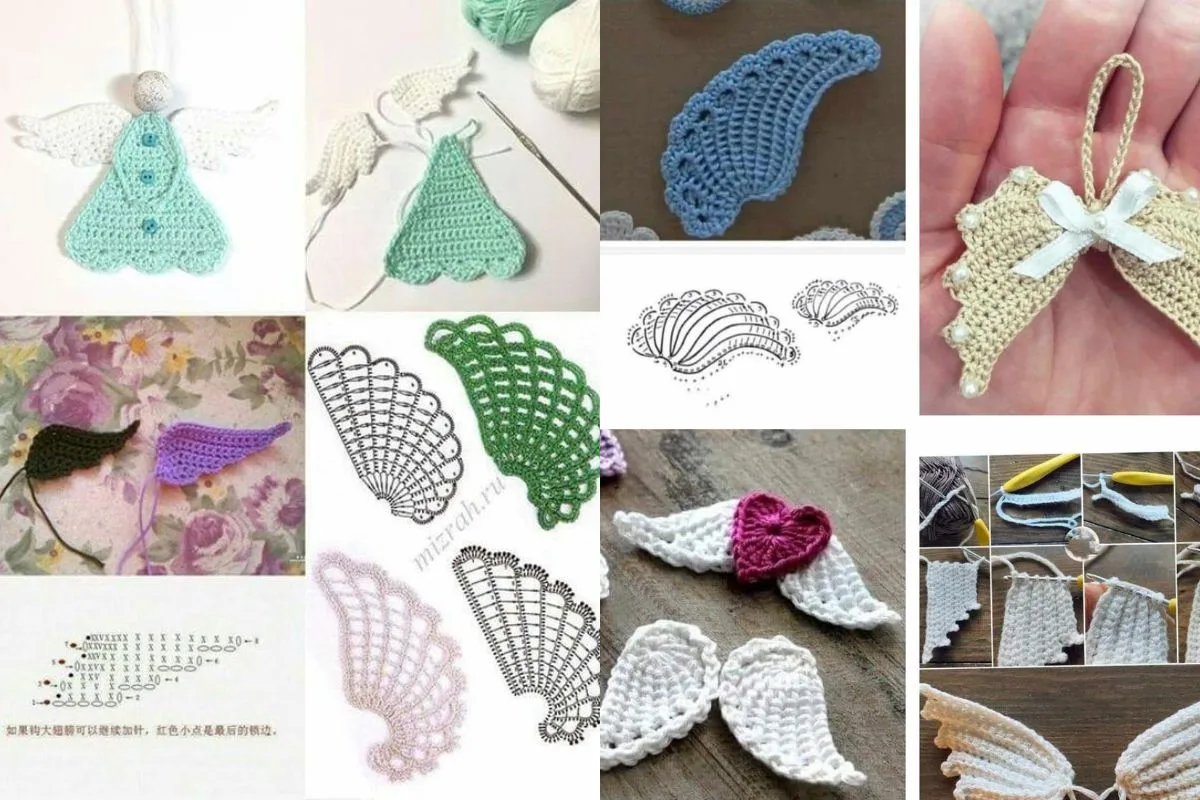
There are so many fun ways to make these angel wings your own. For a soft dreamy look, try a pastel gradient using Mandala or Soft Baby Steps in shades that shift from white to blush pink or pale lavender across the two wings. If you want a more dramatic, fantasy-inspired pair, swap the white yarn for deep jewel tones like emerald or midnight blue using Bernat Velvet for a plush, luxurious texture instead of the classic feathery look. For a shimmering finish, hold a strand of fine metallic thread together with your main yarn while working the double crochet rounds — this adds sparkle without changing the stitch pattern. To resize the wings smaller for a child's costume or doll accessory, simply work the foundation chain shorter and reduce each shaping round by a few stitches, keeping the ratio between rounds consistent so the silhouette stays balanced. For larger, statement-making wings, add an extra shaping round before the final touches, increasing stitch count proportionally to maintain the feather curve. Seasonal variations are easy too: try icy white and silver for a winter fairy look, or warm gold and cream for a sun-goddess vibe. You can also swap the picot edging for a simple shell stitch border if you prefer a softer scalloped edge instead of the pointed picot texture. Adding fabric wire along the top edge before final assembly gives the wings more structure so they hold their shape when worn, which is especially helpful if you're using them for a costume that needs to stay upright. However you customize them, the core shaping technique stays flexible enough to support all kinds of creative twists.

I adore how this pattern turns basic double crochets into something that genuinely looks like it belongs on an angel. The picot edging is my favorite part — it's such a simple stitch, but repeated along the wing's curve it creates this delicate, feathery silhouette that photographs beautifully. Shaping the wing over just three rounds keeps the project from feeling tedious, so you get to watch the form emerge quickly instead of grinding through endless repeats. Making the second wing goes even faster once your hands know the pattern, which is always a satisfying feeling. I also love that the final touches step leaves room for personalization — adding a few beads or sequins along the edges makes each pair of wings feel one-of-a-kind. Whether you're making these for a costume, a themed photo shoot, or just because you love the ethereal look, there's something really rewarding about creating an accessory that feels a little bit magical. This is one of those patterns that looks far more impressive than the actual effort required, which is exactly the kind of project I love sharing.
Common mistakes

  • Pulling the picot stitches too tight along the wing edgeKeep your tension relaxed when closing each picot loop so the points stay soft and open rather than curling inward; work over a finger or stitch marker to keep the loop size consistent.
  • Losing track of stitch placement during the wing shaping roundsUse a stitch marker at the start of each round and count your double crochets before moving to the next round to make sure the shaping stays even on both wings.
  • Making the two wings noticeably different sizesWork both wings back to back rather than one right after the other weeks apart, and refer back to your first wing's stitch counts and row heights as you complete the second one.
  • Choosing a yarn that's too heavy for the lacy, open designStick with a lightweight, soft yarn as suggested in the materials list; heavier yarns will weigh down the open stitch pattern and lose the delicate, feathery drape.
  • Skipping a foundation chain length check before starting the shaping roundsLay your foundation flat and measure it against your intended wing size before beginning round one, since an uneven or twisted foundation chain will throw off the whole shape.
  • Overloading the final touches with beads or sequinsAdd embellishments sparingly along the picot edges rather than covering the whole surface, so the wings keep their light, airy look instead of becoming heavy or cluttered.

The pattern

Written out round by round

Materials

  • To start your angel wings project, gather these essentials: soft, lightweight yarn in white or pastel shades. Also, a crochet hook suitable for your chosen yarn, and optional embellishments like beads or sequins. The right materials will help you achieve that delicate, cloud-like texture.

Abbreviations

  • sc = single crochet
  • dc = double crochet

2. Create the Shape of the Wing

  1. Round 1In the second chain from the hook, work 1 single crochet (sc). Continue to work 1 sc in each chain across. (You should have 49 sc.)
  2. Round 2Chain 3 (this counts as your first double crochet). In the same stitch, work 1 dc, then chain 1 and skip the next stitch. Repeat this pattern across to create a lacy effect.
  3. Round 3Chain 1 and turn. Work 1 sc in the first chain space, then continue working in the chain spaces created in Row 2.

1. Start with the Foundation

Make a Slip Knot : Start by making a slip knot on your crochet hook.

Chain 50 : This will be the foundation chain for one side of the wings.

3. Create the Other Wing

Repeat :

Follow the same steps to create a second wing, starting with a new foundation chain. You can adjust the length of the chain for larger or smaller wings.

5. Final Touches

Weave in Ends : Use the tapestry needle to weave in any loose ends for a clean finish.

Optional Embellishments : Consider adding embellishments such as beads, sequins, or additional yarn for detailing.

Crocheting angel wings is a magical process. This guide will help you make beautiful angel wing shawls. We'll look at various crochet patterns for all skill levels.

First, pick your yarn. A lightweight, lacy yarn is best for ethereal wings. Grab your crochet hook and let's start! The foundation chain is the top edge of your shawl. Work in rows, adding stitches to shape the wing.

Beginners can try a simple triangular shawl pattern. More skilled crocheters can tackle intricate lace designs. Handmade crochet lets you customize, so adjust stitch counts for your size.

Shaping is crucial for an angelic look. Increase stitches at the edges of each row to shape the wing. Keep your tension even for even draping. Blocking your piece will highlight the delicate details.

These crochet tutorials open up endless possibilities. Try different stitches for unique textures. Add beads or sparkly yarn for a heavenly touch. With practice, you'll make stunning angel wing shawls that seem to come from above.

Assembly

Step 1

Position :

Step 2

Once both wings are complete, position them side by side.

Step 3

Join :

Step 4

Using a slip stitch, join the top of both wings together. This will give the wings a more natural appearance.

Important notes

💡 Use a hook one size smaller than the yarn label recommends to keep your double crochet stitches tight enough to hold the wing's shape without sagging.

💡 Block your finished wings by pinning them into shape on a towel and lightly steaming — this helps the picot edges lie flat and the curve of the wing look crisp.

💡 Place a stitch marker at the start of each shaping round on the wing so you always know where your round begins and ends, especially since there are only three rounds to track.

💡 If adding beads or sequins during final touches, thread them onto your yarn before you begin that step so you're not stopping mid-round to restring.

💡 Weave in ends securely along the inner curve of the wing where they'll be hidden, rather than along the outer picot edge where loose ends are more visible.

💡 Attach both wings to your chosen base — a harness, headband, or garment — only after both are fully finished so you can compare sizing and adjust placement evenly.

More photos

Angelic Crochet Angel Wings: Ethereal Pattern for Wearable Accessories — photo 2
Angelic Crochet Angel Wings: Ethereal Pattern for Wearable Accessories — photo 4
Angelic Crochet Angel Wings: Ethereal Pattern for Wearable Accessories — photo 2
FAQs

Frequently asked questions

What yarn weight works best for these angel wings?

A soft, lightweight yarn such as light worsted or DK weight works beautifully for this pattern, since it holds the lacy stitch pattern without adding bulk. White or pastel shades give the most classic angelic look.

How long does it take to make both wings?

Most crocheters finish both wings, including the final touches, in about four to six hours. The second wing typically goes faster since you'll already be familiar with the shaping rounds.

Can I make these wings without the picot edging?

Yes, you can substitute a simple shell stitch or single crochet border if you prefer a softer edge, though the picot stitches are what give the wings their signature feathery texture.

How do I attach the finished wings to a costume?

Once both wings and the final touches are complete, sew them onto a fabric harness, headband base, or directly onto a garment using a needle and matching thread along the inner edge.

Are these wings suitable for a beginner crocheter?

This pattern is best suited for someone comfortable with basic double crochet and chain stitches who's ready to try picot edging; confident beginners can manage it with a bit of patience.

One at a time —

Get the next pattern

Tested round by round before it is sent. No spam.