Made and counted by Wren —

Wren rattan top crochet pattern with ribbed trim

5 mm hook, worsted cotton: airy woven panels seamed into a ribbed wren rattan top.

Wren rattan top crochet pattern with ribbed trim
IntermediateLevel
8-12 hoursTime
5 mmHook
WorstedYarn
Jump to the pattern

About this pattern

This is a flat, two-panel crochet top in worsted weight cotton, made on a 5 mm hook with a 3-round hdc-and-chain repeat that creates an open, woven texture. Foundation chains run 84 to 151 stitches by size. Front and back panels are shaped at the shoulders, seamed together, then finished with hem, sleeve, and neckline ribbing for a cuffed edge.

The Wren Rattan Top is a two-panel garment worked flat in worsted weight cotton on a 5 mm hook, with front and back panels built from a 3-round hdc-and-chain-space repeat that gives the fabric its open, woven look. Foundation chains range from 84 to 151 stitches depending on size, and shoulders are shaped with mirrored decrease rows before panels are seamed at the shoulders and sides. Hem, sleeve, and neckline ribbing finish every raw edge with a stretchy, cuffed border.

The pattern

Written out round by round

Materials

Yarn

  • Lion Brand 24/7 Cotton, or similar worsted weight cotton yarn (acrylic is suitable as an alternative; yardage varies by size)

Hook

  • 5 mm (US H-8)

Darning Needle

  • For seaming panels and weaving in ends
  • Scissors

Abbreviations

  • ch = chain
  • sc = single crochet
  • hdc = half double crochet
  • sl st = slip stitch
  • st(s) = stitch(es)
  • RS/WS = right side/wrong side

Main Panels (make 2; Front and Back)

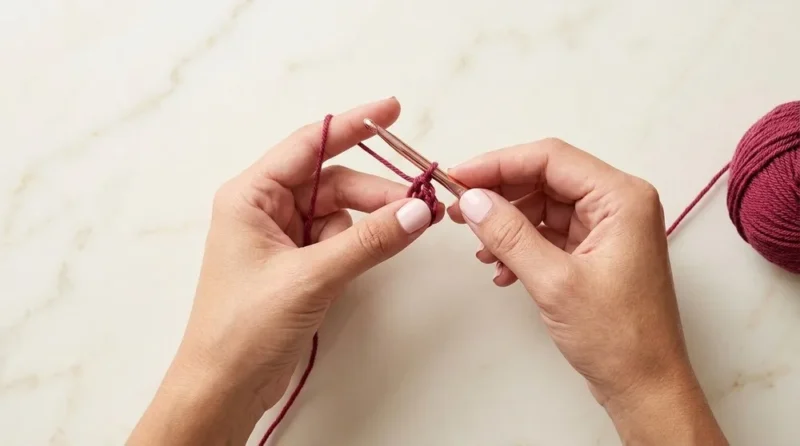
Foundation Row: Ch required number (84–151, according to chosen size; see written pattern).

Round 1(RS): Sc in 2nd ch from hook and in each remaining ch across; turn.
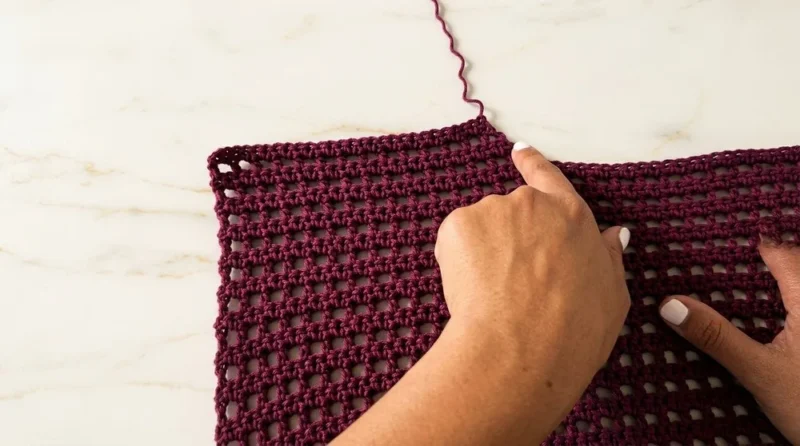
Round 2(WS): Ch 2 , turn. Hdc in first st , ch 1, skip next st, hdc in next st ; repeat from * to end.
Round 3(RS): Ch 1 , turn. Sc in first hdc , sc in ch-1 space, sc in next hdc ; repeat from * to end.Repeat Rows 2 and 3 until the panel measures desired length per pattern.

Hem Ribbing (Bottom Edge)

Attach yarn to the bottom edge.

Ch 5.

Round 1Working into back loops only, sl st in 4 ch, then sl st into next st on bottom edge.
Round 2Turn, skip first st on body, sl st in each back loop of rib strip. Continue: For every other row , skip a st on the body to create a gentle taper (ribbing will be slightly “pulled in” at the hem).Continue working in back loops only until hem ribbing is complete; join edges neatly with sl st or needle.

Left Shoulder

Continue from where you left off.

Work across prescribed number of sts for left shoulder with hdc and ch 1 pattern , ending with a decrease by skipping a st (follow written pattern for specific counts).

Round 2of shoulder: Turn, ch 1, skip 1st st (tapers neckline), work sc across. Alternate rows as directed for number of times/rows for gradual neckline shaping.

Right Shoulder

Attach yarn at indicated st on opposite side.

First row: Ch 2, turn work, skip first st , resume hdc and ch 1 pattern.

Continue as for left shoulder, working decreases at neck edge as instructed.

Construct the Top

Seam shoulders: Align panels with RS facing out ; use darning needle to whip stitch through both loops of each stitch.

Align both panels so chain-2 sides are at opposite ends for a consistent finish.

Seam sides: Starting from the bottom hem, whip stitch up to the armhole, aligning rows as you go. Leave armhole opening (row counts for armhole per written pattern).

Tip: Join “chain-2” edges to “hdc” edges as described for an invisible seam.

Sleeve Ribbing

Repeat the hem ribbing, but work around armhole opening into row ends, not stitches .

Attach yarn at underarm seam.

Ch 5 , sl st in each back loop of rib, sl st into next row edge on body, as for hem ribbing.

Work ribbing all the way around , ensuring slight taper if desired.

Repeat for both sleeves.

Neckline Ribbing

Attach yarn at center back neck (aligning with hem start point for hidden seam).

Work ribbing as for hem , but alternate between working into sts (across neck edge) and into row edges (up and down neck “sides”).

Join ends seamlessly.

Assembly

Step 1Weave in all loose ends with darning needle.
Step 2Steam or block body and ribbing gently for best result.

Tester's notes

5 mm (US H-8) hook: use this size throughout the panels, ribbing, and shoulder shaping to keep the woven mesh and rib gauge consistent.

84 to 151 foundation chain stitches: match the chain count to the size being made before Row 1, since this number sets the panel width for the rest of the piece.

3-round repeat (Rows 1-3 of the Main Panel): mark the start of Row 2 and Row 3 so the hdc-and-chain-space pattern stays aligned as the panel grows.

Stitch markers: place them at the armhole points and at the start/end of ribbing sections before seaming, since these positions are easy to lose track of once panels are joined.

Work in progress

Wren rattan top crochet pattern with ribbed trim — photo 2
Wren rattan top crochet pattern with ribbed trim — photo 3
Wren rattan top crochet pattern with ribbed trim — photo 4

At a glance

Rounds6
Parts7
LevelIntermediate
Time8-12 hours
Hook5 mm
YarnWorsted

Gauge check

After Row 3 of the Main Panel, count stitches across the row and compare to the foundation chain used for the chosen size (84-151), since the hdc-and-chain-space repeat should keep that count steady row to row.

If the fabric feels stiff and the chain spaces are tight, move up a hook size; if the mesh looks loose and the panel sags, drop down a hook size.

If something looks wrong

The panel edges curl or the stitch count drifts from the original chain.
Stitches are being added or skipped in the hdc-and-chain-1 repeat; recount stitches every few rows against the 84-151 chain base and rip back to the last correct row.
Hem ribbing pulls the bottom edge in more than expected.
Too many skip-a-stitch tapers are being worked; the pattern calls for the skip only on every other row, so check that rhythm and rework if the taper looks too tight.
Shoulder seams do not line up when panels are joined.
The Left and Right Shoulder decrease rows were worked to different stitch counts; lay both shoulder pieces flat and count rows and stitches before seaming, matching stitch markers on each side.
Neckline sits crooked or the ribbing seam shows on one side.
Neck and hem ribbing were started on different sides of the garment; always begin both ribbing sections on the same side, as directed, so the seams stack up instead of spiraling.

Yarn substitutions

Fingering or sport weight cottonDrop to a 3.5-4 mm hook, expect a lighter, more drapey fabric, and add stitches beyond the 84-151 foundation range to keep the same finished width.
DK weight acrylic-cotton blendUse a 4.5 mm hook for a slightly denser mesh than the 5 mm original, with less stretch in the ribbing sections.
Worsted weight linen or linen-cotton blendKeep the 5 mm hook, but expect a stiffer, less elastic ribbing and fabric that softens with washing rather than with blocking alone.
FAQs

Questions

How much yarn is needed for this top?

Yardage varies by size, since the pattern is worked from a foundation chain of 84 to 151 stitches depending on the size chosen. Check the written pattern's size chart for the exact yardage tied to the desired finished measurements.

Why does the panel look open and holey rather than solid?

The 3-round repeat alternates hdc stitches with chain-1 spaces, which is what creates the airy, woven texture the pattern is built around. This is expected fabric, not a mistake, as long as the stitch and space count stays consistent row to row.

One at a time —

Get the next pattern

Tested round by round before it is sent. No spam.