Made and counted by Wren —

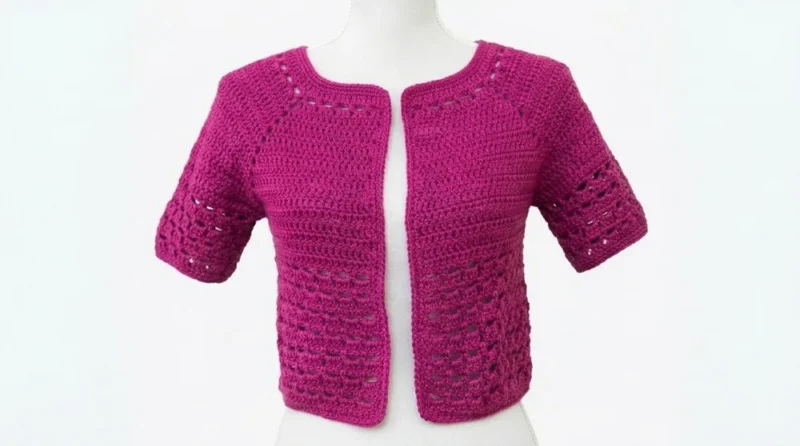
Top-down raglan crochet jacket with a lace band

4.0-4.5mm hook, DK/worsted yarn: top-down raglan jacket with lace band, sc borders.

Top-down raglan crochet jacket with a lace band
IntermediateLevel
20-30 hoursTime
4.5 mmHook
DK/WorstedYarn
Jump to the pattern

About this pattern

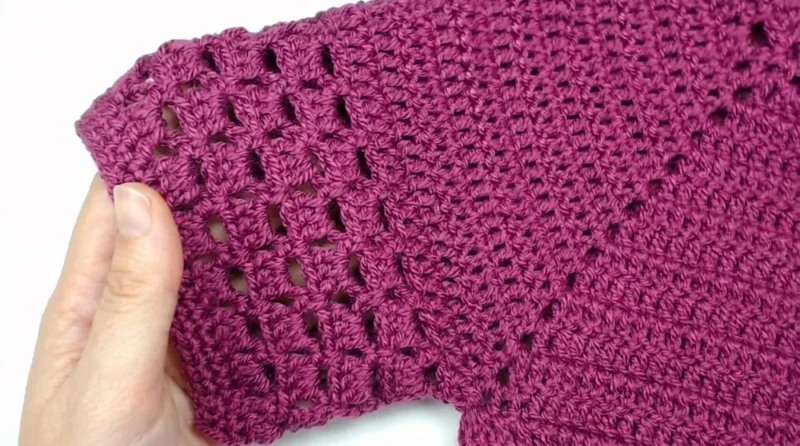
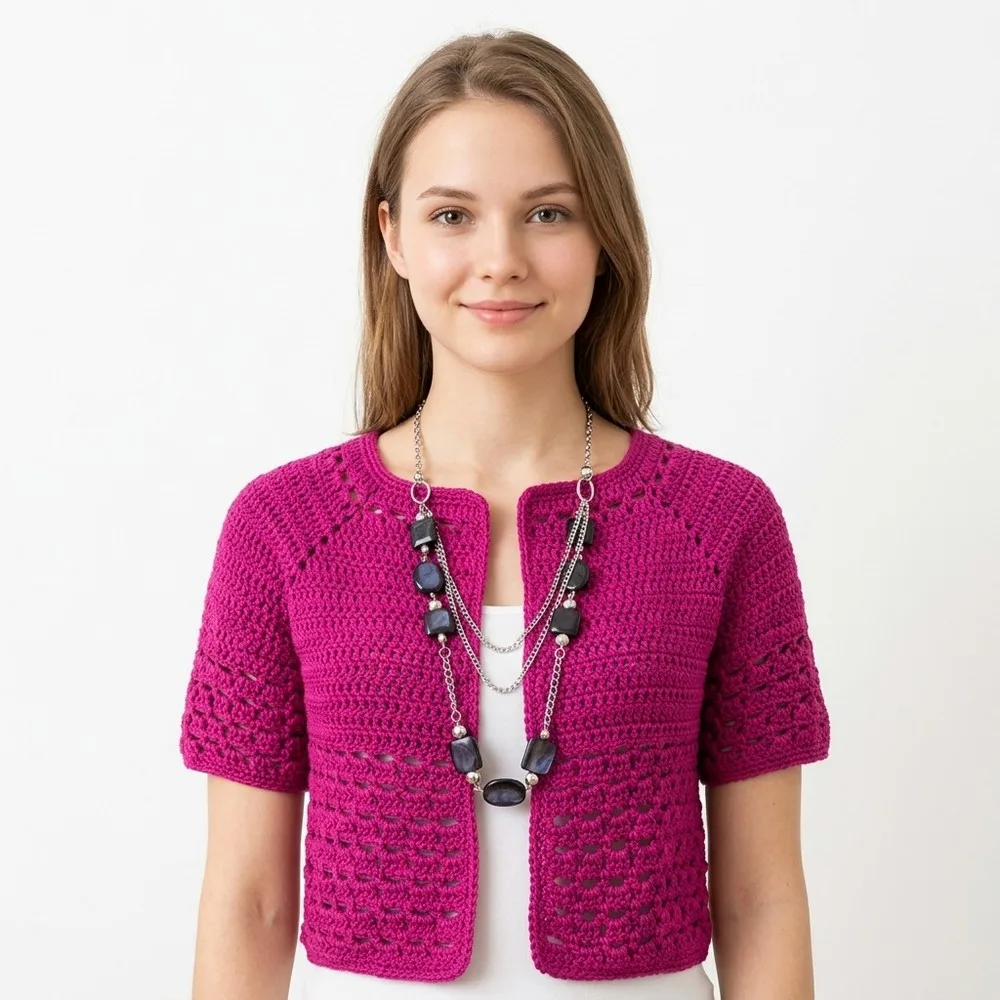
A top-down raglan jacket with a 4-corner yoke worked in dc through Round 14, then separated into body and sleeves at Round 15. The body and sleeves shift from solid dc to a lace band, finished with single crochet borders at the front, hem, neckline, and cuffs. DK or worsted yarn on a 4.0-5.0mm hook, roughly 900-1500 yards depending on size.

This jacket builds top-down from a 4-corner raglan yoke, worked in solid dc through Round 14 before Round 15 separates the sleeves at the underarms. Below the yoke, dc fabric transitions to an airy lace band across the body and sleeves, with single crochet borders finishing the front opening, hem, neckline, and cuffs. The back section alone runs 29 dc across at separation, with 27 dc recorded in the first front and 20 dc in the second shoulder — numbers to match if the yoke is meant to read as originally charted.

The pattern

Written out round by round

Materials

Yarn

  • DK or light worsted weight yarn recommended (exact yarn is not specified in the transcript; choose a yarn that works well with the listed hook and gives good drape).
  • Yardage will depend on size and length; as a rough guideline for a medium-length women’s jacket:
  • S–M: ~900–1200 yards (820–1100 m)
  • L–XL: ~1200–1500 yards (1100–1370 m)

Fiber

  • cotton, acrylic, or blend with good stitch definition.

Main hook

  • 4.0–4.5 mm (G–7 or US 7) for a light yarn, or 5.0 mm (H–8) for a heavier yarn.
  • Choose the hook size that gives you the desired drape and gauge.

Notions

  • Stitch markers (strongly recommended for corners and underarms)
  • Yarn needle
  • Scissors
  • Measuring tape

Abbreviations

  • ch = chain
  • st = stitch
  • sts = stitches
  • sl st = slip stitch
  • sc = single crochet
  • dc = double crochet
  • rep = repeat
  • sk = skip

At each corner

Work 1 dc in the dc before the corner space , then in the ch-2 corner space work: (dc, ch 2, dc)

Then 1 dc in the dc after the corner space and continue dc across.

Repeat this for all corners. Work dc in each st for all sections; only the corners add stitches.

Repeat this pattern up to approximately Round 14 (as in the transcript).

At this point, the yoke should be wide enough to reach across your upper bust/shoulders, and the depth from neckline to underarm should be comfortable.

Pattern correction / clarification:

The transcript refers to “up to the fourteenth round”; ensure all rounds between 4 and 14 are plain dc with corners (dc, ch 2, dc) . No more mesh/arches until later at the hem.

5. Round 15 – Joining for Armholes (Separating Body and Sleeves)

Round 15forms the armholes and joins fronts and back under the arms. Start as for a normal dc round: Ch 1, sc in first st, ch 2 , dc in each dc across the first front until you reach corner 1 .The transcript mentions 27 dc in the first front at this stage; use your actual stitch count.Corner 1 (front/shoulder area): Work corner as usual: (dc, ch 2, dc) in the corner ch-2 sp.

Shoulder section (sleeve to be):

Continue dc across all shoulder sts (the transcript suggests about 45 dc plus corner sts , so 47 including corners for the full shoulder segment, but your count may vary slightly).

Joining front to back at Underarm: At the next corner (between shoulder and back), work: dc in corner space , Instead of ch 2 , work:

1 dc into the corresponding corner space of the back , using a slightly different method: The transcript’s technique:

Work dc in your current corner, then insert hook into the corner space of the back section , sl st (very low stitch) into that space, then dc again in your current corner. The net effect is that the front and back corners are “grabbed” together with a low stitch and then dc, forming a joined armhole.

The key idea: front and back corners are connected by inserting the hook into the back corner space and pulling through (sl st) before completing the second dc in the corner on the front.

This creates the underarm join and closes the sleeve opening.

Work dc across the back sts to the next corner.

At the next corner (other side underarm), repeat the same joining technique to attach the back corner to the second front’s corner, forming the second armhole.

Continue dc across the last front section to the end of the round.

At the end of Round 15, your yoke is now divided: Sleeves (the shoulder sections) are separated and left unworked for now.

The jacket is now a continuous loop composed of front–back–front , with armholes formed under each shoulder.

6. Rounds 16–18 – Body in dc Now you work only on the body , ignoring the sleeves for the moment.

Round 16Start as usual: ch 1, sc in first st, ch 2 , then dc in each dc of the first front until you reach the area where corners were joined at underarm.In the first underarm joining zone: Work 2 dc into the first corner space,1 dc into the stitch that joins the corners (the “very low stitch”/sl st that connected front and back), 2 dc into the second corner space.Continue dc across the back.At the second underarm join, repeat: 2 dc in first corner space, 1 dc in join st, 2 dc in second corner space.Dc across the second front to finish the round.
Round 17& 18: Continue in dc all around the body, one dc in each dc. No more corners exist; this is now a simple tube.7. Body Pattern Section – Alternating Arches and 3-dc GroupsAfter establishing a plain dc section below the bust (transcript: after Round 18), you begin alternating: 1 round of arches (mesh)1 round of groups of 3 dc in each archThe transcript indicates doing this 16 rounds (i.e., 8 repeats of arches + dc groups) for the body.

Arches Round (Body)

Ch 1, sc in first st.

Ch 4.

At the very beginning of each front half , the transcript makes a special note: After the first 3 dc , you start the arch pattern:

So after your first sc, sk 3 dc, sc in 4th st , then ch 4. (This is only at the very beginning and very end of each front half, to make the pattern align correctly.)

For the rest of the round: Ch 4, sk 2 dc, sc in next dc .

Continue this sequence around the back and front body.

At the end of the round:

For the final arch in the front, again skip 3 dc instead of 2 , then sc in the last dc. This matches the pattern that started with skipping 3 dc at the beginning of each front half.

Groups of 3 dc in Arches Round (Body)

Ch 3 (or ch 1, sc, ch 2 for perfect edge), counts as first dc.

Work 2 more dc in the first 4-ch arch (or simply 3 dc in each arch starting from the first, depending how you like).

In each 4-ch arch around: Work 3 dc .

At the end of the round, join with sl st to the first dc.

Repeat for Body Alternate 1 arches round and 1 groups-of-3-dc round .

The transcript: 16 rounds total (arches + 3-dc groups), after the initial dc body rounds.
Notions

Stitch markers (strongly recommended for corners and underarms)

Yarn needle Scissors Measuring tape Finished Size (Approximate, based on transcript counts)

Round 1The pattern as transcribed corresponds roughly to a small/medium with: Top of yoke to armhole separation: after 14 rounds in dc.Bust circumference and body length depend on how many rows you add after the yoke.Sleeves: about ¾ length or shorter , depending on how many rounds you choose.
Round 2Pattern Instructions 1. Yoke Foundation – Round 1 (dc)
Round 3Foundation chain: Ch 99.
Round 4You will now work the first dc row (Round 1): Skip 3 ch (these count as the first dc).
Round 5Dc in the 4th ch from hook.
Round 6Now you have effectively 2 dc (the starting ch 3 counts as 1 dc, plus 1 dc).(2)
Round 7Continue working dc in each ch until you have 15 dc total (including the starting ch-3).(15)

This is the first front half .

Round 8Corner 1: Ch 2 , then dc in the next ch (do not skip a chain).
Round 9Shoulder section 1: Continue working dc in each ch after the corner dc until you have 20 dc for the shoulder.(20)
Round 10Corner 2: Ch 2 , then dc in the next ch .

Back section

Round 1Work 29 dc for the back.(29)
Round 2Corner 3: Ch 2 , then dc in the next ch .
Round 3Shoulder section 2: Work 20 dc for the second shoulder.(20)

Corner 4 & last front:

Round 4Ch 2 , then dc in the next ch , and continue dc in each remaining ch until you have 15 dc for the second front half.Finish the row; you should have used all 99 foundation chains.(15)
Round 5At the end of Round 1, your yoke consists of: 15 dc – front ch-2 corner 20 dc – shoulder ch-2 corner 29 dc – back ch-2 corner(29)
Round 620 dc – shoulder ch-2 corner 15 dc – front 2. Round 2 – Eyelet (Arches) Round Switch temporarily from dc to a mesh/arches pattern.(20)
Round 7Ch 1 , sc in first dc.
Round 8Ch 4 , sk 2 dc , sc in next dc .(2)
Round 9Rep: ch 4, sk 2 dc, sc in next dc across until you reach corner 1 .(2)

Continue along each section

Round 1After the corner, resume: ch 4, sk 2 dc, sc in next dc across the shoulder.(2)
Round 2In each corner ch-2 sp: (sc, ch 4, sc) .
Round 3At the very end of the row, finish with ch 4, sc in last dc .

You now have a row of arches (4-ch loops) across the entire yoke with doubled arches at each corner.

Round 43. Round 3 – Groups of 3 dc in Arches Return to dc, working into each 4-ch arch: Ch 3 (counts as first dc) or use the “perfect edge” method:(3)
Round 5Ch 1, sc in first st, ch 2 (recommended by the video).
Round 6Work 2 dc in the first 4-ch arch (for a total of 3 dc if counting your initial dc).(3)

Alternate

Round 11 round arches 1 round 3-dc groups
Round 2Transcript: 8 rounds of arches + 3-dc groups plus the initial dc round, so 9 rounds total before cuff edging.
Round 3Cuff Edging – Single Crochet Rounds After the last 3-dc groups round, work 2 rounds of sc around the cuff: Ch 1, sc in each st around, sl st to join.
Round 4Repeat for a second sc round, then fasten off , weave in ends.

Customization note:

Round 5For longer sleeves , add more repeats of the arches + 3-dc groups before the sc cuff, and distribute some decreases (e.g., every few rounds) to avoid a sleeve that is too wide or bell-shaped.Repeat the entire sleeve process for the second arm.

Conclusion

Assembly

Step 1Round 15 forms the armholes and joins fronts and back under the arms.
Step 2Start as for a normal dc round:
Step 3Ch 1, sc in first st, ch 2 , dc in each dc across the first front until you reach corner 1 .
Step 4The transcript mentions 27 dc in the first front at this stage; use your actual stitch count.
Step 5Corner 1 (front/shoulder area):
Step 6Work corner as usual: (dc, ch 2, dc) in the corner ch-2 sp.
Step 7Shoulder section (sleeve to be):
Step 8Continue dc across all shoulder sts (the transcript suggests about 45 dc plus corner sts , so 47 including corners for the full shoulder segment, but your count may vary slightly).
Step 9Joining front to back at Underarm:
Step 10At the next corner (between shoulder and back), work:
Step 11dc in corner space ,
Step 12Instead of ch 2 , work:
Step 131 dc into the corresponding corner space of the back , using a slightly different method :
Step 14The transcript’s technique:
Step 15Work dc in your current corner, then insert hook into the corner space of the back section , sl st (very low stitch) into that space, then dc again in your current corner. The net effect is that the front and back corners are “grabbed” together with a low stitch and then dc, forming a joined armhole.
Step 16The key idea: front and back corners are connected by inserting the hook into the back corner space and pulling through (sl st) before completing the second dc in the corner on the front.
Step 17This creates the underarm join and closes the sleeve opening.
Step 18Work dc across the back sts to the next corner.
Step 19At the next corner (other side underarm), repeat the same joining technique to attach the back corner to the second front’s corner, forming the second armhole.
Step 20Continue dc across the last front section to the end of the round.
Step 21At the end of Round 15, your yoke is now divided:
Step 22Sleeves (the shoulder sections) are separated and left unworked for now.
Step 23The jacket is now a continuous loop composed of front–back–front , with armholes formed under each shoulder.

Tester's notes

4.0-4.5mm hook suits a lighter DK yarn; move up to 5.0mm only for a heavier worsted, since the ch-2 corner spaces open fast once the hook size increases.

4 corner spaces need a stitch marker each from Round 1 through Round 14; losing one mid-yoke skews the raglan lines before it becomes visible.

27, 29, and 20: recount the first-front (27 dc), back (29 dc), and second-shoulder (20 dc) stitches before working Round 15, since a miscount here only shows up after the sleeves separate.

14 and 15 are the two fitting checkpoints: try the jacket on after Round 14 (yoke complete) and again after Round 15 (sleeves separated) before continuing.

900-1500 yards is the full range across sizes; buy toward 1500 yards if extending the ¾-length sleeves or adding rows to the lace band.

Work in progress

Top-down raglan crochet jacket with a lace band — photo 2
Top-down raglan crochet jacket with a lace band — photo 3

At a glance

Rounds33
Parts5
LevelIntermediate
Time20-30 hours
Hook4.5 mm
YarnDK/Worsted

Gauge check

After Round 14, lay the yoke flat and check that it spans upper bust to shoulder width comfortably, with the neckline-to-underarm depth matching your torso.

Stitch-count checkpoints

  • Notions · Round 6: 2 sts
  • Notions · Round 7: 15 sts
  • Notions · Round 9: 20 sts
  • Back section · Round 3: 20 sts
  • Back section · Round 5: 29 sts
  • Back section · Round 8: 2 sts

If something looks wrong

The yoke cups or ruffles instead of lying flat by Round 14.
Corner increases are being added somewhere other than the four ch-2 corner spaces, or a corner is worked twice; recount stitches per section against the Back section numbers (29 dc, 20 dc, 15 dc) and remove the extra corner dc.
Underarm gaps or holes appear after Round 15.
The armhole join skipped the transition dc immediately before or after a corner space; work 1 dc in the dc before the corner and 1 dc in the dc after it on both sides of the underarm.
Yoke depth from neckline to underarm feels too shallow or too deep at Round 14.
The round count is off for your frame, not the stitch count; add or remove full dc rounds before Round 15 rather than adjusting stitch counts within a round, since the corners still need to land in the same 4 spaces.

Yarn substitutions

Cotton, DK weightCrisper stitch definition on the lace band, less drape at the shoulders; keep the 4.0-4.5mm hook and expect the jacket to hold its shape rather than skim the body.
Acrylic, worsted weightShows the 5.0mm hook's drape well, softer hand, budget-friendly for the 1200-1500 yard L-XL range; borders may pill faster than a natural fiber.
Wool blend, DK weightBest drape for the raglan yoke to fall smoothly from the corners, blocks the lace band open easily; stick with 4.0-4.5mm and expect more give in the fit than cotton.
FAQs

Questions

How many stitches should the back section have before Round 15?

29 dc, based on the transcript's Back section count. Recount before joining the underarms, since Round 15 relies on the front, back, and shoulder counts (27, 29, and 20 dc) matching up at the corners.

When is the best point to try the jacket on?

After Round 14, when the yoke is complete and should reach comfortably across the upper bust and shoulders. Try it on again once Round 15 separates the sleeves from the body, before working further rounds.

What hook size gives the best drape for the lace band?

4.0-4.5mm for a lighter DK yarn or 5.0mm for a heavier worsted, matched to the yarn on hand. Test both the dc and lace sections on a swatch first, since drape in the lace band depends more on hook size than on yarn weight alone.

One at a time —

Get the next pattern

Tested round by round before it is sent. No spam.