Made and counted by Wren —

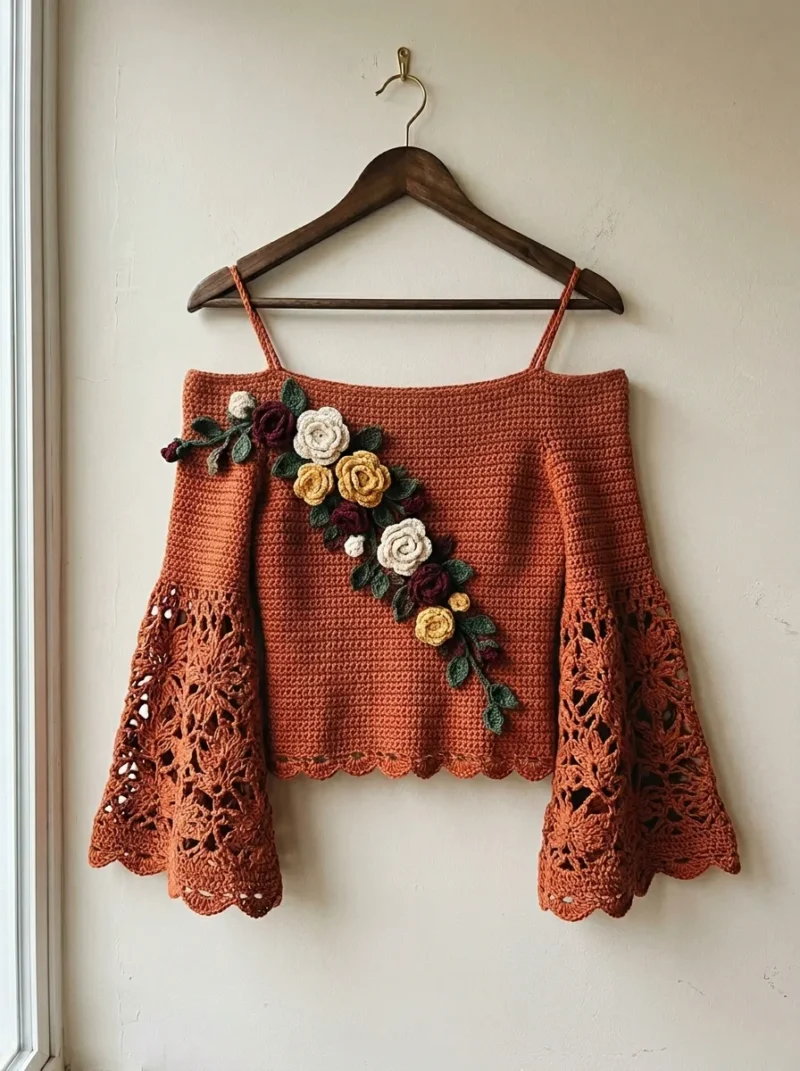
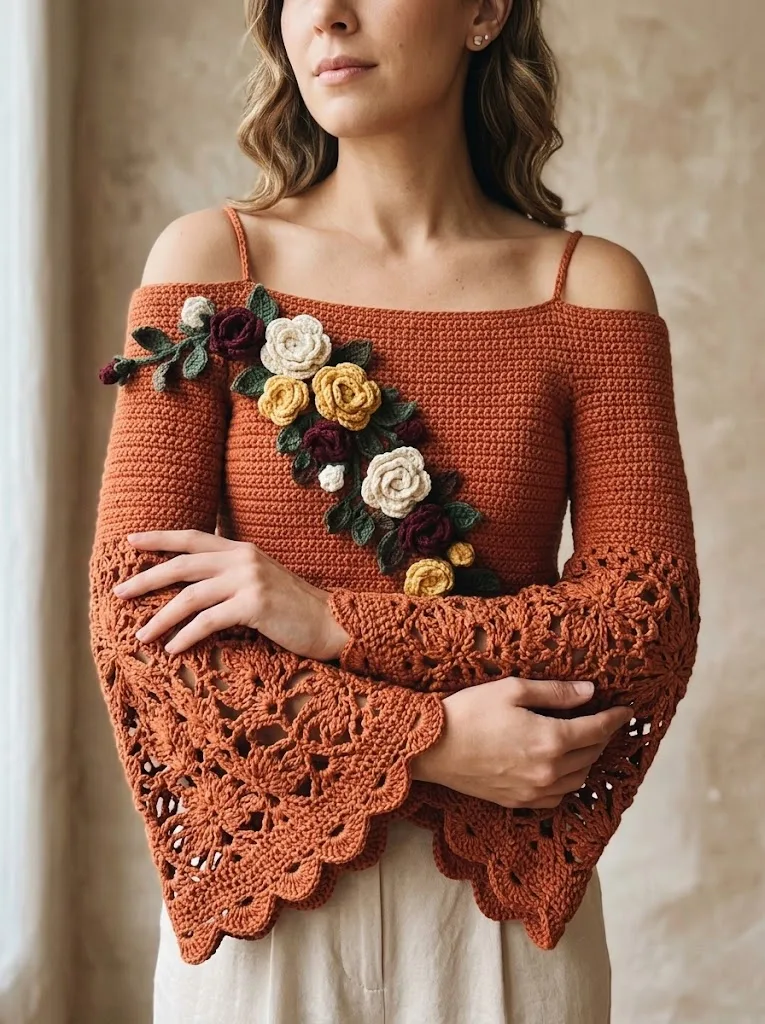
Terracotta bell-sleeve crochet blouse with rose appliqués

4.0mm hook, DK weight cotton: bell-sleeve blouse with rose, leaf, and bud appliqués.

Terracotta bell-sleeve crochet blouse with rose appliqués
IntermediateLevel
15-20 hoursTime
4.0 mmHook
DKYarn
Jump to the pattern

About this pattern

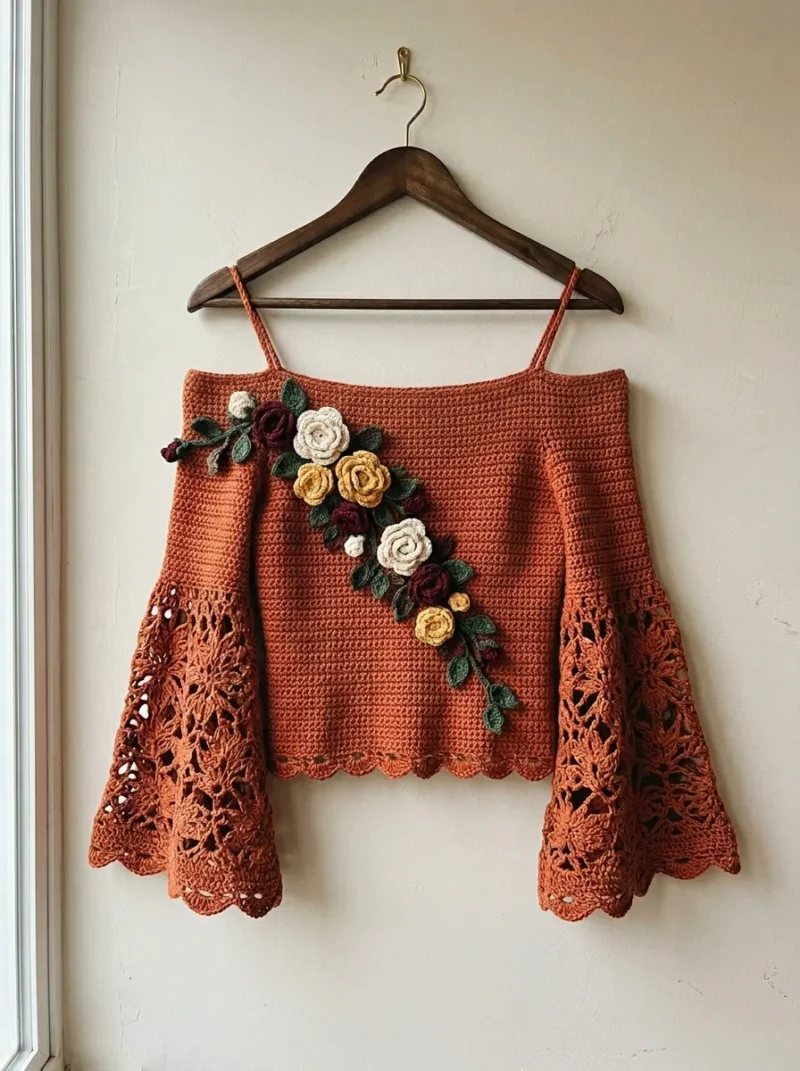
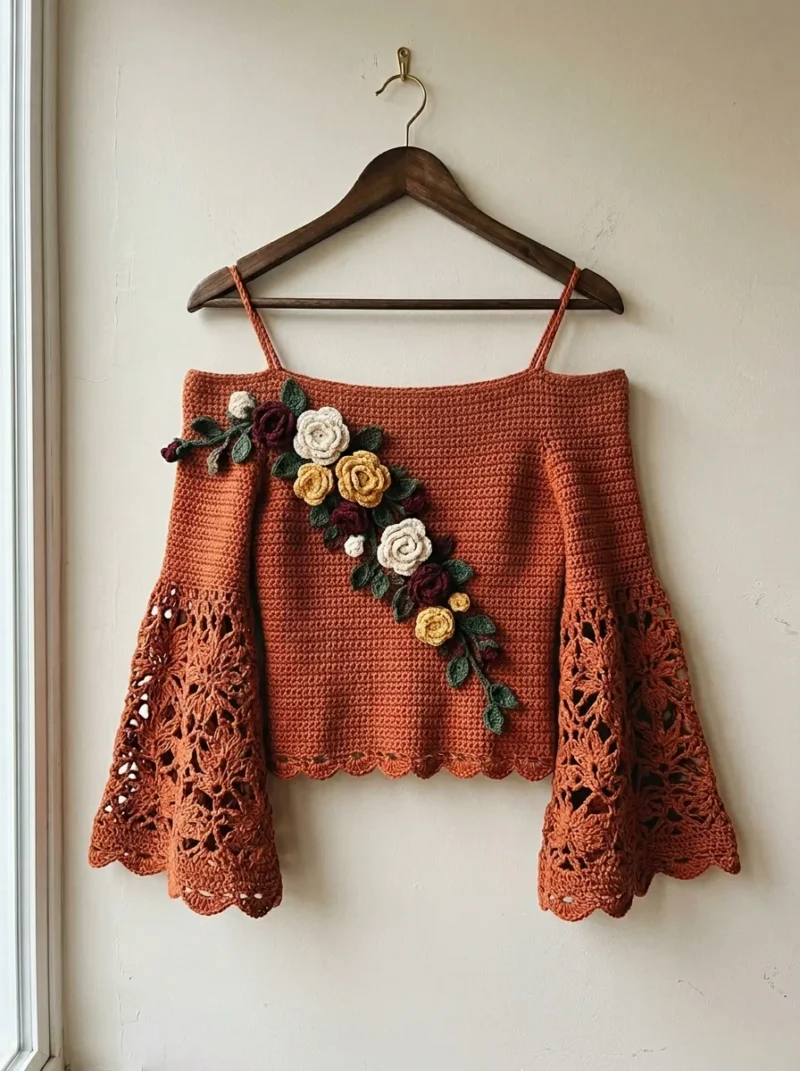
This is an intermediate crochet blouse worked in DK-weight cotton (400-500g, 900-1100 yards) on a 4.0mm hook, with a flat sc bodice, two lace bell sleeves built on 8 dc shells, and chained spaghetti straps. Finishing includes 5-7 rolled roses, 12-15 leaves, and 3-4 small buds crocheted separately and sewn on, plus wet blocking. Gauge: 18 sts and 20 rows = 4 inches in sc.

Terracotta Sunset is a DK-weight cotton blouse built from a flat front bodice panel (ch 82, worked in rows to 81 sc) and two bell sleeves worked in the round from a ch-48 cuff into eight 5-dc shells. Straps are single chains of 80 stitches slip-stitched back; the body gets 5-7 rolled roses, 12-15 leaves, and 3-4 small buds appliquéd on after blocking. Gauge sets the whole thing: 18 sts and 20 rows per 4 inches in sc with the 4.0mm hook. Skill level: intermediate.
The pattern

Written out round by round

Materials

Yarn

  • Main color (MC): 400-500g DK weight cotton or cotton blend yarn in terracotta/rust (approximately 900-1100 yards)
  • Contrast colors for flowers: small amounts (25-50g each) in cream, mustard gold, deep burgundy, and forest green

Hook

  • 4.0mm (US G/6) crochet hook for main body
  • 3.5mm (US E/4) hook for flowers and leaves (optional, for tighter petals)

Notions

  • Tapestry needle for weaving ends
  • Stitch markers (at least 4)
  • Measuring tape
  • Scissors
  • Rust-proof pins for blocking

Gauge

  • 18 stitches and 20 rows = 4 inches in single crochet with 4.0mm hook

Abbreviations

  • ch = chain
  • st = stitch
  • sts = stitches
  • sl st = slip stitch
  • sc = single crochet
  • hdc = half double crochet
  • dc = double crochet
  • tr = treble crochet
  • picot = picot stitch
  • shell = shell stitch (multiple dc stitches worked into the same stitch or space)
  • cluster = multiple incomplete dc stitches joined at the top

Front Bodice Panel

We start with the front bodice. This is worked flat in rows from the bottom up.

Foundation: With MC and 4.0mm hook, ch 82.

Row 1Sc in 2nd ch from hook and in each ch across. Turn. (81 sc)
Row 2Ch 1 (does not count as st throughout), sc in each st across. Turn. (81 sc)
Rows 3–40Repeat Row 2. (81 sc)Your panel should measure approximately 18 inches wide and 8 inches tall.

Shaping the Top Edge:

Row 41Ch 1, sc in first 20 sts, hdc in next 41 sts, sc in last 20 sts. Turn. (81 sts)
Row 42Ch 1, skip first st, sc in next 19 sts, hdc in next 41 sts, sc in next 19 sts, skip last st. Turn. (79 sts)
Row 43Ch 1, skip first st, sc in next 18 sts, hdc in next 41 sts, sc in next 18 sts, skip last st. Turn. (77 sts)Fasten off and weave in ends.

Back Bodice Panel

Work exactly as Front Bodice Panel.

Joining Front and Back

Place front and back panels with wrong sides together. Using MC, join with sl st at bottom corner.

Side Seams: Working through both layers, sl st evenly up side edge for approximately 6-7 inches, leaving 4-5 inches open at top for armholes. Repeat on other side.

Bell Sleeves (Make 2)

This is where the drama happens. These sleeves use a lace motif pattern that creates beautiful openwork. Take your time here.

Cuff Foundation: With MC, ch 48, join with sl st to form ring, being careful not to twist.

Round 1Ch 3 (counts as dc), dc in each ch around, join with sl st to top of ch-3. (48 dc)
Round 2Ch 3, dc in same st, *skip 2 sts, 5 dc in next st (shell made), skip 2 sts, dc in next st*. Repeat from * around, ending with 5 dc in last st before join, join with sl st. (8 shells)(8)
Round 3Ch 3, *5 dc in center dc of shell, dc in dc between shells*. Repeat from * around, join. (8 shells)Rounds 4-8: Repeat Round 3.(8)
Round 9Increase Round Ch 3, dc in same st, *5 dc in center of shell, 2 dc in dc between shells*. Repeat from * around, join. (8 shells, 16 dc between)
Rounds 10–14Ch 3, *5 dc in center of each shell, dc in each dc between*. Repeat around, join.
Round 15Increase Round Ch 3, dc in same st, *7 dc in center of shell (larger shell), 2 dc in next dc, dc in each dc to next shell*. Repeat from * around, join.
Rounds 16–20Continue established pattern, working 7-dc shells and maintaining increases every 5th round.

Lace Motif Section (Rounds 21-30):

Round 21Ch 5 (counts as dc + ch 2), skip 2 sts, *dc in next st, ch 2, skip 2 sts*. Repeat from * around, join to 3rd ch of ch-5. (Mesh round established)
Round 22Sl st into ch-2 space, ch 3, 4 dc in same space (half shell), *ch 1, skip next ch-2 space, 5 dc in next ch-2 space (shell)*. Repeat from * around, ch 1, join.
Round 23Sl st to center dc of shell, ch 3, 4 dc in same st, *ch 2, sc in ch-1 space, ch 2, 5 dc in center dc of next shell*. Repeat from * around, join.
Rounds 24–28Continue lace pattern, alternating shells with chain spaces and sc connections.
Round 29(Scallop Edge): *Sc in center of shell, ch 3, dc in same st, ch 3, sc in same st (picot scallop made)*. Work scallop in each shell around, join.Fasten off, leaving long tail for seaming.

Attaching Sleeves

Pin sleeve opening to armhole, matching underarm seams. With MC, whipstitch or sl st sleeves to bodice, easing fullness evenly around armhole.

Spaghetti Straps (Make 2)

Chain: Ch 80 (or desired length plus 10 extra chains).

Row 1Sl st in 2nd ch from hook and each ch across. Fasten off. Attach straps to inside top edge of front bodice, approximately 3 inches from each side edge. Attach back ends to corresponding position on back panel.Try on and adjust length as needed before securing permanently.

Bottom Scallop Edging

Join MC at any point along bottom edge of bodice.

Round 1Ch 1, sc evenly around entire bottom edge, join. (Approximately 162 sc)
Round 2Ch 1, sc in first st, *skip 2 sts, 5 dc in next st (shell), skip 2 sts, sc in next st*. Repeat from * around, adjusting final repeat as needed to end evenly. Join.
Round 3*Sc in sc, (sc, ch 2, sc) in center dc of shell*. Repeat from * around, join. Fasten off.

Rolled Rose (Make 5-7 in assorted colors)

Using cream, mustard, or burgundy yarn with 3.5mm hook: Foundation: Ch 42.

Row 1Dc in 4th ch from hook, dc in next ch, *3 dc in next ch, dc in next 2 ch*. Repeat from * across. (approximately 60 dc)
Row 2Ch 3, turn, *3 dc in next st, dc in next st*. Repeat from * across. Fasten off, leaving 12-inch tail.Assembly: Starting at the beginning of the strip, roll the crocheted piece tightly, allowing natural curl of the double crochets to form petals. Use tail to stitch through bottom layers, securing the rose shape. Do not pull too tight. Let petals stay fluffy.

Leaves (Make 12-15)

Using forest green yarn with 3.5mm hook: Foundation: Ch 10.

Row 1Sc in 2nd ch from hook, hdc in next ch, dc in next 2 ch, tr in next ch, dc in next 2 ch, hdc in next ch, 3 sc in last ch. Working along opposite side of foundation chain: hdc in next ch, dc in next 2 ch, tr in next ch, dc in next 2 ch, hdc in next ch, sc in last ch. Join with sl st to first sc.Fasten off, leaving tail for attaching.

Small Buds (Make 3-4)

Ch 4, join to form ring.

Round 1Ch 1, 8 sc in ring, join. (8 sc)
Round 2Ch 1, (sc, hdc, dc, hdc, sc) in each st around, join. (8 small petals) Fasten off.

Assembly

Step 1Blocking: Wet block your finished blouse by soaking in lukewarm water for 15 minutes. Gently squeeze out excess water (never wring). Lay flat on blocking mats, pin sleeves open to show lace pattern, and allow to dry completely.
Step 2Weaving Ends: This project has many ends from color changes. Weave each end through at least 2 inches of stitches, working along the same row to hide tails completely.

Tester's notes

3.5mm hook is optional for the flowers only — use it on the Rolled Rose, Leaves, and Small Buds for tighter petals, not on the bodice or sleeves.

4 stitch markers (minimum) mark the shell repeats in Bell Sleeves Round 2 so the 8 shells stay aligned through Round 3 and beyond.

900-1100 yards of MC covers the bodice and sleeves; budget extra yarn separately for the 5-7 roses, 12-15 leaves, and 3-4 buds if working them in the same color.

82-chain foundation for the Front Bodice and 48-chain ring for each Bell Sleeve cuff both need an accurate count before Row/Round 1 — a miscount compounds across all 40 rows or 12 rounds.

This pattern is written for size Small/Medium with a finished bust measurement of approximately 36-38 inches, a relaxed fit with 2-4 inches of positive ease, length (shoulder to hem) of 16 inches, and sleeve length of 18 inches from underarm. To size up or down, add or subtract 8 stitches (approximately 1.5 inches) to the foundation chain; adjust body length as desired before joining sleeves.

Work in progress

Terracotta bell-sleeve crochet blouse with rose appliqués — photo 2
Terracotta bell-sleeve crochet blouse with rose appliqués — photo 4
Terracotta bell-sleeve crochet blouse with rose appliqués — photo 2

At a glance

Rounds27
Parts10
LevelIntermediate
Time15-20 hours
Hook4.0 mm
YarnDK

Gauge check

After Row 1 of the Front Bodice Panel (81 sc), lay the piece flat and measure 18 stitches across; it should span 4 inches.

If the count runs tight or loose, adjust hook size by 0.5mm — down if the swatch measures wider than 4 inches, up if narrower — and rework Row 1 before continuing.

Stitch-count checkpoints

  • Front Bodice Panel · Row 2: 81 sts
  • Front Bodice Panel · Row 41: 81 sts
  • Front Bodice Panel · Row 43: 77 sts
  • Bell Sleeves (Make 2) · Round 1: 48 sts
  • Bell Sleeves (Make 2) · Round 2: 8 sts
  • Bell Sleeves (Make 2) · Round 3: 8 sts

If something looks wrong

The bodice panel comes out narrower or wider than 18 inches.
This points to gauge drift, not a counting error — the 81-sc count is fixed, so if width is off the stitch size itself is off. Re-swatch at 18 sts/4 inches with the 4.0mm hook before redoing the rows.
The 5-dc shells in Bell Sleeves Round 2
This comes from skipping the wrong number of stitches between shells. Recount to skip exactly 2 sts before each shell and work 1 dc between shells, checking against the 8-shell total.
Straps stretch out of shape or feel too
The pattern expects a trial fit — try on and adjust before securing permanently. Shorten by unworking chains from the ch-80 foundation rather than cutting after sewing.
Ends keep peeking through on the right side after blocking.
Tails woven through fewer than 2 inches of stitching pull loose. Rework each end through at least 2 inches along the same row, not diagonally across rows.

Yarn substitutions

100% cotton, DK weightClosest match to the pattern; expect the same 18 sts/4-inch gauge on the 4.0mm hook with slightly crisper stitch definition in the shells.
Cotton-acrylic blend, DK weightSofter handle and lighter overall weight for the same yardage; drape increases slightly, so block the lace sleeves a touch more aggressively to open the 5-dc shells.
Acrylic, worsted weightHeavier than DK, so gauge will not match at 4.0mm — size down to a 3.5mm or 3.75mm hook to approach 18 sts/4 inches, with less stitch definition in the shell rounds.
FAQs

Questions

Can the flowers be skipped without changing the construction?

Yes — the Rolled Rose, Leaves, and Small Buds are appliquéd on after blocking and don't affect the bodice, sleeve, or strap counts. Skipping them removes roughly 5-7 roses, 12-15 leaves, and 3-4 buds worth of extra yarn and hook-swapping, not any structural step.

Why does the pattern call for two hook sizes?

The 4.0mm hook sets the 18 sts/4-inch gauge for the bodice and sleeves; the 3.5mm hook is optional and only tightens the small flower and leaf stitches for denser petals. Using 4.0mm throughout still works if tighter florals aren't needed.

How is strap length determined before attaching permanently?

The chain is worked to 80 stitches or more, then tried on and adjusted; straps attach to the front bodice about 3 inches from each side edge first. Length gets fine-tuned on the body before the back ends are secured to the Back Bodice Panel.

One at a time —

Get the next pattern

Tested round by round before it is sent. No spam.