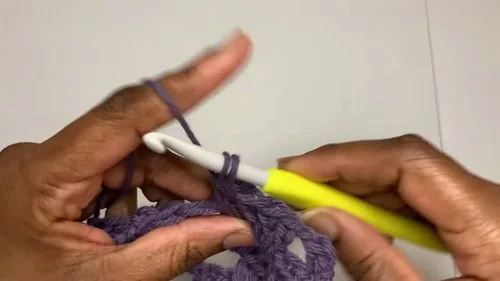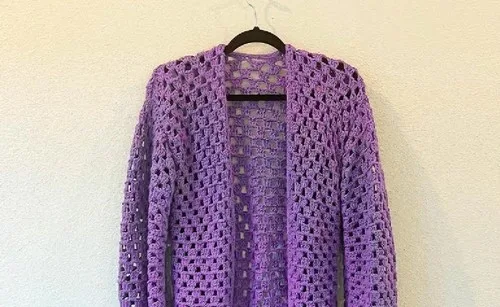
Made and counted by Wren —

Solid-color cluster stitch cardigan with seamed sleeves

7 mm hook, worsted (4) yarn cardigan: 5 panels, slip-stitch seams, single crochet trim.

Solid-color cluster stitch cardigan with seamed sleeves
IntermediateLevel
6-10 hoursTime
7 mmHook
WorstedYarn
Jump to the pattern

About this pattern

This is a seamed cardigan made from five flat panels (1 back, 2 front, 2 sleeves) worked in a repeating cluster-and-chain lace pattern, built on an FSC foundation of 53, 25, and 49 stitches respectively. Body panels run 43 rows; sleeves run 31 rows or to desired length. Assembly is 7 steps: slip-stitched seams, a neckline opening, and a single crochet trim.

This cardigan builds from three flat panels and two sleeves, each started with a foundation single crochet base and worked in an alternating cluster-and-stacked-single-crochet pattern. The back panel starts at 53 stitches, the two front panels at 25 stitches each, and the two sleeves at 49 stitches each, with body panels repeated for 43 rows and sleeves for 31 rows or to the length needed. A 7 mm hook and medium weight (4) yarn carry the stitch count through four seams and a single crochet neckline trim.
The pattern

Written out round by round

Materials

  • Medium weight yarn (4) – example: Lion Brand Pound of Love
  • 7 mm crochet hook for a flowy drape
  • Darning needle, scissors, stitch markers

Abbreviations

  • FSC = Foundation Single Crochet
  • SC = single crochet
  • DC = double crochet

Back Panel

A cluster = 3 double crochet (DC) in the same stitch or space.

The pattern is a repeat of Row 2 and Row 3.

Foundation: Back Panel starts with 53 Foundation Single Crochet (FSC); the two Front Panels start with 25 FSC each; the two Sleeves start with 49 FSC each.

Round 153 Foundation Single Crochet (FSC). (53)
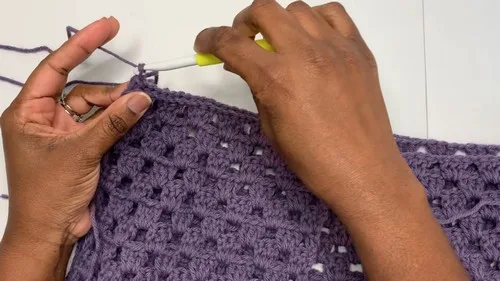
Round 2Turn work; in the first stitch, make a stacked single crochet (counts as 1 DC), add 2 more DC in the same stitch; chain 1, skip 3 stitches, cluster in the 4th stitch; repeat across the row; end with a cluster in the final stitch.
Round 3Turn work; in the first stitch, make a stacked single crochet (counts as 1 DC); chain 1, skip the first cluster; in the first chain-1 space, work a cluster; chain 1, cluster in the next chain-1 space, repeat across; end with chain 1 and 1 DC in the top of the stacked SC from the previous row.Completing the Panels: work the Back Panel and each Front Panel for 43 rows total (repeating Rounds 2-3); work each Sleeve for 31 rows or to your desired length (repeating Rounds 2-3).
Round 4Repeat Rounds 2-3 for a total of 43 rows.

Assembly

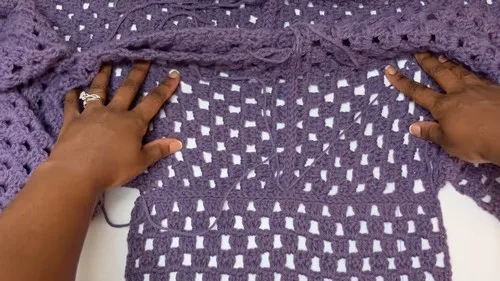
Step 1Join panels with slip stitch, wrong side facing up.
Step 2Shoulder seams: join front panels to back panel, leave opening for neckline.
Step 3Attach sleeves: align midpoint of sleeve to shoulder seam, join to armhole.
Step 4Side and underarm seams: slip stitch from sleeve cuff to underarm and down the sides.
Step 5Weave in ends.
Step 6Work a single row of single crochet around the cardigan opening.
Step 7Turn right side out to complete your cardigan.

Tester's notes

7 mm hook: hold it loosely through the clusters, since the stacked SC counts as 1 DC and uneven tension there throws off the 4-stitch repeat in Round 2.

4 rounds listed per part repeat as Rounds 2-3 for 43 rows on the body or 31 rows on the sleeves, so place a stitch marker every 10 rows to track progress without recounting from Round 1.

53, 25, and 49 starting stitches (back, front, sleeves) each need to divide evenly into the Round 2 skip-3 cluster sequence; a miscounted foundation row shows up as an uneven cluster at the row end.

Solid color yarn means no color changes to plan; weave in ends only at panel starts, panel ends, and the 7 assembly seams.

43-row front and back panels should match in row count before shoulder seaming, and sleeves can stop at 31 rows or earlier once cuff length is reached.

Work in progress

Solid-color cluster stitch cardigan with seamed sleeves — photo 2
Solid-color cluster stitch cardigan with seamed sleeves — photo 3
Solid-color cluster stitch cardigan with seamed sleeves — photo 4

At a glance

Rounds4
LevelIntermediate
Time6-10 hours
Hook7 mm
YarnWorsted

Gauge check

After Round 1, count the foundation stitches on each piece: 53 for the back panel, 25 for each front panel, 49 for each sleeve, since these counts drive every cluster repeat that follows.

If a recount comes up short or long, pull out and redo the FSC row rather than adjusting stitch counts mid-way through Round 2's 4-stitch cluster repeat.

If something looks wrong

The piece cups instead of lying flat.
A cluster has 2 or 4 DC instead of 3; check every cluster across the row, since one extra or missing stitch per repeat accumulates curl across 43 rows.
Panel comes out narrower or wider than
Foundation single crochet count was off at Round 1; recount before starting Round 2, since the skip-3 cluster pattern will not self-correct a wrong base count.
Chain-1 spaces disappear after a few rows.
Clusters are being worked into the top of the chain-1 space instead of the space itself; re-check Round 3's instruction to work the cluster into the chain-1 space, not through it.
Sleeve cap doesn't align with the
Sleeve midpoint wasn't marked before seaming; place a stitch marker at the center of the 49-stitch edge before joining the sleeve to the armhole.

Yarn substitutions

Acrylic, worsted (4) weightClosest match to the original medium weight (4) yarn; same 7 mm hook, same drape, no change to the 53/25/49 stitch counts or row totals.
Cotton blend, worsted (4) weightStiffer drape with less stretch across the 43-row body panels; a 6.5 mm hook keeps the fabric from going board-stiff.
Wool or wool-blend, worsted (4) weightMore give and warmth, but clusters can bloom wider under tension; drop to a 6.5 mm hook to hold the panels to the intended size.
FAQs

Questions

Can the cardigan length be shortened?

Yes. Back and front panels are written for 43 rows, but since the pattern only repeats Rounds 2 and 3, stopping earlier shortens the body. Stop the back panel and both front panels at the same row count so the shoulder seams line up.

Why do the front panels use fewer stitches than the back panel?

The front panels start at 25 stitches each (50 total) against the back panel's 53, which leaves room for the neckline opening created during shoulder seaming. The difference is intentional and matches the 7-step assembly order.

Can sleeve length be adjusted mid-pattern?

Yes. Round 4 for sleeves calls for repeating Rounds 2-3 for 31 rows or to desired length. Measure against the arm periodically and stop once the cuff reaches the needed point before moving to assembly.

One at a time —

Get the next pattern

Tested round by round before it is sent. No spam.