Made and counted by Wren —

Ribbed crochet beanie pattern for child size fit

Size I (5.5 mm) hook, worsted yarn: child beanie, 7.5 in. long, fits 17-20 in. heads.

Ribbed crochet beanie pattern for child size fit
IntermediateLevel
4-6 hoursTime
5.5 mmHook
WorstedYarn
Jump to the pattern

About this pattern

A child-sized beanie worked in the round with worsted weight yarn and a size I (5.5 mm) hook. Round 1 places 13 dc into a magic ring; rounds 2 through 6 increase the crown outward using front post double crochet markers between widening groups of double crochet, with round 6 repeated until the crown measures about 6.5 inches. A 4-round brim then shifts to single crochet, half double crochet, and alternating front-post/back-post half double crochet to create the ribbed edge. Finished measurements: 7.5 inches long, 17 to 20 inch circumference, fitting roughly age 10 through small adult heads. Finishing is three steps: cut, weave in, trim.

The pattern

Written out round by round

Materials

  • Red Heart Super Saver Stripes Yarn (Latte color, size 4 medium)
  • Size I (5.5 mm) crochet hook
  • Yarn needle
  • Scissors

Abbreviations

  • ch = chain
  • dc = double crochet
  • sl st = slip stitch
  • fpsc = front post single crochet
  • fpdc = front post double crochet
  • sc = single crochet
  • hdc = half double crochet
  • fphdc = front post half double crochet
  • bphdc = back post half double crochet

Main Pattern

Round 1Make a magic ring. Into the ring, make 13 dc (count beginning ch-3 as first dc). Close the ring securely. Join with a sl st to the top of the beginning ch-3.(13)
Round 2Make 1 fpsc around the same stitch as joining. Ch 2 (counts as first fpdc). Make 1 dc in between the first and second dc. Make 1 fpdc around the next dc. Repeat: 1 dc between stitches, then 1 fpdc around next dc. Before joining, make 1 dc in between the first and last dc. Total stitches: 26. Join with a sl st on top of beginning ch-2.(26)
Round 3Make 1 fpsc around the joining stitch. Ch 2 (counts as fpdc). Make 2 dc between the front post and next dc. Skip next dc. Make 1 fpdc around next fpdc. Repeat: 2 dc in between, skip 1 dc, 1 fpdc around fpdc. End with 2 dc between last fpdc and last dc. Total stitches: 39. Join with a sl st on top of beginning ch-2.(39)
Round 4Make 1 fpsc around same stitch. Ch 2. Make 3 dc in between the front post and next dc. Skip 2 dc. Make 1 fpdc around next fpdc. Repeat: 3 dc in between, skip 2 dc, 1 fpdc. End with 3 dc as last stitch. Total stitches: 52. Join with a sl st.(52)
Round 5Make 1 fpsc around joining stitch. Ch 2. Make 4 dc between front post and next dc. Skip next 3 dc. Make 1 fpdc around next fpdc. Repeat: 4 dc, skip 3 dc, 1 fpdc. Total stitches: 65. Join with sl st to beginning ch-2.(65)
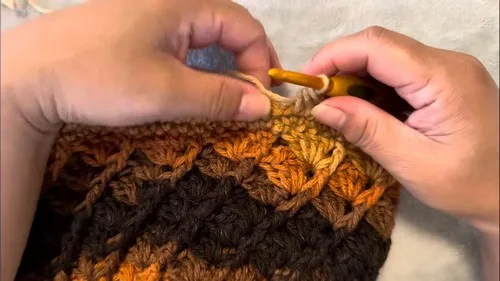
Round 6Make 1 fpsc around joining stitch. Ch 2. Make 4 dc in between front post and next dc. Skip next 4 dc. Make 1 fpdc around next fpdc. Repeat: 4 dc in between, skip 4 dc, 1 fpdc. Join with sl st on top of beginning ch-2.Repeat Round 6 until the hat measures approximately 6.5 inches from the crown.
Brim Round 1Ch 1. Make 1 sc in the same stitch. Sc in next 4 stitches. Make 1 sc in the next fpdc. Continue sc in each stitch around. In last stitch, make 2 sc. Total stitches: 66. Join with sl st to first sc.(66)
Brim Round 2Ch 2 (counts as first hdc). Make 1 hdc in each stitch around. Total stitches: 66. Join with sl st on top of beginning ch-2.(66)
Brim Round 3Ch 2 (counts as hdc). Make 1 fphdc around next hdc. Make 1 bphdc around next hdc. Repeat: fphdc, bphdc around alternating stitches. End with fphdc. Join with sl st on top of beginning ch-2.
Brim Round 4Ch 2. Continue ribbing by making 1 fphdc around each fphdc and 1 bphdc around each bphdc. End with fphdc. Join with sl st on top of beginning ch-2.For a longer brim, repeat Brim Round 4 one or two more times.
Assembly

Step 1Cut the yarn, leaving a tail.
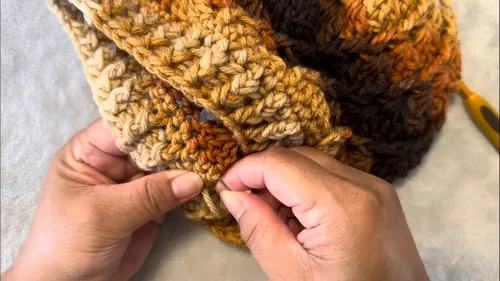
Step 2Use a yarn needle to weave in the tail through the stitches (especially the sc line) back and forth 2–3 times.
Step 3Trim any excess yarn.

Tester's notes

13 dc fill the magic ring in round 1 — count them before joining, since a miscount here throws off every fpdc placement in round 2.

Size I (5.5 mm) hook is listed; a half-size swap in either direction changes the 17-20 inch circumference range, so stay close to that hook unless resizing on purpose.

The crown is built across 6 named rounds, with round 6 repeated as many times as needed until the piece measures about 6.5 inches from the crown; the brim then adds 4 more rounds. Mark round boundaries with a stitch marker on the join stitch so the fpsc and fpdc placements stay aligned round over round.

Super Saver Stripes (size 4 medium) already carries its own color changes built into the dye lot, so no manual color-change technique is needed mid-round.

No stuffing is called for in this pattern; the hat relies on stitch count and yarn tension alone for shape, so keep tension even rather than packing the fabric.

Work in progress

Ribbed crochet beanie pattern for child size fit — photo 2
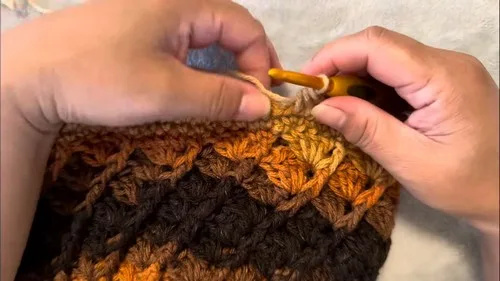
Ribbed crochet beanie pattern for child size fit — photo 3

At a glance

Rounds10
LevelIntermediate
Time4-6 hours
Hook5.5 mm
YarnWorsted

Gauge check

No swatch gauge is given, so check round 1 by feel: the 13-dc magic ring should lie flat without cupping or rippling before moving into round 2's fpdc pattern.

If the circle cups inward, size up the hook; if it ripples outward, size down, since final fit depends on the 7.5-inch length and 17-20 inch circumference holding true.

Stitch-count checkpoints

  • Main Pattern · Round 2: 26 sts
  • Main Pattern · Round 4: 52 sts
  • Main Pattern · Brim Round 1: 66 sts
  • Main Pattern · Brim Round 2: 66 sts

If something looks wrong

The crown doesn't lie flat after round 1.
Usually means the 13-dc count drifted during the magic ring round; recount stitches before joining with the sl st and adjust before starting round 2's fpdc pattern.
The ribbing pattern looks uneven or the
Happens when a fpdc was worked as a regular dc by mistake; check that each fpdc wraps around the post of the stitch below rather than through the top loops.
The finished hat is tighter or looser
Points to tension rather than stitch count if the 13-dc round matched the pattern; re-check hook size against the size I (5.5 mm) called for and adjust half a size.
The join point at the end of each round
Comes from inconsistent slip stitch tension at the join to the beginning ch-3; pull the join snug but not tight, matching the tension of surrounding dc stitches.

Yarn substitutions

Acrylic, worsted (size 4 medium), single-color skeinSwaps out the self-striping effect of the original yarn for a solid look; same size I (5.5 mm) hook and stitch counts apply unchanged.
Cotton, worsted (size 4 medium)Produces a stiffer fabric with less stretch, so the 17-20 inch circumference range may run tighter; consider sizing the hook up slightly to compensate.
Wool-blend, worsted (size 4 medium)Adds more drape and warmth than acrylic, works at the same size I (5.5 mm) hook, but block gently since wool can grow slightly past the stated 7.5-inch length.
FAQs

Questions

Why does round 2 start with a fpsc instead of continuing straight into fpdc?

The fpsc anchors the join point from round 1 before the fpdc/dc ribbing begins, keeping the transition between the crown and ribbed body tidy. Skipping it leaves a visible gap at the seam.

Can this beanie fit an adult, not just a child?

The stated circumference range is 17 to 20 inches, which the pattern lists as fitting children around age 10 through small adults. Outside that range, the starting 13-dc count and the number of crown and brim rounds worked would need resizing.

How much finishing work is left after the brim?

Three steps: cut the yarn leaving a tail, weave the tail through the stitches (especially along the sc line) back and forth 2-3 times with a yarn needle, then trim the excess. No blocking step is listed.

One at a time —

Get the next pattern

Tested round by round before it is sent. No spam.