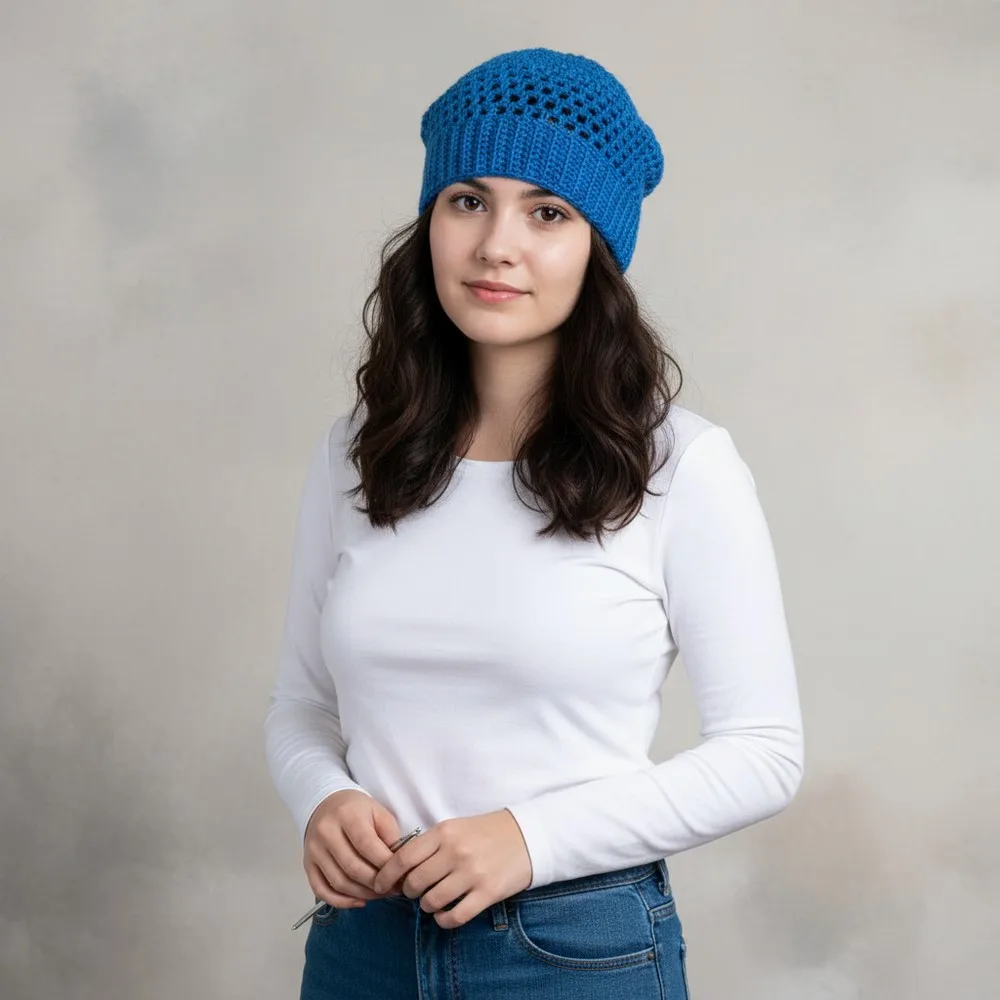
Made and counted by Wren —

Openwork mesh crochet hat with ribbed brim pattern

G/6 (4.0mm) hook, DK/worsted acrylic: openwork mesh hat with ribbed E/4 (3.5mm) brim, 60g yarn.

Openwork mesh crochet hat with ribbed brim pattern
IntermediateLevel
4-6 hoursTime
1.5 mmHook
DK/Light WorstedYarn
Jump to the pattern

About this pattern

This is an openwork mesh hat that begins with a magic ring of 12 dc, increases across rounds 3-7, then works even for rounds 8-19 before a ribbed brim joins invisibly at the edge. It uses about 60g of light worsted/DK acrylic, a US G/6 (4.0mm) hook for the crown, and a US E/4 (3.5mm) hook for the ribbing. Stretch in the ribbing suits a range of head sizes.

The pattern

Written out round by round

Materials

Yarn

  • 60g acrylic yarn, approximately 1.5mm thick (light worsted/DK recommended)

Hook

  • US G/6 (4.0 mm) for hat body; US E/4 (3.5 mm) for brim

Notions

  • Scissors
  • Tapestry needle
  • Stitch marker
  • Measuring tape

Abbreviations

  • ch = chain
  • st = stitch
  • sts = stitches
  • sl st = slip stitch
  • sc = single crochet
  • hdc = half double crochet
  • dc = double crochet
  • inc = increase
  • blo = back loops only

1.Begin with a Magic Ring

Make a magic ring.

Round 1Ch 1 to secure. (Or use “false dc”/standing dc for a neater look.) Work 12 dc into ring.Join with sl st to first dc. (12 dc)Tighten ring.

Main Pattern

Round 32 dc, one after another, then an increase; repeat (2 dc, inc, 2 dc, inc…)
Round 43 dc, then inc; repeat
Round 52 dc, then inc; repeat
Round 66 dc, then inc; repeat
Round 73 dc, then inc; repeat (If this seems confusing, tips & schedule at the end) Each dc is always followed by ch 1.After Round 7: Work should measure about 18 cm (7”) in diameter.

If not

Round 1For larger sizes, add another increase round following the pattern; for smaller, stop after fewer rounds.
Round 2After last increase round, work one round even (no increases).

4.Rounds 8–19: Work Even (No Increases)

Round 1Sl st to next ch-1 sp.
Round 2Begin with standing/false dc (or ch 3).
Round 3(Dc, ch 1) in each ch-1 sp around.
Round 4Join with sl st to first dc at round end.Continue for a total of 12 even rounds (or adjust for desired slouch/length).

Ribbed Band (Brim)

Switch to smaller hook (3.5 mm).

5.Foundation for Band

Count the number of stitches & ch-sps on final round; you should have at least 100–104 .

For every ch-1 sp/dc st (= one “stitch” on last round), there will be one row of ribbing.

6.Elastic Ribbing: Start

With the band color (& a slip knot if preferred), Ch 10.

Turn, working into back bumps only for a neater edge: (Optional: Place a marker at last ch; this is row-end.)

Ch 1 (does not count as a stitch).

Hdc in each ch across. (10 hdc)

Turn.

7.Join Band to Hat

Row A (joining): On hat, sl st to first openwork dc (where band will join).

Sl st to next openwork st for turning (acts as beginning “ch 1” upturn).

Work 10 hdc BLO back up the band row.

Ch 1, turn.

Row B (back up band): Hdc BLO in each st across (10 hdc).

Turn.

Row C:

Continue as Row A: On hat, sl st into next openwork st; sl st into very next (two sl sts for every band row), and proceed as for Row B.

Repeat this process (Rows A/B/turning with sl sts at hat edge, and hdc BLO returning), around entire hat edge.

Tip: Place marker at every 10–20 rows to keep track of count.

Work until you have joined brim around entire lower edge (for sample, 102 rows).

Join last row to foundation starting chain with sl st (or sc seam) through back loops for an invisible join.

8.Close Top of Hat

With a tapestry needle, securely weave in and cinch the magic ring (beginning of hat) to fully close any hole. Pass yarn tail through several times and knot.

9.Weave in all yarn tails.

Hide tails inside stitches for a neat finish.

Tester's notes

12 dc from the magic ring must sit evenly before round 2 begins; an uneven count here compounds through all five increase rounds.

Place a stitch marker at the start of each round from round 1 through round 19; the ch-1 after every dc makes the round start easy to lose without one.

60g of yarn is the total allowance for hat and brim combined; weigh remaining yarn before starting the brim to confirm enough is left.

No color changes are built into this pattern; if adding stripes, break yarn only at the join between round 19 and the brim foundation to keep the invisible join clean.

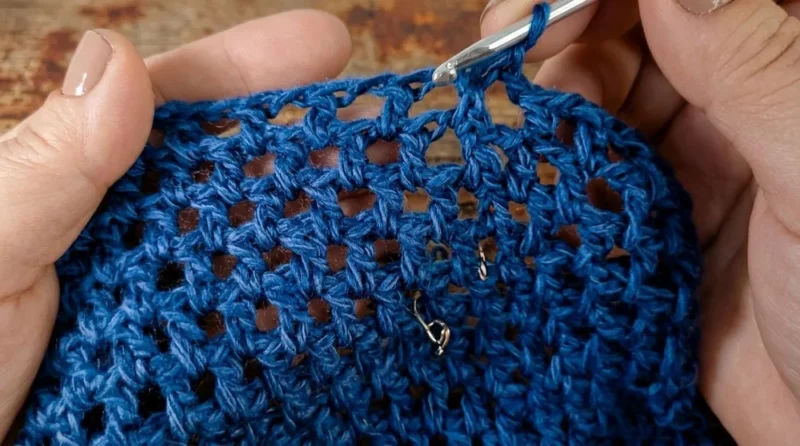
Work in progress

Openwork mesh crochet hat with ribbed brim pattern — photo 2
Openwork mesh crochet hat with ribbed brim pattern — photo 3

At a glance

Rounds12
Parts10
LevelIntermediate
Time4-6 hours
Hook1.5 mm
YarnDK/Light Worsted

Gauge check

After round 1, check that the 12 dc lie flat around the closed magic ring with no gap at the center and no cupping.

The pattern gives no stitch-per-inch gauge, so if the crown starts to cup or ruffle by round 5, judge by feel: loosen tension if the fabric pulls tight and cups, tighten it if the mesh gaps and ripples.

If something looks wrong

The crown cups instead of lying flat after round 7.
Increases in rounds 3-7 are missing or doubled somewhere in the repeat; recount stitches at the end of round 7 against the pattern before starting round 8's even rounds.
The mesh pattern looks tight and solid instead of open.
The ch-1 that follows every dc has been skipped or worked too tight; each dc is always followed by ch 1, so loosen tension on that chain to open the mesh.
The brim doesn't stretch enough to pull over the head.
The US E/4 (3.5mm) hook may have been swapped for the US G/6 (4.0mm) body hook by mistake; the ribbing needs the smaller hook to keep its elasticity.
The join at the brim is visible instead of invisible.
A standard slip-stitch join was used instead of the invisible join method described for round 1; rework the join, pulling the tail through the front loop of the first stitch only.

Yarn substitutions

Cotton, DK/light worsted weightLess stretch than acrylic; mesh holds a crisper, more defined open shape, and the brim may need a slightly larger hook than E/4 (3.5mm) to keep enough give.
Wool-blend, light worsted/DK weightMore natural stretch than acrylic; the ribbing at E/4 (3.5mm) may fit smaller heads without adding extra increase rounds, and hook sizes stay unchanged.
Bamboo/rayon blend, DK weightHeavier drape than acrylic; the hat sits looser and slouchier without adding rounds beyond round 19, and the 4.0mm/3.5mm hook split still applies.
FAQs

Questions

How much yarn is needed for the whole hat?

The pattern calls for about 60g of light worsted/DK acrylic to cover both the mesh body and the ribbed brim. Weigh remaining yarn before starting the brim to confirm enough is left for the ribbing.

Can the size be adjusted up or down?

Yes: for larger sizes, add another increase round following the established pattern, and for smaller sizes, stop after fewer rounds. Either way, work one even round after the last increase round before continuing into rounds 8-19.

Why does the pattern call for two different hook sizes?

The US G/6 (4.0mm) hook keeps the mesh body open across the crown, while the smaller US E/4 (3.5mm) hook tightens the brim so it stretches to fit. Using one hook for both parts removes the ribbing's elasticity.

One at a time —

Get the next pattern

Tested round by round before it is sent. No spam.