Made and counted by Wren —

Granny square polo shirt pattern for confident beginners

3 mm hook, worsted yarn: crochet a granny-stitch polo shirt with in-the-round sleeves and a DC collar.

Granny square polo shirt pattern for confident beginners
BeginnerLevel
6-10 hoursTime
3 mmHook
WorstedYarn
Jump to the pattern

About this pattern

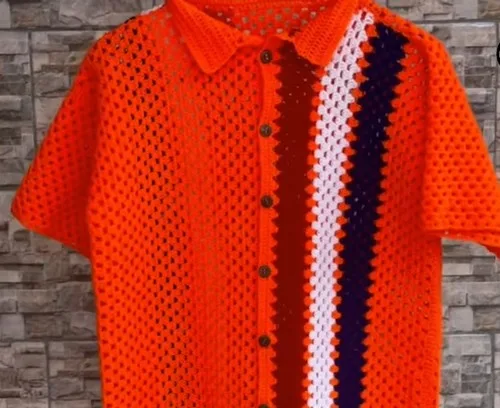
This is a beginner granny-stitch polo shirt built from one long DC panel (worked as alternating Rows 1, 3 and 4 to reach the desired width), using a 3 mm hook and about 180 grams of yarn. The foundation chain sets shirt length, 300 chains in the sample. One back panel and two narrower front panels are seamed together up to an 18 cm armhole mark and a 15 cm shoulder mark, sleeves are then added in the round around that armhole opening, the collar is worked over up to six rows, and a button placket with matching button holes finishes the front.

This polo shirt starts as a single granny-stitch panel worked in alternating DC rows, then gets shaped into sleeves worked in the round around an 18 cm armhole and finished with a collar built over up to six rows of double crochet (the last two rows are optional). The foundation chain length sets the finished shirt length directly — the sample uses 300 chains, cut down after working Row 1. Materials run to about 180 grams of yarn on a 3 mm hook. The number that matters most is the 18 cm armhole opening, since the sleeve rounds are built to fit that measurement exactly, alongside a 15 cm shoulder measurement used when seaming the panels together.

The polo shirt can be customized with different yarn colors or collar styles to match your personal taste, whether you're a crochet novice or an experienced maker.
The pattern

Written out round by round

Materials

Hook

  • 3 mm size

Yarn

  • Approximately 180 grams

Other

  • Stitch markers, tapestry needle, measuring tape

Abbreviations

  • sc = single crochet
  • dc = double crochet
  • ss = slip stitch

Foundation Row (Length)

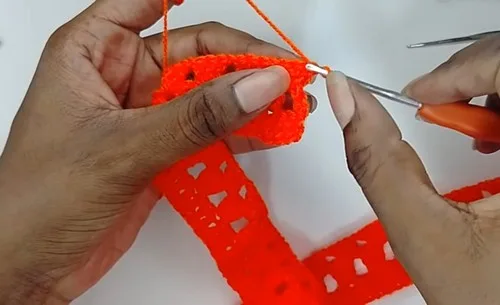
Chain a length equal to the desired length of the shirt (e.g., 300 chains for the example).

Row 1(Double Crochet): Skip 3 chains, then work 1 Double Crochet (DC) in the 4th chain from the hook and in every chain across.Cut off any extra foundation chains at the end for a neat edge.

Granny Stitch Pattern (Width)

The granny stitch is worked by alternating rows.

Row 1(Granny Row 1 - Creates spaces): Chain 1 and Turn. * Skip 2 stitches, work 3 DC in the 3rd stitch, Chain 1 * . Repeat from * across the row. End of the row: Skip 2 stitches, work 1 DC on the top of the 3rd skipped chain from the foundation row.
Row 3(Granny Row 2 - Fills spaces): Turn. Start the row with a standing stitch (or Chain 3) and make 2 more DC into the same first space (creating the first 3-DC cluster). * Chain 1 , work 3 DC into the next chain-1 space * . Repeat from * across the row. End of the row: Chain 1 , work 2 DC in the last chain-1 space, then work the last DC on the last stitch of the previous row.
Row 4(Granny Row 1 Repeat): Turn. Start with a standing stitch (or Chain 3). * Chain 1 , work 3 DC into the next chain-1 space * . Repeat from * across the row. End of the row: Chain 1 , work 1 DC on the top of the last stitch of the previous row.Repeat alternating Rows 3 and 4 until the panel reaches the desired width. Create one back panel and two front panels (half the width of the back).

Assembly and Seaming

Lay out panels: Place the Back panel flat. Lay the two Front panels on top, ensuring the flat (DC-row) edge of the front panels is in the center.

Mark Key Points Armhole: Measure and mark 18 cm from the top for the armhole opening. Shoulder: Measure and mark 15 cm from the center line for the shoulder width.

Seam the Sides: Using a tapestry needle, sew the side seams (front to back) from the bottom up to the 18 cm armhole marker.

Seam the Shoulders: Sew the shoulder seams from the outer edge to the 15 cm marker, leaving the remaining center space for the neck opening.

Sleeves (In the Round)

Work the granny stitch pattern around the 18 cm armhole opening.

Always turn the work at the end of each round to maintain the texture.

Round 1Join yarn at the bottom of the armhole seam. Chain 3 (counts as DC), 1 DC in the same space. * Chain 1 , Skip 2 stitches , 3 DC in the 3rd stitch * .Repeat from * around. Complete the first cluster by making 1 DC in the starting stitch area (total 3 DCs).Slip Stitch (SS) to the top of the Chain 3.
Round 2Turn . SS into the first chain-1 space. Chain 3 , 2 DC in the space (first 3-DC cluster).* Chain 1 , 3 DC in the next chain-1 space * .Repeat around. SS to the top of the Chain 3.Continue: Repeat Round 2 until the sleeve reaches the desired length.

Collar (DC Rows)

The collar is worked in rows, turning at the end of each. The rows alternate between increasing and non-increasing.

The instructor worked a total of six rows .

Row 1Foundation Attach yarn at the last stitch of the neck opening. Work 2 DC in that first stitch (increase).Work 2 DC in each row end around the neck opening and across the back of the neck.2 DC in the last stitch.
Row 2Increase Turn. Start with an increase ( 2 DC in the first stitch). Work 1 DC in each stitch across. End with an increase ( 2 DC in the last stitch).
Row 3No Increase Turn. Work 1 DC in each stitch across.
Row 4Increase Turn. Repeat Row 2.
Rows 5–6Optional Rows 5 & 6 (Optional): Continue the alternating pattern for desired collar width, or work two final rows of no increase (1 DC in each stitch).

Button Placket and Button Holes

The placket is worked in Single Crochet (SC) along the front opening edge.

Row 1(SC): Along the right front edge (where buttonholes will go), attach yarn at the base of the collar.Chain 1 , then work a row of SC evenly down the entire edge.

Row 2 (Button Holes)

Row 2Button Holes Chain 1 and Turn . Work 18 SC . Create a button hole: Chain 2 , Skip 2 stitches . Repeat the sequence of 18 SC , Chain 2 , Skip 2 stitches until the end.
Row 3(Finish Holes): Chain 1 and Turn . Work SC in each stitch. When you reach a Chain-2 space , work 2 SC into the space to cover the gap.Fasten off .Opposite Placket: On the left front edge, work three rows of SC just like the first side, but do not create any button holes .

Assembly

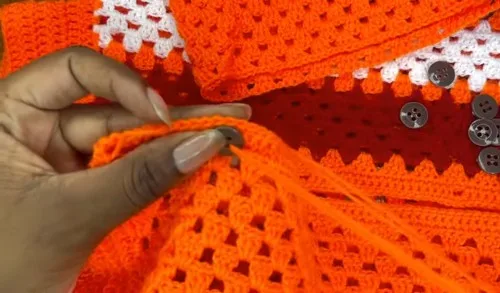
Step 1Sew buttons onto the left front placket to align with the button holes on the right placket.
Step 2Weave in all loose ends.

Tester's notes

3 mm hook holds the granny stitch loose enough for the DC clusters to block flat; a smaller hook draws the panel tight and shrinks the finished width.

180 grams is the total yarn used for the piece as tested; buy extra if the shirt length exceeds the 300-chain sample.

300 chains apply only to the sample length; count and cut the foundation chain to the wearer's actual desired shirt length before working Row 1.

18 cm is the armhole opening the sleeve rounds are built to fit; mark it with a stitch marker before joining yarn for Round 1 of the sleeve. A separate 15 cm mark from the center line sets the shoulder width when seaming.

Row 3 and Row 4 of the panel are not the same row; alternate them exactly, since repeating one twice shifts the chain-1 spaces out of alignment.

One back panel and two front panels (each half the width of the back) are needed; the front panels' flat DC-row edges sit at the center front when laid out for seaming.

Work in progress

Granny square polo shirt pattern for confident beginners — photo 2
Granny square polo shirt pattern for confident beginners — photo 3
Granny square polo shirt pattern for confident beginners — photo 4

At a glance

Rounds14
Parts7
LevelBeginner
Time6-10 hours
Hook3 mm
YarnWorsted

Gauge check

After Round 1 of the sleeve, lay the armhole flat and measure straight across: it should still read close to the 18 cm opening it was worked around, not pulled tighter.

If the round measures noticeably smaller than 18 cm, size up the hook before continuing, since a tight first round will carry through the remaining sleeve rounds.

If something looks wrong

The panel edges wave instead of lying flat.
Uneven placement at the row ends is the usual cause. Check that the closing DC lands on the top of the 3rd skipped chain (Row 1) or the last stitch of the previous row (Rows 3 and 4), not one stitch off.
The sleeve round doesn't close evenly at the join.
The starting cluster and the closing slip stitch aren't meeting in the same space. Slip stitch to the top of the starting chain-3 exactly, not a nearby stitch, to keep the 18 cm round symmetrical.
The collar flares instead of sitting flat around the neck.
Extra increases beyond the stated 2 DC at each row end add width. Work exactly 2 DC in each row end around the neck opening across all rows, no more.
Button holes don't line up with the
Button positions weren't marked before working the button hole row. Mark both plackets with stitch markers first, then work Row 2 (Button Holes) to match those marks.

Yarn substitutions

Cotton, worsted weightLess stretch than the yarn used at 180 grams, so size up to a 3.5 mm hook to keep the granny clusters from tightening; drape sits stiffer and holds the collar shape better.
Acrylic, DK weightLighter than the 180 grams called for here, so plan on more yardage to reach the same 300-chain length; drop to a 2.5-3 mm hook to match gauge on the sleeve rounds.
Wool-blend, aran weightHeavier than the yarn used, so the same 3 mm hook produces a denser fabric and likely uses less than 180 grams to cover the same panel.
FAQs

Questions

How long should the foundation chain be?

Chain to the wearer's desired shirt length rather than a fixed count. The sample used 300 chains; cut off any extra foundation chain at the end for a clean edge before starting Row 1.

Can the sleeves be worked flat instead of in the round?

The pattern builds sleeves directly in the round around the 18 cm armhole opening, closing each round with a slip stitch. Working flat would mean converting every round into a turned row plus adding seam allowance, which isn't part of this pattern.

How much yarn does the whole shirt take?

About 180 grams total on a 3 mm hook, based on the tested shirt length of 300 chains. A longer foundation chain will need more yarn than that.

One at a time —

Get the next pattern

Tested round by round before it is sent. No spam.