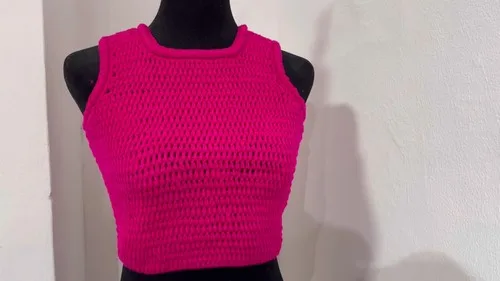
Made and counted by Wren —

Crochet vest top with puffy trim and armhole shaping

3.0mm hook, milk cotton yarn: seamless in-the-round vest top with puffy chain trim, 3 sizes.

Crochet vest top with puffy trim and armhole shaping
IntermediateLevel
4-6 hoursTime
3.0 mmHook
WorstedYarn
Jump to the pattern

About this pattern

A seamless, in-the-round vest top built from a joined foundation chain of 130 to 170 stitches depending on size, worked in double crochet for 18 to 22 rounds before flat armhole shaping and a single crochet border finish it off. A 3.0 mm hook and roughly 4 balls of milk cotton yarn complete the body; an optional 6.0 mm hook and three-strand chain add puffy trim to neckline and hem.

This vest top begins as a single chain of 130 (Small), 140–150 (Medium), or 170 (Large) stitches, joined with a slip stitch into a continuous round before double crochet builds the body for 18, 20, or 22 rows depending on size. Armhole shaping then splits the work flat for a short run of decrease rows, finished with a single crochet armhole border and an optional puffy trim worked from three strands of yarn on a 6.0 mm hook. The number that matters most: the starting chain length, since it sets the entire fit before a single decrease happens.
The pattern

Written out round by round

Materials

  • 3.0 mm crochet hook
  • Milk cotton yarn (approx. 4 balls)
  • Scissors
  • Stitch markers
  • Measuring tape

Abbreviations

  • sc = single crochet
  • dc = double crochet

Chain

Foundation Chain Start with a slip knot.

130 for Small 140–150 for Medium 170 for Large Body of the Vest (in the round)

Round 1Chain 2, skip the first 2 chains. Double crochet (DC) in each stitch across. Join ends with a slip stitch to form a circle.
Round 2Chain 3. Work DC between stitches from the previous row. For Rows 3–18 (Small) / 20 (Medium) / 22 (Large): Chain 3 at the start of each row.Continue placing DC between stitches. Repeat until the appropriate row count for your size.

Dividing and Decreasing (Shaping the Armholes)

Step 1: Divide the vest in half using stitch markers.

Decrease Row 1Chain 2. Skip first space, make an incomplete DC in next. DC until 3 stitches before next marker. Make 3 incomplete DCs, pull through all loops.
Decrease Row 2Chain 3, turn. Skip first stitch, make two incomplete DCs, pull through. Continue with DCs between stitches. Decrease at end like Row 1.For Decrease Rows 3–7 (Small) / 8 (Medium) / 9 (Large): Repeat the above method at beginning and end of each row.
Normal DC RowsNormal Double Crochet Rows Work 7 rows of normal DC (no decreases), from start to end of each row.
Armhole ShapingChain 3 and DC into only 8 stitches. Inside next two stitches, make a decrease.

Part 2

Round 1DC to end.
Round 2Chain 3, turn, DC to last 2 stitches, then decrease.Rows 3–4 (Small) / 5–6 (if desired): Repeat pattern. Fasten off and leave a long tail for sewing.Repeat on the opposite armhole, ensuring symmetry.

Optional: Two Panel Method For front/back panels, follow the same steps with 65 chains per panel .

Construct both panels identically.

Armhole Border

Round 1Work 2 SC per row around.

Assembly

Step 1Join Panels: Use single crochet or whip stitch to attach.
Step 2Puffy Edges:
Step 3Create a chain using 3 yarn strands and a 6.0 mm hook.
Step 4SC around chain to create puffy edging.
Step 5Repeat for neckline and hemline.
Step 6Finish: Weave in all loose ends for a polished look.

Tester's notes

3.0 mm hook drives every round of the body; keep it separate from the 6.0 mm hook needed later for the puffy edging so the two don't get swapped mid-project.

130, 140–150, or 170 starting chain stitches must lie flat and untwisted before the Row 1 slip stitch join, or the body spirals instead of stacking square.

18, 20, or 22 rounds build body height for Small, Medium, and Large; a stitch marker at the chain-3 turning point each round makes the count easy to confirm without recounting from the join.

65 chains per panel apply only to the optional two-panel method; don't substitute this number for the main in-the-round chain counts, since the two approaches aren't interchangeable mid-project.

Work in progress

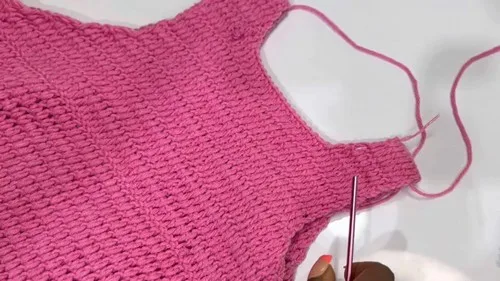
Crochet vest top with puffy trim and armhole shaping — photo 2
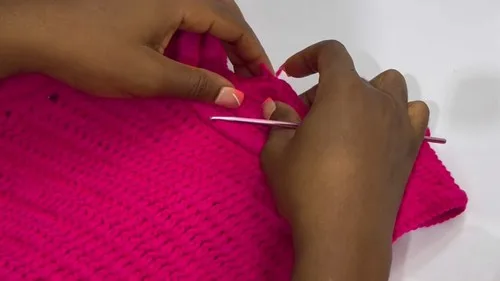
Crochet vest top with puffy trim and armhole shaping — photo 3

At a glance

Rounds9
Parts3
LevelIntermediate
Time4-6 hours
Hook3.0 mm
YarnWorsted

Gauge check

After joining Row 1 of the body, lay the circle flat and check it measures the intended bust circumference before starting the 18–22 rounds of double crochet, since no separate swatch gauge is given beyond the starting chain count.

If something looks wrong

The joined body twists or cups instead of lying flat.
The starting chain (130/140–150/170) was twisted before the Row 1 slip stitch join. Untwist the chain fully and check it flat against a table before joining.
Stitch count drifts across the 18–22 rounds of the body.
A chain-3 at a row start is being skipped or double-counted as a stitch. Count stitches every few rounds and treat the chain-3 consistently as the first double crochet.
The two armholes end up different depths or shapes.
Part 2's decrease rows (3–4 for Small, 5–6 if desired) weren't mirrored on the second side. Work the second armhole in the same stitch order and decrease points as the first, using a marker to track them.
The trim lies flat instead of looking puffy.
The base chain for the edging wasn't built from three yarn strands on the 6.0 mm hook as specified. Rebuild the chain with all three strands held together before working single crochet around it.

Yarn substitutions

Cotton-blend, worsted weightClose match to milk cotton in weight; expect slightly less drape and a firmer fabric, hook stays near 3.0 mm.
Acrylic, worsted weightLighter finished vest with less stretch recovery than milk cotton; sizing down to a 2.75 mm hook keeps stitches from looking loose.
Cotton-linen blend, DK weightThinner fabric with a looser hand, so more rounds than the stated 18/20/22 may be needed to hit the same length; hook can drop to 2.75–3.0 mm.
FAQs

Questions

Which chain count matches which size?

Chain 130 for Small, 140–150 for Medium, or 170 for Large as the starting round. This chain is joined into a circle before any double crochet rows begin.

How does the two-panel method differ from the main pattern?

Instead of one joined round, each of the front and back panels starts from 65 chains and is worked flat. The panels are then joined with single crochet or whip stitch along the sides.

What hook does the puffy edging need?

The puffy edging uses a 6.0 mm hook with three yarn strands held together for the base chain, then single crochet worked around it with the same setup. This is separate from the 3.0 mm hook used for the body.

One at a time —

Get the next pattern

Tested round by round before it is sent. No spam.