About this pattern
US G-6 (4.0mm) hook, worsted velvet yarn: 23-round body horse amigurumi with hoof-color legs.
Made and counted by Wren —
US G-6 (4.0mm) hook, worsted velvet yarn: 23-round body horse amigurumi with hoof-color legs.
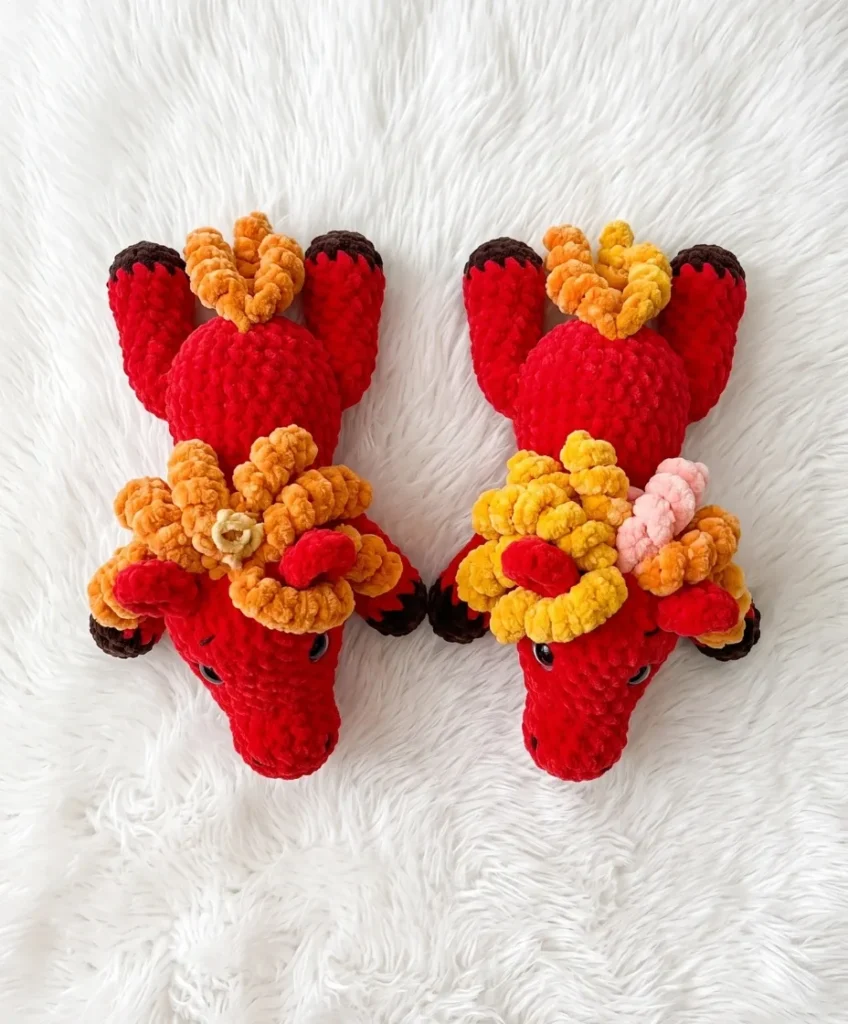
US G-6 (4.0mm) hook, worsted velvet yarn: 23-round body horse amigurumi with hoof-color legs.
The pattern
Rounds ticked off
0 of 0 rounds
Tap a round as you finish it. This device remembers where you stopped.
Yarn
Accent yarn
Hook size
Safety eyes
Stitch markers
Stuffing
Abbreviations
Begin with hoof color yarn.
Begin with hoof color yarn.
Use a US G-6 / 4.0 mm hook as the pattern's baseline; adjust up or down only if Rnd 2 of a test piece cups or gaps rather than lying flat.
Place a stitch marker in the first stitch of every round — all pieces work in continuous spiral with no joining, so the marker is the only way to track round starts.
Legs change from hoof color to body color at Rnd 4; arms change at Rnd 3 (after a BLO round at Rnd 2). Carry the old color loosely inside the piece instead of cutting it if a hoof-color detail repeats later.
Do not stuff the arms — after Rnd 8 they are closed flat with a 3-sc seam and set aside for attaching flat against the body.
Insert the 12 mm safety eyes before fully closing Rnd 23 of the body, positioned symmetrically between Rnds 17–18 on either side of the muzzle join; backings need to be secured while the round is still open enough to reach inside.
This pattern is written in US crochet terminology. Stitch counts are given at the end of each round in parentheses, e.g. (##), and all pieces are worked in a continuous spiral — do not join at the end of each round unless instructed.
Plush/velvet yarn hides stitch definition beautifully, so don't stress about perfectly even tension — the finished piece will look polished regardless.
Keep your tension snug throughout. Plush yarn is forgiving visually, but loose stitches will let fiberfill peek through gaps. If you're finding the fabric too open, drop down to a 3.5 mm hook.
Use the invisible decrease for every dec. Insert your hook through the front loops only of the next two stitches, yarn over and pull through both front loops, then complete the stitch as normal. This eliminates the small hole a standard decrease creates — especially noticeable in the head shaping.
Stuff the foot firmly, the body moderately. A well-stuffed foot helps the horse stand (or perch) upright. The body should be firm but not stretched — if you can see the stuffing color through the yarn, you've gone too far.
When attaching arms and legs through the body, slow down and make sure you're catching the flat folded edge evenly. If a limb twists, it won't hang correctly. A stitch marker through the center fold of each limb helps keep it aligned before you crochet it in.
Plush yarn tangles easily — keep your yarn cake in a zippered bag or bowl while you work to stop it from shedding and tangling as you pull lengths through.
| Rounds | 39 |
|---|---|
| Parts | 5 |
| Level | Intermediate |
| Time | 4-6 hours |
| Hook | 4.0 mm |
| Yarn | Worsted |
After Rnd 2 of the muzzle or leg (12 sc), check that the circle lies flat with no cupping or rippling at the edge.
If it cups, size up the hook; if it ripples, size down — gauge itself is not critical, but stitch tightness needs to keep stuffing from showing through.
| Acrylic worsted (non-velvet, smooth) | Stitch definition sharpens and the surface loses the plush texture; same hook size works, but stuffing may show at lower tension since smooth acrylic has less loft than chenille-style yarn. |
|---|---|
| Cotton worsted | Fabric stiffens and holds shape with less fill, so slightly less fiberfill is needed; drape drops and a 4.0 mm hook may need to size down to 3.5 mm for the same 12-sc circle to lie flat. |
| Bulky-weight chenille | Finished horse scales up noticeably from the same round counts; move to a 5.0-5.5 mm hook and expect to need more fiberfill per piece to fill the larger stitches. |
Original pattern: https://amigurumiarts.com/plush-crochet-horse-amigurumi-free-pattern/
No. The pattern specifies leaving the arms unstuffed and closing Rnd 8 flat with a 3-sc seam across the opening, so they lie flat when attached to the body.
Before Rnd 23 of the body is fully closed, positioned symmetrically between Rnds 17-18 on either side of the muzzle join. Closing the round first makes it difficult to reach inside to secure the backings. A good trick is to use straight pins or locking stitch markers as placeholders before committing — step back and look at the face from a distance before snapping the backings on permanently. Once the safety eye backings are locked, they cannot be removed without damaging the yarn.
Yes, you can substitute a standard worsted weight yarn and the pattern will still work with the same hook size. Keep in mind that the texture will be noticeably different — regular yarn will show your stitch definition more clearly, which means your tension needs to be more consistent. The finished horse will also feel firmer and less velvety than the plush version.
Crocheting the limbs directly into the body creates a much stronger and more secure attachment than sewing them on afterward — this is especially important for a toy that will be handled by young children. It also gives the limbs a clean, neat look with no visible seam at the join point. The technique takes a little practice but becomes very natural after your first attempt.
One at a time —
Tested round by round before it is sent. No spam.
That was the last round. Would you like an email when the next one is finished?