Made and counted by Wren —

Snail Granny Square — Free Crochet Pattern with 3-Color Tube

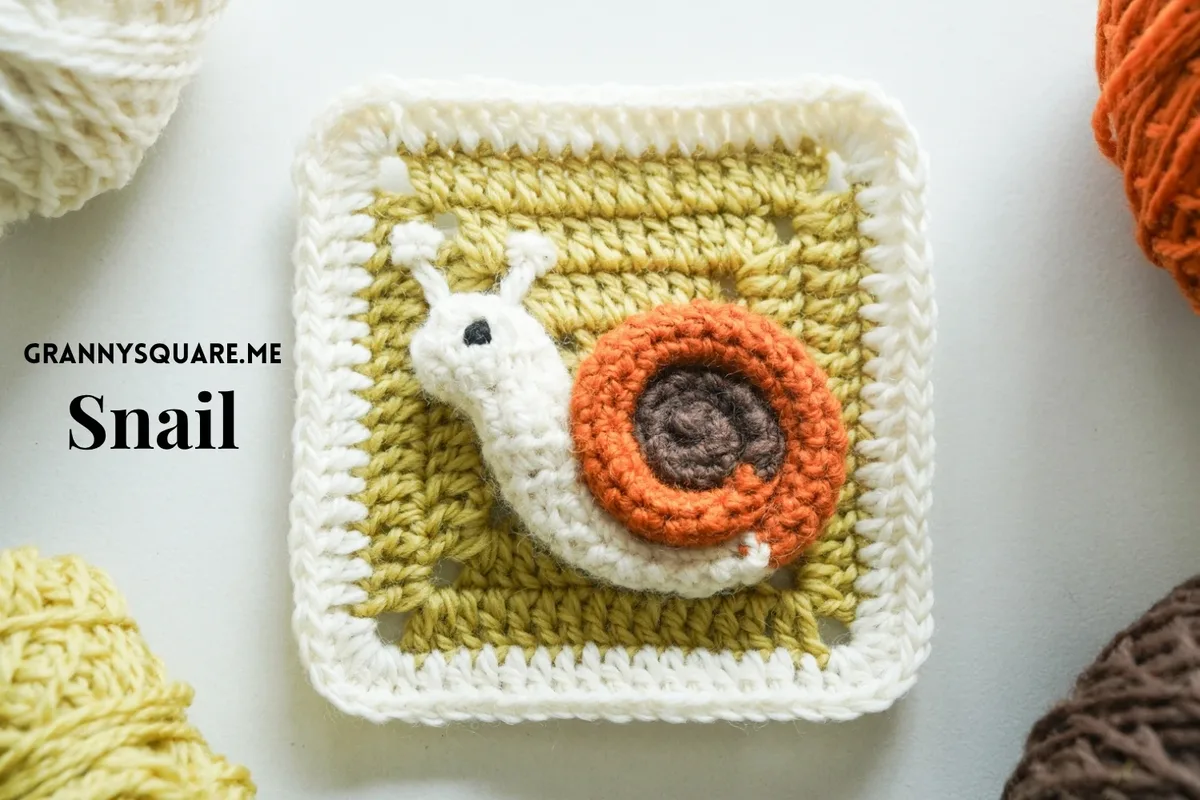
Free snail granny square crochet pattern with a 3-color sculpted tube and shell. Beginner-friendly color changes, 4.13-inch finished square

IntermediateLevel
3-4 HoursTime
3.00 mmHook
DK / SportYarn
Jump to the pattern

About this pattern

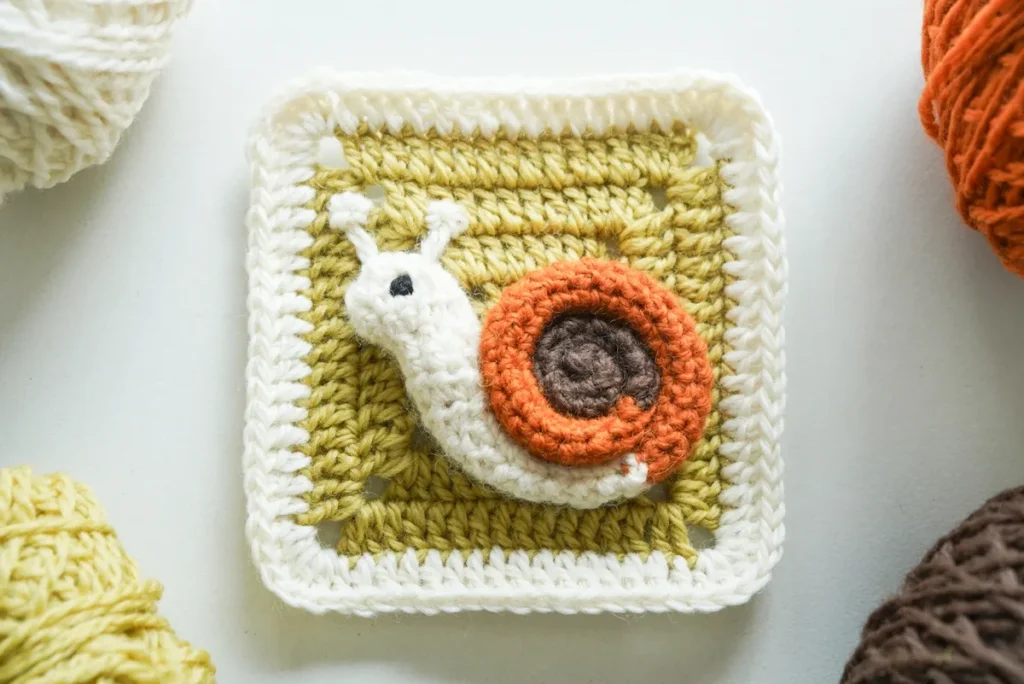
This pattern creates a little sculpted snail worked as a three-color tube that starts at the tip of the tail with just 3 single crochet in a magic loop and grows all the way up to the head. What makes it special is that the snail isn't appliquéd flat — the body is crocheted as a tube first, then rolled up to form the body and head, so the finished granny square has real dimension. It's assembled onto a solid granny square background, which means it mixes happily with other 3D squares made the same way. It's perfect for anyone building a creature sampler blanket, a garden-themed cushion, or a baby playmat that begs to be touched

Technique-wise you'll work a magic loop, single crochet increases, sc2tog and hdc2tog decreases, one front-loop-only round, some half double crochet shaping at the head, and — the star of the show — two mid-round color changes: to orange during the final sc of Round 13, and to white during the final sc of Round 37. Almost all of it is single crochet worked in joined rounds with ch1 as a standing stitch, so there's nothing exotic to learn. If you're a confident beginner ready to level up your color work, this is a friendly stretch. Expect around 3-4 hours from magic loop to finished square

The finished Snail Granny Square measures about 4.13 × 4.13 inches in DK sport wool with a 3.00 mm hook, which is that ideal sampler size — small enough to whip up in an evening, big enough for the snail's stripes to read clearly from across a room. The tube is dense and squishy, the FLO round gives the shell a crisp defined edge, and the whole thing has that irresistible pat-me quality. Make one as a gift topper, or make forty and turn them into a blanket

Whether you're crocheting for a nursery, a niece, or your own sofa, this snail brings personality to a format that's often purely geometric — and that's exactly why people keep coming back to it

Variations

Color is where this snail really opens up. The sample runs a classic shell palette — a warm base, orange for the mid-section, white at the head — but try a bubblegum trio (Paintbox Simply DK in Bubblegum Pink, Marshmallow, and Vanilla Cream) for a nursery square, or go earthy with Drops Merino Extra Fine in Camel, Rust, and Off White for a woodland sampler. A rainbow version is stunning too: instead of the single change at Round 13, change color every 6 rounds and you'll get a candy-striped shell that spirals as you coil it. Want a bigger snail? Add two extra increase rounds early — take the body from 6 sc around up to 8 sc around before you settle into the straight rounds — and add roughly 8-10 extra plain rounds to the tube so the coil still wraps completely. That gives you a snail sized for a 6-inch square. For a mini version, end the long straight section at Round 30 instead of Round 37 and skip the second color entirely; two colors read beautifully at small scale. Yarn substitutions are easy since the tube is almost all single crochet. Cotton like Scheepjes Catona gives crisp stitch definition and a firmer shell that holds its coil. A soft acrylic like Stylecraft Special DK keeps it washable for baby projects. For a seasonal spin, work the shell in deep green and cream for a holiday square, or use a self-striping sock yarn with a 2.5 mm hook for a tiny jewel-toned snail. And don't overlook the fourth color: the granny square background changes the whole mood — cream for cottagecore, charcoal for a modern high-contrast look, sage green for garden vibes

I fell for this one at Round 3. You start with just 3 single crochet in a magic loop — a tail tip so tiny it barely exists — and then you watch it grow, one sc increase at a time, until suddenly you're at 6 stitches around and it's unmistakably a snail body. There's something so satisfying about that slow reveal. The color changes are my favorite part: because you change during the final sc of Round 13 and again during the final sc of Round 37, the stripe transitions land in exactly the same spot every time, which means your color joins spiral beautifully instead of scattering randomly around the tube. The FLO round at Round 38 is a small detail with a big payoff — it creates a visible ridge that reads as the lip of the shell, and it's the thing people notice without knowing why the snail looks so right. Then the head widens with a few hdc rounds and cinches closed again with hdc2tog, so there's almost no sewing at the tip. Fifty-one rounds of quiet, rhythmic stitching and you have a creature. I've made six
Common mistakes

  • Completing the stitch before the colorWork the final sc of Round 13 (and again of Round 37) only up to the point where two loops remain on your hook. Drop the old color, yarn over with the new color, and pull through both loops. That last pull-through is what forms the top of the stitch — which is why the change must happen there, not after the stitch is finished
  • Treating the 'ch1 as a standing st'The ch1 stands in for the first sc, so it counts as one of your stitches for that round — do not also crochet a separate sc into the same base stitch. Recount after every round: 3, then 3, then 4, holding at 4, then 6. If your count creeps up, you're double-counting the standing chain
  • Losing track of the magic loop startAfter you slip stitch to the first sc of the magic loop round, pull the tail firmly to cinch the ring closed, then weave that tail up through the inside of the tube for at least an inch before trimming. On a 3-stitch magic loop there is very little yarn holding it — a loose cinch will gape once you roll the tube
  • Working Round 38 through both loops outRound 38, insert your hook under the front loop only — the loop nearest you as you look at the work. The back loops are deliberately left free so they form a visible horizontal ridge. If you catch both loops, frog just that round; it's a single round and it's the whole reason the shell edge reads correctly
  • Slip stitching into the wrong stitchAlways slip stitch to the first stitch of that same round — the one the ch1 or ch2 stands in for. On Round 38 that means slip stitching to the first sc2tog, not to the plain sc beside it, and on Rounds 50 and 51 it means the first hdc2tog. A locking stitch marker moved into the first stitch of each round takes ten seconds and eliminates this entirely
  • Rolling the whole tube up at the endThe pattern says to roll it into its signature shape, sewing as you go with a long tail — take that literally. Coil an inch or two of the tail end, anchor it to the coil beneath with a few stitches, then roll a little more and anchor again. Sewing in stages keeps each wrap sitting exactly where you put it and stops the shell from unwinding while you work
  • Weaving the color-change tails in afterThe pattern tells you to wrap the tail of the yarn over your hook and weave it in during the following stitches. Trapping the tail inside the next 6-8 sc as you work distributes it invisibly and means zero darning needle work on the body later

The pattern

Written out round by round

Materials

  • Yarn of Your Choice- 4 colors, the sample is made with dk sport wool yarn, with a 3.00 mm crochet hook, the finished Snail Granny Square is about 4.13 × 4.13 inches
  • Crochet Hook — we used a 3.00 mm hook
  • Darning Needle
  • Scissors

Abbreviations

  • ch = chain stitch
  • hdc = half double crochet
  • sc = single crochet
  • dc = double crochet
  • Sl St = slip stitch for joining to a different round
  • st = stitch
  • inc = increase
  • tog = together
  • FLO = front loop only

The Snail

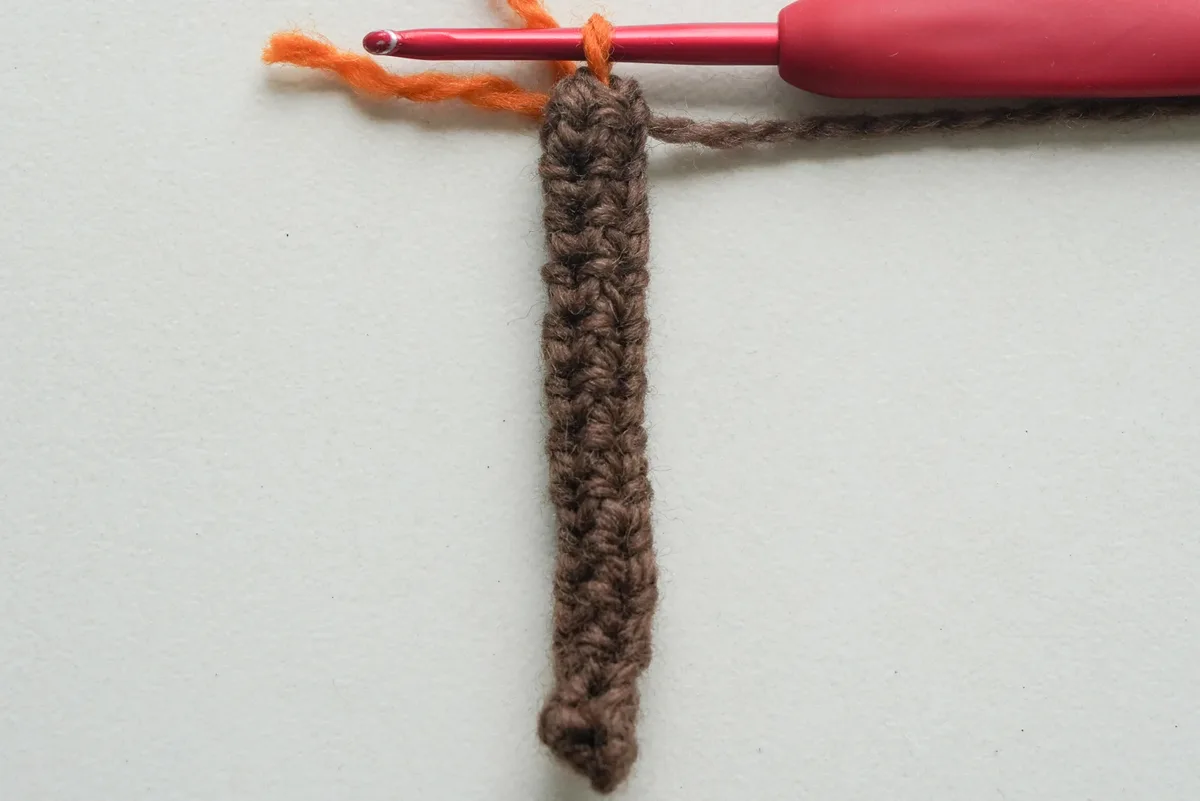
We will crochet a snail-shaped tube in three colors, starting with the tail and ending with the head. The snail's body is crocheted as a tube first, then rolled up to form the body and head. We mainly use single crochet, single crochet increases, and slst.

How to change the color: When you see a color change in the tutorial, work until you reach the stitch for changing, finish the stitch as required, and leave the last two loops on the hook. Yarn over with new color and pull through to complete the stitch. Then wrap the tail of the yarn over your hook and weave in during the following stitches.

Round 1 is the foundation of the snail — it forms the very tip of the tail.

  1. Round 1Ch1+3sc in a magic loop, slst to the first sc.
  2. Round 2ch1 as a standing st, 1sc in each st (3sc), slst to the first sc.
  3. Round 3ch1 as a standing st, sc inc in the same st, 2sc, slst to the first sc.
  4. Round 4-13For each round, ch1 as a standing st, sc in each st around (4sc), slst to the first sc. Change to orange during the final sc of Round 13.

Round 14 is the change-color round: because the change was made during the final sc of Round 13, Round 14 is the first round worked entirely in orange.

  1. Round 14ch1 as a standing st, sc in each st(4sc), slst to the first sc.
  2. Round 15ch1 as a standing st, sc inc in the same st, 3sc , slst to the first sc.
  3. Round 16ch1 as a standing st, sc inc in the same st, 4sc , slst to the first sc.
  4. Round 17-37For each round, ch1 as a standing st, sc in each st around (6sc), slst to the first sc. Change to white during the final sc of Round 37.
  5. Round 38FLO . ch1 as a standing st, sc2tog, 2sc, sc2tog, slst to the first sc2tog.
  6. Round 39-41ch1 as a standing st, sc in each st around (4sc), slst to the first sc.
  7. Round 42ch1 as a standing st, sc inc in this st, 3sc , slst to the first sc.
  8. Round 43ch1 as a standing st, 1sc in the same st, 3sc , sc inc , slst to the first sc.
  9. Round 44ch1 as a standing st, 1sc in the same st, 4sc , sc inc , slst to the first sc.
  10. Round 45ch2 as a standing st, 2sc, 2hdc, hdc inc, 1hdc, slst to the top of the first ch2.
  11. Round 46ch2 as a standing st, 2sc, 2hdc, hdc inc, 2hdc, slst to the top of the first ch2.
  12. Round 47-48ch1 as a standing st, sc in each st around (9sc), slst to the first sc.
  13. Round 49ch2 as a standing st, 2hdc, work (sc inc) 5 times, 1hdc, slst to the top of the first ch2.
  14. Round 50ch1 as a standing st (count as incomplete hdc), 1hdc in the next st to form the first hdc2tog, hdc2tog, 6sc, work (hdc2tog) 2 times, slst to the first hdc2tog.
  15. Round 51ch1 as a standing st (count as incomplete hdc), 1hdc in the next st to form the first hdc2tog, hdc2tog, sc2tog, work (hdc2tog) 2 times, slst to the first hdc2tog. Fasten off and weave in ends.

After completing the snail, roll it into its signature shape. Sewing as you go with a long tail. Leave a long tail for attaching it to the granny square background later.

Granny Square Background

The snail is done. Now it's time for a Basic Solid Granny Square. The only twist is a color switch in Round 5.

  1. Round 1magic loop, ch3(count as 1dc), 3dc+ch3; [4dc+ch3] repeat 3 times, omit the final ch3, work ch1+1hdc to join the top of the first ch3.
  2. Round 2-3ch3 to begin (count as 1dc), 1dc in the same corner. Work 1dc in each st around, (2dc+ch3+2dc) in each corner as you go. When you reach the end of the round and return to the starting corner, 2dc into the starting corner, join the round with ch1, 1hdc into the top of the beginning ch3.
  3. Round 4Work as above for sides and corners. When you return to the starting corner, work 2dc+ch3, then slst to the top of the first true dc. Fasten off.
  4. Round 5Add new yarn in any corner, ch3 to begin (count as 1dc), 5dc in each corner, 1dc in each st, slst to the top of the first ch3 at the end, fasten off.Assemble: attach the snail to the granny square, sew the antennae to the top of the snail's head, and make a French knot for the eye.

Important notes

💡 The 3.00 mm hook is deliberately small for DK sport weight — that tight gauge is what keeps the single crochet tube dense enough to hold its snail shape and gives the stated 4.13 × 4.13 inch finished square. If your stitches look gappy, drop to 2.75 mm before you blame the yarn

💡 Prepare all four colors before you start — three for the snail plus one for the granny square background — and keep the non-working strands loosely wound at the base of your project rather than in separate corners of the room. Mid-round color changes go much faster when the new color is already within arm's reach and untangled

💡 Use a locking stitch marker in the first stitch of every round rather than a strand of scrap yarn. Since so many rounds are identical (plain sc all the way around at 4 or 6 stitches), the marker is your only reliable landmark for finding the join and hitting Rounds 13 and 37 accurately

💡 Keep a simple tally on paper or a phone note as you go. Rounds 4-13 and 17-37 repeat with no visual change, and missing or doubling a round throws off where your color changes land — which is the one thing that's genuinely visible in the finished square

💡 Don't cut your yarn short at Round 51. You need one long tail to roll the tube into its signature shape while sewing as you go, and enough left over to attach the finished snail to the granny square background. Running out mid-coil means joining a new strand in the most awkward possible place

💡 Block the finished square lightly before joining it into a blanket. Pin the base square flat and let the snail sit proud on top — steam the square only, never press the 3D tube, or you'll flatten the shell curl you worked so hard for

More photos

Snail Granny Square — Free Crochet Pattern with 3-Color Tube — photo 2
Snail Granny Square — Free Crochet Pattern with 3-Color Tube — photo 3
Snail Granny Square — Free Crochet Pattern with 3-Color Tube — photo 4
FAQs

Frequently asked questions

Do I need to stuff the snail tube?

No — the pattern never calls for stuffing. The tube is only 3 to 9 stitches around, which keeps it naturally dense, and it's rolled into the snail shape and sewn as you go with a long tail. If you want a plumper shell you can push tiny pinches of fiberfill into the wider section before rolling, but leave the narrow tail end empty or it won't curl

Can I make this square with worsted weight yarn instead of DK sport?

Absolutely — just size your hook up to about 4.00 mm and expect a finished square closer to 5.5 inches instead of 4.13. Keep every stitch count exactly as written; only the finished dimensions change, so make sure the rest of your blanket squares use the same yarn

Why does the pattern say to change color during the last stitch instead of after it?

The final yarn-over of any stitch actually forms the top loops of that stitch, which belong visually to the next round. Work until you reach the stitch for changing, finish it as required but leave the last two loops on the hook, then yarn over with the new color and pull through — that way your new color starts cleanly at the round boundary instead of leaving one odd-colored V sticking out

What does FLO mean and why is it used in Round 38?

FLO stands for front loop only — you insert your hook under just the loop closest to you instead of both loops. Working Round 38 in FLO leaves the back loops exposed as a raised ridge, which creates the defined lip of the snail's shell

How do I attach the snail tube to the granny square base?

Roll the finished tube into its signature spiral with the tail at the centre and the head curling outward, sewing as you go with the long tail so each wrap stays put. Then use the remaining tail to stitch the underside of the coil to the granny square, sew the antennae to the top of the head, and make a French knot for the eye. Leave the head slightly loose so it lifts off the surface for that 3D look

My square is coming out smaller than 4.13 inches — what went wrong?

Nothing is wrong, you're just crocheting at a tighter gauge than the sample, which is extremely common with single crochet. Go up half a hook size and remake one square to compare; consistency across all your squares matters far more than matching the stated measurement exactly

One at a time —

Get the next pattern

Tested round by round before it is sent. No spam.