Made and counted by Wren —

Plush Giraffe Amigurumi Crochet Pattern (Free)

Crochet an adorable plush giraffe amigurumi with velvet yarn, cute ossicones, and spotted body. Free pattern with tips for a soft, gift-ready toy.

Plush Giraffe Amigurumi Crochet Pattern (Free)
IntermediateLevel
4-6 HoursTime
3.5 mmHook
BulkyYarn
Jump to the pattern

At a glance

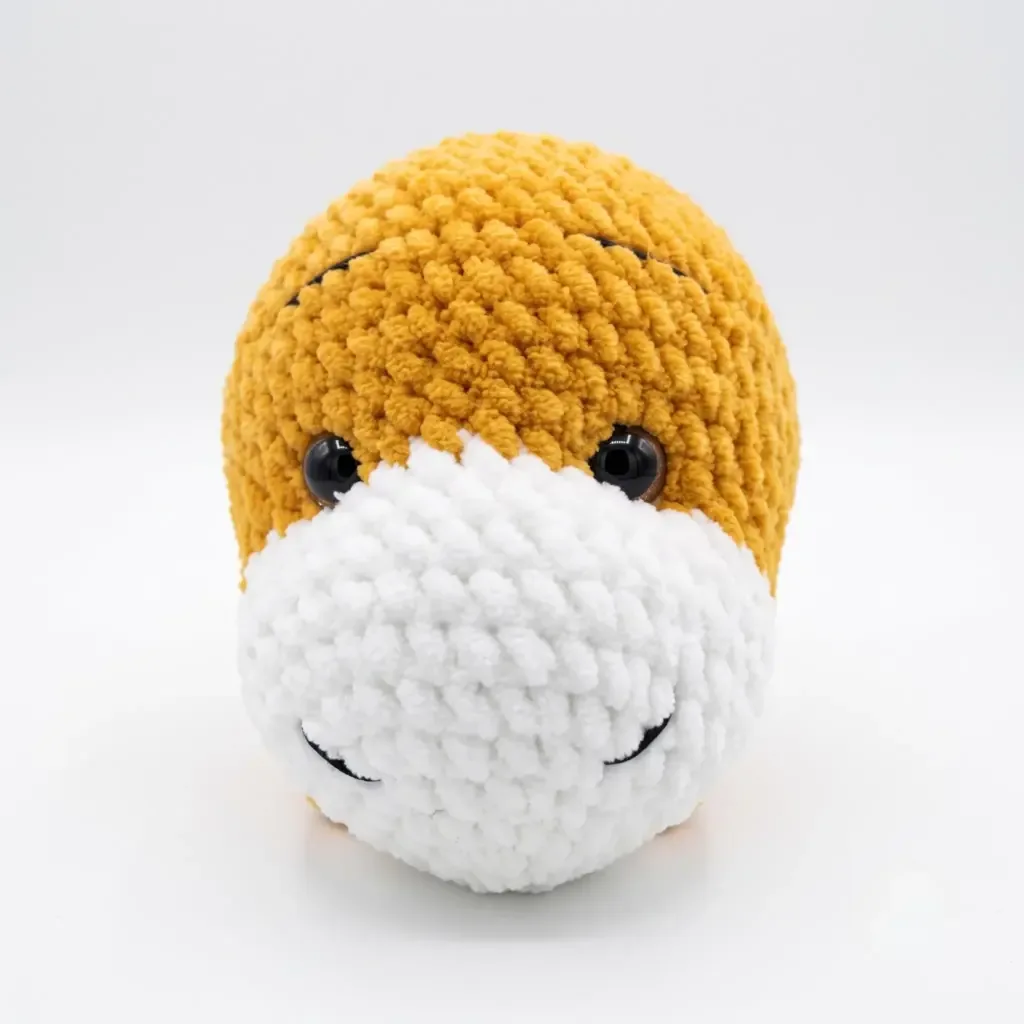
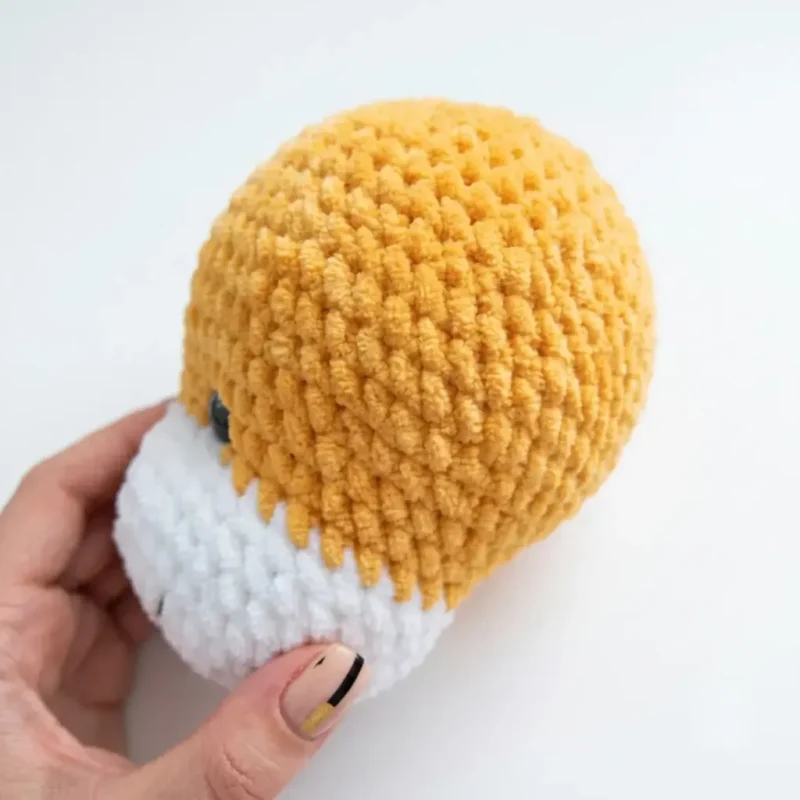
Start by crocheting the head in a continuous spiral, shaping the rounds to form the giraffe's distinctive long face.

Insert the black safety eyes at the marked point on the head, then stuff firmly and finish shaping the top.

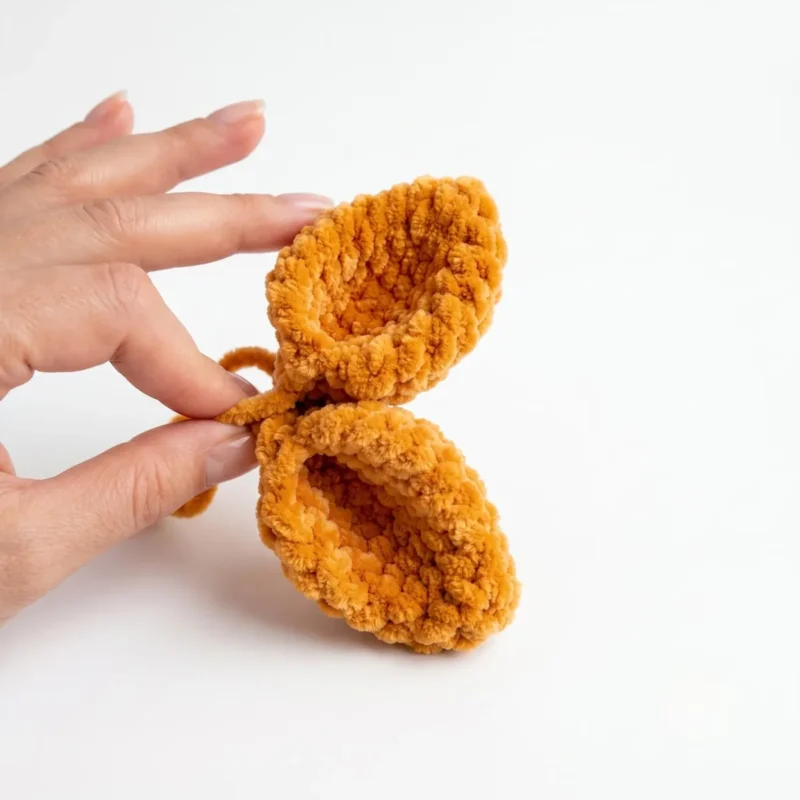
Crochet both ears and both ossicones separately, stuffing lightly and setting them aside for attachment later.

Work the body in spiral rounds, shaping the increases and decreases that give the giraffe its rounded torso.

Crochet all six spots individually, then pin and sew them onto the body in a scattered, natural pattern.

Assemble everything by attaching the head, ears, ossicones, arms, legs, and tail to the stuffed body, then embroider the mouth.

About this pattern

This Plush Giraffe Amigurumi is a lanky, lovable safari friend built from soft bulky-weight plush yarn, complete with a patterned muzzle, tiny ossicones, and a set of six brown spots scattered across its body. What makes this pattern special is how every small detail — the white muzzle center, the black safety eyes, the embroidered mouth — comes together to give the giraffe real personality. It's perfect for amigurumi makers who love animal patterns with a bit more character than a basic round critter.

You'll work the head, body, ears, ossicones, arms, legs, and spots all in continuous spiral rounds, so a stitch marker is essential for tracking your round starts. Expect to use color changes for the muzzle and spots, careful shaping through increases and decreases for the giraffe's distinctive long neck and legs, and a final embroidery step for the mouth. This is an intermediate-friendly project — comfortable beginners can manage it, but prior amigurumi experience with piece assembly will help. Plan on 4-6 hours total between all the components.

The finished giraffe comes out plush, dense, and satisfyingly huggable thanks to the bulky-weight velvet-style yarn and tight gauge that keeps the fiberfill fully hidden. With its tall proportions, spotted coat, and sweet embroidered smile, it makes a charming nursery decoration or a one-of-a-kind handmade gift for a baby shower, birthday, or animal-loving crocheter on your list.

Variations

This pattern is wonderfully easy to customize once you've got the basic giraffe shape down. For a completely different animal-print vibe, try swapping the yellow main color for a soft caramel or tan (like Bernat Baby Velvet in 'Toast' or Comfy Cotton Blend in 'Sand') paired with darker brown spots for a more realistic reticulated-giraffe look. Want a fantasy version instead? Go pastel — lilac body with white spots and a silver-grey muzzle makes a sweet 'unicorn giraffe' hybrid that's especially popular for nursery gifts. For size changes, work the same pattern in a worsted-weight yarn with a smaller E-4 or D-3 hook to shrink the finished giraffe by roughly 20-25%, which is great for keychains or ornament-sized versions (just expect tighter, more time-consuming stitches at that gauge). Going the other direction, a super bulky yarn with an F-5 or G-6 hook will puff the giraffe up into an extra-cuddly oversized cushion-buddy — just watch your stitch tension so gaps don't appear. Seasonal spins are fun too: add a small crocheted scarf around the neck for a winter version, or embroider tiny flowers along the spots for a spring theme. You can also experiment with the spots — instead of six separate brown circles, try clustering smaller spots for a giraffe-calf look, or scatter them asymmetrically for a more whimsical, hand-painted appearance. If you want a girl/boy gift distinction, a bow at the ear or a tiny crocheted bowtie at the neck is an easy five-minute addition that doesn't require altering the base pattern at all.

I adore this giraffe pattern because it turns basic amigurumi shaping into something with real character. Watching the spiral rounds build up that long giraffe neck on the head piece, then adding the white muzzle center and tiny brown spots one by one, is such a satisfying process. The ossicones are a fun, quick little detail that instantly reads 'giraffe' the moment you attach them. I also love working with bulky-weight plush yarn here — it stitches up fast, feels incredibly soft in your hands, and gives the finished toy that irresistible velvety texture kids and adults both want to squeeze. Placing the 10-12mm safety eyes and stitching the embroidered mouth is where the giraffe's personality really shows up, and it's my favorite moment in any amigurumi build. With six spots to make and attach, there's a nice rhythm to this project — enough repetition to relax into, but enough variety between the head, ears, arms, legs, and body to keep it interesting from start to finish.
Common mistakes

  • Stuffing too loosely, causing fiberfillUse a slightly smaller hook than you normally would (E-4/3.5mm) and stuff firmly in small handfuls as you go, pushing fill into corners with your fingers before closing each section.
  • Attaching the safety eyes and ossiconesInsert eyes and pin ossicones in place first, then step back and look at the head from multiple angles before snapping the eye backs on permanently.
  • Skipping or rushing the invisibleWork decreases by inserting your hook into the front loops only of the next two stitches, pulling up a loop through both, then yarning over — this keeps the giraffe's shaping smooth and gap-free.
  • Sewing all six spots in the same spotVary spot placement and slightly rotate a few spots before sewing them on so the coat pattern feels organic and natural, like a real giraffe's markings.

The pattern

Written out round by round

Materials

Yarn

  • Bulky-weight plush/velvet yarn in Yellow (main color), Brown (muzzle, hooves, spots, horns), and White (muzzle center)

Hook

  • US size E-4 (3.5 mm) hook, or the size that gives you a tight, gap-free fabric

Safety eyes

  • 10–12 mm, black, 1 pair
  • Polyester fiberfill stuffing
  • Stitch markers
  • Yarn/tapestry needle
  • Scissors
  • Small amount of dark embroidery thread or yarn for the mouth

Abbreviations

  • ch = Chain
  • dec = Decrease (invisible decrease recommended)
  • inc = Increase (2 sc in same stitch)
  • MR = Magic Ring
  • sc = Single Crochet
  • sl st = Slip Stitch
  • st(s) = Stitch(es)

Head

Worked first in Brown, then switching to Yellow.

  1. Round 16 sc in MR. (6)
  2. Round 2inc in each st around. (12)
  3. Round 3sc, inc repeat around. (18)
  4. Round 42 sc, inc repeat around. (24)
  5. Round 53 sc, inc repeat around. (30)
  6. Round 64 sc, inc repeat around. (36)
  7. Round 7-10sc in each st around. (36)Switch to Yellow for the remaining rounds.
  8. Round 11sc in each st around. (36) Insert safety eyes now, spacing them 7–8 stitches apart.
  9. Round 125 sc, inc repeat around. (42)
  10. Round 13sc in each st around. (42)
  11. Round 146 sc, inc repeat around. (48)
  12. Round 15sc in each st around. (48)
  13. Round 167 sc, inc repeat around. (54)
  14. Round 17sc in each st around. (54)
  15. Round 187 sc, dec repeat around. (48)
  16. Round 19sc in each st around. (48)
  17. Round 206 sc, dec repeat around. (42)
  18. Round 21sc in each st around. (42)
  19. Round 225 sc, dec repeat around. (36)
  20. Round 23sc in each st around. (36)
  21. Round 244 sc, dec repeat around. (30)
  22. Round 253 sc, dec repeat around. (24)
  23. Round 262 sc, dec repeat around. (18)
  24. Round 271 sc, dec repeat around. (12)
  25. Round 28dec around. (6)Stuff firmly before closing. Fasten off, leaving a long tail for sewing to the body. Embroider a soft smile onto the white muzzle before attaching.

Ears (make 2)

Worked in Yellow throughout.

  1. Round 16 sc in MR. (6)
  2. Round 21 sc, inc repeat around. (9)
  3. Round 32 sc, inc repeat around. (12)
  4. Round 43 sc, inc repeat around. (15)
  5. Round 54 sc, inc repeat around. (18)
  6. Round 6-8sc in each st around. (18)
  7. Round 94 sc, dec repeat 3 times. (15)Fold flat and sew closed through both layers. Fold the finished ear in half once more, then sew it to the head between Rnds 18 and 21.

Horns/Ossicones (make 2)

Worked first in Brown, then switching to Yellow.

  1. Round 16 sc in MR. (6)
  2. Round 2inc in each st around. (12)
  3. Round 3sc in each st around. (12)
  4. Round 42 sc, dec repeat 3 times. (9)Switch to Yellow.
  5. Round 5-9sc in each st around. (9)Fasten off, leaving a tail. Attach horns to the head between Rnds 17 and 20, spacing them about 4 stitches apart.

Arms (make 2)

Worked first in Brown, then switching to Yellow.

  1. Round 16 sc in MR. (6)
  2. Round 2inc in each st around. (12)
  3. Round 31 sc, inc repeat around. (18)
  4. Round 4-5sc in each st around. (18)
  5. Round 61 sc, dec repeat around. (12)
  6. Round 7sc in each st around. (12)Switch to Yellow.
  7. Round 8-16sc in each st around. (12)Fold flat and sew closed through both layers.

Legs (make 2)

Worked first in Brown, then switching to Yellow.

  1. Round 16 sc in MR. (6)
  2. Round 2inc in each st around. (12)
  3. Round 31 sc, inc repeat around. (18)
  4. Round 42 sc, inc repeat around. (24)
  5. Round 5-6sc in each st around. (24)
  6. Round 72 sc, dec repeat around. (18)
  7. Round 87 sc, dec repeat twice. (16)Switch to Yellow.
  8. Round 9-16sc in each st around. (16)
  9. Round 172 sc, dec repeat 4 times. (12)
  10. Round 18-21sc in each st around. (12)Fold flat and sew closed through both layers.

Spots (make 6)

Worked in Brown.

  1. Round 16 sc in MR. (6)
  2. Round 2inc in each st around. (12)Fasten off, leaving a tail for sewing directly onto the body.

Body

Worked in Yellow, with legs and arms joined mid-round.

  1. Round 16 sc in MR. (6)
  2. Round 2inc in each st around. (12)
  3. Round 31 sc, inc repeat around. (18)
  4. Round 42 sc, inc repeat around. (24)
  5. Round 53 sc, inc repeat around. (30)
  6. Round 64 sc, inc repeat around. (36)
  7. Round 7-8sc in each st around. (36)
  8. Round 95 sc, inc repeat around. (42)
  9. Round 107 sc, sc across first leg joining it to the body with 6 sc, 15 sc, sc across second leg joining it with 6 sc, 8 sc. (42) This is where you attach both legs — hold each leg against the body opening and sc through both layers.
  10. Round 11-13sc in each st around. (42)
  11. Round 1410 sc, dec, 2 sc, dec repeat 5 times, 10 sc. (36) This forms the belly shaping — keep the decreases centered between the legs.
  12. Round 15sc in each st around. (36)
  13. Round 1610 sc, dec, 1 sc, dec repeat 5 times, 9 sc. (30)
  14. Round 17-18sc in each st around. (30)
  15. Round 198 sc, dec repeat 3 times. (27)
  16. Round 20sc in each st around. (27)
  17. Round 217 sc, dec repeat 3 times. (24)
  18. Round 224 sc, sc across first arm joining it with 6 sc, 5 sc, sc across second arm joining it with 6 sc, 3 sc. (24) Attach both arms the same way you attached the legs.
  19. Round 23-28sc in each st around. (24)Fasten off, leaving a long tail for sewing on the head. Stuff the neck very firmly so the head sits securely once sewn on.

Tail

Worked in Yellow, finished with a small brown tuft.

  1. Round 14 sc in MR. (4)
  2. Round 2-11sc in each st around. (4)Fasten off, leaving a tail for attaching to the body. Add a small tuft of brown yarn to the tip for the tail’s brush.

Assembly

Step 1

Stuff the Head firmly and set it aside — the eyes and smile should already be in place.

Step 2

Sew the Body’s legs and arms in place if you haven’t already joined them during Rnds 10 and 22.

Step 3

Attach the Head to the top of the Body using the long yarn tail, working a whipstitch around the neck opening and adding extra stuffing to the neck as you close the gap.

Step 4

Sew the Ears between Rnds 18 and 21 of the Head, and the Horns between Rnds 17 and 20, spacing horns about 4 stitches apart.

Step 5

Sew the six Spots onto the Body and legs in a pleasing scattered pattern.

Step 6

Attach the Tail to the lower back of the Body.

Step 7

Weave in all remaining yarn ends.

Important notes

💡 Use a US E-4 (3.5mm) hook or size down slightly if you're a loose crocheter — the goal is a tight, gap-free fabric so none of the fiberfill peeks through the bulky yarn stitches.

💡 Keep a stitch marker in the first stitch of every round at all times since all pieces (head, ears, ossicones, arms, legs, spots) are worked in continuous spiral rounds with no joining.

💡 Pre-cut small lengths of brown and white yarn before starting the head so your color changes for the muzzle go smoothly without you fumbling for yarn mid-round.

💡 Stuff the head and body firmly but stop just shy of the final closing rounds so you can still manipulate the opening for a neat, cinched finish.

💡 Test your 10-12mm safety eye placement with removable stitch markers first, viewing the head from the front, before pushing the washers on permanently.

💡 Sew all six spots on before attaching the arms and legs to the body — it's much easier to position them evenly on a flat, unencumbered body piece.

📏 This pattern is written in US crochet terms and finishes at about 38 cm (15 in) tall, including the horns — gauge isn't critical here, just work at a tension tight enough that stuffing doesn't peek through the stitches.

More photos

Plush Giraffe Amigurumi Crochet Pattern (Free) — photo 2
Plush Giraffe Amigurumi Crochet Pattern (Free) — photo 3
FAQs

Frequently asked questions

What yarn weight works best for this giraffe pattern?

A bulky-weight plush or velvet yarn is recommended for the soft, dense texture the pattern is designed around. If you substitute a worsted-weight yarn, size down your hook and expect a slightly smaller finished giraffe.

Can I make this giraffe without safety eyes?

Yes, you can embroider the eyes with black yarn or thread instead, especially if the toy is intended for a very young child. Just plan the eye placement at the same round on the head where the safety eyes would normally be inserted.

How much yarn do I need for each color?

The pattern uses yellow as the main color for the head, body, arms, and legs, with brown for the muzzle, hooves, spots, and horns, and white for the muzzle center. Exact yardage will depend on your gauge, but keep extra brown on hand since it's used across several small pieces.

Is this pattern good for a first amigurumi animal project?

It's better suited to someone with at least one or two amigurumi projects under their belt, since it involves multiple pieces, color changes, and careful assembly. A confident beginner comfortable with magic rings and decreases could still manage it with patience.

How do I keep the spots from looking messy when I sew them on?

Pin all six spots in place first and step back to check spacing and symmetry before sewing any of them permanently. Use a whip stitch close to the spot's edge and weave in ends on the inside of the body so nothing shows.

One at a time —

Get the next pattern

Tested round by round before it is sent. No spam.