Made and counted by Wren —

Free No-Sew Hedgehog Crochet Pattern

Make this free no-sew hedgehog crochet pattern with super bulky yarn and safety eyes—a fast, beginner-friendly amigurumi that stitches up in a weekend.

Free No-Sew Hedgehog Crochet Pattern
IntermediateLevel
4-6 HoursTime
3.5 mmHook
Super BulkyYarn
Jump to the pattern

At a glance

Start at the top of the head with a magic ring and increase steadily to build the rounded body shape.

Continue working the head and body as one seamless piece through all 13 rounds, adding stuffing as you go.

Set the body aside and crochet the small pointed nose separately using its two quick rounds.

Crochet the ears, keeping them small and simple so they'll sit neatly on the finished head.

Work the textured spine section that gives the hedgehog its signature bristly back detail.

Insert and secure the 10mm safety eyes on the face before the head closes up completely.

Assemble everything together, attaching ears, spines, and finishing touches using hot glue for a no-sew finish.

Attach the nose last, positioning it carefully at the tip of the face to complete the hedgehog's expression.

About this pattern

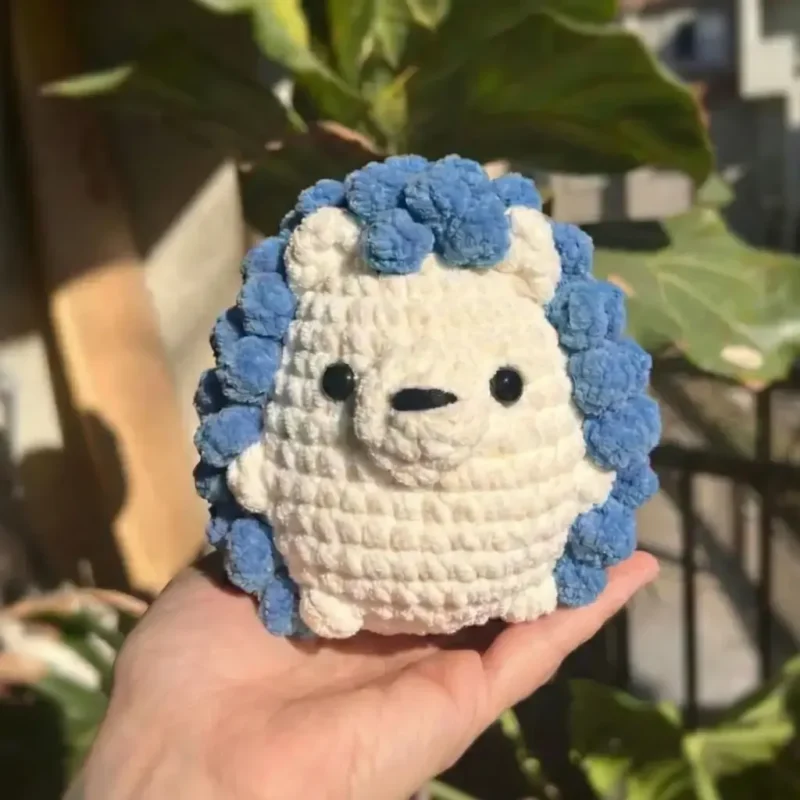
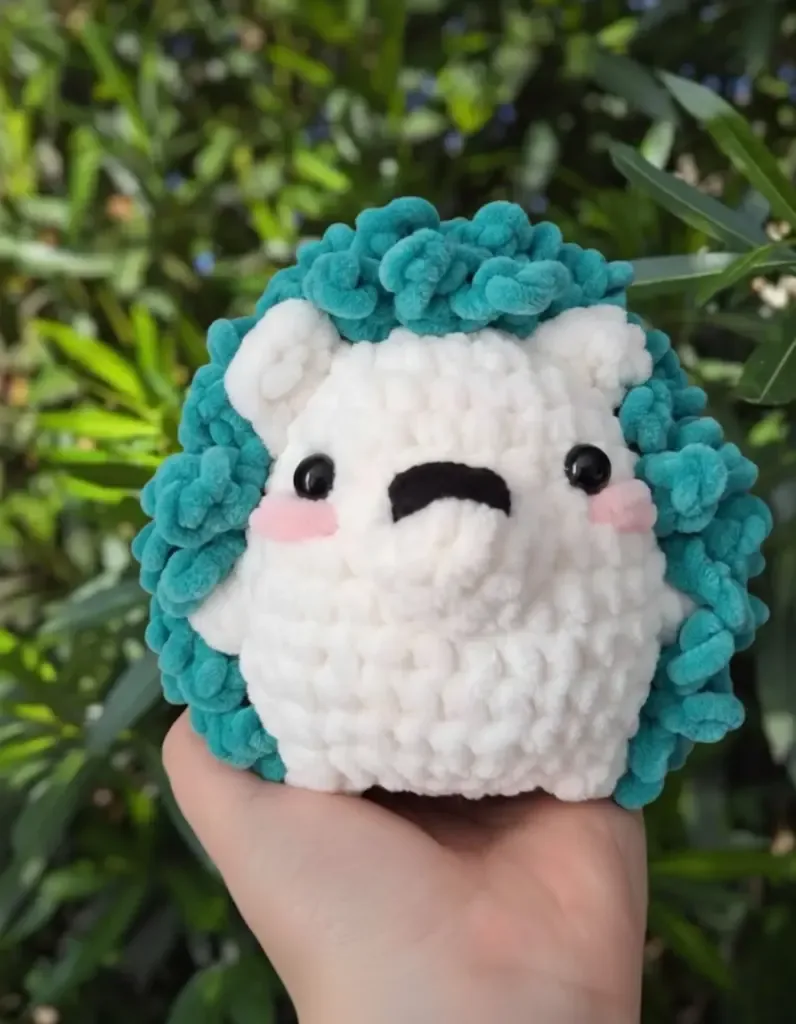
This free no-sew hedgehog crochet pattern turns two colors of super bulky yarn into the roundest, most huggable little critter you've ever made. The head and body are worked as one continuous piece, which means less finishing and more time enjoying the process. It's perfect for crocheters who want a quick, satisfying amigurumi without a mountain of seaming, and it makes an irresistible shelf sitter, baby gift, or nursery decoration.

You'll work primarily in continuous rounds using a magic ring start, single crochet increases and decreases for shaping, and simple color changes between the white and purple yarn to create the classic hedgehog belly-and-back look. The spines are added as a distinct textured section rather than sewn on separately, keeping true to the no-sew spirit of the design. Because you're working with Super Bulky (Category 6) yarn on a small 3.5mm hook, stitches are tight and dense, which helps this project move fast—expect around 4 to 6 cozy hours from start to finish.

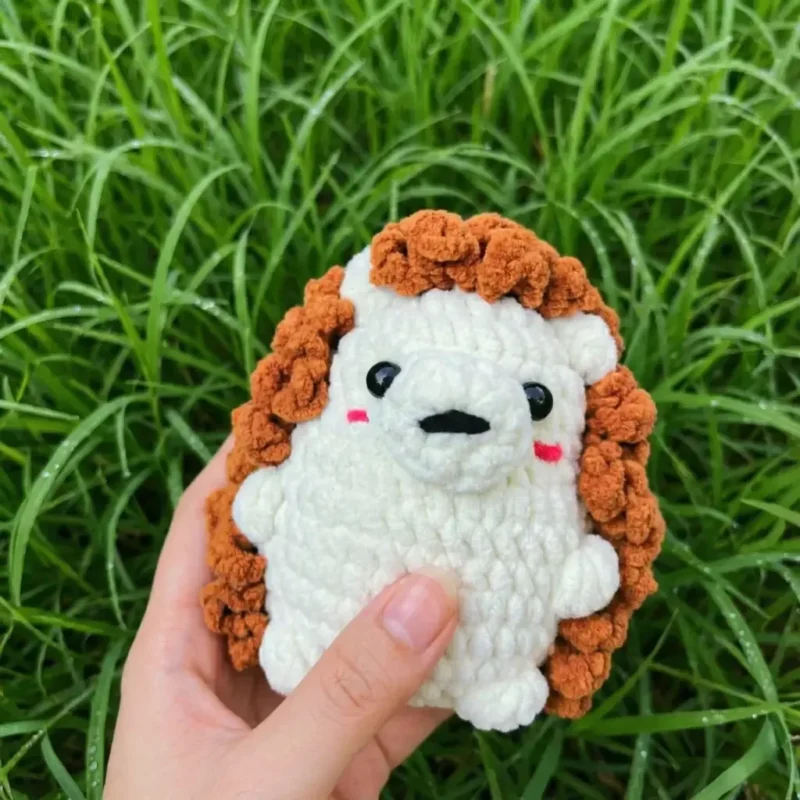
The finished hedgehog is a compact, plush little armful with a rounded body, a sweet pointed nose, tucked ears, and a textured back of spines that begs to be petted. Safety eyes give it real personality, and the dense super bulky stitches mean it holds its shape beautifully without going floppy. Whether it ends up on a bookshelf, in a diaper bag, or wrapped up as a handmade gift, this little guy is the kind of project people ask you to make again.

Variations

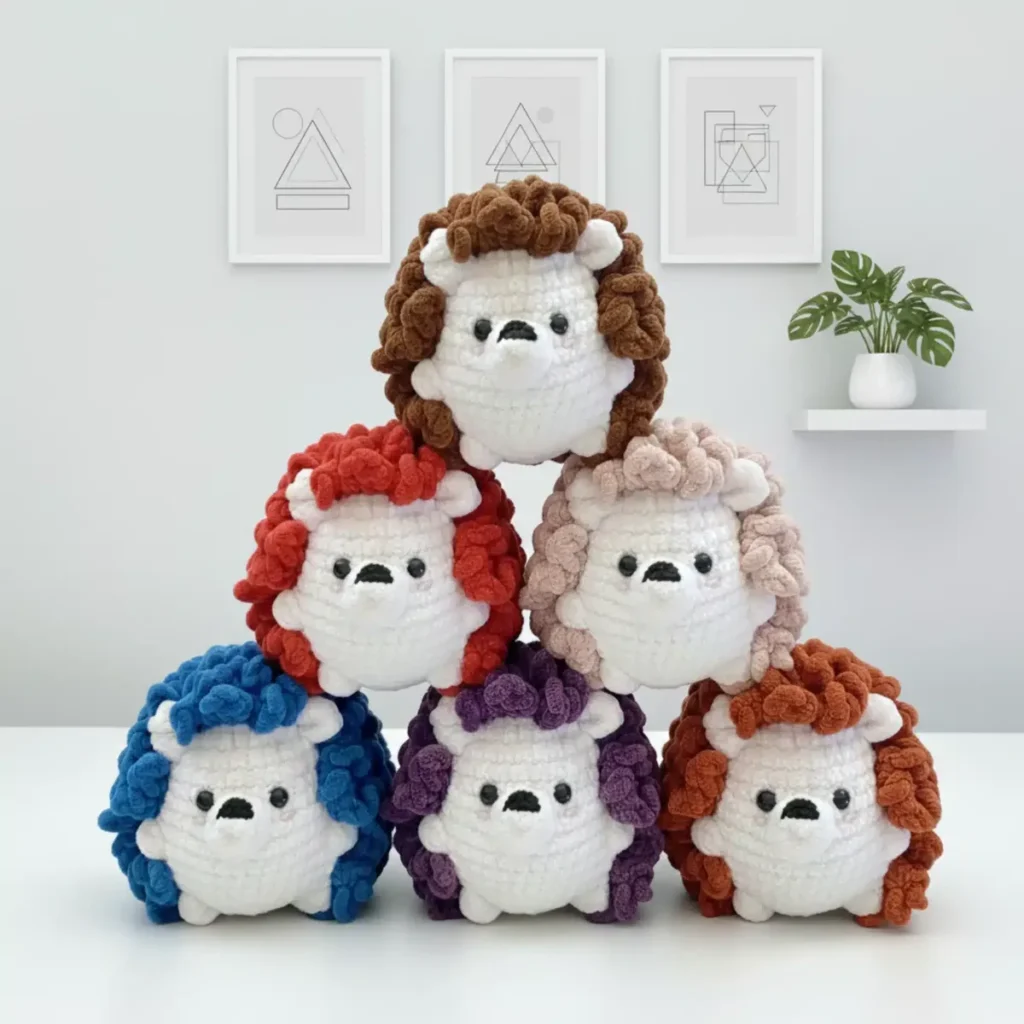
This hedgehog is endlessly customizable once you've got the basic shape down. For a color swap, try soft gray body with a cream belly for a more realistic look, or go bold with mustard yellow spines and a chocolate brown face for an autumn-themed critter. Pastel pink and lavender make an adorable baby shower version, while a deep forest green and brown combo feels right at home on a woodland-themed nursery shelf. If you want to substitute yarn brands, Bernat Blanket, Wool-Ease Thick & Quick, or Premier Chunky Chenille all work beautifully in this Super Bulky weight and add extra plush texture to the spines. To make a mini version, simply drop down to a worsted weight yarn with a 4.5mm hook and expect a hedgehog roughly half the size—perfect for keychains or ornament-sized gifts (just add a jump ring during assembly). For an oversized cuddle buddy, go up to jumbo yarn and a 9mm hook, adding two or three extra increase rounds to the body before you start the straight rounds, which will also mean adding a couple more rounds to the spine section to keep proportions balanced. Seasonal fans can add tiny embroidered snowflakes to the spines for winter, or swap the purple for orange and add a few loose ivy leaves in fall. You can also experiment with speckled or self-striping super bulky yarns instead of a hard color change—this gives the spines a naturally varied, wild texture without any extra color-change rounds. However you customize it, keep the nose and ear proportions close to the original counts so the face stays recognizably hedgehog-shaped.

I adore this pattern because it proves you don't need a mountain of yarn ends and a sewing needle marathon to make something absolutely charming. Working the head and body as one piece means I can crochet in a continuous spiral, watching the shape emerge round by round without stopping to seam anything together. The color change from white to purple happens right in the stitches, so the belly-and-back contrast just appears like magic instead of being pieced on afterward. Crafting the nose is my favorite part—those two tiny rounds create the perfect little point that gives the whole face its personality once the safety eyes go in. And don't even get me started on the spines; that textured section is what transforms a plain round blob into an unmistakable hedgehog. Because it's worked in Super Bulky yarn on a 3.5mm hook, every round flies by and the stitches are so satisfyingly tight and dense, my stuffing barely peeks through. This is the kind of pattern I reach for when I want a finished, gift-worthy project without committing my whole week to it.
Common mistakes

  • Losing track of rounds since the headPlace a stitch marker in the first stitch of every round and move it up as you go—this is non-negotiable for a 13-round piece worked in one continuous spiral.
  • Pulling the magic ring too looseCinch the magic ring closed firmly and give it an extra tug before continuing, then weave the tail through the first few stitches to lock it tight.
  • Overstuffing the body before finishingStuff gradually as you work upward rather than all at once at the end, adding small amounts and checking firmness every few rounds so the final closing rounds aren't fighting tight stuffing.
  • Attaching the safety eyes beforeInsert the eye posts but don't lock the backs on yet—stuff the head partially first, hold the hedgehog at arm's length to check symmetry, then secure the washers once you're happy.
  • Rushing the spine section and makingWork the spine stitches with consistent tension that's slightly looser than your body rounds so the texture pops without puckering the surrounding fabric.

The pattern

Written out round by round

Materials

Yarn Requirements

  • Super Bulky weight yarn (Category 6) in white
  • Super Bulky weight yarn (Category 6) in purple
  • 3.5mm (E) crochet hook

Additional Supplies

  • Stitch marker for tracking your rounds
  • Sewing needle for finishing touches
  • Sharp scissors
  • 10mm plastic safety eyes
  • Hot glue gun
  • Fiberfill stuffing
  • Black yarn for embroidering the mouth line

Abbreviations

  • MR = Magic Ring
  • st(s) = stitch(es)
  • sl st = slip stitch
  • ch = Chain
  • SC = Single crochet
  • INC = Increase
  • DEC = Decrease
  • FLO = Front loop only
  • BLO = Back loop only
  • HDC = Half double crochet
  • BO = Bobble stitch
  • Picot stitch = SLST in 2nd chain from the hook

The Head and Body (Worked as One Piece)

One of the best features of this pattern is that you’ll crochet the head and body together, eliminating the need for assembly later. Start with white yarn and follow these instructions carefully:

Foundation and Initial Rounds:

  1. Round 1Create 6 SC in a Magic Ring (6 stitches total)(6)
  2. Round 2Working in back loops only, make 6 INC (12)
  3. Round 3BLO (SC, INC) 6 times (18)
  4. Round 4BLO (SC, INC) 2 times, then (SC, INC) 5 times, finish with BLO (SC, INC) 2 times (27)

Building the Shape:

  1. Round 5-7Work BLO 7SC, 13SC in both loops, BLO 7SC (27)
  2. Round 8This is a shaping round – BLO (2SC, INC) 2 times, BLO 2SC, INC, (2SC, INC) 3 times, SC, BLO SC, BLO INC, BLO (2SC, INC) 2 times (36)
  3. Round 9-10BLO 10SC, 15SC, BLO 11SC (36)

Adding Character with Bobble Stitches:

  1. Round 11BLO 10SC, BO, 14SC, BO, BLO 10SC (36)
  2. Round 12-14BLO 10SC, 16SC, BLO 10SC (36)

Decreasing and Finishing:

  1. Round 15BLO (2SC, DEC) 3 times, SC, BO, DEC, (2SC, DEC) 2 times, BO, SC, BLO DEC, BLO (2SC, DEC) 2 times (27)
  2. Round 16(SC, DEC) 9 times (18)
  3. Round 17(SC, DEC) 6 times (12)

Important: Before continuing, stuff the hedgehog firmly with fiberfill, shaping it as you go.

  1. Round 186DEC (18)Weave in the yarn end and cut, leaving a tail for securing.

Crafting the Nose

The tiny nose adds so much personality to your hedgehog. Using white yarn:

  1. Round 16 SC in a Magic Ring (6)
  2. Round 2(SC, INC) 3 times (9)Fasten off but DO NOT cut the yarn—you’ll use this tail to attach the nose later.

Creating Adorable Ears

The ears are worked directly onto the body between rows 3 and 4. Position them carefully—the starting point should be straight from where an arm would be, going upward. Each ear spans 12 stitches total, with 2 ears needed.

For each ear: 2 CH 3 HDC SLST in the next stitch

Adding the Signature Hedgehog Spines

This is where your hedgehog truly comes to life! Switch to purple yarn and work into the front loops only (FLO) that you’ve been leaving throughout the body construction.

Spine Pattern:

Attach purple yarn to any FLO stitch on the body. Then repeat this sequence: (3CH, PICOT, 2CH, SLST in the next stitch). Continue this pattern around all the FLO stitches until the entire back is covered in adorable spiky texture.

Assembly

Step 1

Attaching the Nose: Using the tail you left on the nose piece, attach it to the head at rows 7-9. Use 9 slip stitches to securely fasten it in place, ensuring it’s centered and aligned with the face.

Step 2

Creating Facial Features: Mouth Line: Using black yarn, embroider a simple curved line beneath the nose to create a sweet smile

Step 3

Eyes: Attach the 10mm safety eyes at row 7, positioning them evenly on either side of the nose. Use the hot glue gun to secure them from the inside for extra safety

Important notes

💡 Tension Matters: Maintain consistent tension throughout your work for even stitches.

💡 Count Carefully: Use a stitch marker to keep track of your rounds; with 13 rounds worked as one continuous piece, it's easy to lose your place without it.

💡 Stuff Gradually: Add fiberfill as you work rather than waiting until the end, so the shape stays even and rounded all over.

💡 Spine Spacing: Take your time with the spines to ensure even coverage around all the front-loop stitches.

💡 A hot glue gun makes final assembly—especially attaching the nose and securing the spines—much faster and more secure than sewing, but work in small dabs so glue doesn't seep through to the right side.

💡 Before locking in your 10mm safety eyes, hold the head up and view it from multiple angles; hedgehog faces read as 'cute' or 'off' based on just a few millimeters of eye placement.

More photos

Free No-Sew Hedgehog Crochet Pattern — photo 2
Free No-Sew Hedgehog Crochet Pattern — photo 3
Free No-Sew Hedgehog Crochet Pattern — photo 4
FAQs

Frequently asked questions

What yarn weight do I need for this hedgehog pattern?

You'll need Super Bulky (Category 6) yarn in both white and purple. This heavier weight is what gives the finished hedgehog its plush, sturdy shape and helps the project stitch up quickly.

Is this pattern really no-sew?

Yes—the head and body are worked as one continuous piece, and the nose, ears, and spines are either crocheted directly onto the body or attached with a hot glue gun instead of a sewing needle. You'll still want a sewing needle on hand for weaving in ends.

What size hook should I use?

This pattern calls for a 3.5mm (E) crochet hook, which is smaller than you'd typically expect for Super Bulky yarn. The smaller hook keeps your stitches nice and tight so stuffing doesn't show through.

How do I keep track of the rounds since there's no seam?

Use a stitch marker in the first stitch of each round and move it up as you complete each one. Since the head and body span 13 rounds worked continuously, a marker is essential to avoid losing your place.

Can I use a different eye size or a different attachment method for the eyes?

The pattern specifies 10mm plastic safety eyes, which suit the scale of a Super Bulky amigurumi nicely, though you could size down slightly for a more delicate look. If you prefer not to use safety eyes, embroidered eyes are a safe substitute for gifts intended for very young children.

One at a time —

Get the next pattern

Tested round by round before it is sent. No spam.