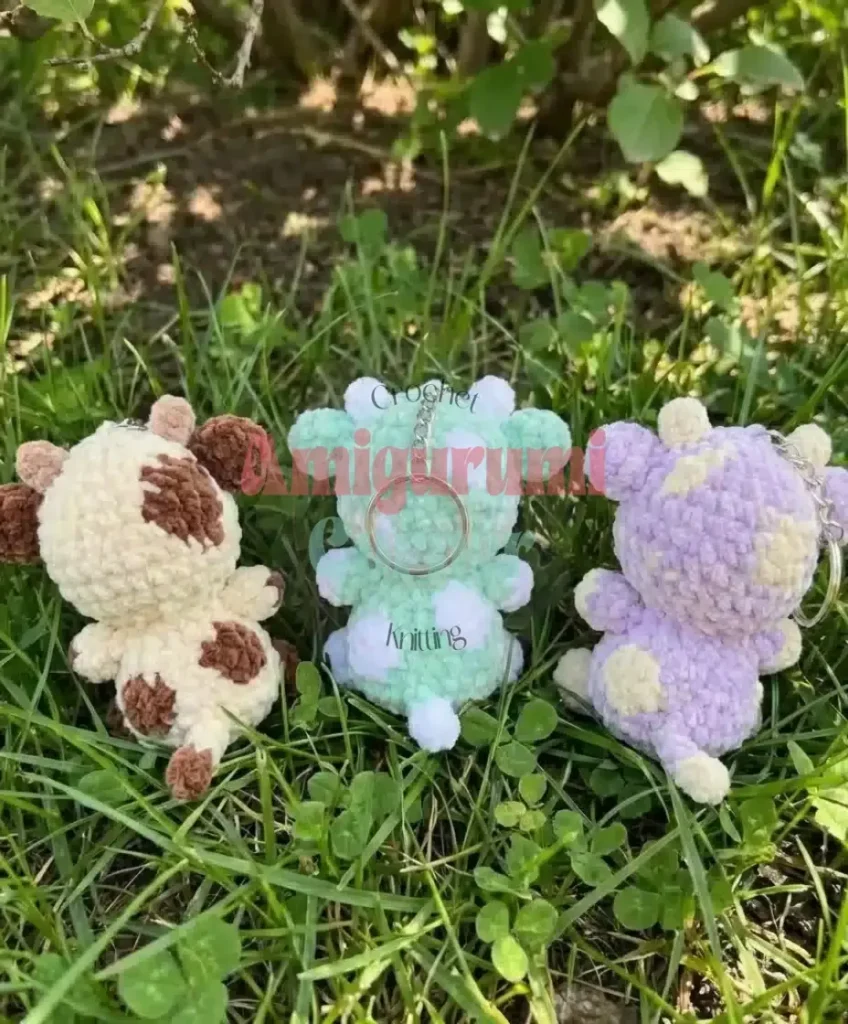
Made and counted by Wren —

Mini cow amigurumi keychain crochet pattern

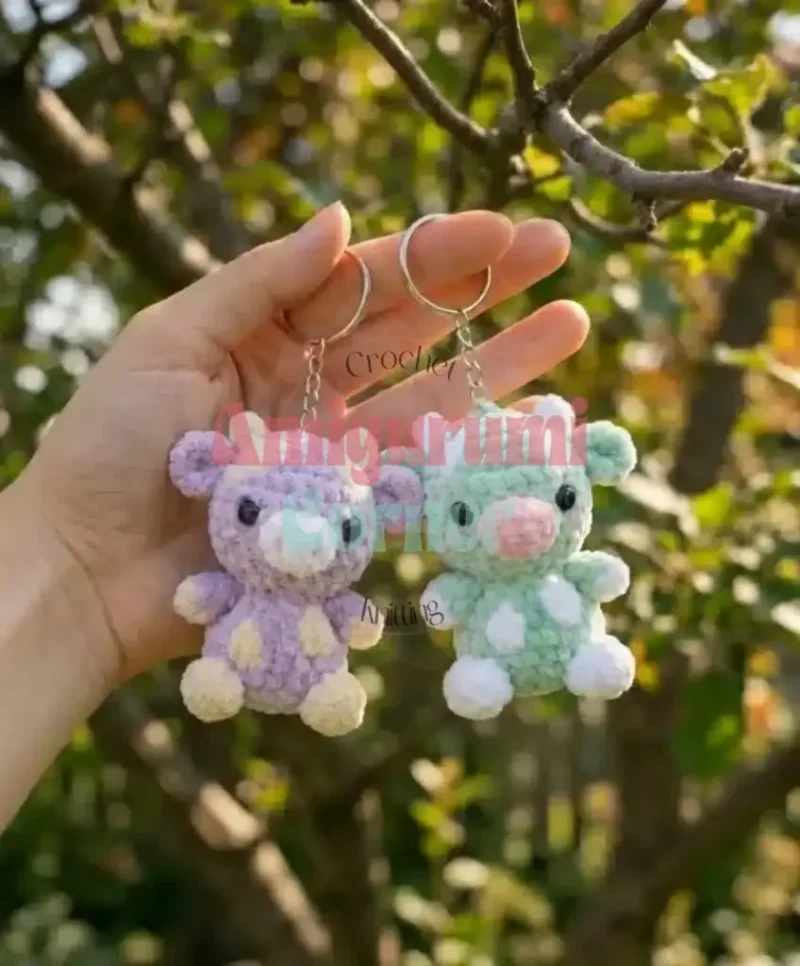
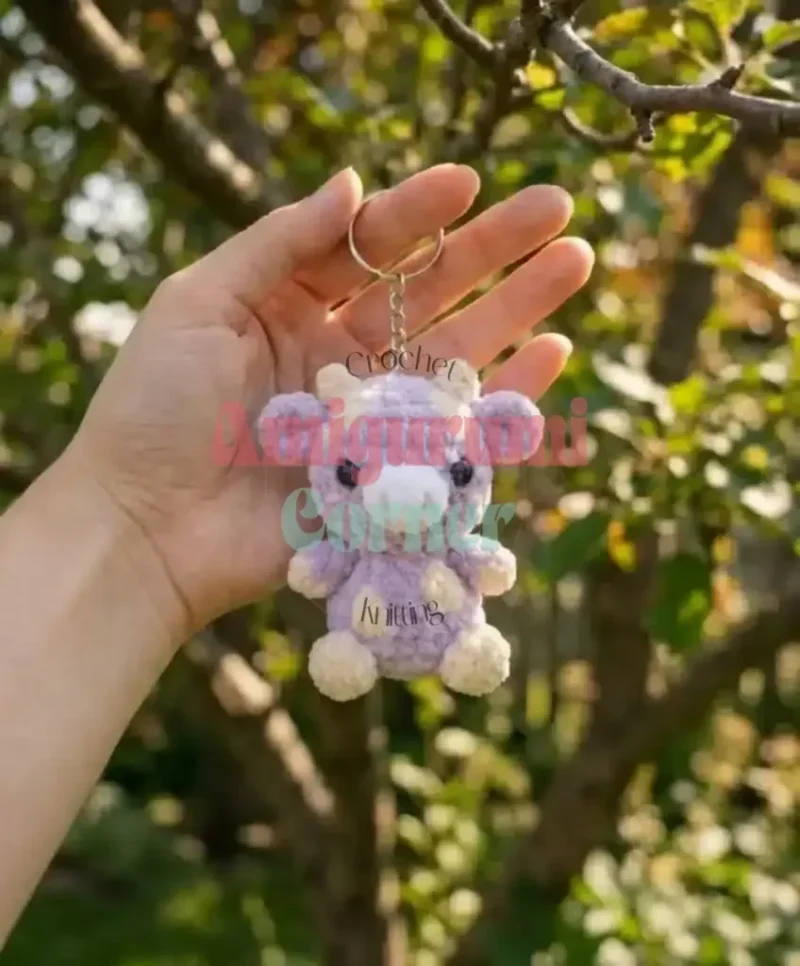
3.5mm hook, velvet yarn: mini cow amigurumi keychain, 3-4 inches tall.

Mini cow amigurumi keychain crochet pattern
BeginnerLevel
4-6 hoursTime
3.5 mmHook
WorstedYarn
Jump to the pattern

About this pattern

A 3-4 inch (7-10 cm) amigurumi cow keychain worked in five parts -- head (8 rounds), snout (3 rounds), ears (3 rounds), horns (2 rounds), and tail (2 rounds) -- using Himalaya Dolphin Baby velvet yarn and a 3.5mm hook. Parts are stuffed lightly, sewn together, then attached to a metal keyring with a jump ring. Black embroidery floss finishes the eyes.

This mini cow keychain amigurumi builds from five separate pieces -- head, snout, ears, horns, and tail -- each worked in continuous rounds from a magic ring, then assembled around a metal keyring. The head takes the longest shaping, at 8 rounds, while snout and ears run 3 rounds each and horns and tail finish in 2. Himalaya Dolphin Baby velvet yarn in cream/white carries the body, with small amounts of beige/light brown for the horns. Finished height lands at 3-4 inches (7-10 cm), small enough to clip onto a bag or zipper pull.
The pattern

Written out round by round

Materials

  • Main Color (Cream/White): 50g of Himalaya Dolphin Baby or similar velvet yarn for head, body, legs, and tail base

Pink

  • Small amount (15g) of Himalaya Dolphin Baby for snout
  • Beige/Light Brown: Small amount (10g) of Himalaya Dolphin Baby for horns
  • Black Embroidery Floss: Small amount of thin black yarn or embroidery thread for eyes

Crochet hook

  • 3.5mm (US size E-4)

Tools

  • Metal keyring with jump ring attachment
  • Polyfill stuffing
  • Yarn needle (large eye for velvet yarn, thinner needle for embroidery)
  • Stitch markers
  • Scissors

Abbreviations

  • MR = magic ring
  • sc = single crochet
  • inc = increase (2 sc in one stitch)
  • dec = invisible decrease (single crochet 2 stitches together)
  • st(s) = stitch(es)
  • () = total stitch count after round
  • [] = repeat instructions in brackets
  • × = repeat specified number of times

Head

Make 1 in Cream/White

Step by step: Make 1 in Cream/White.

Step by step: Make 4 in Cream/White or Chocolate Brown.

Round 16 sc in MR (6)Sc in each st around (6) [work 2 rounds total] Fasten off, leaving a tail for sewing. Stuff very lightly, just enough to give them slight body without making them too firm.
Round 2Inc in each st (12)
Round 3[Sc 1, inc] × 6 (18)Sc in each st around (18) [work 4 rounds total] Add random brown spots during these rounds by switching colors for 2-3 stitches, just like you did for the head.
Round 4[Sc 2, inc] × 6 (24)
Rounds 5–9Sc in each st around (24) [work 5 rounds total] When working rounds 5-9, randomly switch to chocolate brown yarn for 2-3 stitches in different spots around the head to create realistic cow patches. The asymmetry makes each cow unique.
Round 10[Sc 2, dec] × 6 (18)
Round 11[Sc 1, dec] × 6 (12)Step by step: Stuff the body firmly before continuing to the next round.Stuff the head firmly at this point, filling it completely to create a round, smooth shape.
Round 12Dec × 6 (6)Step by step: Fasten off, leaving a long tail for sewing the body to the head.Fasten off, close the remaining 6-stitch hole by weaving yarn through front loops, pull tight, and weave in the end securely.

Snout

Make 1 in Pink

Round 1Ch 4. Starting in 2nd ch from hook: 2 sc, 3 sc in last ch. Turn to work on opposite side of chain: 1 sc, inc in last st (9)
Round 2Inc, 1 sc, [inc] × 3, 1 sc, [inc] × 2 (14)
Round 3Sc in each st around (14)Fasten off, leaving a long tail for sewing. Stuff very lightly when attaching to keep the snout flat and realistic.

Ears

Make 2 (one in Cream/White, one in Chocolate Brown for realistic look)

Round 16 sc in MR (6)
Round 2[Sc 2, inc] × 2 (8)
Round 3Sc in each st around (8)Fasten off, leaving a tail for sewing. Do not stuff. Pinch the bottom flat and sew the opening closed to create a folded ear shape.

Horns

Make 2 in Beige/Light Brown

Round 15 sc in MR (5)
Round 2Sc in each st around (5)Fasten off, leaving a tail for sewing. No stuffing needed for horns.

Tail

Make 1 in Cream/White or Chocolate Brown

Round 14 sc in MR (4)
Rounds 2–4Sc in each st around (4) [work 3 rounds total] Fasten off, leaving a long tail for sewing.Creating the Tail Tuft: Cut 3 short strands of chocolate brown yarn, approximately 1-1.5 inches long. Insert your crochet hook through the tip of the tail at round 1, loop the yarn strands through, pull tight, and trim to create a small brush or tuft at the end.

Assembly

Step 1Step 1: Attach Head to Body: Position the head on top of the body, slightly toward the back rather than centered to create the sitting posture. Using the long tail from the body, sew around the connection point securely with whip stitch. Make sure the head is stable and won’t wobble.
Step 2Step 2: Attach Snout: Position the pink snout on the front of the head between rounds 8-11. Sew it in place using the long tail, adding a tiny bit of stuffing as you sew to give it subtle dimension while keeping it relatively flat.
Step 3Step 3: Embroider Eyes: Thread a thinner needle with black embroidery floss. Create the eyes directly above the snout, spacing them about 4-5 stitches apart. You can make French knots for round eyes or sew small horizontal ovals. For a sparkle effect, add a tiny white stitch on the outer edge of each black eye.
Step 4Step 4: Attach Front Legs: Sew the front legs to the sides of the body where it meets the head, angling them slightly forward. These will act more like arms in the sitting position.
Step 5Step 5: Attach Back Legs: Sew the back legs to the bottom front of the body so the cow sits stably on its own. Position them wide enough apart for good balance.
Step 6Step 6: Attach Horns: Sew the beige horns to the top of the head at rounds 2-3, spacing them evenly on either side of the center.
Step 7Step 7: Attach Ears: Position the ears just below the horns at rounds 4-5. Sew the folded edge to the head, allowing the ear to hang down naturally. Mix the cream and brown ear for the realistic asymmetric look.
Step 8Step 8: Attach Tail: Sew the tail to the lower back of the body at approximately rounds 5-6. Since the cow is sitting, angle the tail slightly to one side so it’s visible from the front.
Step 9Step 9: Attach Keyring: Sew the metal jump ring securely to the very top center of the head at round 1. Use strong stitches and double-knot inside the head to ensure it won’t come loose with daily use.

Tester's notes

3.5mm (US E-4) is the only hook size given; use it across all five parts so head, snout, ears, horns, and tail stay proportional to each other.

8 rounds of head shaping go by fast on velvet yarn since stitches are hard to see, so mark the start of each round and move the marker up every round.

50g of cream/white covers head, body, legs, and tail base combined, so weigh out remaining yarn before starting the ears to confirm enough is left.

Ears get no stuffing at all, while snout and head take only light stuffing; overfilling the ears prevents the pinch-and-fold flat shape from holding after sewing.

Color changes between cream/white, pink snout, and beige/light brown horns happen at the start of a part, not mid-round, so fasten off and rejoin cleanly rather than carrying strands.

Work in progress

Mini cow amigurumi keychain crochet pattern — photo 2
Mini cow amigurumi keychain crochet pattern — photo 3

At a glance

Rounds18
Parts5
LevelBeginner
Time4-6 hours
Hook3.5 mm
YarnWorsted

Gauge check

After round 1 of the head (6 sc in a magic ring), the circle should lie flat with the 6 stitches evenly spaced and no visible gaps between them.

Stitch-count checkpoints

  • Head · Round 2: 12 sts
  • Head · Round 4: 24 sts
  • Head · Round 11: 12 sts
  • Head · Round 12: 6 sts
  • Snout · Round 1: 9 sts
  • Snout · Round 2: 14 sts

If something looks wrong

Ears don't hold their folded shape after sewing.
Ears are left unstuffed by design; the bottom needs to be pinched fully flat before the opening is sewn closed, or the fold won't set.
Snout looks lumpy instead of sitting flat on the face.
The snout only takes 3 rounds and light stuffing added while sewing; pack in small pinches as you stitch it on rather than stuffing it fully beforehand.
Head wobbles once attached to the body.
The seam wasn't whip-stitched around its full circumference; re-sew with the long tail from the body, catching both layers all the way around before fastening off.
Round 1 of a part cups instead of lying flat.
The 6 sc worked into the magic ring are uneven in tension; check that all 6 stitches sit level and pull the ring fully closed before starting round 2.

Yarn substitutions

Acrylic worsted weight (standard, non-velvet)Stitch definition becomes visible round to round instead of blurred by velvet fuzz; hook size stays close to 3.5mm and stuffing behavior is unchanged.
Cotton DK weightProduces a firmer, flatter fabric with less give, useful for the snout holding its shape, but drape is reduced and a smaller hook around 3mm may be needed to match gauge.
Chenille or velvet-style bulky weightThicker strand pushes the finished size past the stated 3-4 inches (7-10 cm); size the hook up to roughly 4-4.5mm to keep stitches tight enough to hold stuffing.
FAQs

Questions

Can this be made without a keyring?

Yes, skip the jump ring attachment and leave the long tail from the head or body free as a hanging loop instead. None of the five parts or stuffing steps change.

How much yarn is needed in total?

Materials list 50g cream/white for head, body, legs, and tail base, 15g for the snout, and 10g beige/light brown for the horns. Black embroidery floss covers the eyes, so total yarn use stays under 75g.

Why velvet yarn instead of standard worsted?

Himalaya Dolphin Baby velvet yarn gives the dense, fuzzy texture typical of amigurumi cow faces and hides stitch definition better at this 3-4 inch scale. Standard worsted acrylic substitutes fine but shows stitches more clearly.

One at a time —

Get the next pattern

Tested round by round before it is sent. No spam.