Made and counted by Wren —

Mila Bunny Crochet Pattern: Free Amigurumi Plush

Crochet Mila the Bunny with this free amigurumi pattern featuring floppy or standing ears, chenille yarn texture, and a sweet embroidered face.

Mila Bunny Crochet Pattern: Free Amigurumi Plush
IntermediateLevel
4-6 HoursTime
4.0 mmHook
BulkyYarn
Jump to the pattern

At a glance

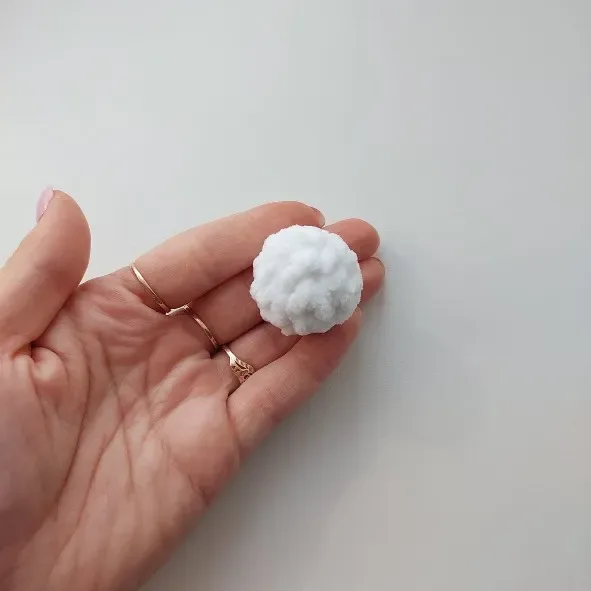
Crochet the tail as a small separate piece worked over four rounds and set it aside for later.

Make the ears in your chosen style — quick floppy ears, taller standing ears, or fluffy faux-fur standing ears.

Work each leg from the lower feet upward over six rounds, stuffing lightly as you complete each piece.

Begin the head and body as one continuous top-down piece, working in a steady spiral with a stitch marker moved every round.

Join the legs to the body partway through the continuous rounds so they're integrated rather than sewn on afterward.

Stuff the head and body firmly in stages as the rounds progress, then close up the final rounds.

Attach the ears and tail, snap in the safety eyes and nose, and finish with embroidered eyelids, brows, and nose bridge.

About this pattern

Mila is a plush little bunny worked up in irresistibly soft bulky velvet or chenille yarn, and she's the kind of amigurumi that makes people stop scrolling. Her gray body with white chest, paws, and cuffs gives her a sweet two-tone look, while pink paw pads and an embroidered nose bridge add all the personality. This one is perfect for crocheters who love a cuddly, textured finish and want a project that photographs beautifully once it's stuffed and posed.

You'll work the head and body as one continuous top-down piece, join the legs, ears, and tail as you go, and get to choose between two adorable ear styles — floppy or standing (with a faux-fur variation for extra fluff). Expect continuous spiral crochet throughout, plus safety eye and nose placement, embroidery work for the eyelids and brows, and careful color-blocking between Colors A, B, and C. This sits comfortably at an intermediate skill level and takes most crocheters a solid weekend to finish.

The finished Mila is a soft, huggable bunny with a rounded velvety body, perky or floppy ears, and a face full of embroidered charm. The chenille yarn gives her a plush, almost stuffed-animal-store texture that's irresistible to touch, and her size makes her ideal for a nursery shelf, a baby shower gift, or a cozy companion for a bunny-loving friend.

Variations

I adore this pattern because the velvet yarn does so much of the work for you — every round comes out looking impossibly soft and finished, even before you add the embroidery. Working the head and body as one continuous top-down piece feels so satisfying; there's no seaming a head to a neck, just smooth, uninterrupted spiral rounds. I love that you get to choose your own bunny personality too — go floppy-eared and gentle, or standing-eared and alert, or even try the faux-fur standing ears for a fluffier finish that photographs like a dream. The pink paw pads are such a tiny detail, but they're the kind of thing that makes people pick Mila up and say 'oh my gosh, look at her feet!' And the embroidered nose bridge, eyelids, and brows are where she really comes alive — that's the moment a pile of yarn turns into a bunny with a face and a mood. It's a project that rewards patience in the best way, and unwrapping the finished plush at the end never stops feeling like magic to me.

Common mistakes

  • Losing track of the spiral rounds without a stitch markerSince this pattern is worked in a continuous spiral with no joining or chaining up, drop a stitch marker into your first stitch of each round and move it up every time — otherwise it's very easy to lose your place across 23 rounds of the head and body.
  • Under-stuffing the head and body before closing upBecause the head and body are one continuous piece, stuff firmly as you go rather than waiting until the end — add fiberfill in small handfuls every few rounds so the shape stays smooth instead of lumpy or floppy.
  • Attaching safety eyes and nose before checking placementSafety eyes and the 10mm nose are permanent once snapped in, so pin or hold them in place first, sit the head up, and eyeball the symmetry from multiple angles before committing.
  • Mixing up which ear style pieces to makeSince there are three ear options — floppy (2 rounds), standing (8 rounds), and faux-fur standing (2 rounds) — double check you're following the round counts for the ear style you actually chose before joining them to the head.
  • Skipping the embroidery details or rushing themThe nose bridge, eyelids, brows, and eye whites done in cotton embroidery floss are what give Mila her expression, so take your time stitching these last — a slightly wonky brow or eyelid changes her whole personality more than any other step.

The pattern

Written out round by round

Materials

  • Bulky-weight velvet or chenille yarn in three colors: Color A — Gray (main body), Color B — White (chest, paws, cuffs, tail), Color C — Pink (paw pads)

Crochet hook

  • US G/6 (4.0 mm)

Tools

  • Black and white cotton embroidery floss (for the nose bridge, eyelids, brows, and eye whites)
  • Safety eyes — 18 mm (use 20 mm for a fluffier faux-fur version)
  • Safety nose — 10 mm (often glued on at finishing)
  • Clear-drying craft or gel glue
  • Polyester fiberfill
  • Stitch marker
  • Yarn needle / tapestry needle
  • Scissors
  • Small felt scraps (for the embroidered eye whites)

Abbreviations

  • bobble = a cluster of unfinished double crochets closed together
  • ch = Chain
  • dc = Double Crochet
  • dec = Invisible Decrease
  • FO = Fasten Off
  • hdc = Half Double Crochet
  • inc = Increase (2 sc in same st)
  • MR = Magic Ring
  • sc = Single Crochet
  • sl st = Slip Stitch
  • st / sts = Stitch / Stitches

Tail (make 1)

Worked in Color B (white), in a continuous spiral.

  1. Round 16 sc in MR. (6)
  2. Round 2inc in each st around. (12)
  3. Round 3sc in each st around. (12)
  4. Round 46 dec, sl st to finish. (6) Fasten off and stuff lightly.

Floppy Ears (make 2)

Worked flat and loosely. Ch 15. Starting in the 2nd ch from hook:

  1. Round 12 sc, 11 hdc, 6 hdc in last ch; working back along the opposite side of the foundation chain: 11 hdc, 2 sc. (32) Turn, but do not ch 1 to turn.
  2. Round 213 sc, 6 inc in the hdc section, 13 sc. (38) Fasten off.

Standing Ears (make 2)

Worked in a continuous spiral.

  1. Round 16 sc in MR. (6)
  2. Round 2inc in each st around. (12)
  3. Round 33 sc, inc repeat 3 times. (15)
  4. Round 4-6sc in each st around. (15)
  5. Round 73 sc, dec repeat 3 times. (12)
  6. Round 84 sc, dec repeat 2 times. (10)
  7. Round 93 sc, dec repeat 2 times. (8)
  8. Round 102 sc, dec repeat 2 times. (6) Fasten off, leaving a long tail for attaching.

Standing Ears, Faux-Fur Version (make 2)

Fur yarn is thick, so doubled ears would stand too stiff — these are worked in turned rows instead. Ch 7. Starting in the 2nd ch from hook:

  1. Round 12 sc, 3 hdc, 6 hdc in last ch; working back along the opposite side: 3 hdc, 2 sc. (16) Turn, but do not ch 1 to turn.
  2. Round 25 sc, 6 inc in the hdc section, 5 sc. (22) Fasten off, leaving a long tail for attaching.

Lower Feet / Legs (make 2)

Worked in Color B (white), in a continuous spiral. From Rnd 3, work the pink paw-pad bobbles in Color C, each made of 2 unfinished dc, changing colors as noted above.

  1. Round 16 sc in MR. (6)
  2. Round 21 sc, inc repeat 3 times. (9)
  3. Round 31 sc, Color C bobble, 1 sc, Color C bobble, 5 sc. (9)
  4. Round 4Color C bobble, 3 sc, Color C bobble, 4 sc. (9)
  5. Round 52 sc, bobble-decrease in Color C (work 2 unfinished dc into one st and 2 into the next — 5 loops on hook — then close all loops together) , 5 sc. (8) Fasten off Color C.
  6. Round 68 sc, then 1 offset sc to bring the round neatly to the side. (8) Stuff, fold flat with the pad centered, then work 4 sc through both layers and fasten off.

Head & Body (worked as one piece)

Worked in Color A (gray), top-down, in a continuous spiral.

  1. Round 16 sc in MR. (6)
  2. Round 2inc in each st around. (12)
  3. Round 31 sc, inc repeat 6 times. (18)
  4. Round 42 sc, inc repeat 6 times. (24)
  5. Round 53 sc, inc repeat 6 times. (30)
  6. Round 6 (Standing)sc in each st around. (30)
  7. Round 6 (Floppy)6 sc; hold ear 1 in place so it folds inward, 4 sc through both layers; 10 sc; hold ear 2 in place, 4 sc through both layers; 6 sc. (30)
  8. Round 7-8sc in each st around. (30) Change to Color B.
  9. Round 94 sc, inc repeat 6 times. (36)
  10. Round 10-12sc in each st around. (36)
  11. Round 1318 dec. (18) Insert the safety eyes after Rnd 8 now, spacing the posts about 6 sts apart, and stuff the head firmly. Change to Color A, keeping Color B ready for the arm cuffs.
  12. Round 142 sc, inc repeat 6 times. (24)
  13. Round 1510 sc; Arm 1: ch 7, starting in the 3rd ch from hook work 5 hdc, then 6 sc across the body; Arm 2: ch 7, starting in the 3rd ch from hook work 5 hdc, then 8 sc across the body. (24)
  14. Round 167 sc, inc repeat 3 times. (27)
  15. Round 174 sc, inc, 8 sc, inc repeat 2 times, 4 sc. (30)
  16. Round 18sc in each st around. (30)
  17. Round 1915 sc; hold Arm 1 in place, work a Color B bobble (5 unfinished dc) through both layers; 2 sc; hold Arm 2 in place, work a Color B bobble through both layers; 11 sc. (30) Fasten off Color B.
  18. Round 20-22sc in each st around. (30)
  19. Round 233 sc, dec repeat 6 times. (24) Stuff.
  20. Round 241 sc; hold the tail in place, 1 sc through both layers; dec leaving 3 sts open (these are picked up next round); then 2 sc, dec repeat 5 times. (18)
  21. Round 251 sc; 3 sc through both layers to join the remaining tail sts; 3 sc; hold leg 1 in place with the pad facing up, 4 sc through both layers; 1 sc; hold leg 2 in place, 4 sc through both layers; 2 sc. (18) Add stuffing.
  22. Round 261 sc, dec repeat 6 times. (12)
  23. Round 276 dec. (6) Fasten off, leaving a tail of about 20 cm. Close the opening.

Assembly

Step 1

Using the long tail left at the end of the Head & Body, tack the Lower Feet / Legs to the body with a few stitches, anchoring about 2–3 sts out from each side of the white paw-pad bobbles so Mila balances and sits up nicely.

Step 2

Shape the face with a horizontal cinch: insert the yarn needle at the bottom of the head and bring it out after Rnd 8 at the inner corner of the first eye, re-insert at the inner corner of the second eye, and come back out at the bottom. Pull to cinch.

Step 3

Work a vertical cinch: bring the yarn up from the bottom into the center of Rnd 9, then back out at the bottom of the head. Pull tight. This splits the muzzle into two soft, rounded cheeks.

Step 4

Cut small eye whites from felt and glue them in place beside each eye.

Step 5

Using a few strands of black cotton floss, embroider the nose bridge, eyelids, and small eyebrows.

Step 6

Glue the safety nose in place if it wasn’t posted earlier.

Step 7

For the standing-ear version, sew each ear on with its long tail — anchor one edge at the magic-ring point and the other edge after Rnd 2.

Step 8

Weave in all ends.

Important notes

💡 Use a US G/6 (4.0mm) hook and keep your tension noticeably tighter than usual with bulky velvet or chenille yarn, since it's slippery and can create gaps if worked loosely.

💡 Place your stitch marker in the very first stitch of each round of the head and body and move it up every round — with 23 rounds worked continuously, this is your only way to track where rounds begin.

💡 Stuff the legs and tail firmly before joining them to the body, but leave the neck area of the head and body slightly less packed until you're ready to close it, so you can adjust the final shape.

💡 When working with three yarn colors (A, B, C), keep small bobbins or yarn butterflies wound so you're not constantly untangling gray, white, and pink strands mid-round.

💡 Glue on the safety nose only after you've finalized eye placement and embroidered the face details — gluing early can trap thread ends and make later adjustments impossible.

💡 If making the faux-fur standing ears, brush out the chenille gently with a soft pet brush after finishing to fluff the texture before attaching the ears to the head.

💡 Gauge is not critical for this project, but keep your tension tight and even so the stuffing never shows through your stitches.

💡 Master the invisible decrease: work each dec under the front loops only of the next two stitches, then yarn over and pull through both. On chenille this keeps the surface smooth and avoids a visible bump.

💡 This pattern is written in US crochet terminology.

FAQs

Frequently asked questions

Which ear style should I choose for Mila?

Floppy ears (just 2 rounds) give her a gentle, sleepy look and are the quickest to make, while standing ears (8 rounds) give her an alert, perky expression. The faux-fur standing ear version uses the same short 2-round construction as the floppy ears but with fuzzy yarn for a fluffier finish.

Do I need to chain or join at the end of each round?

No — this pattern is worked entirely in a continuous spiral with no joining or chaining up anywhere except where rows are specifically noted. A stitch marker moved up each round is essential to keep track of your position.

What size safety eyes should I buy?

Use 18mm safety eyes for the standard version, or size up to 20mm if you're making the fluffier faux-fur standing ear variation, since the extra texture around the face can make smaller eyes look lost.

How do I get the pink paw pads to look neat?

Work the Color C pink sections with a snug first stitch after each color change and weave in ends carefully on the inside so the transition between gray and pink stays crisp. Blocking isn't necessary with chenille, but a gentle steam can help set stubborn color-change bumps.

One at a time —

Get the next pattern

Tested round by round before it is sent. No spam.