Made and counted by Wren —

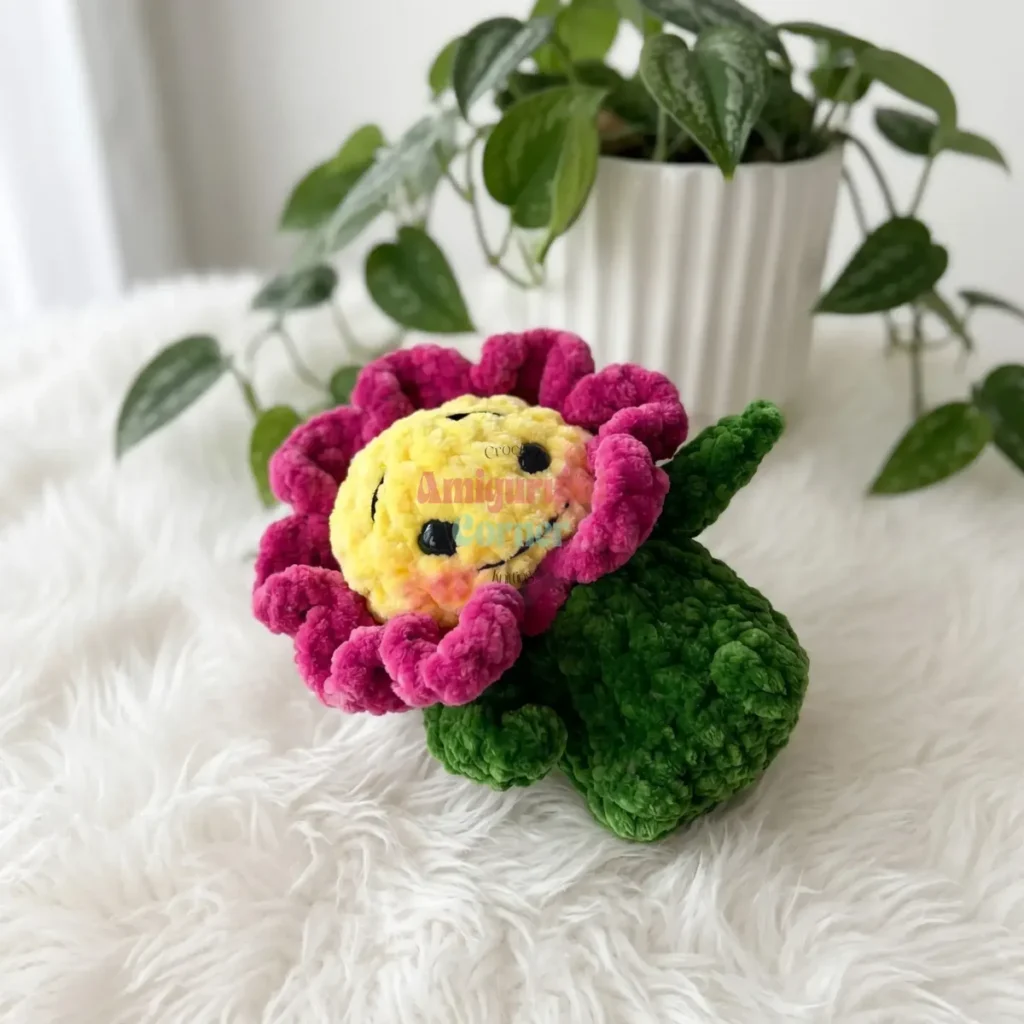
Flower amigurumi with a fanned petal trim

G/6 (4 mm) hook, bulky chenille yarn: spiral amigurumi flower with 8-petal fan trim and 10 mm safety eyes.

Flower amigurumi with a fanned petal trim
IntermediateLevel
4-6 hoursTime
4 mmHook
BulkyYarn
Jump to the pattern

About this pattern

A small amigurumi flower worked in bulky chenille yarn on a G/6 (4 mm) hook: the body and head form one continuous-spiral piece over 14 rounds, while the petals are a separate flat strip from a ch-27 foundation producing 8 petals. Finishing requires 10 mm safety eyes, black yarn for embroidered mouth and eyebrows, and polyfill stuffing dense enough to hide behind tight stitches.

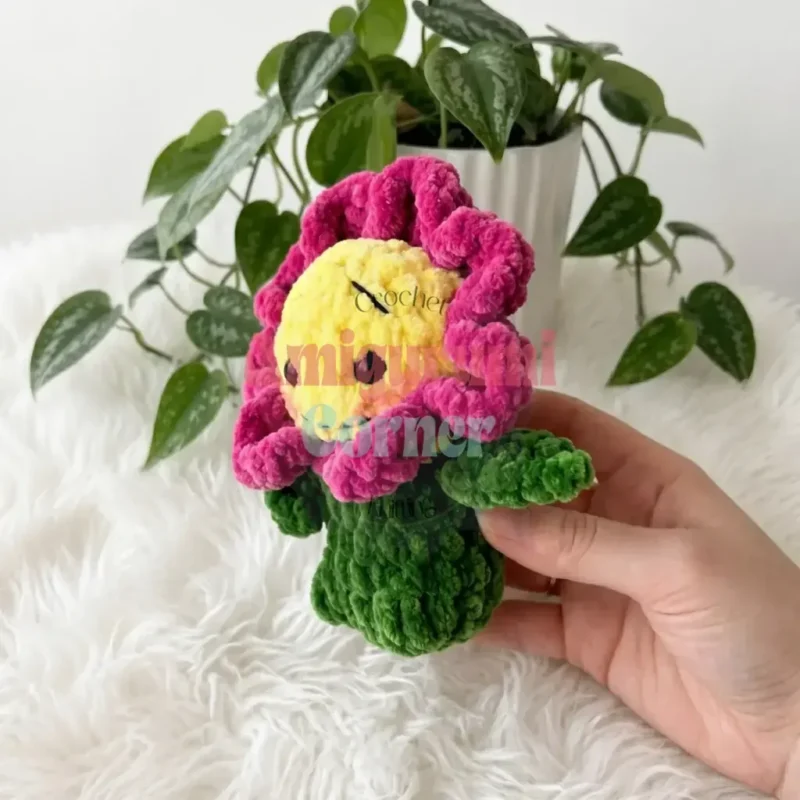
This amigurumi flower is a two-part build: a continuous-spiral green body topped with a yellow head worked over 14 rounds, plus a flat petal strip made from a single ch-27 foundation row that yields 8 petals in one pass. The head carries a pair of 10 mm safety eyes, sunk and secured with black yarn run through from eye to eye, then finished with embroidered mouth and eyebrows. Round 4 anchors two 4-dc bobble paws once the spiral reaches 18 stitches, and Round 8 adds two crocheted leaf arms — each a short chain worked back in graduated stitches (sl st, sc, hdc, dc, tr) and slip-stitched back into the body. The petal strip wraps around the head-body join afterward, fanning outward instead of lying flat against the seam.
The pattern

Written out round by round

Materials

Yarn

  • Chunky chenille yarn (CYCA #5 Bulky) in three colors — green for the body, yellow for the head, and your preferred accent color for the petals. Approximately 50–80 g total across all three colors.

Hook

  • US Size G/6 (4 mm)

Safety eyes

  • One pair, 10 mm

Stuffing

  • Polyfill fiberfill

Stitch marker

  • To track continuous spiral rounds

Tapestry needle

  • For assembly and weaving in ends
  • Scissors
  • Black yarn or embroidery thread: For embroidering the mouth and eyebrows

Abbreviations

  • ch = Chain
  • dc = Double Crochet
  • dec = Invisible Decrease (1 sc worked over 2 sts)
  • hdc = Half Double Crochet
  • inc = Increase (2 sc in the same stitch)
  • MR = Magic Ring
  • sc = Single Crochet
  • sl st = Slip Stitch
  • SM = Stitch Marker
  • tr = Treble Crochet

Body–Head (Make 1)

Begin with green yarn.

Round 16 sc in MR. (6)
Round 2Inc in each st around. (12)
Round 3(1 sc, inc) ×6. (18)
Round 48 sc, 4-dc Bobble in next st (paw) , 3 sc, 4-dc Bobble in next st (paw) , 5 sc. (18)4-dc Bobble: [Yo, insert hook into same st, yo, pull up loop, yo, draw through 2 loops] ×4; yo, draw through all 5 loops on hook. This creates one compact rounded paw shape.
Rounds 5–7Sc in each st around. (18) — 3 rounds.Tip: the leaf arms appear mid-round with no visual warning. Before you begin this round, place a locking stitch marker on stitch 4 and stitch 12 so you know exactly where each leaf chain begins — this saves you from counting back once you're already mid-leaf.
Round 84 sc, Leaf (see note) , 7 sc, Leaf (see note) , 6 sc. (18)Leaf (arm): Ch 6; working back along the chain — sl st in 1st ch from hook, sc in next ch, hdc in next ch, dc in next ch, tr in next ch. Sl st into the body stitch where you began the chain, then continue along the main round.
Round 9(1 sc, dec) ×6. (12)Tip: work the invisible decrease by inserting your hook through the front loop only of the first stitch, then through the front loop only of the second stitch, and complete as a normal sc. This eliminates the raised ridge a standard decrease creates, keeping the head smooth and round from every angle.Stuff the body firmly before continuing. Do not close the opening yet.Change to yellow yarn.
Round 10Inc in each st around. (24)
Round 11Sc in each st around. (24)
Round 12Sc in each st around. (24)
Round 13Sc in each st around. (24)After completing Rnd 13 and before working Rnd 14, insert safety eyes between Rnds 12 and 13 of the overall piece (the 3rd and 4th rounds of the head), with 3–4 stitches between them. Stuff the head firmly.
Round 14(2 sc, dec) ×6. (18)
Round 15(1 sc, dec) ×6. (12)
Round 16Dec ×6. (6)Fasten off, leaving a long tail. Thread the tail through the remaining 6 stitches, pull tight to close the opening, secure, and cut yarn.

Petals (Make 1)

This piece is worked flat. Use your petal color yarn.

Foundation: Ch 27.

Row 1Starting in the 3rd ch from hook — 3 dc in same ch, ch 2, sl st in next ch, sl st in next ch; (ch 2, 3 dc in same ch, ch 2, sl st, sl st) ×7 . One ch remains at the end of the chain — work 1 sl st into the last ch. (8 petals total)Fasten off, leaving a long tail for sewing.(8)

Assembly

Step 1Complete all face embroidery before attaching petals. Using black yarn, embroider a small curved mouth and two short eyebrows onto the yellow head. Sink the safety eyes slightly inward using the standard amigurumi eye-sinking technique: thread a length of black yarn through from one eye to the other, pull gently, and knot securely at the back.
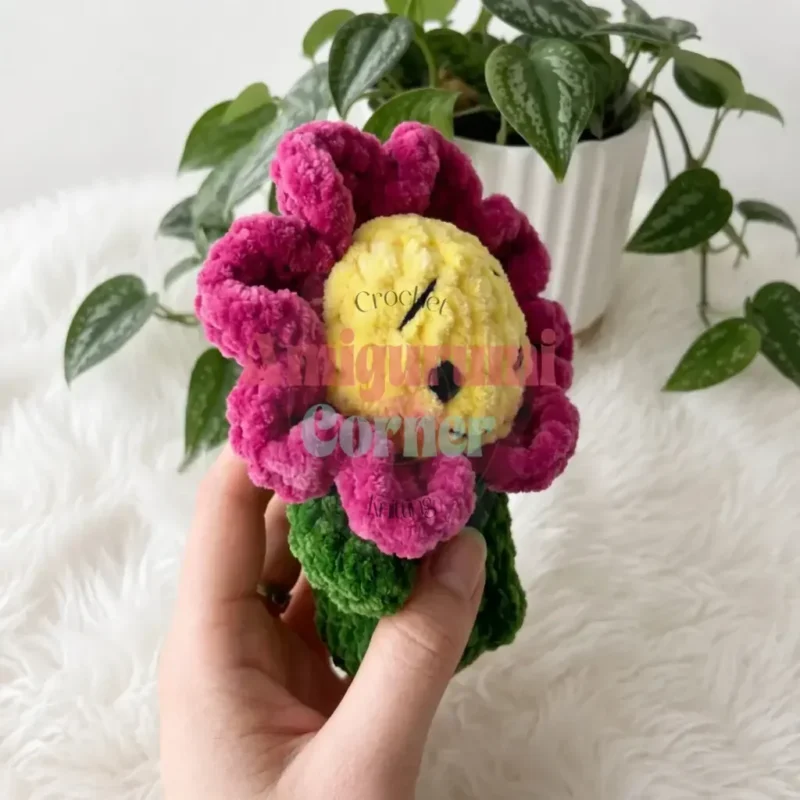
Step 2Once the face is complete, wrap the petal strip in a circle around the join between the head and the body, positioning the petals so they fan outward evenly.
Step 3Using the long yarn tail from the petal strip and your tapestry needle, sew the strip in place with a whipstitch all the way around the circumference. Pull snugly with each stitch so the petals stand upright rather than drooping.
Step 4Weave in all remaining yarn ends securely on the wrong side.

Tester's notes

4 mm (G/6) is the only hook used throughout both the spiral body-head and the flat petal strip; a bigger hook makes the chenille stitches gap enough for polyfill to show.

14 rounds make up the entire body-head piece, worked in one continuous spiral with no joins — keep a stitch marker on the first stitch of every round and move it up each time.

18 stitches is the working count through Rnd 3 and into Rnd 4, where the two 4-dc bobble paws are placed; count stitches at that point so the paws land symmetrically.

3 colors (green, yellow, accent) draw from one 50-80 g total, so weigh or eyeball the split before starting to avoid running short on the head color partway through.

10 mm safety eyes get sunk inward with a length of black yarn pulled from eye to eye and knotted at the back — do this before sewing on the petal strip, since the assembly order calls for completed face embroidery first.

This pattern is written in US crochet terminology. Stitch count is given at the end of each round in parentheses: (##).

Work in progress

Flower amigurumi with a fanned petal trim — photo 2
Flower amigurumi with a fanned petal trim — photo 3

At a glance

Rounds15
Parts2
LevelIntermediate
Time4-6 hours
Hook4 mm
YarnBulky

Gauge check

Gauge is not listed as critical, but after Rnd 3 the body should sit at 18 stitches with fabric tight enough that no white fiberfill is visible between stitches.

Stitch-count checkpoints

  • Body–Head (Make 1) · Round 4: 18 sts
  • Body–Head (Make 1) · Round 11: 24 sts
  • Body–Head (Make 1) · Round 15: 12 sts
  • Body–Head (Make 1) · Round 16: 6 sts
  • Petals (Make 1) · Row 1: 8 sts

If something looks wrong

The petal strip cups or curls instead
The 3-dc fan at each of the 8 petals was worked too tightly off the ch-27 foundation; loosen tension on those dc clusters and finger-block the strip flat before wrapping it around the join.
The two paw bobbles from Rnd 4 sink
The 4-dc bobble was not cinched tight enough when closing; pull the closing loop firmly before continuing to the next stitch so the bobble sits above the surrounding sc.
White fiberfill is visible through the
Tension is too loose for the chenille weight on the G/6 (4 mm) hook; tighten each stitch as it is made, or drop to a smaller hook, and stuff only once the fabric is dense.
The petal strip does not reach all the
The ch-27 foundation produces a fixed 8-petal strip with no extra length; stretch the strip slightly while pinning rather than trying to add petals mid-piece.

Yarn substitutions

Cotton, worsted weight (CYCA #4)Produces a smaller, firmer flower than the bulky chenille on a G/6 (4 mm) hook; stitch definition sharpens, drape stiffens, and a smaller hook is needed to keep the fabric tight enough to hide stuffing.
Acrylic, bulky weight (CYCA #5), non-chenilleKeeps finished size and the G/6 (4 mm) hook close to the original, but the velvety chenille texture is lost; the 4-dc bobble paws and petal fans both show sharper stitch definition.
Wool-blend, worsted weight (CYCA #4)Adds a warmer, stretchier hand but shrinks the finished size below the three-color chenille version worked at 50-80 g; swatch first, since wool blends can felt slightly and may need a smaller hook than G/6 (4 mm).
FAQs

Questions

How much yarn does each color need?

Total yarn across green, yellow, and the petal accent color runs 50-80 g; the pattern does not split that amount per color, so weigh remaining yarn after the 14-round body-head to gauge how much is left for the petal strip.

Why are the paw bobbles placed at Round 4 and not earlier?

Round 4 is the first round after the body-head reaches a stable 18-stitch count in Rnd 3, giving the bobbles a fixed, even anchor point. Placing them in Rnd 1 or 2 would shift them off-center as the piece keeps increasing.

Does the petal strip need blocking before it is sewn on?

The ch-27 foundation and its 8 petals are worked flat in one row, so the strip tends to roll slightly off the hook. Flatten it by hand before wrapping it around the head-body join for a cleaner fan.

Is this amigurumi safe for babies and toddlers?

The 10 mm safety eyes used in this pattern are not suitable for children under three years old because they present a small-parts choking risk. For a baby-safe version, embroider the eyes with black yarn instead, using a satin stitch or French knot. Make sure all sewn-on components, including the petal strip and leaf arms, are attached firmly enough that they cannot be pulled free.

How do I keep the petal strip from twisting when I sew it on?

Pin the strip in place before sewing a single stitch. Lay it flat around the head-body join, making sure every petal faces outward, and secure it with locking stitch markers or straight pins at four evenly spaced points around the circumference. Sew slowly between the pins, checking the alignment as you go. Five minutes of pinning prevents the kind of lopsided result that requires removing and resewing the entire strip.

One at a time —

Get the next pattern

Tested round by round before it is sent. No spam.