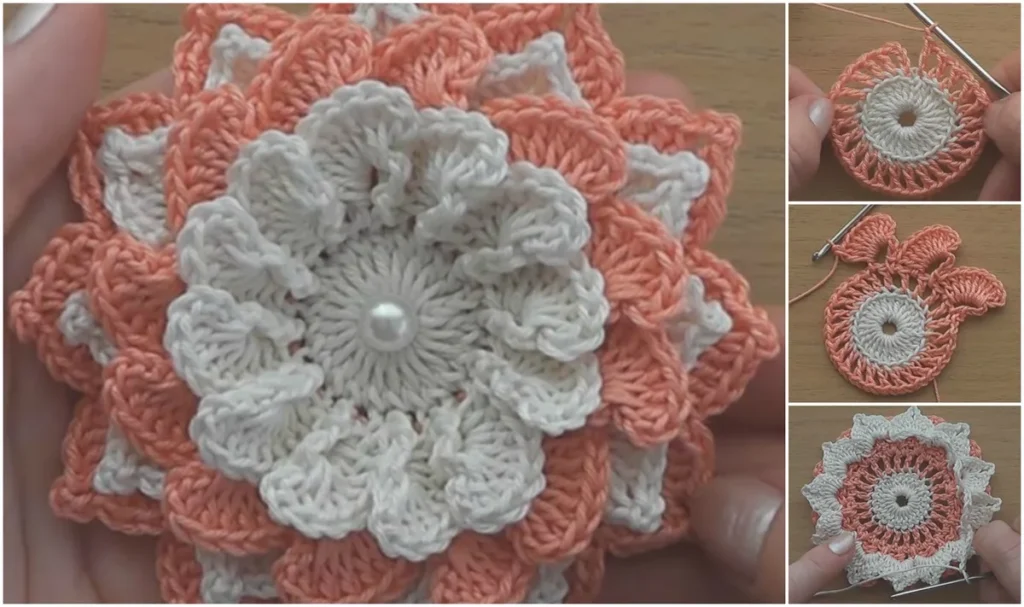
Made and counted by Wren —

Crochet Very Easy Flower Embellishment Pattern

Learn to crochet a very easy flower embellishment in just 3 rounds. Perfect for hats, bags, and scarves with this beginner-friendly pattern.

BeginnerLevel
30-45 MinutesTime
WorstedYarn
Jump to the pattern

At a glance

Start with a small center loop or ring to form the base of the flower.

Work the first round of stitches around the ring to build out the flower's core.

Move into the second round, adding stitches that begin to form the petal shapes.

Complete the third and final round to fully define each petal around the flower.

Fasten off and weave in both yarn tails securely through the back of the stitches.

Lightly steam or block the flower flat so the petals sit evenly and neatly.

Sew the finished flower onto your hat, bag, scarf, or blanket using a tapestry needle.

Repeat the process in different colors or sizes to create a coordinated set.

About this pattern

This Very Easy Flower Embellishment is the kind of pattern every crocheter should keep in their back pocket. Worked in just three simple rounds, it transforms a small ball of yarn into a cheerful little bloom that instantly upgrades anything it touches. It's perfect for beginners who want a quick confidence-building win, and equally perfect for experienced crocheters who need a fast, satisfying project to fill an odd half hour.

The techniques here are refreshingly simple — you'll work through three rounds that build the flower from center to petals, practicing basic stitch placement and shaping along the way. There's no fussy shaping math or advanced stitchwork required, which makes this an ideal project for absolute beginners or anyone easing back into crochet after a break. Expect to finish in well under an hour, start to finish.

The finished flower is small, sweet, and endlessly adaptable — the exact size will depend on your yarn weight and hook choice, but it's designed to sit neatly as an accent rather than a standalone piece. Add it to the side of a hat or beanie for a fun pop of color and style, matching the yarn or going bold with a contrasting shade. Decorate the edges of a scarf or shawl by attaching several flowers in a line for a chic floral border, or scatter them across for a whimsical look. On bags and totes, attach one flower as a simple accent or line several along the top for a border of blooms. Scatter flowers across a plain blanket or throw for an elegant, floral-inspired design, or place them on the corners for added detail. You can even attach one to a gift tag, card, or ribbon to give a present a handmade touch. Because it works up so quickly, it also makes a lovely last-minute handmade touch for gifts.

Variations

To make fuller flowers, try adding extra petals by increasing the number of stitches in each round, or use thicker yarn.

I adore this pattern because it proves you don't need hours of work to make something genuinely charming. In just three rounds, you go from a simple starting loop to a full little flower with defined petals — and that transformation happens so fast it feels like magic every single time. I love that the pattern doesn't lock you into one look either; because it's worked in your choice of yarn and color, every single flower turns out a little different, which makes a batch of them feel handmade in the best possible way. It's also the perfect palette-cleanser project — when I'm between bigger makes or need something mindless to work on while watching TV, this is what I reach for. The best part is watching your scrap yarn stash shrink while your embellishment stash grows. By the time you finish round three, you'll have a ready-to-attach motif that can go on literally anything you own. It's satisfying, it's fast, and it never feels like a chore.

Common mistakes

  • Starting loop is left too looseWhether you use a magic ring or a chain-and-slip-stitch start, tug the tail firmly before beginning round one and check that the center closes into a tight, small circle with no visible hole.
  • Losing track of which round you'reDrop a stitch marker or a small scrap of contrasting yarn into the first stitch of each new round so you always know exactly where you are and can count stitches accurately.
  • Petals coming out uneven in sizeWork the same stitch pattern into each petal repeat consistently, and lightly steam or block the finished flower on a flat surface to even out any petals that look slightly askew.
  • Yarn tension tightening upConsciously relax your grip every round or two, and if a round feels too snug to work into, size up your hook by half a size just for that round.
  • Leaving yarn tails too short to weaveLeave at least a 6 inch tail at both the beginning and end of the flower so you have plenty of length to weave in invisibly through several stitches for a secure finish.
  • Attaching the finished flowerUse a tapestry needle and whipstitch or sew through the very back loops of the flower's center stitches so your attachment stitches stay hidden on the front side.

The pattern

Written out round by round

Materials

  • Worsted weight yarn
  • Crochet hook (size to suit your yarn)
  • Yarn needle (for weaving in ends)

Abbreviations

  • ch = chain
  • st = stitch
  • sl st = slip stitch
  • sc = single crochet
  • hdc = half double crochet
  • dc = double crochet
  • inc = increase
  • dec = decrease
  • mr = magic ring
  • fo = finish off

Step-by-Step Guide to Crochet a Basic Flower

This simple crochet flower pattern creates a small, beautiful flower that you can easily attach to your projects.

Make a Magic Ring Start by creating a magic ring. This will serve as the center of your flower.

  1. Round 1Chain 1, work 6 single crochets into the ring. Join with a slip stitch to the first single crochet.
  2. Round 2Chain 2 (counts as first double crochet), work 2 double crochets in the same stitch. Skip one stitch, then work 3 double crochets in the next stitch. Repeat around. Join with a slip stitch to finish the round.
  3. Round 3To create the petals, chain 1, work 5 double crochets in the next stitch, then slip stitch into the next. Repeat this around to create 6 petals in total.Fasten Off: Cut the yarn and pull through the last loop to secure. Weave in any loose ends with a yarn needle.

And that’s it! You now have a simple, beautiful crochet flower.

Important notes

💡 Choose a hook one size smaller than your yarn label recommends for a firmer, more structured flower that holds its petal shape well.

💡 Keep a stitch marker handy to mark the first stitch of each round — with only three rounds total, it's easy to lose your place otherwise.

💡 Save every yarn scrap over a few yards long; this pattern is a fantastic way to use up leftover balls from bigger projects.

💡 Block your finished flower by lightly steaming it and pinning the petals flat while it cools, which really helps the shape pop.

💡 For attaching to hats or bags, sew through a sturdy point of the base fabric so the flower doesn't sag or flop over time.

💡 If working multiple flowers for a border or cluster, make one full flower first as a size reference before batching the rest.

FAQs

Frequently asked questions

How much yarn do I need for one flower?

This is a small motif, so a single small ball or even leftover scraps are typically more than enough for one complete flower. It's an excellent stash-buster project for using up remnants from other patterns.

What hook size should I use?

The right hook size depends on your chosen yarn weight — check your yarn label's recommended hook and consider sizing down slightly for a firmer, more defined flower shape. A smaller hook helps the petals hold their form nicely.

How do I attach the flower to my project?

Use a tapestry needle and whipstitch through the back loops of the center stitches to sew it securely onto a hat, bag, or scarf. This keeps the attachment stitches hidden on the visible side.

Is this pattern really beginner-friendly?

Absolutely — with just three straightforward rounds and no complex shaping, it's one of the easiest embellishment patterns to learn. It's a great confidence-building project for anyone new to crochet.

One at a time —

Get the next pattern

Tested round by round before it is sent. No spam.