Made and counted by Wren —

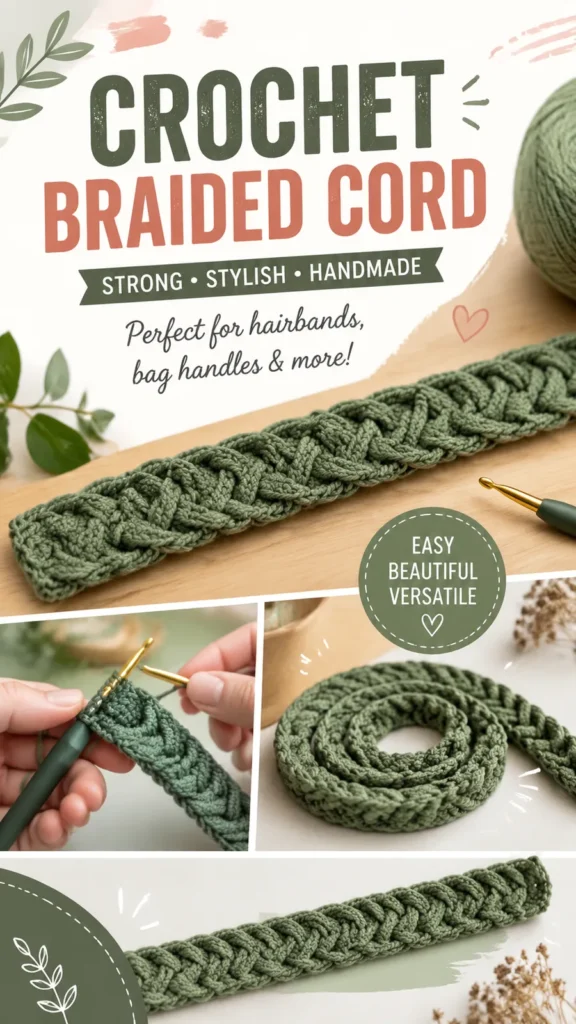
Crochet braided cord pattern for bag handles and belts

4 mm hook, worsted cotton yarn: flat braided crochet cord for bag handles, belts, and straps, 18 inches (46 cm) long.

Crochet braided cord pattern for bag handles and belts
BeginnerLevel
2-4 hoursTime
4 mmHook
WorstedYarn
Jump to the pattern

About this pattern

A flat, turned-row crochet strip worked in single crochet with front-loop-only stitches placed to raise diagonal ridges, producing a braided look without separate motifs. The 6-stitch strip repeats Rows 3-6 to reach length, finishing at about 18 inches (46 cm) long and 1.25 inches (3 cm) wide with a 4 mm hook and worsted cotton yarn. Blocking sets the braid; hand washing and flat-drying keep the shape.

This flat crochet cord builds a braided texture from single crochet rows interrupted by front-loop-only stitches, which raise diagonal ridges that overlap into a woven look. Worked in turned rows rather than joined rounds, the strip starts at 6 stitches and holds that count through all 7 rounds of the main pattern. The finished sample measures 18 inches (46 cm) long and 1.25 inches (3 cm) wide, sized for a handle, belt, or strap; length extends by repeating Rows 3-6 until the cord reaches the size needed.

Skill level: confident beginner. Yarn: suggested worsted weight cotton yarn, approximately 80 yards (73 meters). Gauge: approximately 18 single crochet stitches by 20 rows = 4 inches (10 cm). Terminology: US crochet terms. Color: pick a single yarn color you love, or experiment with contrasting colors to make the braided texture stand out.

The pattern

Written out round by round

Materials

  • Worsted weight cotton or cotton-blend yarn, approximately 80 yards (73 meters)
  • 4 mm (US G-6) crochet hook
  • Yarn needle for weaving ends
  • Scissors
  • Stitch markers (optional)
  • Measuring tape

Abbreviations

  • ch = chain
  • sc = single crochet
  • sl st = slip stitch
  • st = stitch
  • FLO = front loop only
  • rep = repeat
  • RS = right side
  • WS = wrong side
  • UK equivalents = single crochet is double crochet, and slip stitch is slip stitch.

Main Pattern

Starting ChainCh 7.
Round 1(RS): Sc in 2nd ch from hook and in each ch across. Turn. (6 sts)
Round 2(WS): Ch 1, sc in each stitch across. Turn. (6 sts)
Round 3(RS): Ch 1, sc in first stitch, FLO sc in next 4 stitches, sc in last stitch. Turn. (6 sts)
Round 4(WS): Ch 1, sc in each stitch across. Turn. (6 sts)
Round 5(RS): Ch 1, sc in first stitch, FLO sc in next 4 stitches, sc in last stitch. Turn. (6 sts)
Round 6(WS): Ch 1, sc in each stitch across. Turn. (6 sts)
Rows 7–72Repeat Rows 3-6 eighteen times. Maintain 6 stitches across each row.(6)
Final RowCh 1, sc across all stitches. Fasten off, leaving a 10 inch (25 cm) tail for finishing.

Special Stitch Explanation

Raised Braid Stitch: Insert the hook into the front loop only of the indicated stitch, complete a single crochet, then gently pull the stitch forward to create a raised ridge. Alternating these stitches creates the braided texture.

Creating a Longer Strap

For a full handbag handle, continue repeating Rows 3-6 until the cord reaches the desired length. Measure frequently because yarn stretch can slightly increase the finished size.

Assembly

Step 1Weave in all yarn ends using a yarn needle.
Step 2Gently stretch the cord into a straight shape.
Step 3Block lightly with steam or water if needed.
Step 4Attach both ends to a crochet bag, belt buckle, or accessory base using strong sewing stitches.
Step 5For the best appearance, lightly block the finished cord after crocheting. Cotton yarn responds well to gentle shaping and helps the braid look neat and defined.
Step 6Hand washing or gentle machine washing in a protective bag is recommended for handmade crochet accessories. Allow the piece to dry flat to maintain its shape.

Tester's notes

4 mm (US G-6) hook needs to stay consistent across all 7 rounds of the main pattern, or the FLO rows raise unevenly as the cord lengthens.

6 stitches is the count for every row; recount after each FLO row before turning, since front-loop-only stitches are easy to drop at the row ends.

Rows 3-6 repeat for added length; mark Row 3 with a stitch marker on the first pass so the braid sequence lands on the correct row during extension.

Worsted cotton or cotton-blend yarn is specified for stitch definition; a stretchier fiber blurs the raised ridge the FLO stitch produces.

No color changes are called for in this pattern; if stripes are added, change color only on a WS row (Row 2, 4, or 6) so the ridge on the right side stays clean.

Before attaching the strap to a bag, gently pull it lengthwise; this reveals the final stretch and prevents attaching a handle that becomes too long with use.

At a glance

Rounds9
Parts3
LevelBeginner
Time2-4 hours
Hook4 mm
YarnWorsted

Gauge check

The pattern's gauge is approximately 18 single crochet stitches by 20 rows = 4 inches (10 cm); working to this gauge with the 4 mm (US G-6) hook helps the finished cord match the approximately 18 x 1.25 inch (46 x 3 cm) size.

If gauge runs tight or loose, swap hook size up or down by half a size and recheck after a few rows before continuing, rather than changing the stitch count.

Stitch-count checkpoints

  • Main Pattern · Round 2: 6 sts
  • Main Pattern · Round 4: 6 sts
  • Main Pattern · Round 6: 6 sts
  • Main Pattern · Rows 7–72: 6 sts

If something looks wrong

The strip curls lengthwise instead of lying flat.
Front-loop-only stitches pull fabric forward and can tighten rows if tension is uneven; block the finished cord flat and pin the edges while damp, as the assembly step directs, to reset the curl.
The braided ridges look flat instead of raised.
This happens when the front loop isn't isolated correctly or the stitch isn't pulled forward after working it; recheck the Raised Braid Stitch step and gently tug each FLO stitch forward before moving on. A smaller hook or slightly tighter tension also helps raised sections stand out.
Stitch count drifts away from 6 partway through the cord.
Uneven edges usually happen when the first or last stitch of a row is missed. Count your stitches after each row and make sure every row finishes with exactly 6 stitches; place a marker in the first stitch of each row as a check.
The cord reads wider or narrower than
Tension loosens over a long run of Rows 3-6; measure with tape every few repeats, as the Longer Strap note advises, and adjust hook tension rather than the stitch count.

Yarn substitutions

Worsted weight cotton or cotton-blend yarn (as specified)Recommended because it provides strength, stitch definition, and a clean braided appearance; use with the 4 mm hook called for in the pattern.
Sport weight yarnSuggested for a delicate accessory cord rather than a load-bearing handle; pair with a smaller hook than the 4 mm specified for the standard strap.
FAQs

Questions

Can the cord be made wider than 1.25 inches (3 cm)?

Yes; adjusting the starting chain while keeping an even stitch structure changes the width, with more stitches producing a wider strap. Keep the stitch count even so the FLO rows land in the correct position on each repeat.

How is the cord extended for a full bag handle?

Repeat Rows 3-6 of the Main Pattern until the cord reaches the length needed, measuring frequently since cotton yarn stretches slightly once worked. The 18 inch (46 cm) sample uses 7 rounds total, so extra repeats of Rows 3-6 add length beyond that.

Does the cord need blocking before use?

Blocking is the first assembly step and is recommended because cotton yarn shapes well, which keeps the braid texture defined. After blocking, hand wash or use a gentle machine cycle in a protective bag and dry flat to hold the shape.

One at a time —

Get the next pattern

Tested round by round before it is sent. No spam.