Made and counted by Wren —

Crochet Strawberry Keychain: Free Amigurumi Pattern for Beginners

Make an adorable crochet strawberry keychain with this free amigurumi pattern featuring magic rings, safety eyes, and cute embroidered seed details.

Crochet Strawberry Keychain: Free Amigurumi Pattern for Beginners
IntermediateLevel
4-6 HoursTime
2.5 mmHook
WorstedYarn
Jump to the pattern

At a glance

Start by crocheting two small legs and two arms using magic rings and quick single crochet rounds.

Shape the petal-look leaf piece separately, working its rounds to create gentle, dimensional points.

Build the main strawberry body in rounds, increasing near the top to form its widest curve.

Pause partway through the body to lock in the safety eyes before the opening gets too small.

Continue shaping the body with decrease rounds while stuffing firmly to keep the strawberry plump.

Close the base of the body neatly and weave in any loose yarn ends.

Attach the legs and arms to the body, then embroider tiny seed details across the red surface.

Secure the leaf piece on top and add an optional keychain cord to finish the piece.

About this pattern

This crochet strawberry keychain is the kind of pattern that makes you want to whip up a whole basketful in an afternoon. You'll build a plump red strawberry body, two stubby legs, two little arms, and a petal-shaped leaf top, all stitched in rounds with worsted weight cotton yarn. It's perfect for crocheters who love amigurumi but want a project that finishes fast without sacrificing that squishy, giftable charm strawberries are known for.

You'll lean on magic ring starts for every clean, hole-free piece, plus single crochet rounds with strategic increases and invisible decreases to shape the rounded body and tapered leaf points. Safety eyes get seated firmly around rounds 10-11 of the main body before stuffing, so you're working with both structural and detail techniques in one project. Expect roughly 4 to 6 hours total, spread across body, limbs, leaf, and finishing.

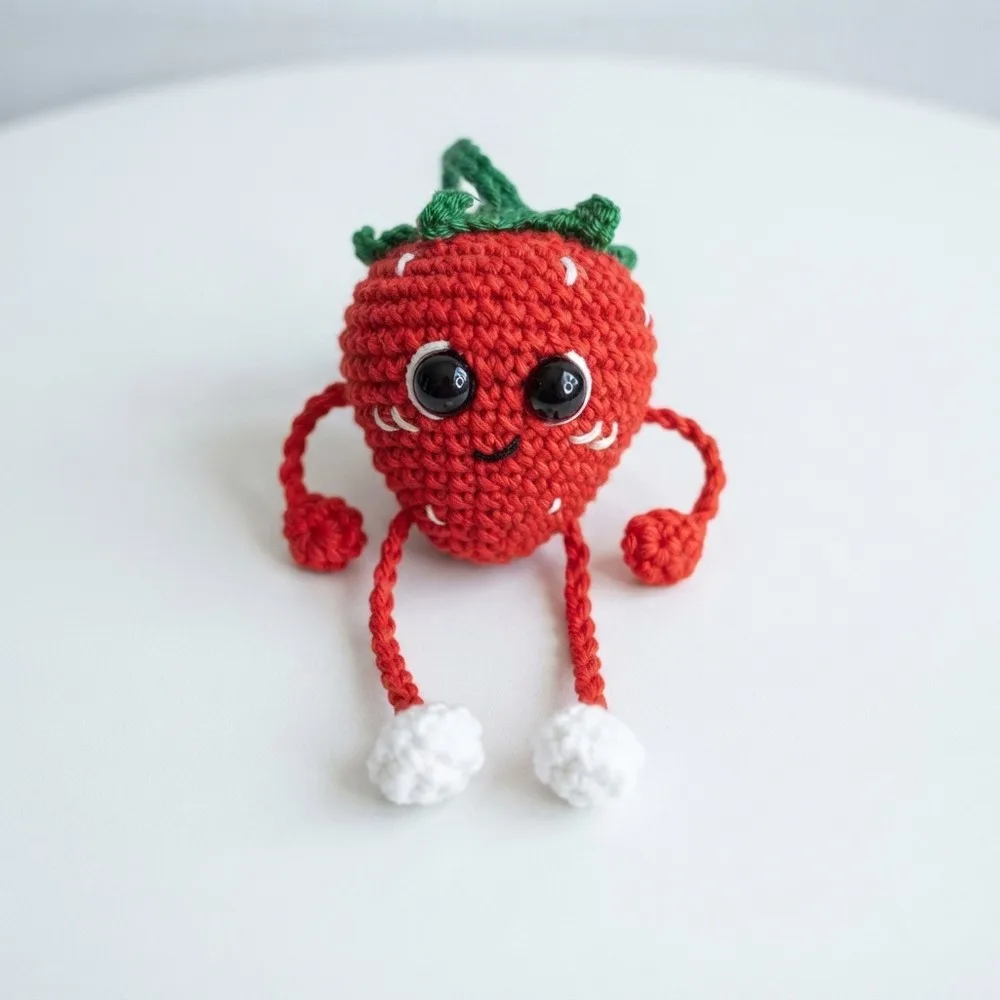
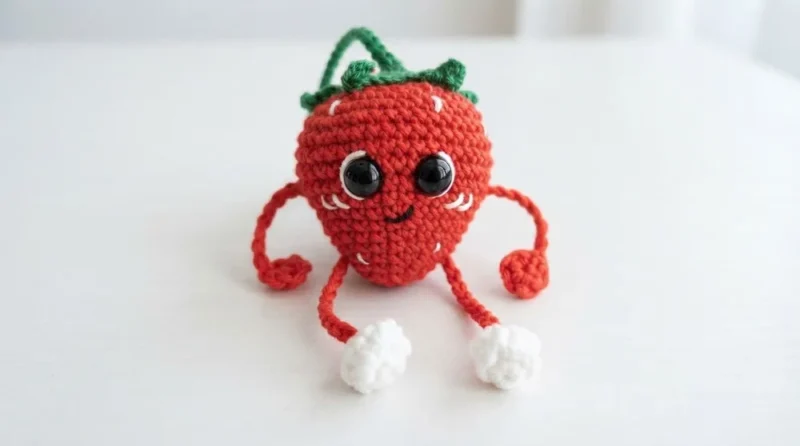
The finished strawberry sits small in the palm of your hand, plump and rounded with tiny embroidered seeds dotting the red body and a jaunty green leaf crown on top. It's soft, huggable in miniature, and instantly recognizable as a strawberry the moment someone spots it dangling from a bag or keyring. Add the optional keychain cord and it becomes a ready-made gift for fruit lovers, teachers, or anyone who needs a little pocket-sized joy.

Variations

Once you've made one strawberry, the variations practically crochet themselves. Try a pastel version in blush pink and sage green cotton, like Lily Sugar'n Cream or Paintbox Yarns Cotton DK, for a softer, spring-market vibe instead of the classic bright red and green. For a mini charm size, drop to a 2.0mm hook and work the same round structure with your yarn held slightly tighter; the piece will finish noticeably smaller and work well as an earring or zipper pull instead of a keychain. Going bigger is just as easy: size up to a 3.5mm hook with the same worsted cotton for a plush, huggable strawberry that skips the keychain findings entirely and becomes a shelf sitter or nursery decoration. Swap the black safety eyes for a simple embroidered smile and no eyes at all for a more abstract, textural fruit-bowl decoration. For a fun themed twist, work the body in yellow and orange to make a matching 'lemon' or 'peach' friend using the exact same round counts, just changing your color changes at the increase and decrease points. You could also felt tiny white French knots instead of embroidered seeds for a raised, textured look that catches the light differently than flat stitches. If you want a coordinated set, make several strawberries in graduated sizes using the size-adjustment tips above, then string them onto a single cord for a garland instead of individual keychains. Finally, consider swapping standard fiberfill for scented polyester stuffing (strawberry or vanilla scented craft fiberfill is widely available) so your finished keychain smells as sweet as it looks, a lovely touch for gift-giving.

I adore this pattern because every piece has a job and a personality. The main body works up in twelve rounds of increases and invisible decreases that create that classic strawberry taper, rounder at the top and narrowing gently toward the base, and watching that shape emerge round by round is so satisfying. Setting the safety eyes between rounds 10 and 11 is a small but exciting moment; suddenly your strawberry has a face and a soul. I love that the legs and arms are made from simple magic ring starts and short single crochet rounds, so they come together quickly while you're still riding the momentum from the body. The petal-shaped leaf top is my favorite detail: those gentle shaping rounds give it real dimension instead of a flat green blob. And embroidering the seeds at the end feels like the reward round, transforming a red amigurumi ball into an unmistakable strawberry. It's a project where technique and cuteness genuinely meet.
Common mistakes

  • Pulling the magic ring closedCinch the magic ring tail firmly and check that no visible hole remains before working your first stitches into it; a loose center will show as a gap at the base of the body, legs, arms, or leaf.
  • Losing track of round countsPlace a stitch marker in the first stitch of every round and move it up as you go; this makes it instantly obvious which round you're on and prevents accidental extra increases or decreases.
  • Attaching the safety eyes too earlyTry the eyes in place before locking the backing washer on, checking spacing against the actual stitch rounds, and only secure them once you're happy with placement, since safety eyes cannot be removed once locked.
  • Using a regular single crochet decreaseWork invisible decreases by inserting your hook into the front loops only of the next two stitches before pulling through, which keeps the surface smooth and rounded rather than ridged.
  • Under-stuffing the main body beforeStuff firmly in small pinches as you work the closing decrease rounds, using a tapestry needle or chopstick to push fiberfill into the narrower top and bottom areas before the opening gets too small.
  • Embroidering the seed details with yarnUse a thinner embroidery yarn or split your cotton yarn strand for the seed embroidery so the small stitches sit neatly on top of the fabric without puckering it.

The pattern

Written out round by round

Materials

  • Worsted weight or 4-ply cotton yarn in red, green, white, and black
  • 2.5 mm crochet hook
  • Safety eyes (small size, e.g., 6 or 8 mm)
  • Polyester fiberfill stuffing
  • Stitch markers
  • Embroidery needle and yarn for details
  • Scissors
  • Tapestry needle
  • Optional keychain findings or chain

Abbreviations

  • sc = single crochet
  • hdc = half double crochet
  • dc = double crochet
  • ch = chain
  • sl st = slip stitch
  • inv dec = invisible decrease

1. Arms (Make 2)

  1. Round 1Create a magic ring, crochet 6 single crochets (sc) into it. Join the round by slip stitching (sl st) into the first sc.Chain 25 for the arm length. Cut yarn leaving about 10 cm tail for weaving in ends. Weave in ends securely.

2. Legs (Make 2)

  1. Round 1Make a magic ring and crochet 6 sc into it. Join with a slip stitch to form a round.
  2. Round 2Crochet 6 increases: 2 sc in each stitch around, total 12 sc . Join with slip stitch.
  3. Round 3Crochet 12 sc evenly around. Join with slip stitch. Cut Yarn: Leave a long tail (~20 cm) for sewing the leg to the body during assembly.

3. Leaf / Top Piece

  1. Round 1Magic ring, 5 sc inside. Join with slip stitch.
  2. Round 2Crochet 5 increases: 2 sc in each stitch, total 10 sc . Join with slip stitch.

The petal shapes are formed by combining chains, slip stitches, single crochet, half-double crochet, and double crochet stitches worked into the round, creating the layered, dimensional leaf top.

  1. Round 3(Petal Formation): Petal repeat 5 times: Chain 5, skip 1 base chain, slip stitch in next chain, 1 sc, 1 half-double crochet (hdc), 1 double crochet (dc), Skip 1 base stitch, join with slip stitch.Fold in half and attach securely to the center of the leaf piece.

Optional Keychain Cord: Chain 40.

4. Main Body

Begin with magic ring and rounds as follows: wrap yarn around your fingers to create an adjustable loop, then work stitches into the loop before pulling it closed for a tight, hole-free center.

  1. Round 1Magic ring, crochet 6 sc . Join slip stitch.
  2. Round 2Increase: 2 sc in each stitch around – total 12 sc .
  3. Round 3Crochet 12 sc evenly.
  4. Round 4Pattern: 1 sc, 1 increase; repeat 6 times – total 18 sc .
  5. Round 5Crochet 18 sc evenly.
  6. Round 6Pattern: 2 sc, 1 increase; repeat 6 times – total 24 sc .
  7. Round 7Crochet 24 sc evenly.
  8. Round 8Pattern: 3 sc, 1 increase; repeat 6 times – total 30 sc .
  9. Round 9Crochet 30 sc evenly.
  10. Round 10Pattern: 2 sc, 1 increase, 2 sc; repeat 6 times – total 36 sc .
  11. Round 11Pattern: 5 sc, 1 increase; repeat 6 times – total 42 sc .
  12. Rounds 12-14Crochet 42 sc in each round.

Continue Body Shaping and Closure

Invisible Decrease (inv dec): Insert hook into the front loop of the next two stitches; yarn over and pull up a loop (3 loops on hook); insert hook into the back loop of those same two stitches; yarn over and pull up a loop (5 loops on hook); yarn over and pull through all 5 loops on hook for an invisible decrease. Also, be sure safety eyes were placed firmly between rounds 10 and 11, the face embroidered, and the arms and legs sewn on symmetrically using their yarn tails before continuing with the closure rounds below.

  1. Round 15Pattern: 5 sc, 1 invisible decrease; repeat 6 times – total 36 sc .
  2. Round 16Pattern: 2 sc, 1 invisible decrease, 2 sc; repeat 6 times – total 30 sc .
  3. Round 17Pattern: 3 sc, 1 invisible decrease; repeat 6 times – total 24 sc .
  4. Round 18Pattern: 1 sc, 1 invisible decrease, 1 sc; repeat 6 times – total 18 sc .
  5. Round 19Pattern: 1 sc, 1 invisible decrease; repeat 6 times – total 12 sc . Stuff the body firmly at this stage for shape.
  6. Round 206 invisible decreases – total 6 sc remaining. Finish off by closing the hole using a tapestry needle and weaving in ends securely.

Assembly

Step 1

The finished strawberry keychain measures approximately 10 cm (4 inches) in length excluding optional keychain cord.

Step 2

Arms and legs are about 7 cm (2.7 inches) , giving realistic proportions.

Step 3

The leaf creates a lovely decorative top, around 5 cm (2 inches) across.

Step 4

The strawberry body measures approximately 6 cm (2.5 inches) at its widest point, and the optional keychain cord measures about 15 cm (6 inches) when folded in half.

Step 5

Safety Eyes: Place safety eyes firmly between rounds 10 and 11 of the main body at your desired spacing, before stuffing.

Step 6

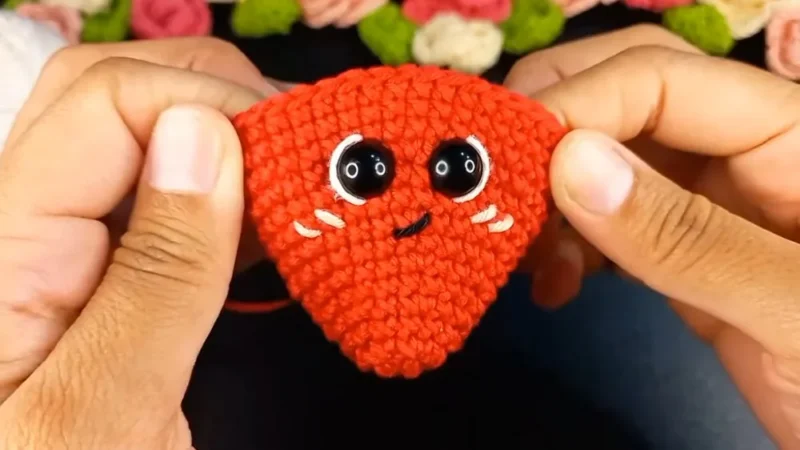
Embroider Face: Use black yarn or embroidery thread to create a smile, eyelashes, or other facial details.

Step 7

Attach Arms and Legs: Sew the arms and legs securely to the body using yarn tails, positioning them symmetrically.

Step 8

Seed Embroidery: Using white yarn or thread, embroider small seed marks scattered across the strawberry body to mimic a strawberry's natural look.

Step 9

Secure the leaf piece atop the body, then attach the optional keychain cord to the center of the leaf if desired, to finish the piece.

Important notes

💡 Use a 2.5mm hook with worsted weight cotton for tight, even stitches that keep fiberfill from peeking through, especially important on such a small amigurumi piece.

💡 Keep a stitch marker in the first stitch of each round throughout the 12-round main body and the 6-round shaping and closure section, since amigurumi is worked in a continuous spiral with no visible round breaks.

💡 Attach safety eyes firmly between rounds 10 and 11 of the main body before adding any stuffing, since you'll have much easier access to the wrong side of the fabric while it's still open.

💡 Stuff the body gradually as you close the final decrease rounds rather than all at once at the end, so the fiberfill distributes evenly and the strawberry keeps its rounded shape.

💡 Weave in every yarn end cleanly with a tapestry needle, running the tail through several stitches and back before trimming, since a small toy like this gets handled and tugged often on a keyring.

💡 Attach the optional keychain cord or finding through a sturdy stitch at the top of the leaf piece so the weight of the strawberry doesn't pull against a weak or thin attachment point.

💡 Gauge is not critical for this amigurumi, but keep an even, tight tension throughout so stuffing doesn't peek through the stitches.

💡 The magic ring is used to start almost every piece — arms, legs, leaf, and main body — because it creates a tight, hole-free center that a simple chain-and-join round can't match.

💡 The optional keychain cord is easy to add (chain 40, fold in half, and attach to the leaf) but can be skipped entirely if you'd rather keep the strawberry as a stuffie without a cord.

More photos

Crochet Strawberry Keychain: Free Amigurumi Pattern for Beginners — photo 2
Crochet Strawberry Keychain: Free Amigurumi Pattern for Beginners — photo 3
FAQs

Frequently asked questions

What size hook and yarn should I use for the strawberry keychain?

This pattern calls for a 2.5mm crochet hook paired with worsted weight or 4-ply cotton yarn in red, green, white, and black. The smaller hook relative to the yarn weight keeps stitches tight so stuffing doesn't show through.

Can I make this pattern without safety eyes?

Yes, you can embroider small French knot eyes with black embroidery yarn instead of using safety eyes, which also makes the toy safer for very young children. Just plan your placement around rounds 10-11 of the main body as the pattern suggests for safety eyes.

How much yarn do I need to complete one strawberry keychain?

Because the body, legs, arms, and leaf are all small amigurumi pieces, one strawberry uses only a small amount of each color, easily covered by a single skein of each red, green, white, and black cotton. Leftover scraps from other amigurumi projects work great here.

Is this pattern really suitable for beginners?

It's labeled beginner-to-intermediate, so if you already know magic rings and single crochet you'll be fine, but the invisible decreases and color coordination give it a bit more challenge than a true first project. It's a great next step after you've made one or two simple amigurumi shapes.

How do I attach the leaf piece to the top of the body?

Once the main body is stuffed and closed, sew the petal-shaped leaf piece securely over the top using a tapestry needle, tacking through several points around the leaf's edge for stability. This is also the ideal spot to attach your optional keychain cord or finding for extra strength.

One at a time —

Get the next pattern

Tested round by round before it is sent. No spam.