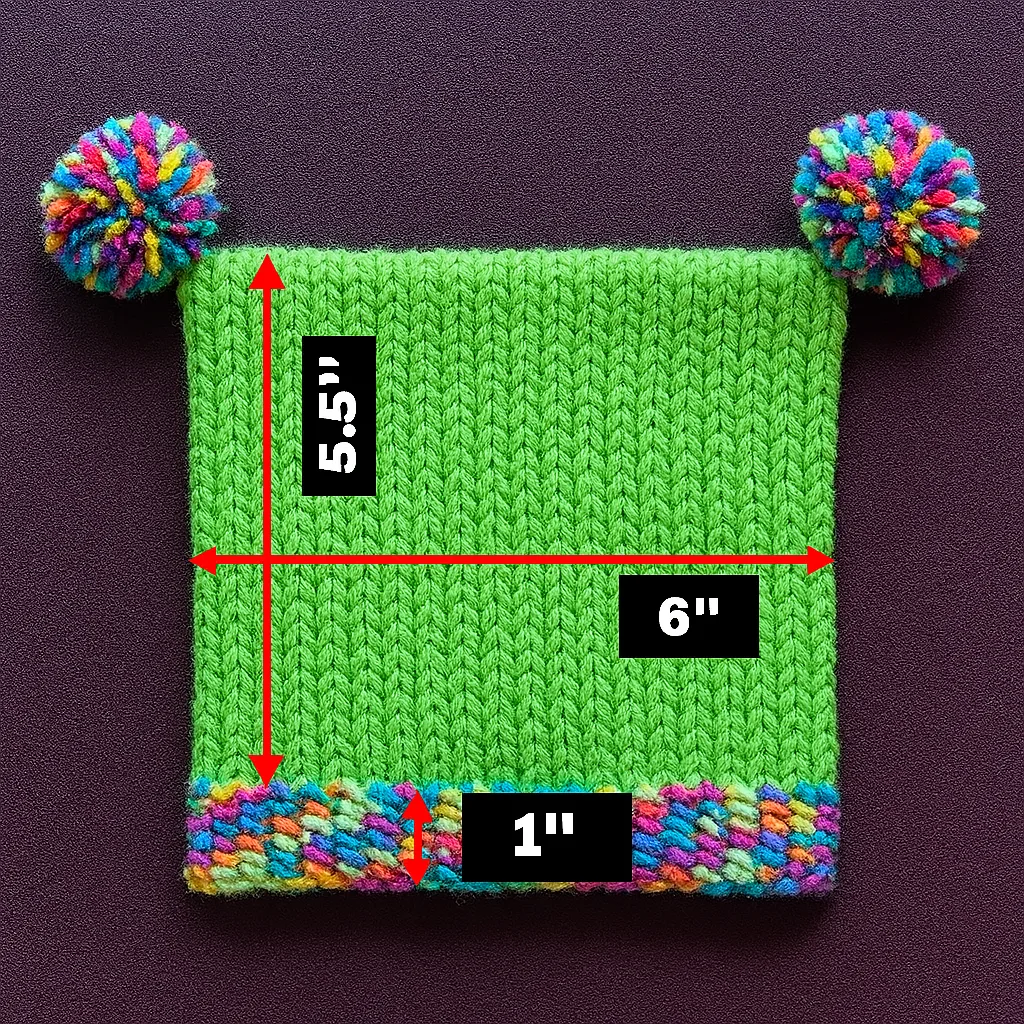
Made and counted by Wren —

Crochet Square Baby Hat: The Perfect DIY Baby Accessory

Learn to crochet a square baby hat with this easy pattern using DK or worsted yarn. A soft, sweet handmade accessory perfect for gifting new parents.

BeginnerLevel
2-3 HoursTime
4 mmHook
DK/WorstedYarn
Jump to the pattern

At a glance

Begin by chaining 4 and joining with a slip stitch to form your starting ring.

Work the first round into the ring to establish the base of your square motif.

Continue with the second round, building outward to increase the square's size.

Complete the third and final round to finish your square to its full dimensions.

Fasten off and set the square aside once all three rounds are complete.

Fold the square and align the corners so the top of the hat will sit symmetrically.

Thread a yarn needle and whip stitch or slip stitch the sides together to shape the crown.

Weave in all loose ends carefully so nothing scratches against baby's delicate skin.

About this pattern

This crochet square baby hat is a delightfully clever twist on the classic baby beanie — instead of working in the round to form a dome, you crochet a simple square motif and then seam it into a snug, sweet-fitting cap. It's the kind of pattern that makes you smile the whole time you're making it, because the construction feels almost like a magic trick. Perfect for baby showers, newborn photo sessions, or just because you want to make something soft and small for a little one you adore.

The techniques here are refreshingly approachable, built around a basic granny-style square worked from a foundation ring joined with a slip stitch. If you can chain, join a ring, and follow simple rounds, you're fully equipped for this project — it's a wonderful pick for confident beginners or anyone who wants a quick, satisfying make. Expect to spend somewhere around two to three hours from first stitch to woven-in ends, including the seaming step at the end.

The finished hat has a charming, slightly structured look thanks to its square-turned-cap construction, with soft folded corners that give it real personality on a baby's head. Worked up in a gentle DK or worsted weight yarn, it feels light and breathable — never bulky or stiff — which makes it genuinely comfortable for delicate newborn skin. Whether you keep it simple in a single soft hue or get playful with color, this little hat makes an irresistibly personal gift.

Variations

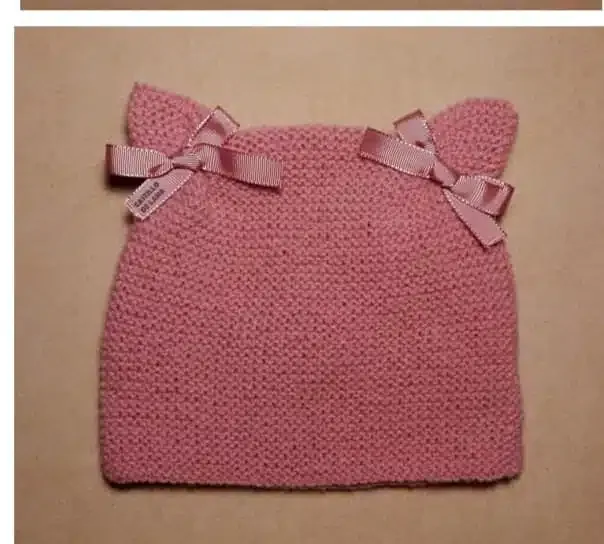
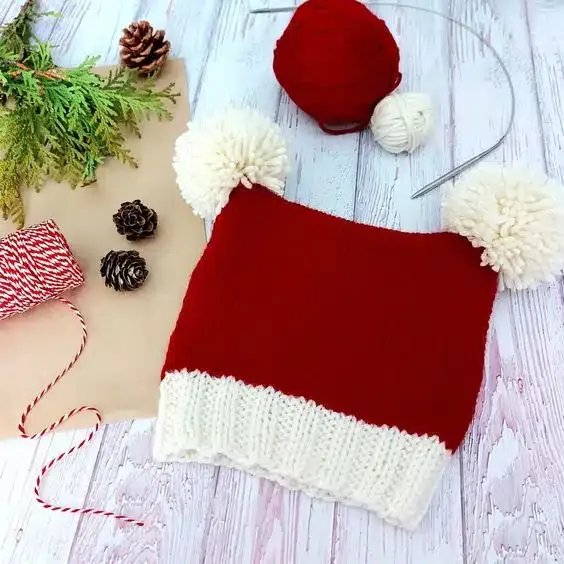
One of my favorite things about this square baby hat is how endlessly customizable it is once you've got the basic construction down. For newborns, try dropping to a lighter fingering weight yarn with a 3.5mm hook to create a smaller, more delicate version — just keep an eye on your gauge as you work the rounds so the square stays proportional. For an older baby or toddler, size up to a chunky yarn with a 5.5mm hook for a cozier, faster-growing fit. Color is where this pattern really gets to shine. Try a soft heathered gray or oatmeal ( Vanna's Choice or Bernat Softee Baby are lovely choices) for a gender-neutral, giftable classic, or go playful with a color-blocked square using two contrasting shades — one color for the first two rounds, a second for the final round, so the border pops. A pastel ombré effect using a self-striping baby yarn like Caron Cakes can also look absolutely stunning worked into this square shape. Seasonal touches are easy to add too: attach a small pom-pom or tassel to one corner for a whimsical, elf-like point, or add a simple crocheted flower appliqué to a corner for a girly, garden-party feel. If you want a more rustic, textured look, swap your smooth DK yarn for a lightly brushed or bouclé baby yarn — it adds gorgeous depth to the simple square rounds without changing the construction at all. Finally, consider making a matching set: a smaller square coaster-style motif becomes an adorable baby rattle cover, or scale the pattern down further for a set of doll-sized hats to pair with the baby version as a keepsake gift.

There's something so satisfying about watching a flat square transform into a wearable little hat — it genuinely feels like a bit of crochet magic! I love that this pattern starts so simply, with just a chain-4 ring joined with a slip stitch, so you're not fumbling with complicated foundation rounds before you even get going. The three rounds of the main pattern build up quickly, which means you get that rewarding 'it's really taking shape' feeling almost right away instead of waiting forever to see progress. What really won me over, though, is the seaming step. Whip-stitching or slip-stitching the sides together to form the crown is such a clever, low-fuss way to shape a hat without any decrease rounds or fussy math. It's forgiving, it's quick, and it lets the square silhouette shine through in the sweetest way. Add in the fact that you get to choose a soft, baby-safe cotton or acrylic yarn, and this becomes one of those projects where the process is just as lovely as the finished object. It's simple enough to enjoy while you chat or watch TV, but special enough to feel like a genuine handmade treasure.
Common mistakes

  • Starting ring too loose after the ch 4, joinPull your beginning tail snug before working your first round so the center hole doesn't gape open at the top of the hat later — a loose ring can leave an unsightly gap once seamed.
  • Losing track of which round you'rePlace a stitch marker in the first stitch of each round as you start it, and move it up each time — this keeps your rounds clearly separated, especially if you set the project down mid-make.
  • Seaming the sides unevenly, resulting in a lopsided crownBefore you start stitching the sides together with your yarn needle, fold the square in half and match up corners first, pinning or clipping them in place so the top stays symmetrical while you whip stitch or slip stitch.
  • Choosing a scratchy or stiff yarn for a baby-worn itemStick with a soft cotton or acrylic yarn with good elasticity as the pattern suggests — avoid novelty or wool-blend yarns that might feel rough against sensitive newborn skin.
  • Weaving in ends too loosely or leaving tails on the outsideWeave each end through several stitches in different directions with your yarn needle and trim closely, always checking the inside isn't scratchy against a baby's scalp.
  • Using a hook size mismatched to your yarn weightStick close to the recommended 4mm (G-6) hook for DK or worsted weight yarn — sizing up or down significantly can throw off your square's finished dimensions and make seaming trickier.

The pattern

Written out round by round

Materials

Yarn

  • Choose a soft yarn that’s gentle on a baby’s skin. Cotton or acrylic yarn is an excellent choice for this project. Consider using yarn with a soft texture and good elasticity.

Recommended Weight

  • DK (double knit) or worsted weight yarn.

Suggested Colors

  • Go for soft pastels like baby blue, pink, or cream for a classic look, or experiment with vibrant colors for a more modern touch.

Crochet Hook

  • Select a hook size that corresponds with your yarn weight. Typically, a 4mm (G-6) crochet hook works well with most baby yarns.

Scissors

  • Always have a pair of sharp scissors on hand for cutting yarn ends.

Yarn Needle

  • Used to weave in the loose yarn ends once your project is complete.

Stitch Marker

  • Optional but helpful for marking the beginning of each round.

Abbreviations

  • ch = chain
  • st = stitch
  • sl st = slip stitch
  • dc = double crochet
  • shell = shell stitch

Main Pattern

Step 1 Begin with a Foundation Chain. Start by making a foundation chain of 4 chains (ch 4). Join the chains into a ring with a slip stitch (sl st). This ring will be the center of your square.

  1. Foundation Ringch 4 , join with a sl st to form a ring.
  2. Round 1In the ring, make 3 double crochet stitches (dc) . These will form your first cluster. Then, chain 2, and make 3 double crochet stitches into the ring again. Repeat this process 3 more times to complete the first round. You should have 4 clusters in total. At the end of the round, join the last stitch to the top of the first dc with a slip stitch.
  3. Round 2For the second round, chain 3 (this will count as your first double crochet). Then, in the next gap between clusters, make 2 dc , chain 2, and make 3 dc . Repeat this process for all four gaps between clusters, joining at the end of the round with a slip stitch.Step 4 Continue Increasing. Now, continue working the following rounds, increasing in each corner to form the square. For each round, add 3 double crochets in the corner spaces (the spaces created by the chain-2 gap in the previous round) to make your square expand symmetrically.
  4. Round 3In the corners, work 3 dc, chain 2, 3 dc in the corner spaces, and continue with 3 dc between corners.
  5. Round 4Repeat the same process but increase the space between each corner set of 3 dc. Keep repeating this process until your square is large enough to fit around the baby’s head.Before you finish the square, measure the size against the baby’s head to ensure it fits comfortably. If necessary, add or subtract rounds until the hat fits. The goal is for the square to have a side length that matches the circumference of the head.To finish off your crochet square baby hat , add a simple scalloped edge or shell stitch around the hat’s opening. This adds a charming touch and keeps the hat from looking too plain.For a shell stitch, work 5 dc into each stitch around the hat’s edge.For a scalloped edge: *dc, chain 2 , dc* in each stitch around.Once you’ve finished the hat, use your yarn needle to weave in any loose ends. Be sure to do this carefully to ensure there are no loose yarn ends that might irritate the baby’s skin.Measure the baby’s head circumference before starting, and compare it to the size of your square. Make adjustments by adding or removing rounds until the square fits comfortably around the baby’s head.

Step 5 Measure and Fit

Step 6 Fold the Square

Once you’re happy with the size of the square, fold it in half, aligning two opposite corners. This will form the basic shape of the hat.

Step 7 Seam the Sides

Now, using a yarn needle, stitch the sides of the square together. This can be done with a simple whip stitch, or you can use a slip stitch if you prefer a neater seam. Ensure the sides are aligned properly so that the top of the hat is symmetrical.

Step 8 Add the Edging

Step 9 Weave in Loose Ends

Step 10 Add a Pom-Pom (Optional)

For an extra adorable touch , you can add a pom-pom to the top of the hat. This step is entirely optional, but it can make the hat even more charming.

Final Touch Enjoy Your Creation!

And there you have it — your very own crochet square baby hat ! This delightful hat is not only a great project for crocheting enthusiasts but also a perfect gift for new parents.

While the square shape is unique and functional, you can adapt this project to other shapes, such as circles, if you prefer a more traditional look.

You can change colors at the beginning of each round to create a striped effect or even add small color blocks at the corners. Just be sure to weave in the ends neatly.

Important notes

💡 Use a 4mm (G-6) hook as your starting point, but always crochet a quick swatch first since baby hat sizing is unforgiving — even a small gauge difference changes the fit noticeably.

💡 Keep a stitch marker on hand to mark the beginning of each round; it's optional but genuinely helpful for staying oriented through the three rounds of the main pattern.

💡 When seaming the sides together, work slowly and check the fit against a doll, stuffed animal, or even your own fist to make sure the crown will sit snugly on a baby's head.

💡 Choose a whip stitch for a quick, sturdy seam or a slip stitch seam if you want a neater, more polished finish on the visible parts of the hat.

💡 Always double- and triple-check that all yarn ends are woven in securely and trimmed close — loose fibers or tails can irritate delicate baby skin or become a safety concern.

💡 If gifting this hat, consider making it slightly generously sized since babies grow fast — a little extra room means more wear time before they outgrow it.

More photos

Crochet Square Baby Hat: The Perfect DIY Baby Accessory — photo 2
Crochet Square Baby Hat: The Perfect DIY Baby Accessory — photo 3
FAQs

Frequently asked questions

What size baby does this square hat pattern fit?

The pattern is designed to be adaptable, so fit largely depends on your yarn weight and hook size combined with your gauge. Using the recommended DK or worsted yarn with a 4mm hook typically produces a newborn-to-3-month size; swatching first is the best way to confirm fit.

Can I use cotton yarn instead of acrylic for this hat?

Absolutely — both cotton and acrylic are recommended in the materials list specifically because they're gentle on baby skin. Cotton offers a bit more structure and breathability, while acrylic tends to be softer and more elastic, so choose based on the feel you prefer.

Do I need any special stitches to make this hat?

No special stitches are required beyond a basic foundation ring joined with a slip stitch and the stitches used across the three rounds of the main pattern. It's a great project if you're comfortable with fundamental crochet techniques.

How do I join the square into a hat shape?

Once your square is complete, you fold it and use a yarn needle to stitch the sides together with either a whip stitch or a slip stitch. Aligning the sides carefully as you seam keeps the top of the hat symmetrical and neat.

Is this pattern good for beginners?

Yes, it's a wonderful beginner-friendly project since it only involves a simple starting ring, three straightforward rounds, and a basic hand-seaming technique. It's a great way to practice finishing skills like weaving in ends and seaming without tackling complex shaping.

One at a time —

Get the next pattern

Tested round by round before it is sent. No spam.