Made and counted by Wren —

Crochet Penguin Amigurumi Pattern For Beginners

Learn to crochet an adorable penguin amigurumi with this beginner-friendly pattern featuring simple stitches, cute wings, and a huggable stuffed body.

Crochet Penguin Amigurumi Pattern For Beginners
BeginnerLevel
3-5 HoursTime
WorstedYarn
Jump to the pattern

At a glance

Begin the main body with a magic ring and work through 12 rounds, increasing and decreasing to shape the rounded penguin form.

Stuff the body gradually as you go so the shape stays smooth and even rather than lumpy.

Crochet the wings separately in gray yarn across 7 rounds, keeping the tension snug for a structured flipper shape.

Work the legs in black yarn for the first few rounds to form the sturdy stuffed base.

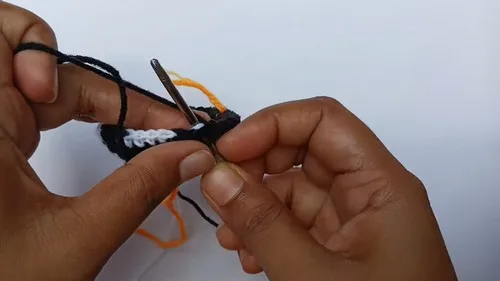
Weave in all yarn tails securely, including the ends from the black-to-gray color change.

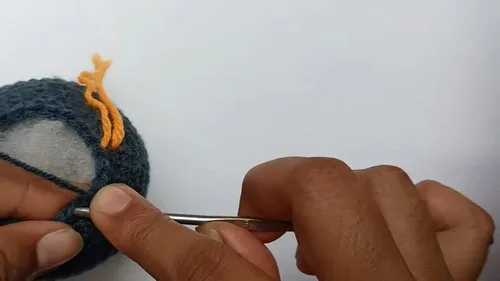
Pin the wings and legs onto the body to check placement and symmetry before sewing.

Stitch each piece securely in place to complete your huggable little penguin friend.

About this pattern

This crochet penguin amigurumi pattern brings to life one of the most beloved little creatures with a rounded body, tiny wings, and a soft stuffed shape that just begs to be hugged. It's an ideal project for anyone who wants a quick, satisfying make that results in a genuinely charming finished piece. Whether you're crafting it as a nursery decoration, a holiday-season gift, or a fun shelf companion, this penguin fits right in and never goes out of style.

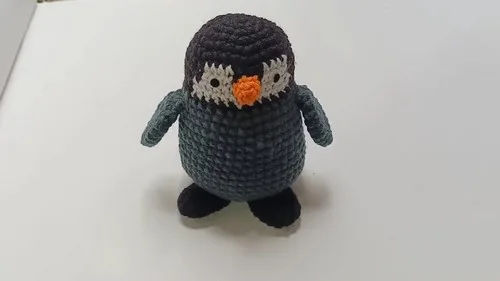
The finished penguin has a plump, huggable body with a rounded belly, small flippers, and stubby little legs that let it stand on its own. Its classic black, white, and gray color palette gives it that unmistakable penguin charm, while the soft stuffing makes it irresistibly squeezable. It's small enough to tuck into a gift bag but substantial enough to become a favorite little friend on a bookshelf or bedside table.

Variations

One of my favorite things about this penguin pattern is how easy it is to make it your own! For a classic look, stick with black for the body and head, white for the belly panel, and a soft gray like Vanna's Choice in "Silver Grey" for the wings and lower legs — it mimics that natural penguin coloring beautifully. Want a fun twist? Try an orange or yellow accent on the beak and feet using a bright acrylic like Super Saver in "Pumpkin" for a playful pop of color that really makes the face stand out. If you're feeling festive, swap the gray wings for deep red or forest green to give your penguin a seasonal feel without changing a single stitch count. For size variations, try using a smaller hook (like an E or F) with the same stitch pattern and a fingering-weight yarn to create a mini pocket-sized penguin, or size up with a bulky yarn and larger hook for an oversized huggable version — just remember that changing yarn weight will affect your final gauge and finished size. You can also experiment with adding a tiny crocheted scarf or a small knit hat for extra character, especially if you're making this as a themed gift. For yarn substitutions, any worsted-weight acrylic or cotton blend works beautifully — brands like Bernat Softee Chunky or Caron Simply Soft both hold stitch definition well for amigurumi shaping. However you customize it, this penguin pattern is flexible enough to become a whole flock of unique little friends!
Common mistakes

  • Starting the main body with a loose magic ring that leaves a visible hole at the center.Pull the magic ring tail tightly before beginning round 2, and give it an extra tug again once the first few rounds are complete to fully close the gap.
  • Losing track of stitch count during the increase and decrease rounds in the 12-round main body.Use a stitch marker at the start of each round and count your stitches after every round to catch mistakes early before they compound.
  • Stuffing the body unevenly, leading to a lopsided or lumpy penguin shape.Add stuffing in small amounts as you go rather than all at once at the end, gently shaping the fiberfill with your fingers to keep the body smooth and rounded.
  • Attaching the wings too high or too low, throwing off the penguin's proportions.Pin the wings in place with stitch markers first and step back to check symmetry before sewing them securely to the body.

The pattern

Written out round by round

Materials

  • Worsted weight yarn
  • Crochet hook (size to suit your yarn)

Abbreviations

  • sc = single crochet
  • inc = increase
  • dec = decrease

Main Body

The main body is worked in a continuous spiral, starting with black yarn and a magic ring.

  1. Round 16 single crochets in a magic ring (6)Step by step: 6 sc (6).
  2. Round 26 increases (12)
  3. Round 3(1 single crochet, increase) * 6 times (18)
  4. Round 4(2 single crochet, increase) * 6 times (24)
  5. Round 5(3 single crochet, increase) * 6 times (30)
  6. Round 6(4 single crochet, increase) * 6 times (36)
  7. Round 710 black, 4 white, 15 black, 3 black, 4 white (36)
  8. Round 812 black, 4 white, 3 black, 4 white, 15 black (36)
  9. Round 910 black, 6 white, 1 black, 6 white, 13 black (36)
  10. Round 1010 black, 13 white, 13 black (36)
  11. Round 11(4 single crochet, decrease) * 6 times (30)
  12. Round 12(8 single crochet, decrease) * 3 times (27)

Wings (Gray yarn)

  1. Round 16 single crochet in a magic ring (6)
  2. Round 2(1 sc, inc) * 3 (9)
  3. Round 3(2 sc, inc) * 3 (12)
  4. Round 4(3 sc, inc) * 3 (15)
  5. Round 5R6: 15 sc (15)
  6. Round 7(3 sc, dec) * 3 (12)
  7. Round 86 dec (6)

Legs (Black yarn)

  1. Round 16 sc in a magic ring (6)
  2. Round 26 inc (12)
  3. Round 3(1 sc, inc) * 6 (18)
  4. Round 4R7: 18 sc (18)

Change to gray yarn and continue

  1. Round 13(8 single crochet, increase) * 3 times (30)
  2. Round 14(4 single crochet, increase) * 6 times (36)
  3. Round 15R17: 36 single crochet (36)
  4. Round 18(5 single crochet, increase) * 6 times (42)
  5. Round 19R20: 42 single crochet (42)
  6. Round 21(6 single crochet, increase) * 6 times (48)
  7. Round 22R25: 48 single crochet (48)
  8. Round 26(6 single crochet, decrease) * 6 times (42)
  9. Round 27(5 single crochet, decrease) * 6 times (36)
  10. Round 28(4 single crochet, decrease) * 6 times (30)
  11. Round 29(2 single crochet, decrease) * 6 times (18)
  12. Round 30(1 single crochet, decrease) * 6 times (12)
  13. Round 316 decreases (6)

Important notes

💡 Use a hook one size smaller than the yarn label recommends to keep your stitches tight enough that stuffing won't peek through the fabric.

💡 Place a stitch marker at the beginning of every round, especially through the 12-round main body, so you never lose your place during increases and decreases.

💡 When changing to gray yarn in the legs section, leave a 6-inch tail on both colors to weave in securely later without unraveling your color change.

💡 Stuff the main body firmly but in stages, adding a little fiberfill every few rounds so the shape stays even instead of lumpy at the end.

💡 Weave in all yarn tails, including the black-to-gray color change ends, using a tapestry needle woven through several stitches for a secure, invisible finish.

💡 Lay out and pin the wings and legs before sewing to double-check placement and symmetry, since amigurumi pieces are much easier to adjust before they're attached.

More photos

Crochet Penguin Amigurumi Pattern For Beginners — photo 2
Crochet Penguin Amigurumi Pattern For Beginners — photo 3
FAQs

Frequently asked questions

What yarn weight works best for this crochet penguin pattern?

A worsted-weight (medium, size 4) acrylic or cotton-blend yarn works best for this pattern, as it holds stitch definition well for amigurumi shaping. Brands like Super Saver or Vanna's Choice are great affordable options.

How much yarn do I need to make this penguin?

Since this is a small amigurumi project with a 12-round body, 7-round wings, and 4-round legs, you'll only need small amounts of black, white, gray, and orange yarn — often just leftover scraps from your stash are enough.

Is this pattern really beginner-friendly?

Yes, it primarily uses single crochet with basic increases and decreases, making it approachable even if you've only made a few amigurumi pieces before. The color change section does require a bit of care, but it's a great skill-building step.

What type of stuffing should I use for the body?

Polyester fiberfill is ideal for this penguin because it's lightweight, washable, and holds its shape well inside the stuffed body. Add it gradually in small amounts as you crochet each round for the smoothest, most even result.

Can I make this penguin stand up on its own?

Yes, the 4-round legs are designed to give the penguin a stable base so it can stand upright once stuffed and attached. Make sure to stuff the legs firmly and attach them evenly to the bottom of the body for the best balance.

One at a time —

Get the next pattern

Tested round by round before it is sent. No spam.