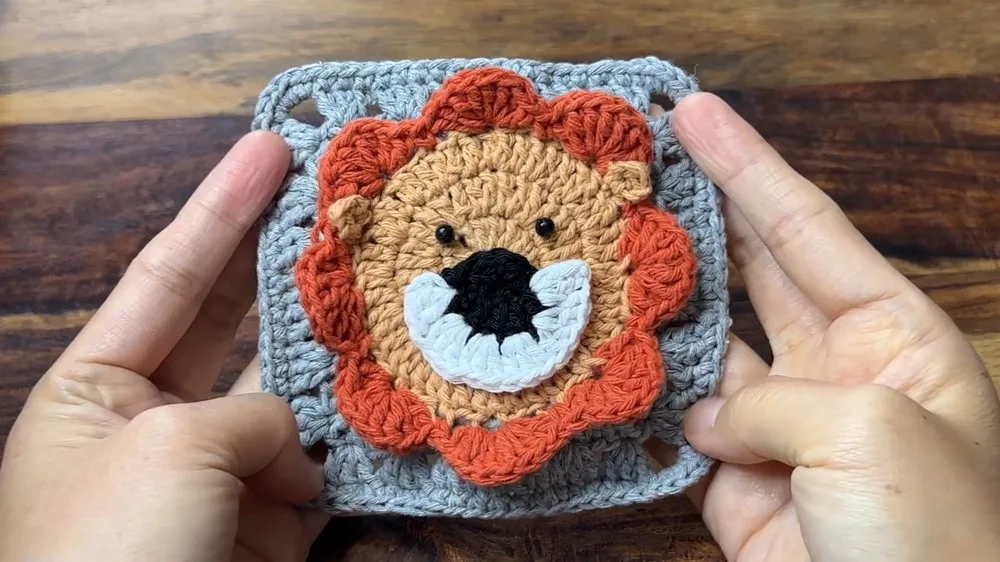
Made and counted by Wren —

Crochet Lion 3D Granny Square Pattern for Beginners

Learn to crochet an adorable 3D lion granny square with this easy step-by-step pattern using double crochet, magic rings, and simple increases.

Crochet Lion 3D Granny Square Pattern for Beginners
BeginnerLevel
2-3 HoursTime
WorstedYarn
Jump to the pattern

At a glance

Start by forming a double magic ring to create a secure, gap-free foundation for the lion's center.

Work your beginning chain-3 and fill the ring with double crochets to build the first solid round.

Close the round with a slip stitch into the top of the chain-3 to lock the stitch count in place.

Begin the second round by increasing into every stitch, doubling your stitch count as the circle grows outward.

Join again neatly so the increases sit evenly and the emerging shape stays perfectly round.

Make a second matching circle (the Bottom Part), then join both pieces together with single crochet before starting the square rounds.

Transition into the Forming the Square rounds, where increases shift toward the corners to square off the edges.

Continue working corner increases evenly so all four sides grow at the same steady rate.

Finish by weaving in your ends and lightly blocking the square so the lion motif and corners lie flat.

About this pattern

This Crochet Lion 3D Granny Square takes the traditional granny square you already know and love and gives it a whimsical, dimensional twist. Instead of a flat round of color changes, you build a raised lion motif right in the center using a double magic ring, then transform the surrounding rounds into the familiar square shape. It's a wonderful project for anyone who wants to add a little personality to their granny square stash, and it's especially fun for animal lovers, nursery decorators, or anyone building a themed blanket.

The main techniques here are all approachable for beginners: a double magic ring for a tight, gap-free start, standard double crochets, and the classic granny square increase of working two double crochets into each stitch to flare the corners outward. You'll also practice joining rounds neatly with a slip stitch into the top of your beginning chain-3, which is a skill that will serve you in almost every future granny square project. Expect to spend about 2-3 hours total, working at a relaxed, beginner-friendly pace.

When you're finished, you'll have a charming, textured square with a lion-inspired center popping forward from a classic granny frame — the kind of piece that looks far more advanced than the stitches actually are. It works beautifully as a single squishy coaster, a repeated motif for a jungle-themed blanket, or a fun appliqué stitched onto a bag or pillow. Because it's small and quick, it also makes a delightful handmade gift for a baby shower, a lion-loving friend, or a fellow granny square collector.
Variations

I adore this pattern because it proves you don't need fancy stitches to make something that feels special — just double crochets, a magic ring, and the classic granny square increase, all working together to build dimension. Starting with a double magic ring gives you that satisfying, no-gap center that beginners often struggle to achieve with a regular chain ring, so your lion's face starts strong from stitch one. Watching the stitch count jump from 16 to 32 in a single round is genuinely fun; you can feel the shape rounding out beneath your hook in real time. I also love that this square teaches the exact join-and-chain-3 rhythm you'll use in dozens of other granny square patterns, so it's a fantastic confidence-builder disguised as a cute little lion. There's something so satisfying about turning a flat round into a dimensional motif using nothing but increases — it feels like a magic trick every single time. Whether you're making one as a quick weekend win or a whole stack for a blanket, this pattern rewards you fast, which is exactly what keeps me reaching for my hook again and again.

Common mistakes

  • Pulling the double magic ring too tightMake your 15 double crochets into the ring first, then gently tug the tail to close it snugly — check that there's no visible hole in the center, but the ring still lies flat rather than cupping.
  • Losing track of the stitch countPlace a stitch marker at the start of the round and count out loud as you work each increase; if your final count is off, recount before joining so the square stays symmetrical.
  • Forgetting that the beginning chain-3Always join your slip stitch into the top of that chain-3, not into the base stitch below it, so your round closes at the correct spot and the join line stays hidden.
  • Working increases into the wrongUse a contrasting stitch marker in the very first stitch of each round so you always know exactly where your increase pattern needs to line up.
  • Leaving a loose or twisted joinPull your slip stitch join snug (but not tight enough to pucker) and weave in the tail immediately after each round so tension issues don't compound as you continue.
  • Mixing up which section you're inLay your pattern parts out before you start — Lion Head (3 rounds, made twice), Bottom Part Circle (3 rounds), Joining the Pieces (1 round), and Forming the Square (3 rounds) — and check off each round as you complete it.

The pattern

Written out round by round

Materials

  • Yarn in various colors
  • Crochet hook
  • Scissors
  • Yarn needle

Abbreviations

  • ch = chain
  • st = stitch
  • sl st = slip stitch
  • sc = single crochet
  • hdc = half double crochet
  • dc = double crochet
  • inc = increase
  • dec = decrease
  • mr = magic ring
  • fo = finish off
  • tr = treble crochet

Main Pattern

Lion Head Lion Head (Make 2 Circles): make 2 circles using the pattern below for the lion's head.

  1. Round 1Create a double magic ring. Chain 3 (counts as 1 double crochet). Make 15 double crochets into the ring. Join with a slip stitch to the third chain of the beginning chain-3 for a total of 16 stitches.(16)
  2. Round 2Chain 3 (counts as 1 double crochet). Make a double crochet in the first stitch. Increase (2 double crochets) in each stitch around. Join with a slip stitch at the end of the round for a total of 32 double crochets.(32)
  3. Round 3Chain 3 (counts as 1 double crochet). Make one double crochet in the same stitch. Make one regular double crochet in the next stitch, then an increase (2 double crochets) in the following stitch. Repeat around. A total of 48 stitches.Cut the yarn, set it aside.(48)

Bottom Part Circle Bottom Part Circle: create this second circle to form the base behind the lion's head.

  1. Round 1Create a magic ring. Chain 1. Make 6 single crochets into the ring. Join to the first single crochet.(6)
  2. Round 2Chain 3 (counts as 1 double crochet). Make 2 double crochets in the same stitch. Make 2 double crochets in the next stitch, then make 3 double crochets in the next stitch. Repeat around. Join to the beginning chain-3.
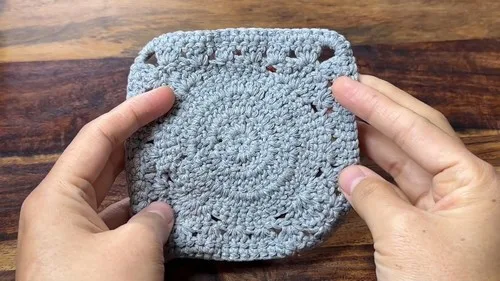
  3. Round 3Chain 3. Make 2 double crochets in each stitch around. Repeat. A total of 32 stitches.Joining the Pieces Joining the Pieces: hold both completed circles together and single crochet around to join them into one piece. (32)
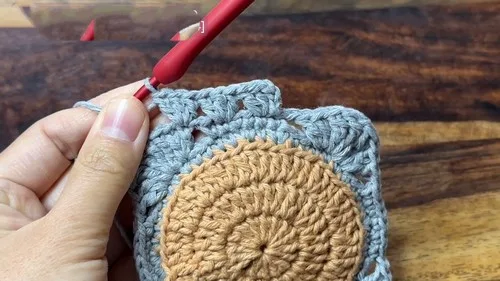
  4. Round 5Holding both circles together, insert the hook into any back loop of a stitch from both pieces. Work around with single crochets to join them together. Chain 1. Make 11 regular single crochets, then increase by 2 single crochets in the next stitch. Repeat around. Work 9 regular single crochets at the end.

Forming the Square

  1. Round 6Chain 1. Make 6 single crochets. Chain 1, skip 2 stitches, work 2 double crochets into the next stitch, make 2 treble crochets in the next stitch, chain 1, then 2 more treble crochets in the same stitch for the corner. Continue the pattern on each side until the end of the round.
  2. Round 7Chain 3 (counts as 1 double crochet). Skip 2 stitches, make 3 double crochets in the next stitch. Repeat this pattern along each side. Chain 3 for the corner. Skip 1 stitch (the chain-1 space), continue with 3 double crochets, skip 2 stitches along the next side. Repeat around.
  3. Round 8Single crochet around the entire square. In each corner chain space, work 5 single crochets. Join to the first single crochet at the end of the round.Lion's Mane and Face Details Step by step: Chain 3, work 7 double crochets into the same stitch. Skip 2 stitches and make a single crochet in the next. Repeat this pattern around for the mane. Nose For the nose, with black yarn create a small piece with 3 double crochets, turn, work some single crochets, and finish. Ears Make ears by attaching them with a chain-2 arch and double crochet stitches.

Face Details Attach white yarn for additional facial features.

Assembly

Step 1

Fasten off all yarn ends, weave in the loose ends, and shape your granny square.

Step 2

Attach any additional features like eyes or mouth with your yarn needle.

Important notes

💡 Use a hook one size smaller than you'd normally choose for your yarn weight to keep the double magic ring and first round nice and tight, preventing gaps at the lion's center.

💡 Count your stitches at the end of every single round before moving on — catching a miscount at 16 or 32 stitches is much easier than unraveling rows later.

💡 Keep a removable stitch marker in the first stitch of each round; it makes finding your join point and lining up increases effortless, especially once the square starts looking uniform.

💡 Block your finished square gently with steam or a light spray of water and pins — this helps the increase rounds lie perfectly flat and squares off any slightly wavy corners.

💡 Work your foundation chain-3 and first double crochet snugly but not tight; overly tight foundation stitches can make the increase round harder to work into evenly.

More photos

Crochet Lion 3D Granny Square Pattern for Beginners — photo 2
Crochet Lion 3D Granny Square Pattern for Beginners — photo 3
FAQs

Frequently asked questions

What size hook works best for this pattern?

A standard hook sized for worsted weight yarn (typically 5.0-5.5mm) works well, though sizing down slightly helps keep the double magic ring tight. Always check your gauge against your yarn label if you want a specific finished size.

Can I use this square in a full-size blanket?

Absolutely — this square is designed to be repeated, so you can make as many as you need and join them in rows just like a traditional granny square blanket. Alternating the lion square with plain granny squares creates a nice balanced pattern.

Do I need special stuffing for the dimensional lion center?

This pattern doesn't require stuffing since the dimension comes purely from the increase structure of the stitches. If you want extra pop, you can tuck a small amount of fiberfill behind the center rounds before joining, but it's completely optional.

Why does my square look wavy or ruffled instead of flat?

A wavy edge usually means too many increases were added in one spot or the stitch count crept up on a round. Recount your stitches against the pattern (16, then 32) and rip back if needed to correct the shape.

What yarn weight is recommended for beginners making this square?

A worsted weight (medium, size 4) acrylic or cotton yarn is ideal because it's affordable, easy to see your stitches in, and widely available in the golden and cream tones that suit a lion motif. Smooth, non-fuzzy yarn will also make it easier to spot and correct any stitch count errors.

One at a time —

Get the next pattern

Tested round by round before it is sent. No spam.