Made and counted by Wren —

Crochet heart keychain amigurumi pattern for beginners

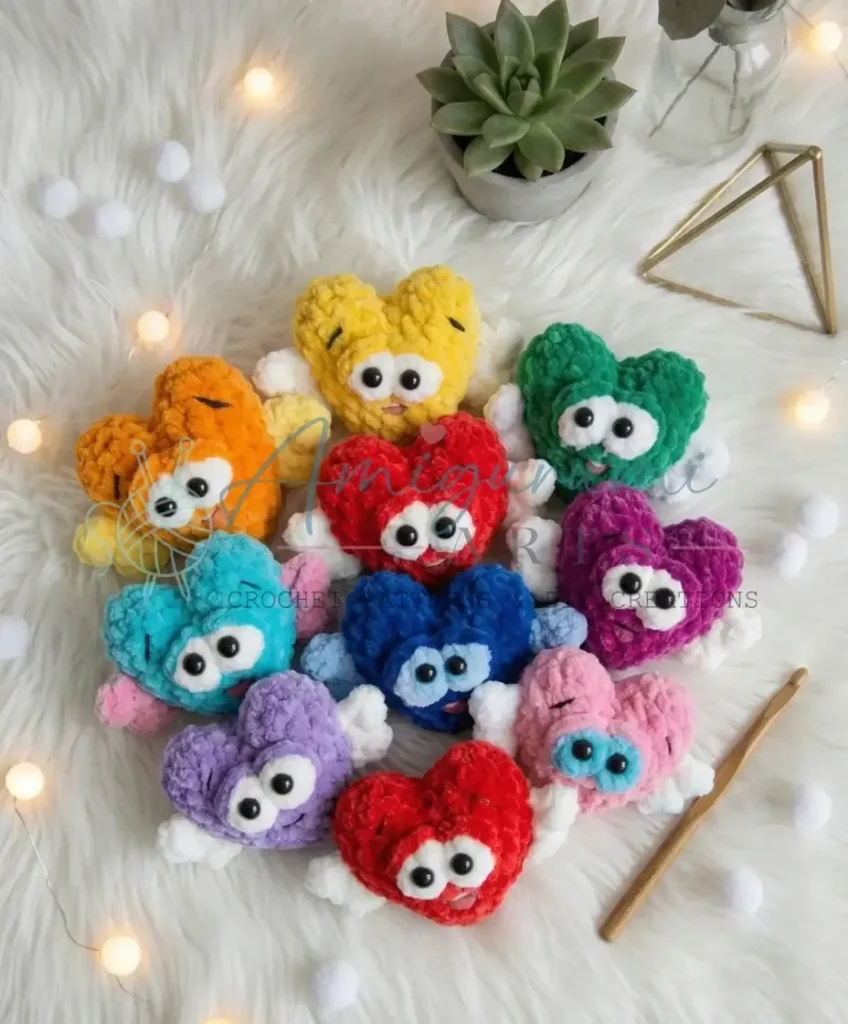
3.5 mm hook, worsted plush yarn: crochet a heart keychain amigurumi with attached wings and 7 mm eyes.

Crochet heart keychain amigurumi pattern for beginners
BeginnerLevel
2-3 hoursTime
7 mmHook
WorstedYarn
Jump to the pattern

About this pattern

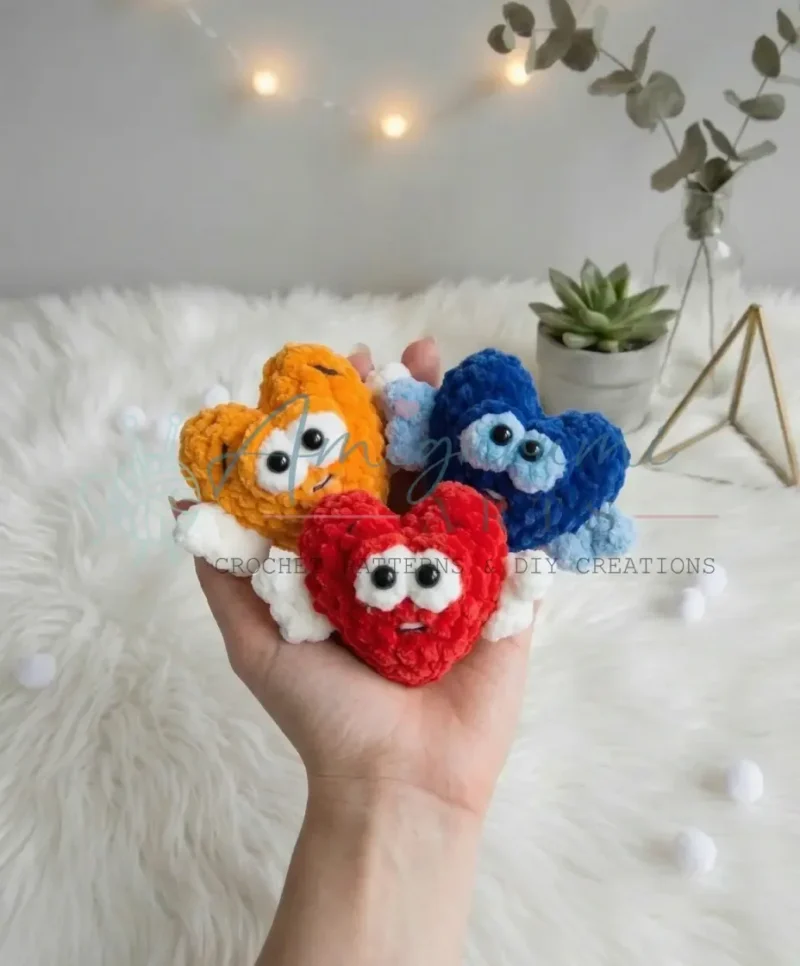
A plush amigurumi heart keychain worked in continuous spiral rounds, built from two 3-round heart halves joined into one body with contrast-color wings crocheted directly onto Rounds 5 through 7. It takes about 9 g of main color yarn, 2 g of contrast yarn, a US E-4 / 3.5 mm hook, polyfill stuffing, two 7 mm safety eyes, and a keychain finding.

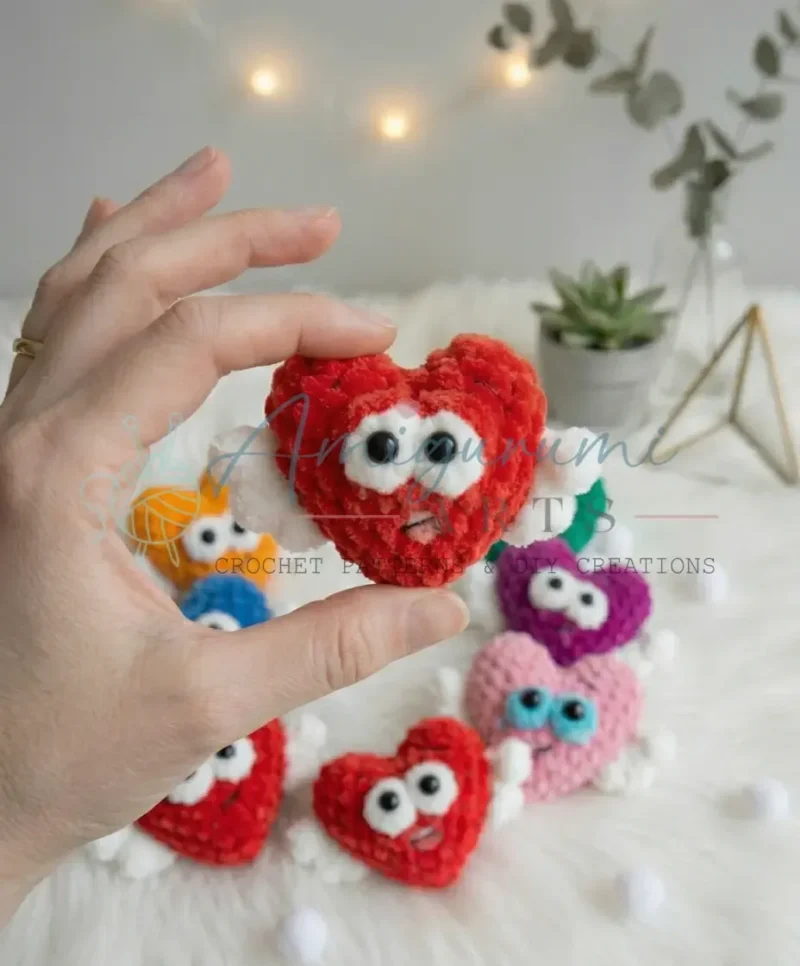
This heart keychain amigurumi builds from two identical heart halves — each a 3-round spiral finishing at 10 stitches — joined and continued into a single heart body, with contrast-color wings crocheted directly onto Rounds 5 through 7 rather than sewn on afterward. Total yarn use stays small: about 9 g of main color plus 2 g of contrast, worked on a US E-4 / 3.5 mm hook. The 10-stitch count at Round 2 is the number to check before continuing, since every later round depends on it holding. Worked in Himalaya Dolphin Baby (or equivalent plush yarn) with this hook, the finished heart measures approximately 6 cm / 2½ inches tall; gauge is not critical, but hook size will affect the final size. Pattern is written in US crochet terminology.
The pattern

Written out round by round

Materials

Main color yarn

  • Plush / chenille-style yarn (e.g., Himalaya Dolphin Baby or similar), approx. 9 g

Contrast color yarn

  • Plush / chenille-style yarn, approx. 2 g

Embroidery thread

  • Black or brown polyester thread for eyebrows and mouth (small length)

Adhesive safety eyes

  • Black, 7 mm × 2

Adhesive mouth

  • Pre-made adhesive mouth piece (or embroider with thread)

Craft glue

  • B-7000 or similar strong fabric/craft adhesive

Hook

  • US E-4 / 3.5 mm

Stuffing

  • Polyfill / fiberfill
  • Yarn needle / tapestry needle
  • Scissors
  • Stitch marker
  • Keychain ring / keychain finding

Abbreviations

  • BLO = Back Loop Only
  • ch = Chain
  • dc = Double Crochet
  • dec = Decrease (invisible decrease recommended)
  • inc = Increase (2 sc in same stitch)
  • MR = Magic Ring
  • sc = Single Crochet
  • sl st = Slip Stitch
  • SM = Stitch Marker
  • st / sts = Stitch / Stitches

Heart Half (make 2)

Work both halves in main color.

Round 1MR, 5 sc into ring. Pull ring closed. (5)
Round 2Inc in each st around. (10)
Round 3Sc in each st around. (10)For the first half: fasten off and cut yarn, leaving a short tail. For the second half: do not cut yarn — continue to Round 4.

Heart Body (joining and continuing from second half)

The heart is worked in two identical halves that are joined at Round 4, continuing in a continuous spiral — do not join or chain at the start of each round unless specified. Use a stitch marker to track the beginning of each round. Stuff the heart gradually as you crochet — do not wait until the end.

Round 4With the second half still on your hook, insert hook into the first stitch of Round 4 on the first half and work 1 sc to join. Continue sc in each remaining st around the first half (9 more sc), then sc in each st around the second half. (20)
Round 5Sc in each st around. (20) + 1 shift stitch at end of round to reposition for Round 6. Place your stitch marker after the shift stitch to mark the new round start.Shift stitch note: a shift stitch (Пс) is used at the end of Round 5 to reposition the working yarn cleanly before Round 6. This is a single slip stitch worked in the next stitch to shift your starting position without leaving a visible jog.(20)
Round 6Switch to contrast color for bobble stitches; use main color for all sc. Sc in each of next 8 sts; Bobble in next st (see note below); sc in next st; Bobble in next st; sc in each of next 9 sts. (20)Bobble Stitch: in the same stitch, work 4–5 incomplete dc (yarn over, insert hook, pull up a loop, yarn over, pull through 2 loops — leaving last loop on hook each time), then yarn over and pull through all loops on hook at once. The bobble stitches (eye bases) are worked in the contrast color; all other stitches in Round 6 use the main color — switch yarn colors as needed and do not cut the main color while working the bobbles. Fasten off and weave in contrast color yarn ends once the round is complete.
Round 7(3 sc, dec) × 4. (16)
Round 8Sc in each st around. (16)
Round 9(2 sc, dec) × 4. (12)Add final stuffing now — fill firmly but not to the point of distorting the heart shape.
Round 10Dec × 6. (6)Close the opening: cut yarn, thread tail onto yarn needle, and weave through the front loops of the remaining 6 sts. Pull tight to close. Fasten off and hide the tail inside the heart.

Wings (make 2 — worked directly onto the heart body)

Wings are crocheted directly onto the sides of the heart using contrast color yarn, worked between Rounds 5 and 7. Both wings attach at the same rows but are worked in opposite directions.

First Wing:

Hold the heart with the eye side (bobbles) facing you. Attach contrast color yarn to Round 5 on the left side of the heart. Working upward (from Round 5 toward Round 7):

Round 1Ch 3; starting in the 2nd ch from hook, sc in next 2 ch.
Round 2Sl st into Round 6 on the heart body.
Round 3Ch 4; starting in the 2nd ch from hook, sc in next 3 ch.
Round 4Sl st into Round 7 on the heart body.Fasten off. Weave in ends inside the heart.

Second Wing:

Hold the heart with the eye side facing you. Attach contrast color yarn to Round 7 on the right side of the heart. Working downward (from Round 7 toward Round 5):

Round 5Ch 4; starting in the 2nd ch from hook, sc in next 3 ch.
Round 6Sl st into Round 6 on the heart body.
Round 7Ch 3; starting in the 2nd ch from hook, sc in next 2 ch.
Round 8Sl st into Round 5 on the heart body.Fasten off. Weave in ends inside the heart.

Assembly

Step 1Embroider the eyebrows: Using black or brown embroidery thread and your yarn needle, embroider two small arched eyebrows above the bobble stitch eye bases.
Step 2Embroider the eyelids: Using a short length of main color plush yarn, work two straight stitches across the top of each bobble to create soft eyelid accents.
Step 3Attach the eyes: Apply a small dot of B-7000 craft glue to the back of each 7 mm adhesive eye. Press firmly onto each bobble stitch. Allow to dry fully before handling.
Step 4Attach the mouth: Glue the adhesive mouth piece below the eyes using B-7000. Alternatively, embroider a mouth using black or brown embroidery thread, and add a small tongue using a few stitches in pink plush yarn.
Step 5Secure all yarn ends — check that all tails are woven in and hidden inside the heart body.
Step 6Attach the keychain finding through the top of the heart where the two halves meet, or through a secure stitch at the top center of the piece.

Tester's notes

9 g of main color yarn covers both heart halves and the heart body; weigh the ball before starting so it doesn't run short mid-round.

3.5 mm (US E-4) hook holds plush yarn tight enough to hide stuffing without splitting the chenille strands — don't size down further.

10 stitches at the end of Round 2 is the number every later round is built from; recount before moving to Round 3 on each half.

2 g of contrast yarn is enough for both wings; cut a working length before starting rather than pulling from the ball, since wings are worked directly onto the heart body and yarn needs to reach across rows.

This pattern is written in US crochet terminology.

Gauge: worked in Himalaya Dolphin Baby (or equivalent plush yarn) with a US E-4 / 3.5 mm hook, the finished heart measures approximately 6 cm / 2½ inches tall. Gauge is not critical, but hook size will affect the final size.

Tight tension is your best friend — with plush chenille yarn it's easy to miss stitches because the fibers hide the loops. Work slowly, especially in the early rounds, and count every stitch after each round; pulling your yarn snug prevents gaps in the stuffed body.

Nail the invisible decrease — insert your hook through the front loops only of the next two stitches before completing the decrease. This keeps the fabric smooth and prevents the little "ears" that a standard decrease leaves behind — especially visible on a small piece like this.

Stuff as you go, not all at once — once the opening reaches Round 9, it's too small to push stuffing in evenly. Add fiberfill gradually from Round 7 onward, shaping the heart as you fill. Aim for firm but not rigid — the piece should hold its shape without feeling stiff.

Use B-7000 generously for the eyes — on plush yarn, the surface is soft and uneven, so adhesive eyes benefit from a slightly larger bead of glue. Press and hold for 30 seconds, then leave undisturbed for at least 2 hours before attaching the keychain finding. This prevents eyes from popping off with everyday use.

Work in progress

Crochet heart keychain amigurumi pattern for beginners — photo 2
Crochet heart keychain amigurumi pattern for beginners — photo 3

At a glance

Rounds18
Parts3
LevelBeginner
Time2-3 hours
Hook7 mm
YarnWorsted

Gauge check

After Round 2 of a Heart Half, count stitches: the round should sit at 10 with no gaps between stitches and no rippling at the edge.

Worked in Himalaya Dolphin Baby (or equivalent plush yarn) with a US E-4 / 3.5 mm hook, the finished heart measures approximately 6 cm / 2½ inches tall. Gauge is not critical, but hook size will affect the final size.

Stitch-count checkpoints

  • Heart Half (make 2) · Round 1: 5 sts
  • Heart Half (make 2) · Round 2: 10 sts
  • Heart Half (make 2) · Round 3: 10 sts
  • Heart Body (joining and continuing from second half) · Round 5: 20 sts
  • Heart Body (joining and continuing from second half) · Round 7: 16 sts
  • Heart Body (joining and continuing from second half) · Round 9: 12 sts

If something looks wrong

The heart half comes out oval instead
10 stitches after Round 2 means every stitch got its increase; a shape that skews oval usually means an increase was missed or doubled — recount and rework before Round 3.
The two heart halves don't match in size when held together.
Both halves start from the same 5-stitch magic ring and should each land on 10 stitches at Round 2; check that tension stayed consistent between the two, since a looser first half will show once joined.
Wings sit crooked or don't line up on both sides.
Wings are worked in opposite directions between Rounds 5 and 7, so mismatched row counts on the two sides show up as asymmetry; count rows back from Round 7 on each side before fastening off.
Stuffing shows through or the fabric
Plush yarn at 3.5 mm can gap if tension loosens partway through a round; firm up stitch tension around the bobble rounds and add stuffing before closing, not after.

Yarn substitutions

Acrylic chenille, worsted weightClose match to the original plush texture at the same approximate 9 g / 2 g yardage; no hook change needed from 3.5 mm.
Cotton, DK weightFirmer stitch definition and less halo than plush yarn, so bobble eyes and wings read more crisply; drop to a 3 mm hook to keep the 10-stitch Round 2 count from gapping.
Wool-blend, aran weightThicker fabric hides stuffing with less fill needed, but the finished heart runs larger than the 9 g plush original; size up to a 4 mm hook to keep the spiral from tightening.
FAQs

Questions

Why does the second heart half keep its yarn attached instead of fastening off?

The second half continues directly into Round 4 of the heart body, so cutting yarn there would mean rejoining mid-spiral. Only the first half is fastened off, leaving a short tail for later joining.

Can the wings be added before the heart body is finished?

No — wings are worked directly onto Rounds 5 through 7 of the completed heart body, using those rounds as foundation rows. Working them earlier leaves no stitches to attach into.

How much yarn is needed in total?

About 9 g of main color plush yarn covers both heart halves and the heart body, plus roughly 2 g of contrast yarn for both wings. A small extra length of black or brown polyester thread is also needed for the eyebrows and mouth if not using the adhesive mouth piece.

What skill level is required for this crochet heart keychain pattern?

This pattern is ideal for beginners who are comfortable with the magic ring, single crochet, and basic increases and decreases. The bobble stitch in Round 6 is the only technique that steps slightly beyond the basics, but it's clearly explained in the pattern notes and is very manageable with a little practice. If you've completed one or two small amigurumi projects before, you'll find this straightforward and quick.

One at a time —

Get the next pattern

Tested round by round before it is sent. No spam.