Made and counted by Wren —

Cute Unicorn Amigurumi Keychain Crochet Pattern

Learn to crochet an adorable unicorn amigurumi keychain with a sparkly horn, fluffy mane, and safety eyes—perfect for gifts, bags, and keys.

Cute Unicorn Amigurumi Keychain Crochet Pattern
IntermediateLevel
4-6 HoursTime
2 mmHook
WorstedYarn
Jump to the pattern

At a glance

Start by crocheting the ears in light pink and white yarn, working all nine rounds to build their rounded shape.

Make two matching ears so they'll sit evenly and symmetrically on either side of the head.

Lightly stuff the horn so it holds its point and stands upright once attached.

Crochet the head and face pieces using your light pink and white four-ply yarn, keeping tension snug with the 2 mm hook.

Insert and secure the 6 mm safety eyes before closing up the head so placement is easy to check.

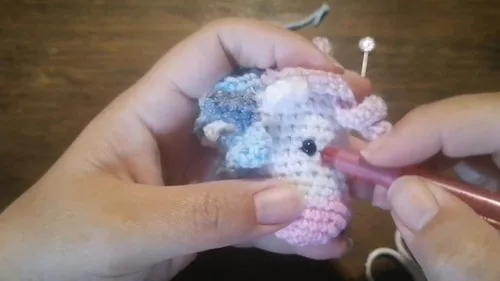
Attach the finished ears and horn securely to the head in your desired arrangement.

Add the colorful mane strands down the head and neck, then trim and fluff before attaching the keyring.

About this pattern

This pattern brings a tiny magical creature to life—a unicorn amigurumi keychain with a sparkly horn, a rainbow-bright mane, and the sweetest little face you've ever crocheted. What makes it special is the mix of textures: soft four-ply cotton for the face and ears against a sparkly thick yarn horn that catches the light. It's perfect for crocheters who love whimsical mini makes, unicorn-obsessed kids, or anyone hunting for a one-of-a-kind handmade gift that fits right in a pocket or on a keyring.

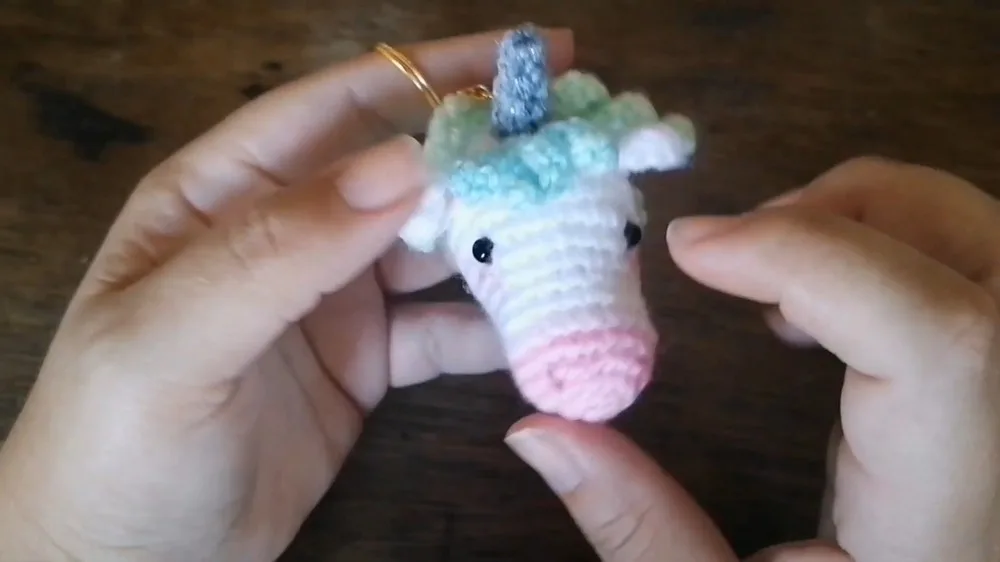
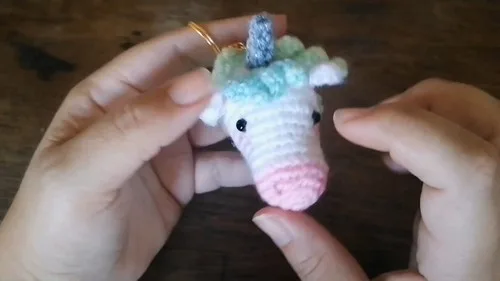
When it's finished, you'll have a pint-sized unicorn charm just a few inches tall, with a plush snout, perky ears, a glittering horn, and a mane bursting with color, all finished off with sparkling 6 mm safety eyes and attached to a sturdy keyring. It's soft, huggable, and endlessly charming—small enough to tuck into a birthday card box or clip onto a backpack. Whether you're making it for yourself or a friend, it's the kind of handmade treasure that gets compliments every single time.

Variations

The beauty of this unicorn keychain is how easily you can make it your own. For the mane, try a true rainbow gradient using scrap worsted-weight yarn in red, orange, yellow, green, blue, and purple loops for a classic unicorn look, or go pastel with cotton candy pink, lavender, and mint for a softer aesthetic. If you want a galaxy unicorn, use deep purple, navy, and metallic silver thread twisted together for the mane strands. Swap the sparkly horn yarn for a solid gold or iridescent thread if you can't find a glittery option— Vanna's Glamour or Metallic both work beautifully as substitutes and hold their shape well over just two rounds. For size changes, go mini by using a 1.5 mm hook and thinner thread for a keychain small enough for a bracelet charm, or size up with a 3.5 mm hook and worsted weight yarn throughout to create a bigger plush version—just remember increasing hook size will increase your finished ear and horn dimensions proportionally, so stuff a bit more firmly to maintain shape. Seasonal fans can swap the pink and white snout for autumn oranges and browns for a 'harvest unicorn,' or use icy blues and whites for a winter-themed version with a silver horn. You could also skip the safety eyes and embroider closed, sleepy eyes with black embroidery floss for a dreamier look. Finally, if keychains aren't your thing, simply omit the keyring and attach a loop of yarn instead to turn this into an ornament, bag charm, or even a tiny plush toy for a dollhouse.
Common mistakes

  • Using a hook that's too large for the 2 mm recommended size, leaving visible gaps between stitches.Stick close to the 2 mm hook or go down half a size if your tension runs loose; tight, gap-free stitches are essential since the pieces are small and stuffing will show through loose gaps.
  • Losing track of rounds while working the 9-round ears, resulting in mismatched ear sizes.Place a stitch marker at the start of every round and jot down a tally as you go, or use a row counter so both ears end up perfectly matched in height and shape.
  • Working the horn's sparkly thick yarn too loosely, causing it to flop over instead of standing upright.Crochet the horn's two rounds tightly and consider lightly stuffing it with a small wisp of fiberfill before sewing it closed, giving it enough structure to stand proud on the head.
  • Mixing up the light pink and white yarn placement when shaping the snout and face details.Lay out your pattern piece order before starting and refer back to which sections call for pink versus white so the color blocking on the face comes out clean and intentional.
  • Attaching the 6 mm safety eyes without checking spacing and placement first.Insert the eye posts without locking the washers in place, then hold the piece at arm's length to check that the eyes are level and evenly spaced before snapping the backs on permanently.
  • Rushing the mane attachment and ending up with sparse or uneven strands.Cut mane yarn pieces to consistent lengths ahead of time and attach them in a deliberate line down the head, then trim and fluff evenly once all pieces are secured for a full, balanced look.

The pattern

Written out round by round

Materials

  • Colorful yarn for the mane
  • Sparkly thick yarn for the horn
  • Light pink and white four-ply yarn for the snout, ears, and face
  • 2 mm crochet hook
  • Scissors
  • Yarn needle and pins
  • Stitch marker
  • 6 mm safety eyes
  • Keyring

Abbreviations

  • ch = chain
  • st = stitch
  • sl st = slip stitch
  • sc = single crochet
  • hdc = half double crochet
  • dc = double crochet
  • inc = increase
  • dec = decrease
  • mr = magic ring
  • fo = finish off

Ears (light pink and white yarn)

Create a magic ring.

Crochet the following into the ring: 1 single crochet, 1 half double crochet, 1 double crochet, 1 triple crochet, chain 1, then mirror it backward: 1 triple crochet, 1 double crochet, 1 half double crochet, and 1 single crochet.

Make two ears.

Face (light pink yarn): Start with a magic ring, 6 single crochet stitches.

  1. Round 26 increases (2 single crochet stitches in each stitch around). In Row 3: 1 single crochet, 1 increase repeat around to 18 stitches.
  2. Round 42 single crochet, 1 increase repeat 6 times to 24 stitches.
  3. Round 524 single crochet stitches around. Attach safety eyes between rows 10 and 11, on the first and third increase marks.In Row 6: Change to white yarn with 12 single crochet stitches then 6 decreases.
  4. Round 7-818 single crochet stitches around.
  5. Round 92 single crochet, 1 increase repeat 6 times to 24 stitches. For Row 10: 3 single crochet, 1 increase repeat around to 30 stitches.
  6. Round 11-1530 single crochet stitches around.
  7. Round 163 single crochet, 1 decrease repeat 6 times around. For Row 17: 2 single crochet, 1 decrease repeat around.
  8. Round 181 single crochet, 1 decrease repeat around, then stuff the head firmly.
  9. Round 196 decreases, slip stitch to close, and fasten off.

Horn (sparkly thick yarn)

Start with a magic ring, then crochet 4 single crochet stitches into the ring.

In Rows 1-2: 4 single crochet stitches all around.

  1. Round 31 single crochet, 1 increase around.
  2. Round 46 single crochet stitches all around, then slip stitch and fasten off.

Mane (colorful yarn)

Chain 22.

Skip the first chain from the hook and single crochet 20, leaving one chain stitch left.

Slip stitch into the last chain stitch.

Chain 21, repeat single crochet 20 back along the chain, and slip stitch into the first chain at the start.

Repeat to create a total of five hair strands.

Fringe (same yarn as mane): Chain 8, skip the first chain, and then single crochet 6 across; slip stitch into the last chain.

Repeat, chaining 7 and single crochet 6 for each subsequent strand, slip stitching into the final chain.

Sew all parts together, position the eyes, ears, horn, mane, and fringe as desired, and attach the keyring.

Important notes

💡 Use a 2 mm crochet hook exactly as specified—this small size is what keeps your amigurumi stitches tight enough to hold stuffing without gaps showing through.

💡 Keep your stitch marker moving up with each round on the 9-round ears; amigurumi worked in a spiral is easy to lose track of without one.

💡 When working with the sparkly thick yarn for the horn, expect a different tension than your four-ply yarn—crochet a bit more snugly to compensate for the yarn's thickness and slipperiness.

💡 Weave in yarn tails as you finish each piece rather than saving them all for the end; it's much easier to manage loose ends on small amigurumi pieces one at a time.

💡 Before attaching the keyring, double check that all pieces (ears, horn, mane) are securely sewn on, since a keychain gets more handling and tugging than a shelf display piece.

More photos

Cute Unicorn Amigurumi Keychain Crochet Pattern — photo 2
Cute Unicorn Amigurumi Keychain Crochet Pattern — photo 3
FAQs

Frequently asked questions

What size will the finished unicorn keychain be?

Since this pattern uses a small 2 mm hook with four-ply yarn, the finished unicorn will be a compact, palm-sized charm—perfect for keys or bag clips. Exact size can vary slightly based on your personal tension.

Can I use regular worsted weight yarn instead of four-ply?

You can, but you'll need to size up your hook to match the thicker yarn, which will result in a noticeably larger finished piece. If you want to keep the compact keychain scale, four-ply with the 2 mm hook is the way to go.

What's the best way to attach the mane so it doesn't fall out?

Secure each mane strand with a firm knot or loop stitch directly into the head fabric, then add a small dot of fabric glue at the base if you want extra security. This is especially helpful since keychains get handled frequently.

Do I need to stuff the horn since it's only 2 rounds?

A light stuffing helps the horn hold its shape and stand upright rather than collapsing. Even a tiny pinch of fiberfill makes a noticeable difference in how crisp and pointed the horn looks.

Are safety eyes necessary, or can I embroider the eyes instead?

Safety eyes give a polished, classic amigurumi look and are quick to attach, but embroidered eyes work great too if you prefer a softer expression or are gifting to a very young child. Just make sure whichever method you choose is secure enough for frequent handling on a keychain.

One at a time —

Get the next pattern

Tested round by round before it is sent. No spam.