Made and counted by Wren —

Free Crochet Bear Pattern: Adorable Plush Bear with Honey Pot

Make a huggable crochet bear plush with sculpted muzzle, cozy T-shirt, and tiny honey pot. Free pattern with tips for beginners to intermediate makers.

Free Crochet Bear Pattern: Adorable Plush Bear with Honey Pot
IntermediateLevel
6-8 HoursTime
14 mmHook
BulkyYarn
Jump to the pattern

At a glance

Crochet the upper and lower paws separately, working each in rounds before joining them together.

Join the paw pieces to form complete limbs ready to attach to the body later.

Build the main body in rounds, shaping it with increases before working the sleeve openings.

Create the sleeve openings so the red T-shirt piece will fit neatly around the arms.

Complete the body and attach the upper paws so they sit correctly through the shirt sleeves.

Construct and sculpt the head, using a tapestry needle to shape the rounded, expressive face.

Add the muzzle, nose, and embroidered eyebrows, then secure the 14mm safety eyes for the finished expression.

Stitch together the pot pieces in brown and beige, then assemble everything for the final display.

About this pattern

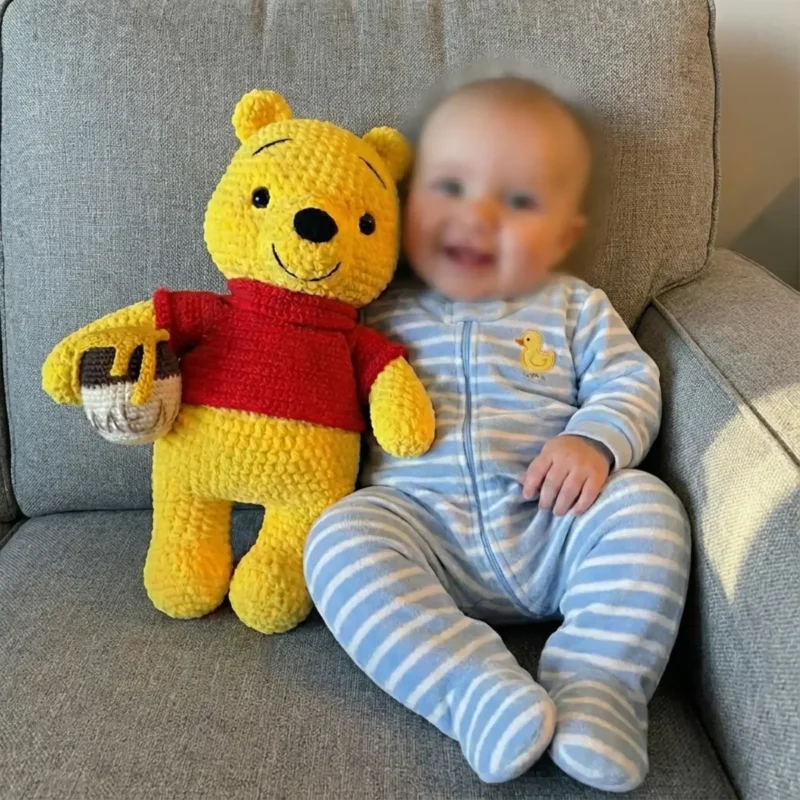
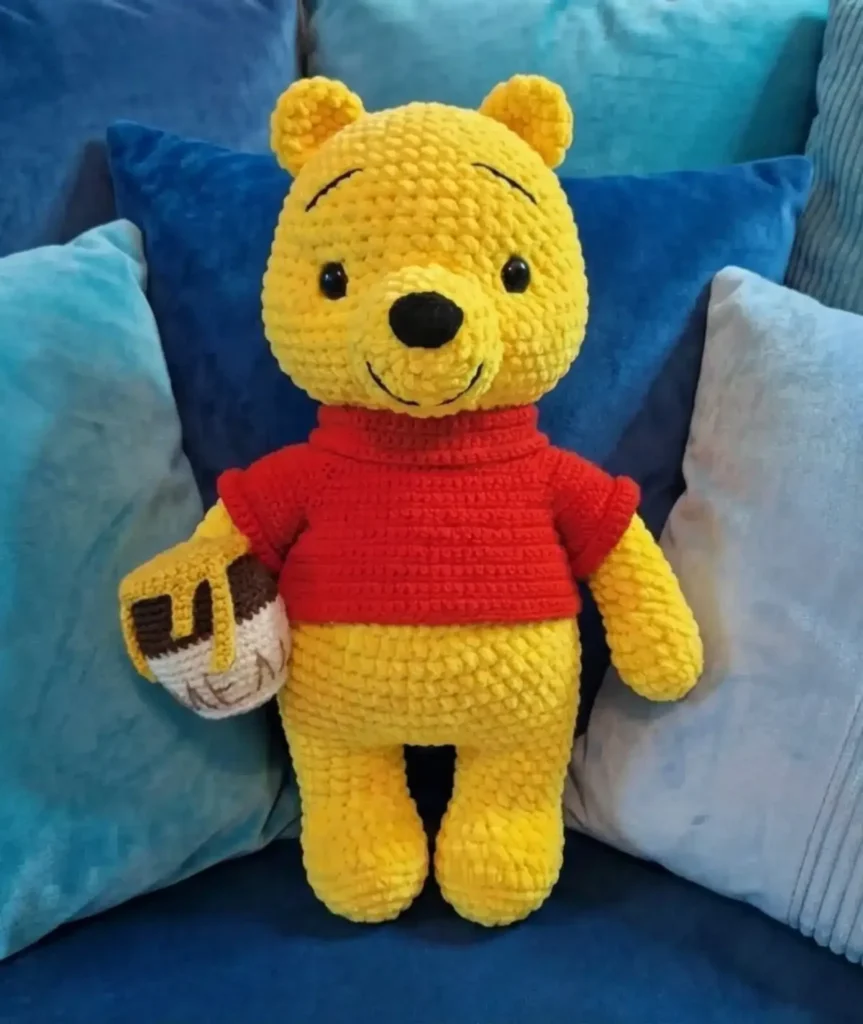
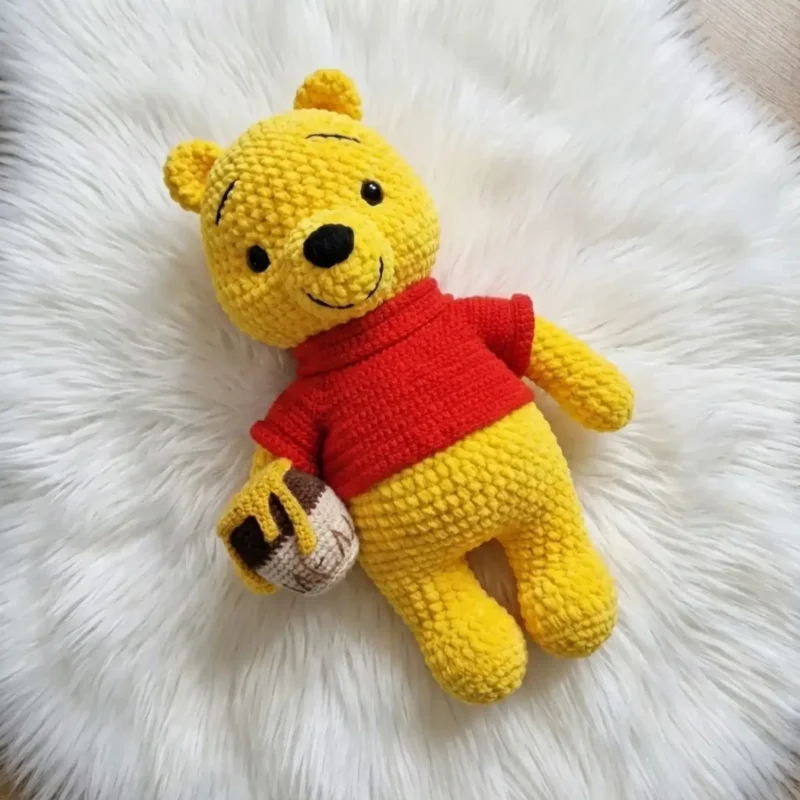
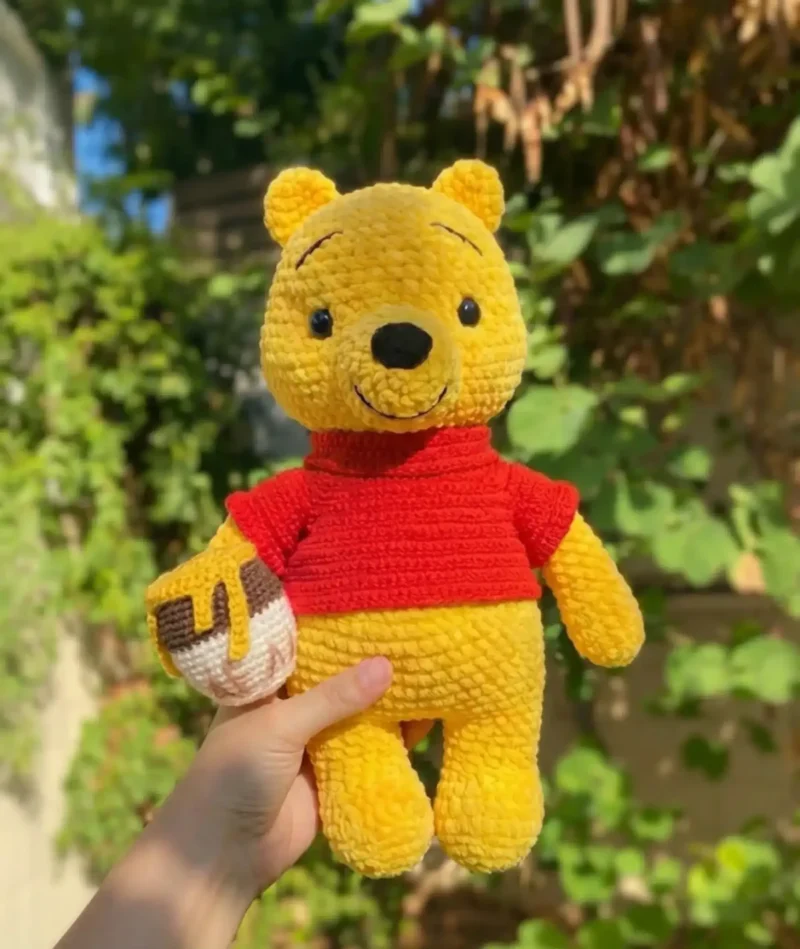
This crochet bear pattern brings together everything I love about amigurumi design: a soft, huggable body, a sculpted muzzle that gives him real personality, and the sweetest little honey pot accessory tucked in his paws. Made in plush yarn with a contrasting red T-shirt, this bear feels like the kind of toy you'd find in a high-end boutique, not something you stitched yourself at your kitchen table. He's perfect for gifting to a new baby, adding to a growing amigurumi collection, or just keeping yourself company on the couch.

The finished bear stands as a plump, squeezable plush with a rounded belly, sculpted facial features, and a jaunty red shirt that makes him look ready for a picnic. His honey pot adds a storytelling touch that turns a simple toy into a tiny scene. He's soft enough for cuddling, sturdy enough to sit proudly on a shelf, and special enough to become someone's forever-favorite handmade gift.
Common mistakes

  • Rushing the muzzle sculpting step and ending up with a flat, lifeless face instead of the intended rounded, expressive look.Work slowly with your tapestry needle, pulling the sculpting stitches snug and checking the shape from multiple angles before securing. Add small amounts of extra stuffing behind the muzzle if it looks too flat.
  • Placing the 14mm safety eyes too close together or too high, giving the bear an off-putting or startled expression.Insert the eyes loosely first and use stitch markers to test placement, viewing the head from the front and both side profiles before locking the washers in place.
  • Skipping stitch markers when working the sleeve openings, causing the T-shirt shaping to misalign with the body.Place a stitch marker at the start of every round and additional markers at the sleeve opening points so you can count accurately and keep the openings symmetrical.
  • Under-stuffing the paws and body, resulting in a floppy bear that won't hold his sculpted shape.Stuff firmly in small pieces as you go rather than all at once at the end, pushing fiberfill into the paw tips and joints so the plush yarn stays smooth and gap-free.
  • Attaching the upper paws before finishing the body completion round, which throws off the paw positioning relative to the T-shirt.Follow the pattern order closely — complete the body and sleeve openings first, then attach the upper paws so they sit correctly through the T-shirt's sleeve holes.

The pattern

Written out round by round

Materials

Yarn Requirements

  • Plush yarn Wolans Bunny Baby in Yellow 100-44 (main color): 1.5 skeins

YarnArt Jeans DK weight yarn in multiple colors

  • Yellow 88 (for muzzle sculpting and honey)
  • Black 53 (for eyebrows and nose)
  • Red 90 (for T-shirt): 1 skein
  • Brown 40 (for pot)
  • Beige 07 (for pot)

Additional Supplies

  • One pair of 14mm safety eyes
  • 3.75mm crochet hook (for plush yarn)
  • 1.75mm crochet hook (for cotton yarn)
  • Polyester fiberfill stuffing
  • Scissors
  • Stitch markers
  • Tapestry needle for sculpting
  • Long needle for detail work

Optional

  • fabric glue for securing embroidered details
  • this …

Abbreviations

  • sc = single crochet
  • inc = increase
  • dec = decrease
  • mr = magic ring

The Upper Paws (Make 2)

Crochet the paws with yellow plush yarn.

Step by step: Crochet the ears with yellow plush yarn.

Step by step: Crochet the tail with yellow plush yarn.

Step by step: Start crocheting with beige yarn and a 1.75mm crochet hook.

Step by step: Crochet with yellow yarn and a 1.75mm crochet hook.

  1. Round 16 sc into MR
  2. Round 2(inc) * 6 (12)
  3. Round 3(2 sc, inc) * 4 (16)Step by step: 18 sc (3 rounds).Step by step: 18 sc.
  4. Round 4-616 sc (3 rounds)
  5. Round 7(dec) * 3, 10 sc (13)
  6. Round 81 sc, dec, 10 sc (12)
  7. Round 9-1812 sc (10 rounds) Stuff the lower half of the paw. Make 3 shift stitches and flatten the paw along the decreases. Crochet 6 sc through both loops to close. Fasten off and break yarn on the first paw. Leave the working yarn attached on the second paw.

The Bottom Paws (Make 2)

Crochet the paws with yellow plush yarn.

  1. Round 1Chain 8 and start crocheting 6 sc to the chain, 3 sc in the last chain. Continue crocheting on the other side of the chain foundation 6 sc, 3 sc in the last chain (you’ll create an oval shape with increases on the roundings and 6 sc on both sides). Place a stitch marker. (18)
  2. Round 26 sc, (inc) * 3, 6 sc, (inc) * 3 (24)
  3. Round 36 sc, (inc, 1 sc) * 3, 6 sc, (inc, 1 sc) * 3 (30)
  4. Round 430 sc through the back loops only
  5. Round 5Crochet with sc as usual, but do not complete the row to the end (about three sc). Stop in the middle of the heel and place a marker.

Important Note: The six decreases in rounds 6 and 8 should be positioned exactly on the heel. Make shift stitches if needed to align properly.

  1. Round 69 sc, (dec) * 6, 9 sc (24)
  2. Round 724 sc
  3. Round 86 sc, (dec) * 6, 6 sc (18)
  4. Round 9-1218 sc (4 rounds) Stuff the paw carefully, ensuring the toe and heel are well-shaped. Break yarn on one paw and secure. Leave the working yarn on the second paw to begin joining.

Muzzle

Crochet the muzzle with yellow plush yarn.

  1. Round 16 sc into MR
  2. Round 2(inc) * 6 (12)
  3. Round 3(1 sc, inc) * 6 (18)
  4. Round 4(2 sc, inc) * 6 (24)
  5. Round 524 sc Leave a long yarn tail for sewing. Pin the muzzle under the eyes and sew through each loop carefully. Stuff with fiberfill as you sew. Fasten off and break yarn.

Nose

Crochet the nose with black yarn and a 1.75mm crochet hook.

  1. Round 1Chain 5 and start crocheting 3 sc, 3 sc in the last chain, continue on the other side of the chain foundation 3 sc, 3 sc in the last chain (creating an oval) (12)
  2. Round 23 sc, (inc) * 3, 3 sc, (inc) * 3 (18)Measure a yarn piece approximately 19.6 inches long—you’ll use this to sew the nose and embroider the smile and eyebrows. Pin the nose in the center, starting from the third round to the end of the muzzle. Sew through each loop carefully.

Main Pattern

  1. Round 1Chain 61, start crocheting in the second chain from hook: 60 sc
  2. Round 210 sc, (3 sc in one stitch), 10 sc, (3 sc in one stitch), 16 sc, (3 sc in one stitch), 10 sc, (3 sc in one stitch), 10 sc (68)
  3. Round 368 sc
  4. Round 411 sc, (3 sc in one stitch), 12 sc, (3 sc in one stitch), 18 sc, (3 sc in one stitch), 12 sc, (3 sc in one stitch), 11 sc (76)
  5. Round 576 sc
  6. Round 612 sc, (3 sc in one stitch), 14 sc, (3 sc in one stitch), 20 sc, (3 sc in one stitch), 14 sc, (3 sc in one stitch), 12 sc (84)
  7. Round 784 sc
  8. Round 813 sc, (3 sc in one stitch), 16 sc, (3 sc in one stitch), 22 sc, (3 sc in one stitch), 16 sc, (3 sc in one stitch), 13 sc (92)

Collar Construction

  1. Round 1Crochet 60 sc to the collar, chain 1
  2. Round 2-960 sc, chain 1 at the end of each row (8 rows) Fasten off and break yarn.

Creating Sleeve Openings

  1. Round 9Crochet 14 sc, chain 14, count 19 stitches from the previous row and attach the chain, 26 sc (the distance between sleeves on the front), chain 14, count 19 stitches from the previous row and attach the chain, complete with 14 sc to the end of the row (82)
  2. Round 1082 sc
  3. Round 111 sc, (7 sc, inc) * 10, 1 sc (92)
  4. Round 12-2192 sc (10 rows) Crochet around the entire T-shirt with sc.

Body Completion and Upper Paw Attachment

  1. Round 33In this round, you’ll attach the upper paws. Mark 10 sc on the front (the distance between the paws) with two additional markers. Start crocheting from the main marker: 7 sc, 6 sc with the first paw together, 10 sc to the front, 6 sc with the second paw, and complete with 7 sc to the end. (36)
  2. Round 34(4 sc, dec) * 6 (30)
  3. Round 35(3 sc, dec) * 6 (24)Stuff the body and neck thoroughly. Do not cut yarn—continue directly into the head.

Head Construction

  1. Round 36(3 sc, inc) * 6 (30)Attach the honey to the pot without breaking the working yarn and crochet 30 sc around, holding the bottom of the pot facing toward you.Step by step: 30 sc through back loops only.
  2. Round 37(4 sc, inc) * 6 (36)Step by step: 36 sc.Place a marker at any point between rounds 36 and 37 for easy reference when positioning eyes and sculpting the muzzle.
  3. Round 38(5 sc, inc) * 6 (42)Step by step: 42 sc (5 rounds); Change to brown yarn and crochet 42 sc; 42 sc (5 rounds).
  4. Round 39(6 sc, inc) * 6 (48)
  5. Round 40(7 sc, inc) * 6 (54)
  6. Round 41(8 sc, inc) * 6 (60)
  7. Round 42-4660 sc (5 rounds)
  8. Round 47(8 sc, dec) * 6 (54)
  9. Round 4854 sc
  10. Round 49(7 sc, dec) * 6 (48)
  11. Round 50-5348 sc (4 rounds) Eye Placement: Install the safety eyes between rounds 47 and 48. The distance between the eye stems should be 9 sc. Count the distance in round 48 for accuracy. Fasten the washers securely on the wrong side.
  12. Round 54(6 sc, dec) * 6 (42)
  13. Round 55(5 sc, dec) * 6 (36)Step by step: 36 sc.
  14. Round 56(4 sc, dec) * 6 (30)Step by step: Fasten off and break yarn. Stuff the pot with fiberfill.
  15. Round 57(3 sc, dec) * 6 (24)
  16. Round 58(2 sc, dec) * 6 (18)
  17. Round 59(1 sc, dec) * 6 (12)Leave a long tail for sewing. Pin the tail in the center on the back. Sew carefully through each loop. Stuff as you sew. Fasten off and break yarn.Leave a long yarn tail for sewing. Pin the ears on the top of the head from the 3rd round to the top. Sew through each loop carefully. Fasten off and break yarn.
  18. Round 60(dec) * 6 (6)Critical Stuffing Note: The head should be square on top with nice plump cheeks. Use a long needle to distribute fiberfill to the lower sides for cheeks and push stuffing to the forehead corners for volume. This shaping step dramatically affects the final appearance—take your time here! Complete stuffing, then fasten off and break yarn.

Assembly

Step 1

Attach beige yarn to the bottom of the pot in the 6th round and crochet 30 sc through the front loops only. Fasten off and break yarn.

Step 2

Embroider “Hunny” with a double strand of brown thread. Split the yarn into two threads and sew carefully with a sewing needle for neat lettering. Fasten off and break yarn.

Important notes

💡 Stuff as you close each section rather than waiting until the very end; this keeps the plush yarn tight enough that fiberfill won't peek through the stitches.

💡 Use stitch markers at the start of every round throughout the Head Construction section, since its 18 rounds include multiple shaping changes that are easy to lose track of.

💡 When color changing for the T-shirt and pot (red, brown, beige), carry unused yarn loosely inside your work or cut and rejoin to avoid puckering on the visible right side.

💡 Secure embroidered details like the eyebrows and nose with a little fabric glue on the back side of the work for extra durability, especially if this bear will be a child's cuddle toy.

💡 Take your time on the Head Sculpting step — this is what separates a flat-faced amigurumi from a professional-looking plush, so don't skip pulling and anchoring those sculpting stitches.

More photos

Free Crochet Bear Pattern: Adorable Plush Bear with Honey Pot — photo 2
Free Crochet Bear Pattern: Adorable Plush Bear with Honey Pot — photo 3
Free Crochet Bear Pattern: Adorable Plush Bear with Honey Pot — photo 4
FAQs

Frequently asked questions

What yarn weight works best if I don't have Wolans Bunny Baby plush yarn?

Any bulky plush or velvet-style yarn with good stitch definition will work well with a 3.75mm hook. Look for chenille or velvet yarns like Bernat Baby Velvet or Comfy Cotton for a similar soft, huggable texture.

Can I skip the honey pot and just make the bear?

Absolutely — the bear stands complete on his own once the Head Construction and Body Completion sections are finished. The honey pot is a lovely add-on prop, but the bear doesn't depend on it structurally.

Why does the pattern use two different hook sizes?

The 3.75mm hook matches the thicker plush yarn used for the body, while the 1.75mm hook is sized for the finer cotton yarn used in the muzzle sculpting, nose, and honey pot details. Using the correct hook for each yarn keeps your tension tight and your stitches even.

Is this pattern suitable for a first amigurumi project?

It's better suited to someone who has completed at least one or two simpler amigurumi first, since the head sculpting and two-hook color work add complexity. If you're a confident beginner comfortable with magic rings and increases, you can still work through it with patience.

How do I make sure the safety eyes are placed evenly?

Insert the eye posts loosely before securing the backs, then hold the head up and check symmetry from the front and both sides. Use stitch markers or a bit of scrap yarn to mark your intended spots before committing to the final placement.

One at a time —

Get the next pattern

Tested round by round before it is sent. No spam.