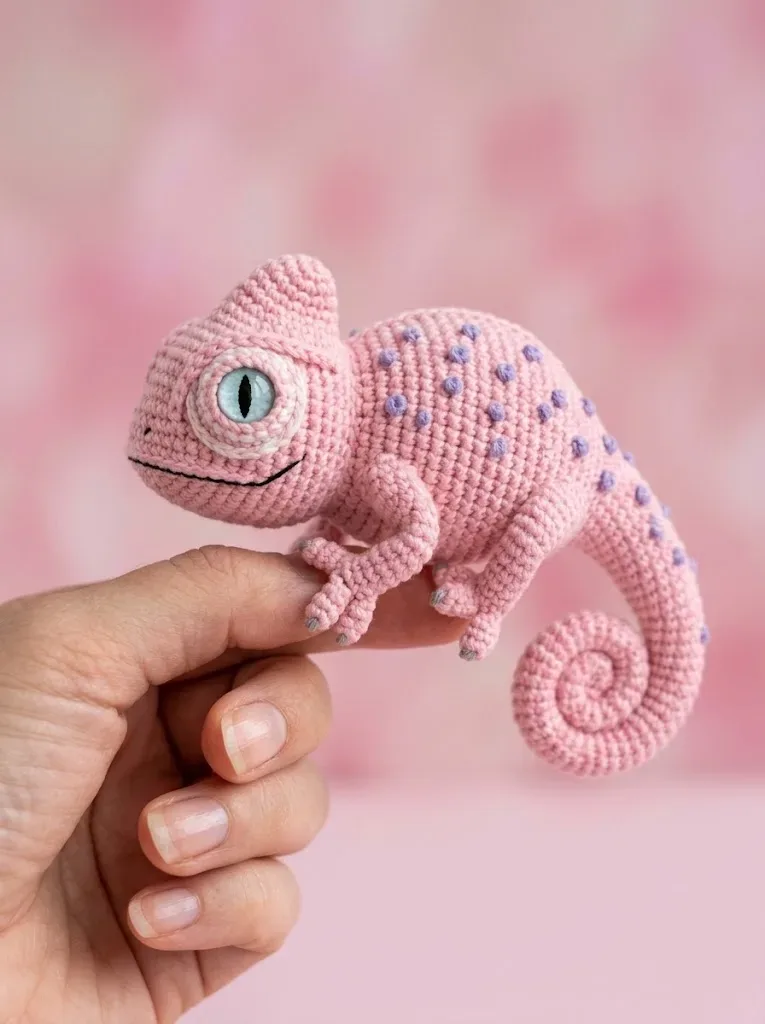
Made and counted by Wren —

Cotton Candy Pink Chameleon Amigurumi Free Crochet Pattern

Crochet an adorable cotton candy pink chameleon amigurumi with lavender spots and grey toe pads using this detailed free pattern with tips and troubleshooting.

IntermediateLevel
4-6 HoursTime
2.5 mmHook
Sport/DKYarn
Jump to the pattern

At a glance

Start the main body by working single crochet in the round through all 16 rounds, keeping tension tight throughout.

Complete the shorter 3-round piece separately, which forms one of the chameleon's smaller components.

Work the 10-round piece next, following the same tight gauge to keep it structurally matched to the body.

Add CC4 grey yarn to crochet the tiny toe pads onto the front two toes for that authentic gripping look.

Stuff each finished section firmly with polyester fiberfill as you close it up, working the fill into corners.

Insert and secure the small safety eyes, checking placement carefully before snapping the backings into place.

Finish with black embroidery thread to stitch the mouth line and eye pupils, then assemble all pieces together.

About this pattern

This Cotton Candy Pink Chameleon Amigurumi turns a classic backyard critter into the sweetest pastel companion, working up in soft cotton candy pink with playful lavender spots and grey toe pad accents. It's the kind of pattern that makes you smile the whole way through, perfect for crocheters who love amigurumi with a little extra personality and detail work. Whether you're building a collection of critter friends or want a whimsical centerpiece for a nursery shelf, this little guy delivers charm in every round.

You'll work through a 16-round main body section, a shorter 3-round piece, and a 10-round component, using tight single crochet stitches to keep that signature amigurumi shape crisp and stuffing-proof. Expect color changes between MC, CC1, and CC4 for the spots and toe pads, plus safety eye placement and a bit of embroidery for the mouth and pupils. This is an intermediate-friendly project — comfortable if you've done a few amigurumi before, though motivated beginners with patience for gauge and shaping will do just fine too, with a cozy weekend's worth of stitching ahead.

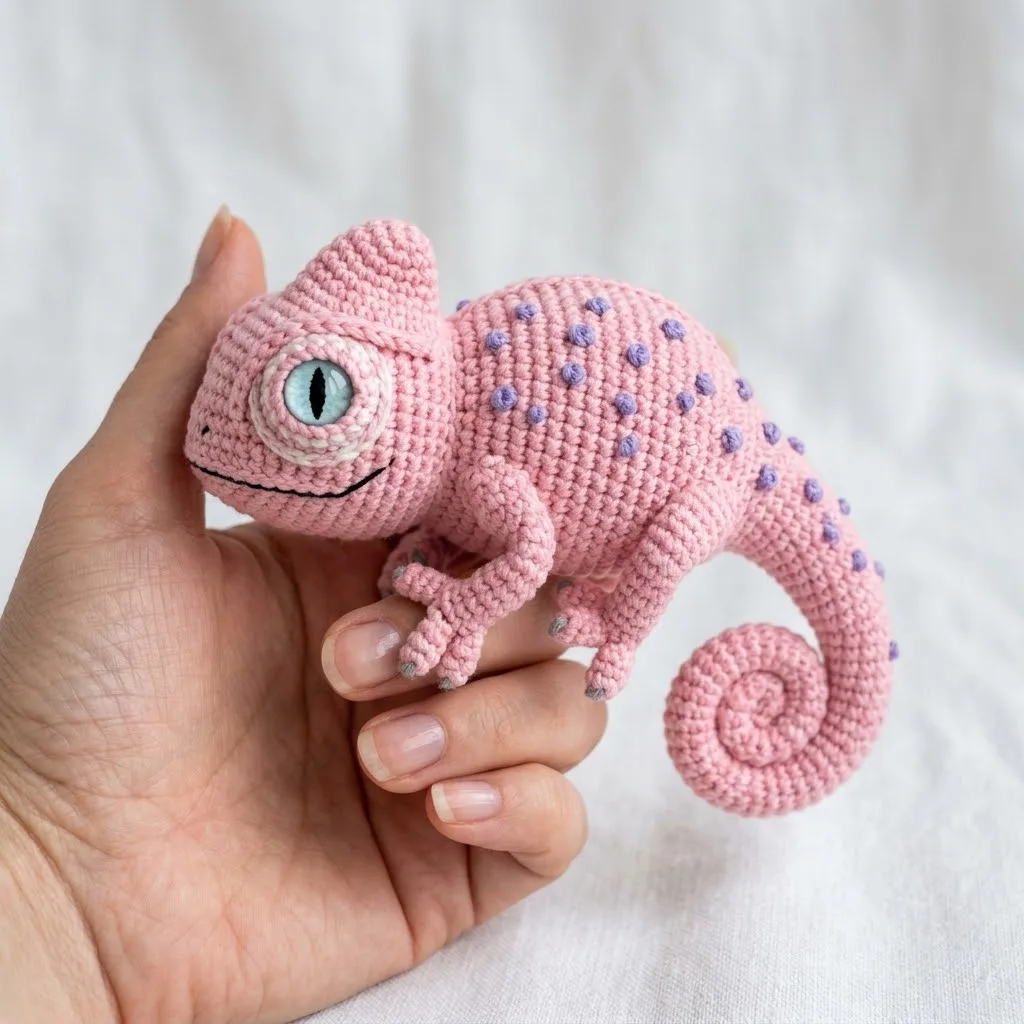
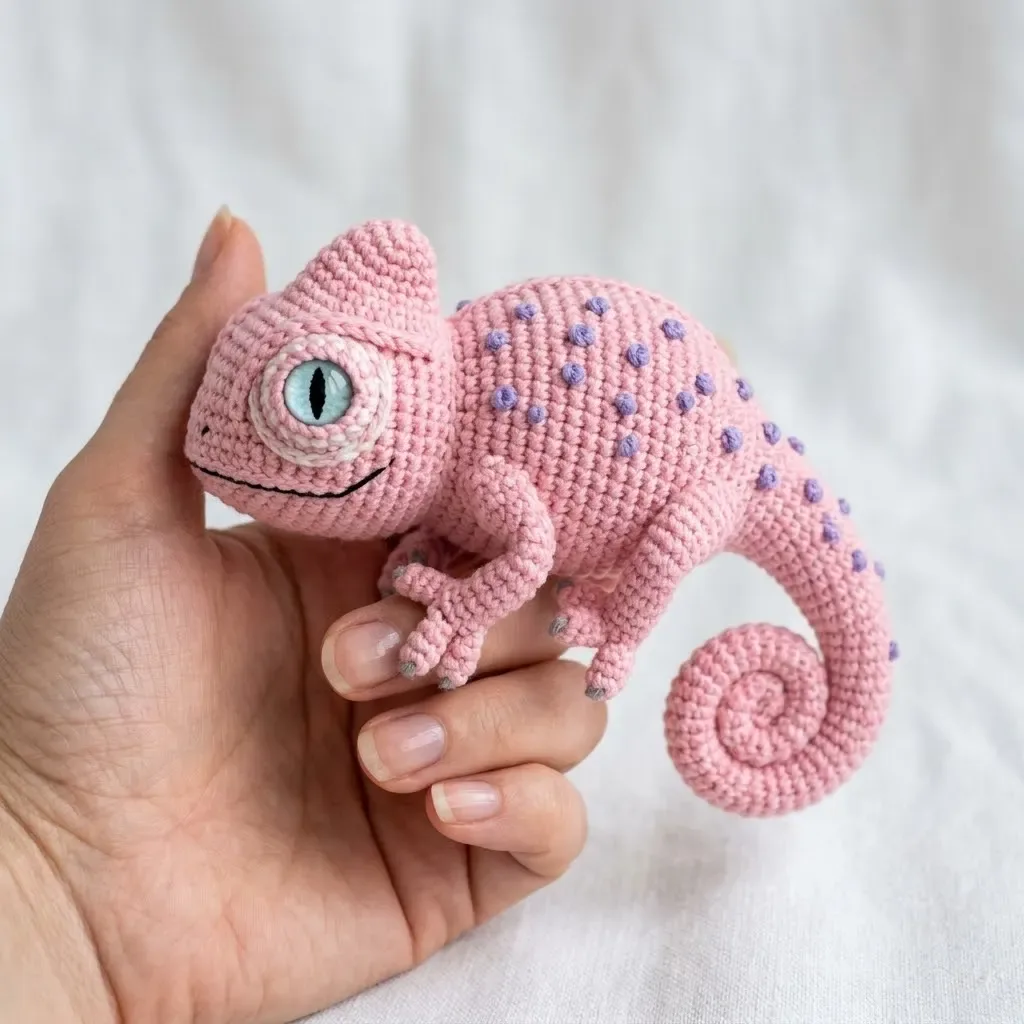
The finished chameleon comes together as a compact, huggable shape with a rounded body, distinct toe pads for that authentic gripping-branch look, and embroidered facial details that give it real character. Worked at a tight sport or DK weight gauge, it holds its shape beautifully and feels dense and satisfying in the hand, not floppy or thin. It makes a delightful handmade gift for animal lovers, a fun addition to a nursery or playroom, or simply a joyful, colorful project to keep for yourself.

Variations

This chameleon is begging for a color palette remix! Try a classic green-and-yellow tropical version using Scheepjes Catona in Apple Green for the MC with Lemon or Gold for CC1 spots — perfect if you want a more true-to-nature look. For a galaxy chameleon, work the MC in deep purple or navy with metallic or glitter-flecked CC1 spots in silver or teal, using Drops Safran or any mercerized cotton that holds stitch definition well. A rainbow pastel version is adorable too: keep the MC as this cotton candy pink, but rotate CC1 through mint, lavender, and butter yellow across different spot rounds for an ombré-spot effect. Size-wise, if you want a slightly larger chameleon, size up to a 3mm or 3.5mm hook with the same sport/DK weight yarn — your stitches will loosen just enough to add bulk without losing shape, though you may need extra stuffing to keep it firm. Going smaller works too: drop to a 2mm hook for a keychain-sized version, though tiny safety eyes (or embroidered eyes) become essential since 6mm eyes will overwhelm a shrunk-down body. For themed variations, a red-and-orange 'firebelly' chameleon makes a fun autumn project, while a soft grey-and-white version with black CC4 toe pads gives a sweet, storybook feel ideal for a baby gift. You could also swap the grey toe pads for a metallic gold CC4 for a more fantastical, dragon-like creature. If you're stash-busling, any smooth mercerized cotton or cotton-acrylic blend in sport or DK weight will substitute beautifully — just keep your gauge tight so the fiberfill stays hidden.

There's something so satisfying about watching this little chameleon take shape round by round — the tight single crochet stitches build up into that signature amigurumi density, and by the time you're adding the lavender spots with CC1, you can already see its personality emerging. I love how the grey toe pads on CC4 give this pattern an unexpected realistic touch that most amigurumi patterns skip entirely; it's a small detail, but it's the kind of thing that makes people stop and say 'wait, you MADE this?' The color transitions between MC, CC1, and CC4 keep your hands busy and your project visually interesting, so you're never stuck doing the same thing for too long. And once you get to the eye assembly and embroider that little mouth line, the whole thing just comes alive. This isn't a pattern you rush through — it's one you savor, section by section, watching a cotton candy pink blob slowly become a character with a face and tiny gripping toes. It's genuinely one of my favorite amigurumi builds for that reason alone.
Common mistakes

  • Using a hook that's too large, causing stuffing to peek through the stitches on the 16-round body section.Drop down to a 2.5mm hook or smaller until your test swatch shows no visible gaps between single crochet stitches — tight gauge is essential for amigurumi.
  • Losing track of stitch count during the long 16-round body piece, especially around increase and decrease rounds.Place a stitch marker at the start of every round and recount your stitches before moving on; use at least the 4 markers listed in materials to track key points like color change spots.
  • Sewing safety eyes in before finalizing the shape of the head, resulting in misaligned or asymmetrical eye placement.Insert safety eyes loosely first, hold the piece at arm's length or check in a mirror, and adjust spacing before snapping the backs on permanently.
  • Carrying CC1 or CC4 yarn loosely across the back of the work during color changes, creating loose floats that show through or catch on stuffing.Carry unused colors snugly along the inside of the round, catching them under stitches every few stitches so the color change stays neat and the wrong side stays flat.
  • Under-stuffing the body, especially near the toe pad and eye assembly areas, leading to a saggy or lopsided chameleon.Stuff firmly in small pieces as you go rather than all at once at the end, pushing fiberfill into corners like the toe area before closing up each section.
  • Rushing the black embroidery thread details for the mouth line and eye pupils, resulting in wobbly or uneven lines.Use a tapestry needle with a large eye, work slowly with short stitches, and lightly sketch the mouth line placement with a pin first if needed before embroidering.

The pattern

Written out round by round

Materials

Yarn

  • Main color (MC): Light pink/cotton candy pink, sport weight or DK weight cotton or cotton blend yarn, approximately 50 grams
  • Contrast color 1 (CC1): Lavender or light purple for spots, small amount (less than 10 grams)
  • Contrast color 4 (CC4): Grey for toe pads, tiny amount
  • Black embroidery thread for mouth line and eye pupils
  • Looking at the tight, neat stitches in this chameleon, I recommend a smooth cotton or cotton blend yarn in sport weight. Brands like Scheepjes Catona, Drops Safran, or any mercerized cotton will give you that crisp stitch definition that makes amigurumi details pop.

Tools

  • 2.5mm crochet hook (or size needed to achieve tight gauge with no stuffing showing through)
  • Stitch markers (at least 4)
  • Tapestry needle with large eye
  • Polyester fiberfill stuffing
  • Small safety eyes 6mm in blue, or embroider eyes as shown
  • Scissors
  • Pins for assembly
  • Gauge
  • Gauge is not critical for amigurumi, but your stitches should be tight enough that stuffing doesn’t show through. Work a small swatch in single crochet rounds. If you can see gaps between stitches, go down a hook size.

Abbreviations

  • ch = chain
  • st = stitch
  • sts = stitches
  • sl st = slip stitch
  • sc = single crochet
  • inc = increase
  • dec = decrease
  • mr = magic ring

With MC

  1. Round 1MR, 6 sc in ring. (6 sts)Step by step: Sc in each st around. (6 sts) Do not stuff the legs. Flatten slightly.
  2. Round 2Inc in each st around. (12 sts)
  3. Round 3*Sc 1, inc* repeat around. (18 sts)
  4. Round 4*Sc 2, inc* repeat around. (24 sts)
  5. Round 5*Sc 3, inc* repeat around. (30 sts)
  6. Round 6-8Sc in each st around. (30 sts)
  7. Round 9*Sc 4, inc* repeat around. (36 sts)
  8. Round 10-14Sc in each st around. (36 sts) This is the widest part of the body.
  9. Round 15*Sc 4, dec* repeat around. (30 sts)
  10. Round 16-17Sc in each st around. (30 sts)
  11. Round 18*Sc 3, dec* repeat around. (24 sts)
  12. Round 19-20Sc in each st around. (24 sts) Begin stuffing the body firmly now.
  13. Round 21*Sc 2, dec* repeat around. (18 sts)
  14. Round 22Sc in each st around. (18 sts)
  15. Round 23*Sc 1, dec* repeat around. (12 sts) Continue stuffing as you decrease.
  16. Round 24Dec around. (6 sts) Fasten off, leaving a long tail. Weave through remaining stitches and pull closed.

With MC

  1. Round 1Ch 8, sc in 2nd ch from hook, sc in next 5 ch, 3 sc in last ch. Working along opposite side of foundation chain: sc 6. (15 sts)
  2. Round 2Ch 1, turn. Sc 6, inc, sc 1, inc, sc 6. (17 sts)
  3. Round 3Ch 1, turn. Sc 7, inc, sc 1, inc, sc 7. (19 sts) Fasten off, leaving a long tail for sewing.

With MC

  1. Round 1MR, 6 sc in ring. (6 sts)
  2. Round 2Inc in each st around. (12 sts)
  3. Round 3-5Sc in each st around. (12 sts)
  4. Round 6*Sc 1, dec* repeat around. (8 sts)
  5. Round 7-20Sc in each st around. (8 sts)
  6. Round 21*Sc 2, dec* repeat around. (6 sts)
  7. Round 22-30Sc in each st around. (6 sts) Insert wire armature now, bending one end into a small loop so it won’t poke through.
  8. Round 31-35Sc in each st around. (6 sts)
  9. Round 36Dec, sc 1, dec, sc 1. (4 sts)
  10. Round 37-40Sc in each st around. (4 sts) Fasten off, weave tail closed. Curl the tail into a spiral shape.

Body width

Your finished size may vary slightly depending on your tension and hook size.

Eye Assembly

Insert the blue eye center into the cream eye ring. The cream piece wraps around the blue like a socket. Sew them together around the edge. Using black embroidery thread, create a vertical pupil stitch down the center of the blue portion.

For front two toes

Toe 1: Ch 4, sc in 2nd ch from hook, sc 2, sl st to next st on leg.

Toe 2: Ch 4, sc in 2nd ch from hook, sc 2, sl st to next st on leg.

Fasten off. With CC4 (grey), embroider small pads on the underside of each toe tip.

My stitches have gaps

The eyes don’t bulge enough:

Important notes

💡 Keep your 2.5mm hook (or smaller) on hand throughout — this pattern relies on tight gauge to keep the polyester fiberfill from peeking through your stitches, so don't be afraid to size down if your swatch shows gaps.

💡 Work with a smooth mercerized cotton like Scheepjes Catona or Drops Safran for the crispest stitch definition — the spots and toe pads read much more clearly against a smooth cotton than a fuzzy or textured yarn.

💡 Place at least 4 stitch markers strategically at the start of rounds and at color change points so you never lose track of where CC1 or CC4 needs to begin.

💡 Stuff as you close each section rather than waiting until the very end — this is especially important for the toe pad areas where it's harder to add stuffing after the fact.

💡 When attaching the small 6mm safety eyes, test the placement with the backing off first, checking symmetry from multiple angles since amigurumi heads can look different from straight-on versus a slight angle.

💡 Keep your black embroidery thread and tapestry needle nearby for the final mouth line and pupil details — these small finishing touches are what really bring the chameleon's expression to life.

More photos

Cotton Candy Pink Chameleon Amigurumi Free Crochet Pattern — photo 2
Cotton Candy Pink Chameleon Amigurumi Free Crochet Pattern — photo 3
FAQs

Frequently asked questions

What yarn weight works best for this chameleon pattern?

Sport weight or DK weight cotton or cotton blend yarn is ideal, as recommended in the materials list. A mercerized cotton like Scheepjes Catona or Drops Safran gives the crisp, tight stitch definition needed for the spots and toe pads to stand out clearly.

Can I embroider the eyes instead of using safety eyes?

Yes, the pattern notes you can embroider the eyes as an alternative to the 6mm blue safety eyes. This is a great option if the chameleon is intended for a small child, since embroidered eyes eliminate any small-parts safety concern.

Why does my finished piece show the stuffing through the stitches?

This usually means your hook is too large for your yarn weight, leaving small gaps between single crochet stitches. Try sizing down to a 2.5mm hook or smaller and work a quick test swatch to confirm your stitches are tight enough before continuing.

How much yarn do I actually need for each color?

You'll need approximately 50 grams of the light pink main color, less than 10 grams of lavender for the CC1 spots, and just a tiny amount of grey for the CC4 toe pads. It's a great stash-buster project since the contrast colors require so little yardage.

Is this pattern good for a first amigurumi project?

It's rated intermediate mainly due to the color changes between MC, CC1, and CC4 and the multiple pattern sections, so having a couple of simpler amigurumi projects under your belt first is helpful. That said, a patient beginner comfortable with magic rings and basic increases/decreases can absolutely tackle it with a little extra care.

One at a time —

Get the next pattern

Tested round by round before it is sent. No spam.