Made and counted by Wren —

Chubby Bunny Plush Crochet Pattern: Cuddly Amigurumi Friend

Make an adorable chubby bunny plush with this written crochet pattern using jumbo chenille yarn, safety eyes, and a sweet dress and bow for finishing touch

Chubby Bunny Plush Crochet Pattern: Cuddly Amigurumi Friend
IntermediateLevel
4-6 HoursTime
10 mmHook
JumboYarn
Jump to the pattern

At a glance

Start the head in a magic ring and increase steadily over several rounds to build a large, rounded shape.

Pause partway through the head to insert the safety eyes evenly spaced before continuing to close it up.

Stuff the head firmly in stages as you work the final rounds so it holds a full, plump shape.

Crochet two matching arm tubes in short rounds, stuff them lightly, and set them aside with long tails.

Build the body by making two small leg tubes first, then joining them together into one wider base round.

Shape the hips with increases placed on opposite sides of each leg, then continue shaping upward and stuff firmly before closing.

Crochet two long ears and a simple bow, then assemble everything by sewing the head, arms, ears, and bow into place.

Finish by adding the little dress over the body, tucking the straps above the arms, and sewing on the cheeks.

About this pattern

This chubby bunny plush is the kind of project that makes you want to clear your evening and just crochet. Worked up in jumbo chenille yarn, every round builds toward a round, huggable body with a big head, tiny arms, and long floppy ears that give it that irresistible bunny charm. It's perfect for crocheters who love amigurumi with personality — someone hunting for a nursery decoration, a baby shower gift, or just an excuse to buy that impossibly soft chenille yarn they've been eyeing.

The pattern leans on core amigurumi skills: working in a magic ring, single crochet increases and decreases to shape the head and body, and continuous rounds without joining. You'll also practice attaching pieces as you go, like joining the two legs into one body round. With the head at 8 rounds, the body at 10, and quick 2-round arms, it moves faster than it looks thanks to the chunky yarn and 10mm hook. Expect an evening or two of focused stitching plus assembly time.

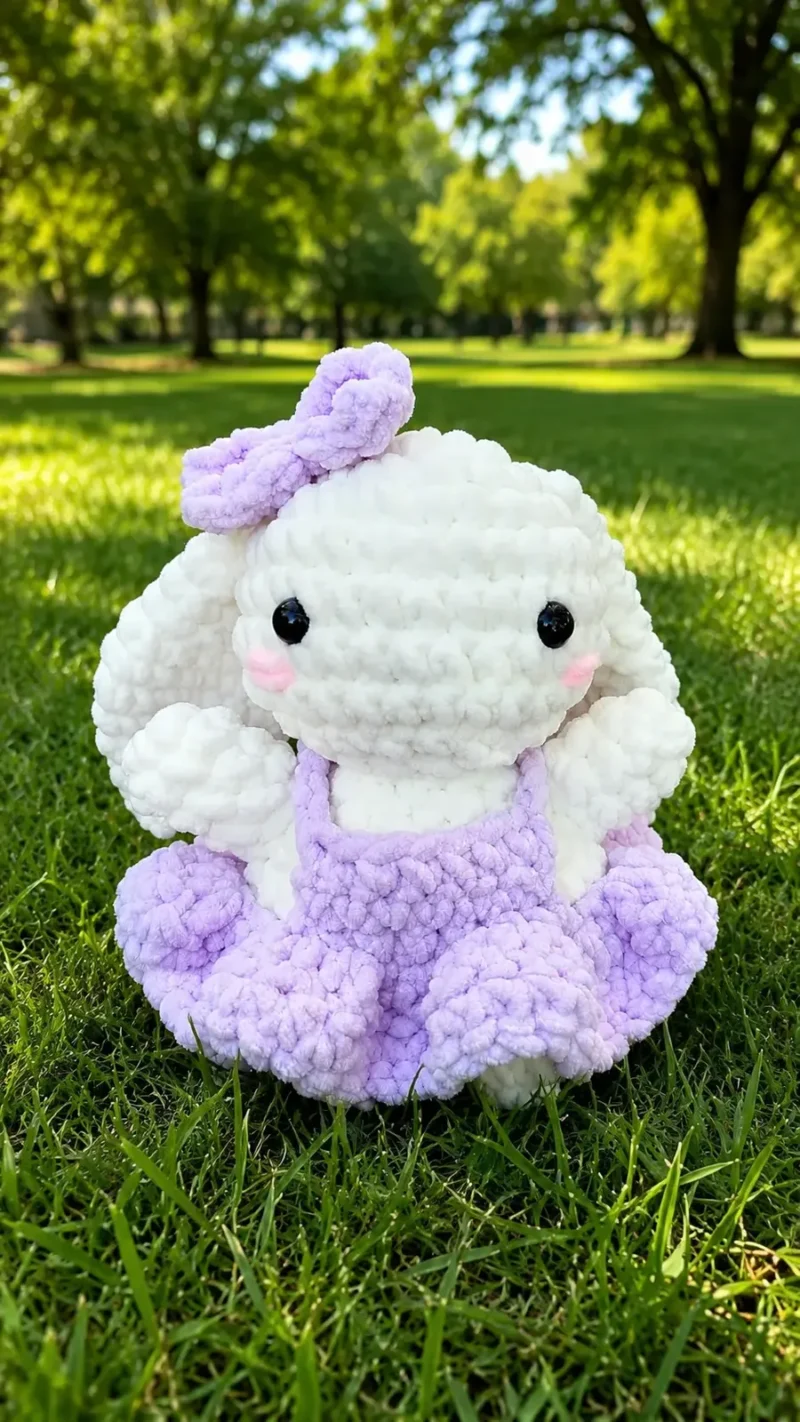
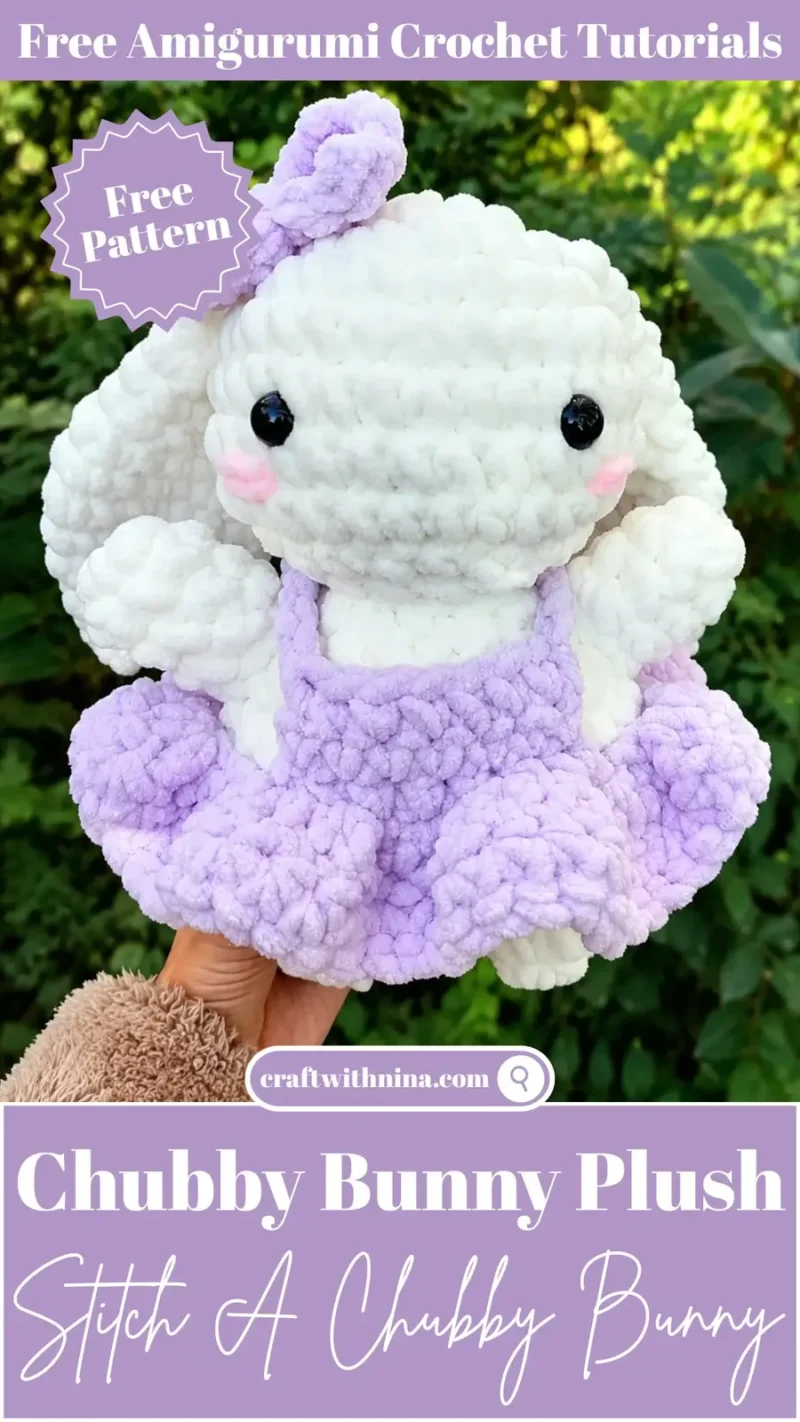
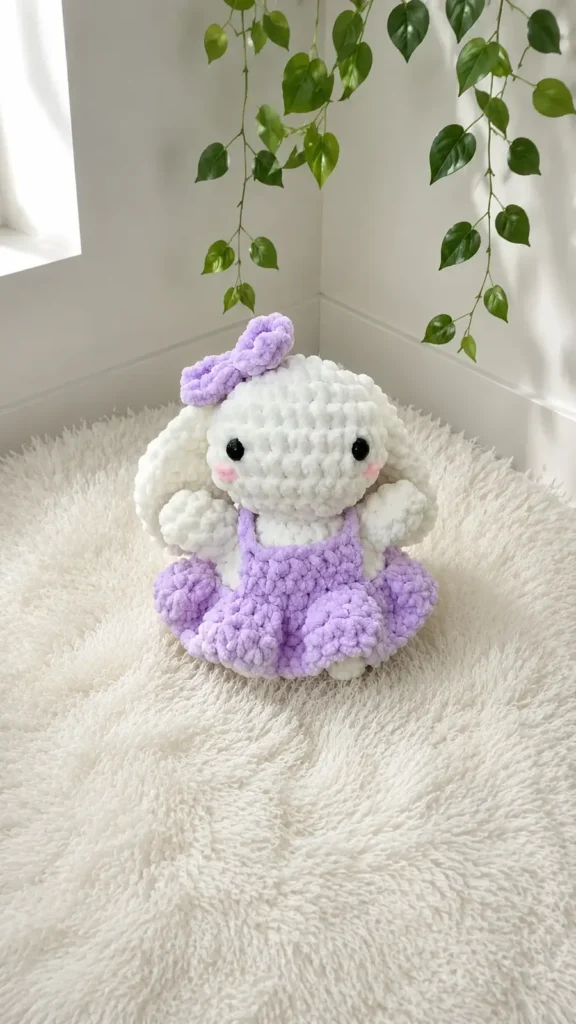
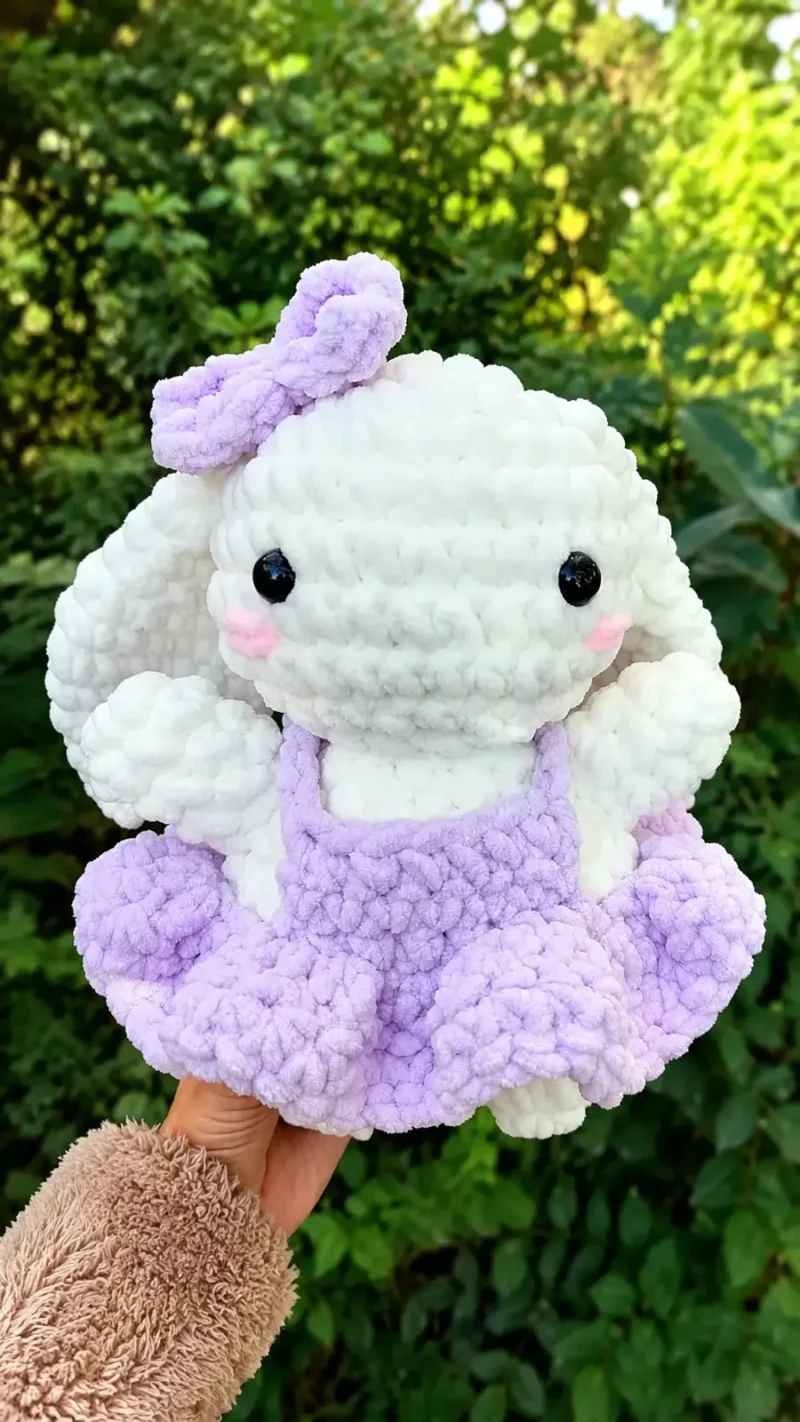
When it's finished, you get a plump, soft-bodied bunny with a dress and a little bow tucked behind one ear — the kind of finished piece that looks like it came from a boutique shelf. The jumbo chenille gives it a plush, almost velvety texture that's wonderfully tactile for little hands, while the safety eyes and sewn cheeks give it real personality. It's substantial enough to sit proudly on a shelf and soft enough to be an actual, well-loved snuggle toy.

Variations

The easiest way to make this bunny your own is through color. Try a soft blush body with cream ears and a dusty rose dress for a classic nursery look, or go bold with a mustard yellow body, white ear centers, and a navy bow for a more modern palette. If you want a woodland theme, work the body in warm brown and the dress in sage green with a tiny fabric flower instead of a bow. Swapping the jumbo chenille for a worsted weight yarn held double will shrink the finished bunny down to a more portable, pocket-sized friend — just remember your stitch counts will look tighter and denser, so size down your hook slightly for a firm fabric that holds stuffing well. Going the other direction, an even larger hook and super bulky yarn will give you an oversized floor cushion-style bunny, perfect as a statement nursery piece. For personality tweaks, try embroidering a tiny nose and whisker lines instead of relying only on the safety eyes, or add a fabric tail pom-pom to the back of the body for extra dimension. You could also skip the dress entirely and crochet a simple bowtie collar for a more gender-neutral or masculine-styled bunny. If you're making it for a baby, consider using cotton yarn instead of chenille for easier washing, though you'll lose some of that signature plush texture. Multiples in coordinating colors also make an adorable bunny family display.

I adore this pattern because the jumbo chenille yarn does so much of the visual work for you — every round comes out looking plush and polished with almost no effort. There's something deeply satisfying about watching the head grow from a tiny 6-stitch magic ring up to a full, round shape in just 8 rounds. Placing the safety eyes between rounds 6 and 7 and then stuffing firmly is my favorite moment; that's when the bunny's face really comes to life. I also love that the body isn't just a plain oval — joining the two legs together in round 4 to form the base, then shaping the hip increases on opposite sides, makes it feel like real sculptural crochet rather than a basic sphere. And don't get me started on the tiny dress and bow — dressing up an amigurumi always feels like the fun reward round after all that shaping work.
Common mistakes

  • Stuffing the head before placing the safety eyes.Insert and secure the eyes between rounds 6 and 7 first, while the opening is still easy to reach, then stuff firmly before closing round 9.
  • Losing track of stitch placementCount carefully to the 8-stitch mark and 2-chain gap so the legs sit evenly side by side instead of twisted or offset.
  • Mismatching the hip increases on both legs in round 5.Deliberately place the increases on opposite sides of each leg so the hips flare symmetrically rather than both leaning the same direction.
  • Under-stuffing the arms and ears.Even small pieces need firm, even stuffing pushed into the tip first so they hold their shape and don't go floppy over time.
  • Sewing the arms too close to the head.Leave a one-row gap between the arms and the head as noted, and space the arms 9-10 stitches apart when viewed from the front for a balanced look.
  • Attaching the dress strapsCheck that the dress straps sit above the arms before final placement so the outfit drapes naturally over the shoulders.

The pattern

Written out round by round

Materials

  • 3 colours of jumbo chenille yarn (or your preferred yarn type)
  • 10mm crochet hook (or another suitable size)
  • Darning needle
  • Polyfill stuffing
  • Safety eyes ( used 15mm)
  • Scissors

Abbreviations

  • MR = Magic Ring
  • SC = Single Crochet
  • DC = Double Crochet
  • FO = Fasten Off
  • SS = Slip stitch
  • CH = Chain
  • inc = Increase
  • dec = Decrease

Head

Place eyes between Round 6 and Round 7, around 8 stitches apart.

Stuff firmly before Round 9.

Continue stuffing if needed after Round 10.

FO, no need to leave a long tail.

  1. Round 16 SC in a MR. (6)
  2. Round 2Inc x 6. (12)
  3. Round 3(1 SC, inc) x 6. (18)
  4. Round 4(1 SC, inc, 1 SC) x 6. (24)
  5. Round 5(3 SC, inc) x 6. (30)
  6. Round 6-8SC around. (3 rows) (30)
  7. Round 9(1 SC, dec) x 10. (20)
  8. Round 10Dec, (1 SC, dec) x 6. (13)

Arms

Make 2
  1. Round 16 SC in a MR. (6)
  2. Round 2-4SC around. (2 rows) (6)Stuff the arms.

FO and leave a long tail for sewing.

Body

FO after Round 3 and repeat Round 1-3 to make another leg. For the second leg, do not FO and CH 2 instead.

For Round 5, the increases should be on opposite sides on each leg (hip area).

Stuff firmly before Round 11.

Continue stuffing if needed after Round 11.

  1. Round 16 SC in a MR. (6)
  2. Round 2(1 SC, inc) x 3. (9)
  3. Round 3SC around. (9)
  4. Round 4Attach the first leg to the second leg with a SC. 8 SC, 2 SC in the CH2, 9 SC, 2 SC in the CH2. (22)
  5. Round 54 SC, inc, 11 SC, inc, 5 SC. (24)
  6. Round 6(3 SC, inc) x 6. (30)
  7. Round 7-8SC around. (2 rows) (30)
  8. Round 9(3 SC, dec) x 6. (24)
  9. Round 10(2 SC, dec) x 6. (18)
  10. Round 11(1 SC, dec, 2 SC, dec) x 2, 1 SC, dec, 1 SC. (13)

Ears

Make 2

Do not stuff the ears.

FO and leave a long tail for sewing.

  1. Round 14 SC in a MR. (4)
  2. Round 2Inc x 4. (8)
  3. Round 3(1 SC, inc) x 4. (12)
  4. Round 4SC around. (12)
  5. Round 5(2 SC, inc) x 4. (16)
  6. Round 6-8SC around. (3 rows) (16)
  7. Round 9(2 SC, dec) x 4. (12)
  8. Round 10-11SC around. (2 rows) (12)
  9. Round 12(1 SC, dec) x 4. (8)
  10. Round 13-14SC around. (2 rows) (8)
  11. Round 15Pinch the edges together and SC along the top to seal the edges. (4)

Bow

FO and tie a piece of yarn around the rectangle to cinch the middle inwards.

  1. Round 1CH 7, SC 6 starting on the 2nd CH from hook. (6) CH 1 and turn.
  2. Round 2-3SC across, CH 1 and turn at the end of each row. (2 rows) (6)

Dress

This is a flexible guide.

FO and put the skirt on the bunny. Sewing is not required if you want the dress to be removable.

Round 1 of the skirt should be placed on Round 7 of the body.

On the front of the bunny, attach new yarn on Round 1 of the skirt before starting Round 4.

Do not FO after Round 6; CH 7 for one strap and leave to attach later.

Repeat Round 4-6 plus the CH 7 centered across the back. Do not FO yet.

The two CH7s made while crocheting the front and back panels should be on the left and right of the bunny.

Attach both chains to the corresponding corner on the opposite panel with a SS and FO.

  1. Round 1CH as many as required to wrap around Round 7 of the body (35 used). Form a loop with a SS. (35)
  2. Round 2CH 2, then DC twice in each stitch around. (70)
  3. Round 3SS to the first DC and CH 1, SC around. (70)
  4. Round 4CH 1, SC 7 along the top of the skirt, making sure it is centered. (7)
  5. Round 5-6CH 1 and turn, SC across. (7)

Assembly

Step 1

FO, sew head to body and sew any holes in the legs closed.

Step 2

Sew ears to the head, between Round 3 and Round 4.

Step 3

Place arms 9-10 stitches apart (view from the front). Sew arms to Round 9 and Round 10 of the body, leaving a one row gap between the arm and the head.

Step 4

Make sure the straps of the dress are placed above the arms.

Step 5

Sew cheeks (using colour 3) underneath the eyes.

Step 6

Sew bow to the ear.

Step 7

Weave in all the ends.

Important notes

Jumbo chenille yarn is soft but can split easily, so work with a firm, even tension and check your stitch count often since it's harder to rip back without visible marks.

A 10mm hook feels large at first if you're used to standard amigurumi yarn, so practice your magic ring a couple of times before starting the head.

Stuff firmly and in stages rather than all at once — pack the head before round 9 and top off again after round 10 if it still feels soft.

When making the second leg for the body, remember not to fasten off; instead chain 2 to bridge into the first leg for the joining round.

Safety eyes are permanent once snapped in place, so test the spacing and height with pins first, then insert the eyes eight stitches apart as guided.

Sew the cheeks underneath the eyes using your third yarn color to really define the bunny's face before you move on to the ears and bow.

Finished size depends on the yarn weight and hook size you choose; made with jumbo chenille yarn and a 10mm hook as directed, this plushie turns out delightfully soft, squishy, and chubby.

More photos

Chubby Bunny Plush Crochet Pattern: Cuddly Amigurumi Friend — photo 2
Chubby Bunny Plush Crochet Pattern: Cuddly Amigurumi Friend — photo 3
Chubby Bunny Plush Crochet Pattern: Cuddly Amigurumi Friend — photo 4
FAQs

Frequently asked questions

Can I make this pattern with regular worsted weight yarn?

Yes, you can use medium worsted weight yarn or velvet yarn instead of jumbo yarn. Keep in mind that your bunny will turn out much smaller, so adjust your hook size to a 3.5mm or 4.0mm accordingly.

How do I stop jumbo chenille yarn from shedding while working?

To minimize shedding, avoid frogging (unraveling) your work repeatedly. You can also lightly singe the loose ends of chenille yarn with a lighter to lock the fibers in place before weaving them in.

Are safety eyes safe for baby gifts?

Safety eyes are generally secure, but they can pose a choking hazard for babies and toddlers. If you are making this bunny for a young child, embroidered eyes made with black yarn are a safer alternative.

Do I have to make the dress removable?

No, you can sew the dress directly onto the body during assembly if you want it to stay permanently in place. Leaving it loose simply allows for fun outfit changes.

Why does my bunny lean to one side when standing?

Leaning usually happens if the stuffing inside the legs and lower body is uneven, or if the initial leg connection was slightly rotated. Adjust the polyfill inside the base to help balance your plushie.

One at a time —

Get the next pattern

Tested round by round before it is sent. No spam.