Made and counted by Wren —

Blooming Tulip Scarf Crochet Pattern: Pretty Floral Wrap

Crochet a blooming tulip scarf with easy dc and sc stitches. This written pattern creates a floral lattice wrap perfect for gifting or wearing all season.

IntermediateLevel
4-6 HoursTime
5.5 mmHook
WorstedYarn
Jump to the pattern

At a glance

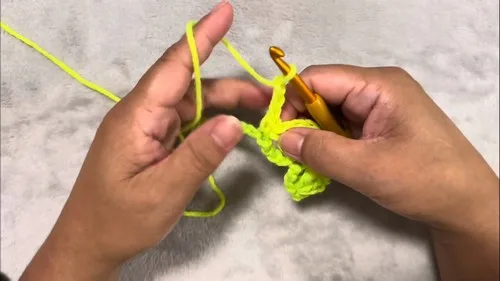
Chain a long foundation row and work the first tulip clusters into the back ridge of the chain to start the scarf.

Space out sc, chain-3, and 3-dc groups along the row, skipping a few chains between each cluster.

Finish the starting row with a single crochet in the last chain to anchor the final tulip.

Turn your work, chain up, and begin stitching new tulip clusters directly into the open chain-3 spaces below.

Repeat that same clustering process row after row so each new tulip blooms above the one before it.

Keep alternating identical rows in this rhythm, checking length regularly as the lacy tulip fabric grows.

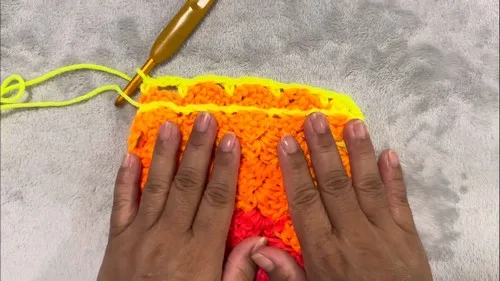
Once the scarf reaches your desired length, work one final row of clusters to mirror the opening row.

Fasten off with a generous tail and weave in the ends to complete the finished tulip scarf.

About this pattern

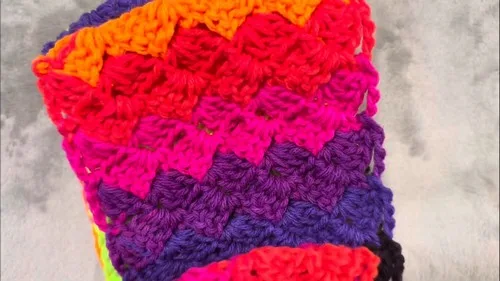
This blooming tulip scarf turns a simple foundation chain into a row of little flower-like clusters that repeat down the entire length of the piece. Each cluster of double crochets sits on either side of an open chain-3 space, creating a lacy, tulip-shaped motif that catches the light beautifully. It's perfect for crocheters who love texture with movement, and it makes a wonderful project for anyone wanting to level up from basic scarves into something with real visual interest.

The main technique here is working into the back ridge of your foundation chain, which gives the starting edge a clean, finished look instead of a twisted one. From there, you're simply repeating a sc, ch-3, 3-dc combination into chain spaces row after row, so once you get the rhythm down it becomes wonderfully meditative. This sits at an intermediate skill level because of the back-ridge chain and the shell-in-space repeats, and most crocheters finish a full-length scarf in about 4 to 6 hours of actual hook time.

The finished scarf is long and drapey, typically 75 to 80 inches, with a soft, open lattice of tulip clusters running its full length using a worsted weight yarn and an I hook. It has beautiful movement, wraps easily around the neck two or three times, and looks equally at home tossed over a coat or knotted loosely indoors. Because it's striking without being fussy, it makes a lovely handmade gift for a friend, a teacher, or yourself.

Variations

This tulip pattern is a fantastic base for experimenting with color. Try working the entire scarf in a single variegated or self-striping yarn like Super Saver Stripes to let the tulip clusters shift shades naturally as you go, or pick a solid pastel like blush pink, buttery yellow, or sage green for a softer, more romantic look. For a bolder statement, alternate two contrasting solid colors every couple of rows — a deep burgundy paired with cream gives the tulip motifs an eye-catching, almost embroidered look. If you want a lighter, warm-weather version, swap the worsted weight Super Saver Stripes for a DK weight cotton-blend yarn and drop down to a size H or 5.0mm hook; you'll get a thinner, more breathable scarf with slightly smaller tulip clusters. Going the opposite direction, a bulky weight yarn with a J or K hook creates an oversized, cozy version that works up in half the time and feels wonderful as a chunky wrap. Length is another easy variable: stop around 60 inches for a shorter scarf that won't drag, or push past 80 inches if you love extra-long wraparound styles. You can also turn this same stitch pattern into a matching cowl by joining the foundation chain into a round before starting Round 1, then working continuously without turning — perfect for using up leftover yarn from the scarf. For gifting, consider working a narrower version using half the starting chain length as a headband or hair wrap, finished with the same simple sc, ch-3, 3-dc repeat for a coordinating accessory set.

I adore this scarf because it proves you don't need complicated stitches to get a jaw-dropping result — just a smart repeat. Working the first row into the back ridge of the chain is one of my favorite little tricks; it gives you that neat, corded edge that makes the whole piece look intentional and polished from the very first row. Once you're through Round 1, the rest of the scarf is pure rhythm: sc into the space, chain 3, three dc into the same space, over and over, watching little tulip clusters bloom across your hook. There's something so satisfying about turning a plain chain of stitches into a lattice of flowers with almost no effort. It's also endlessly relaxing to work on while watching TV since the pattern repeat is easy to memorize after just a couple of rows. And because the length is entirely up to you, you get to decide exactly how dramatic and wrap-worthy your finished scarf becomes.
Common mistakes

  • Working into the front loops of the foundation chain instead of the back ridge in Round 1.Turn your chain over and locate the single bump running along the back of each chain stitch — that's the back ridge. Working into it keeps the starting edge from twisting and gives the scarf a clean, corded bottom edge.
  • Miscounting the skipped chains between tulip clusters in Round 1.After making the first 3-dc group, count carefully: skip exactly 3 chains before placing your next sc, ch-3, 3-dc combo. Placing a stitch marker in every fifth or sixth cluster helps you catch mistakes early.
  • Losing track of which chain-3 space to work into on Rounds 2 through 4.Always work your sc, ch-3, 3-dc combo into the ch-3 space from the previous row, not into the stitches themselves. Spreading the space open with your fingers before inserting the hook makes this much easier to see.
  • Forgetting the turning chain of 4 at the start of each new row.Before turning your work at the end of a row, chain 4 first — this replaces the first double crochet and sets your hook at the right height to begin the next row's pattern.
  • Adding or dropping a tulip cluster partway through the scarf, causing the edges to become uneven.Count your clusters at the end of every row and compare that number to your very first row. Keeping the cluster count identical row after row is what keeps the scarf's edges straight and symmetrical.
  • Stopping the length measurement inconsistently, leading to a scarf that's shorter or longer than intended.Lay the scarf flat and measure from end to end rather than stretching it while checking length, since the open lattice stretches more than solid fabric and can give you a false reading.

The pattern

Written out round by round

Materials

Yarn

  • Super Saver Stripes by Red Heart, number 4 medium.

Crochet Hook

  • Size I (5.5 mm).

Abbreviations

  • ch = chain
  • sc = single crochet
  • dc = double crochet

Main Pattern

Repeat Rounds 3 and 4, alternating between them, until the scarf reaches the desired length (suggestions of 75 or 80 inches long are provided).

  1. Round 1Make a chain of 25. Identify the back ridges of the chains. Into the 5th chain from the hook, make 3 dc into the back ridge of that chain. Skip the next 3 chains, then in the next chain make 1 sc, ch 3, then 3 dc all into the same chain (back ridge). Repeat skipping 3 chains and working sc, ch 3, 3 dc in the next chain until the end of the row. In the very last chain, work 1 sc.
  2. Round 2Chain 4, turn. Sc into the next ch-3 space, ch 3, then 3 dc in that same space. Continue to sc into the next ch-3 space, ch 3, and 3 dc in the same space until the end of the row.
  3. Round 3Chain 4 to turn. Follow the same pattern as Round 2, working stitches into the ch-3 spaces from the previous row.
  4. Round 4Repeat the instructions from Round 2.
  5. Round 5(Final Row): Repeat the pattern across to add a final touch, matching the beginning of the scarf.

Assembly

Step 1

Cut the yarn, leaving a tail long enough for weaving in ends.

Important notes

Before starting Round 1, stretch out your foundation chain of 25 and take a moment to find the back ridge on each stitch — this single step makes a big difference in how professional the finished edge looks.

Rounds 3 and 4 are worked identically, so once you've completed them once, you'll simply alternate repeating that same pair of rows until you reach your desired scarf length.

Because the finished length is flexible, decide early whether you're aiming closer to 75 or 80 inches, and keep a small ruler or tape measure nearby to check progress every several rows.

This lacy tulip stitch uses more yarn than a solid single crochet fabric of the same length, so buy an extra skein of Super Saver Stripes if you're aiming for the longer end of the length range.

Since the fabric is open and lightweight, block the finished scarf gently by pinning it to shape and lightly steaming or misting it — this helps the tulip clusters sit flat and even.

Leave a generous tail when you cut your yarn at the end so you have plenty of length to weave in securely without the end working its way loose from the open lattice stitches.

More photos

Blooming Tulip Scarf Crochet Pattern: Pretty Floral Wrap — photo 2
Blooming Tulip Scarf Crochet Pattern: Pretty Floral Wrap — photo 3
FAQs

Frequently asked questions

Can I use a different yarn weight than the worsted weight Super Saver Stripes called for?

Yes, this stitch pattern adapts well to other weights. Just remember that a lighter DK yarn will need a smaller hook and produce a thinner scarf, while a bulkier yarn with a larger hook will make the tulip clusters bigger and the scarf work up faster.

How long should I make the tulip scarf?

The pattern suggests 75 to 80 inches as a comfortable finished length for wrapping the scarf around your neck a couple of times. You can stop shorter for a lighter drape or keep repeating Rounds 3 and 4 for a longer, more dramatic wrap.

Why does my starting row look twisted or uneven?

This usually happens when the stitches in Round 1 are worked into the front loops of the chain instead of the back ridge. Working specifically into the back ridge bump keeps that first row flat and neatly finished.

Do I need to count stitches carefully throughout, or just at the start?

It's worth checking your tulip cluster count at the end of every row, especially in the first few rows while you're still getting used to spotting the ch-3 spaces. Consistent counting prevents the sides of the scarf from drifting narrower or wider.

Is this pattern good for someone who has only made basic scarves before?

If you're comfortable with chains, single crochet, and double crochet, this is a great next step up. The repeat is simple once you learn it, though the back-ridge chain and shell-in-space technique make it better suited to someone past the total beginner stage.

One at a time —

Get the next pattern

Tested round by round before it is sent. No spam.