Made and counted by Wren —

Beginner fingerless gloves with a ribbed cuff and shell body

3 mm hook, DK weight yarn: ribbed-cuff fingerless gloves with a shell-stitch body and thumb gap.

Beginner fingerless gloves with a ribbed cuff and shell body
BeginnerLevel
3-4 hoursTime
3 mmHook
DKYarn
Jump to the pattern

About this pattern

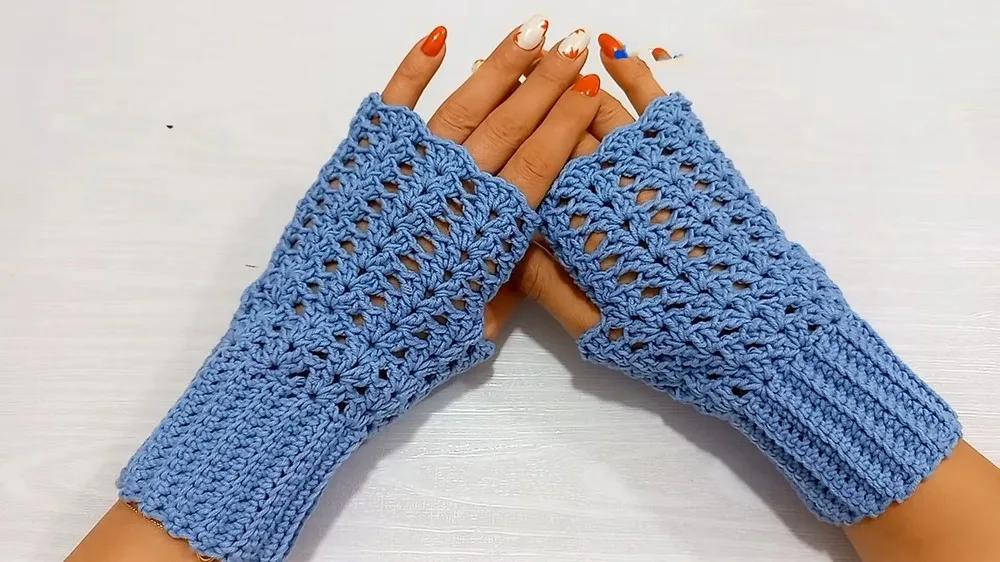
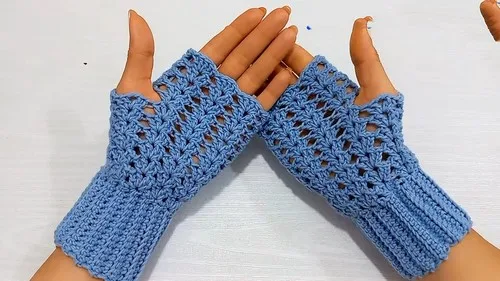
This pattern makes fingerless gloves from two parts: a ribbed band worked flat as a strip of 14 single crochets, seamed into a ring, and a shell body of 2-double-crochet, chain-1, 2-double-crochet clusters worked directly from that seam. The thumb opens at round 3 of the body by skipping two shell positions. Two identical gloves are needed; a 3 mm hook is used throughout.

This project produces a pair of fingerless gloves worked in two separate pieces per hand: a ribbed band and a shell-stitch body. The band starts as a flat strip of 14 single crochets, repeated in back-loop-only rows until long enough to seam into a ring; the body then picks up 2-double-crochet, chain-1, 2-double-crochet shells directly from the seamed edge. Round 3 of the body works 8 shells before skipping two shell positions to open the thumb gap. A 3 mm hook keeps the shell fabric firm enough to hold its shape without stuffing or wire.
The pattern

Written out round by round

Materials

  • Yarn (Yarn Art Jeans was used originally)
  • 3 mm crochet hook

Abbreviations

  • ch = chain
  • sc = single crochet
  • dc = double crochet
  • sl st = slip stitch

Ripped Band

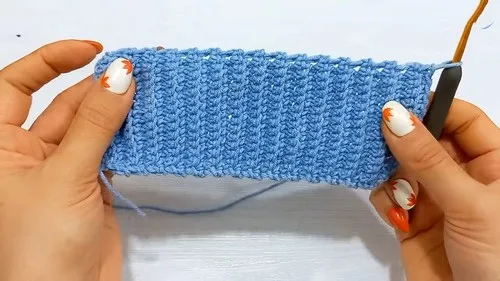
Round 1Start with a slip knot; chain 15; skip the first chain; starting from the second chain, work one single crochet into each chain across (14 single crochets in total); chain 1 and turn your work.
Round 2Single crochet under both loops of the first stitch; work single crochets into the back loop only of each stitch across until the last stitch; single crochet under both loops of the last stitch; chain 1 and turn your work.
Rounds 3–30Repeat Round 2.

Body of Fingerless Gloves

Make 2
Round 1Start with 3 chains (counts as the first double crochet); into the seam's space, work another double crochet, chain 1, and then 2 more double crochets in the same space; skip two rows of the rib band and in the next row's top, work the following into the next space: 2 double crochets, chain 1, 2 double crochets; repeat this sequence around the top of the band, skipping two row tops between each shell (sequence of 2 double crochets, chain 1, 2 double crochets); join the round with a slip stitch to the third chain of the starting chain.
Round 2Following Rounds Slip stitch into the next double crochet and then into the chain-1 space to begin the new round; work 3 chains (counts as a double crochet), another double crochet, chain 1, and then 2 more double crochets in the same chain-1 space; skip the double crochets and work the sequence only in the chain-1 spaces; join the round as previously done and repeat this step for several more rounds, or until the fingerless glove reaches the desired height before the thumb area.
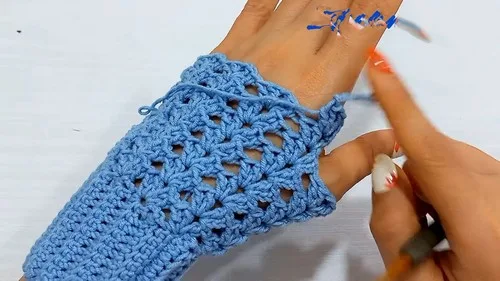
Round 3Creating Thumb Space Continue the pattern for 8 shells; skip the last two sets of shells (those different ones) to create a space for the thumb; join with a slip stitch to the starting chain.
Rounds 4–6Continue working the pattern around for three more rounds, creating the shell pattern in each chain-1 space.
Round 7After reaching the desired height post thumb space, work a final round of shell stitches (5 double crochets) into each chain-1 space; join with a slip stitch, fasten off, and weave in ends.

Assembly

Step 1Fold the band, putting the first row close to the last row, right sides facing each other.
Step 2Join with slip stitches by inserting the hook under both loops of the stitches from the last row and then into the remaining loop of the corresponding stitches from the first row.
Step 3Continue this slip stitch seam until all stitches are joined.
Step 4Turn the band right side out.
Step 5Join with a slip stitch, fasten off, and weave in ends.

Tester's notes

3 mm hook holds the shell body firm; sizing up makes Round 3's thumb gap stretch out of proportion to the 8 shells worked before it.

14 single crochets across the Ripped Band's first row set the finished band width; recount before starting Round 2 so the back-loop-only repeats land correctly.

Rounds 3 through 30 of the band are identical repeats of Round 2; mark every few rows to avoid losing count on a long strip.

Tension in the back-loop-only rows should match Round 1, or the seamed band pulls tighter on one edge than the other.

Two Body pieces are required, one per hand; work them as mirror images if a left and right distinction matters, since the shell pattern does not build that in automatically.

Work in progress

Beginner fingerless gloves with a ribbed cuff and shell body — photo 2
Beginner fingerless gloves with a ribbed cuff and shell body — photo 3
Beginner fingerless gloves with a ribbed cuff and shell body — photo 4

At a glance

Rounds8
Parts2
LevelBeginner
Time3-4 hours
Hook3 mm
YarnDK

Gauge check

After Round 1 of the Ripped Band, count stitches across: there should be 14 single crochets from the 15-chain start, with fabric that lies flat rather than curling under.

If the strip curls or the stitch count comes out short or long, change hook size before working Round 2 rather than adjusting later at the seam.

If something looks wrong

The ribbed band twists once seamed into a ring.
Back-loop-only rows were worked unevenly across the Round 2 through 30 repeats. Check that both long edges of the strip have the same row count before starting the slip-stitch seam.
Shells in the Body rounds don't stack
The two skipped row tops between shells were miscounted when placing Round 1 into the band's seam space. Recount two row tops between each 2-double-crochet, chain-1, 2-double-crochet shell before moving on.
The thumb opening comes out too tight or too loose.
Round 3's skip was measured against the wrong shell count. Confirm 8 shells are complete first, then skip exactly the last two shell sets, not two chain-1 spaces.
The glove body sits crooked against the seamed band.
Round 1 of the Body was started into the wrong row tops. Reposition the shells into the seam's chain-1 space and into row tops two rows apart, not adjacent rows.

Yarn substitutions

DK weight cotton-acrylic blendClosest match to the original fabric weight; stitch counts stay the same and drape stays crisp rather than stretchy.
Worsted weight acrylicProduces a bulkier fabric from the same 14-stitch band and 8-shell counts; move up to a 4 mm hook to keep the shells from stiffening.
Fingering weight wool blendGives a thinner, more elastic result; hold two strands together or the 14-stitch band width runs narrow and the shells gap open.
FAQs

Questions

Why does the Ripped Band repeat Round 2 through Round 30?

The repeats set the strip's finished length before it gets seamed into a ring around the wrist. More or fewer repeats changes the band's width, which changes how many row tops are available for the Body's 8 shells.

How is the thumb gap actually formed?

It happens in Round 3 of the Body, after 8 shells are complete around: the last two shell sets are skipped rather than worked, leaving an open space at the top of the piece. Rounds 4 through 6 continue past that gap without closing it.

Does this pattern need two separate glove pieces?

Yes, two Body pieces are made, one for each hand, each built on its own Ripped Band. Both use the same 14-single-crochet band and the same 8-shell thumb setup.

One at a time —

Get the next pattern

Tested round by round before it is sent. No spam.