Made and counted by Wren —

Amigurumi Teddy Bear in a Red Sweater Crochet Pattern

Make an adorable amigurumi teddy bear with a knit red sweater using this detailed crochet pattern with jointed limbs, plush yarn, and a soft muzzle.

Amigurumi Teddy Bear in a Red Sweater Crochet Pattern
IntermediateLevel
4-6 HoursTime
2 mmHook
BulkyYarn
Jump to the pattern

At a glance

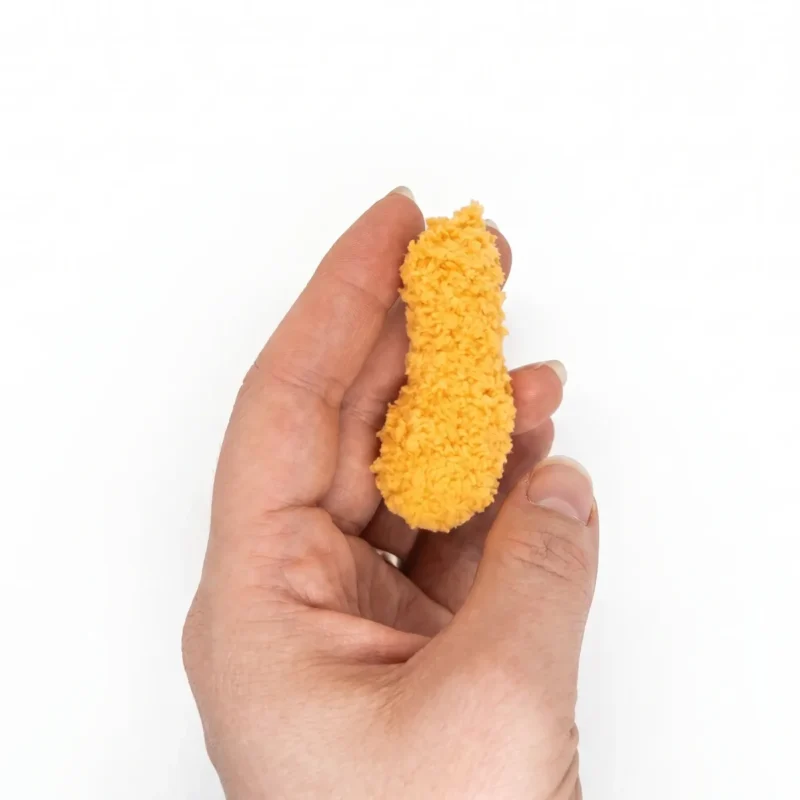
Crochet the arms and legs first in continuous spiral rounds, then set them aside to stuff and joint later.

Work the body in one continuous spiral, shaping it with increases and decreases across its twenty-two rounds.

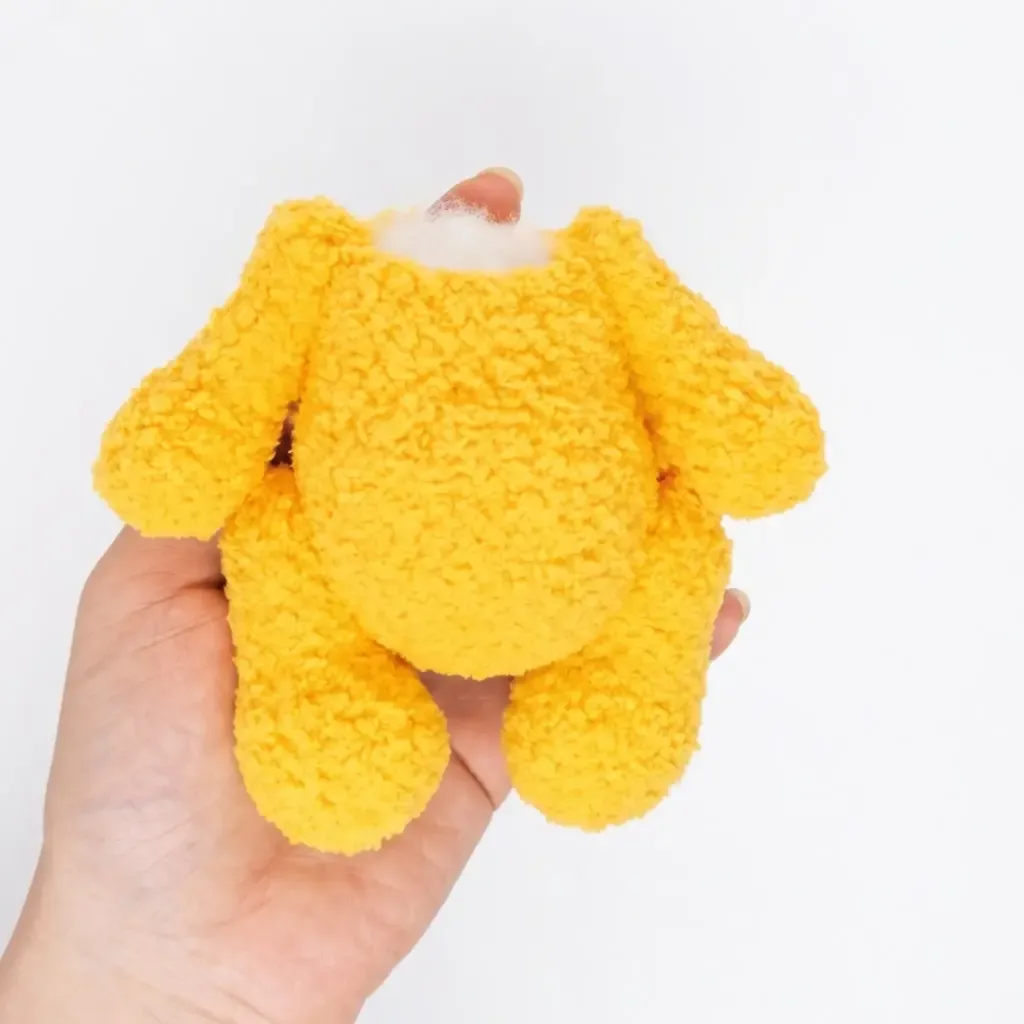
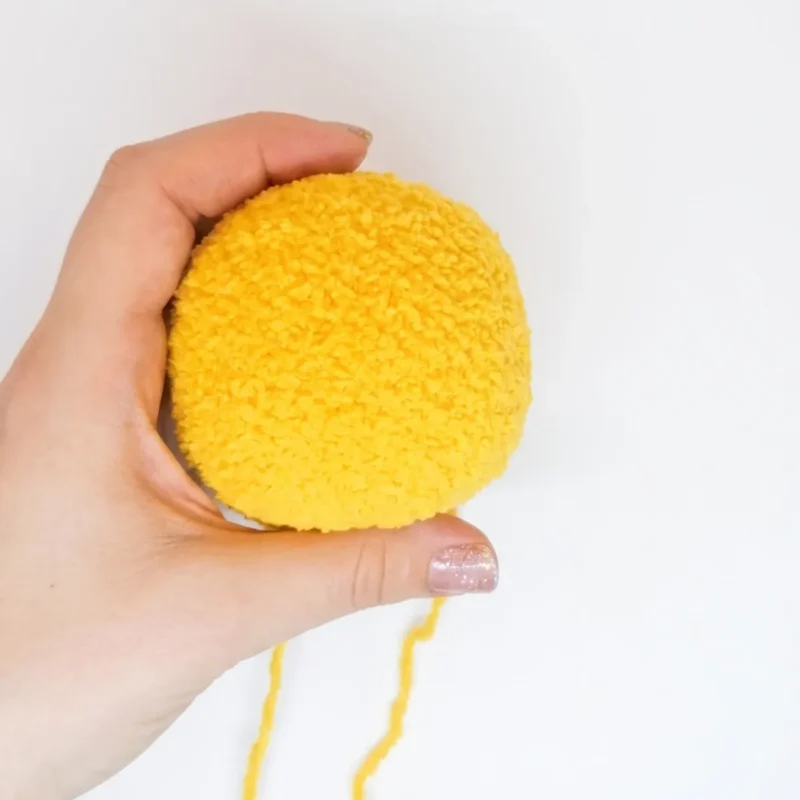
Crochet the head separately, building it up round by round before adding the small four-round muzzle to the front.

Make two simple two-round ears worked flat, then attach them to the head in a balanced, symmetrical position.

Insert the safety nose and embroider the facial details before the head is fully stuffed and closed.

Stuff each body part firmly with fiberfill, paying special attention to the muzzle, ears, and limb tips.

Attach the arms and legs to the body using the T-pin safety joints so the finished bear can pose.

Knit the sweater flat with slipped edge stitches, then dress your finished bear in his cozy red top.

About this pattern

This pattern brings to life a classic amigurumi teddy bear worked up in golden yellow plush yarn and dressed in a hand-knit red sweater that makes him instantly cuddle-worthy. What sets this bear apart is the combination of crochet and knitting techniques, plus articulated joints that let his arms and legs actually move. He's perfect for crocheters who want to level up from basic amigurumi and create a toy that feels genuinely poseable and huggable, whether it's headed for a nursery shelf or a child's arms.

The finished bear is a soft, dense little friend thanks to the plush microfiber yarn, with a rounded muzzle, perky ears, and a snug red sweater that adds a pop of color against his golden fur. He's substantial enough to sit proudly on a shelf yet soft enough for snuggling, making him a wonderful handmade gift for a birthday, baby shower, or just-because moment. Anyone who receives this bear will know real care went into every round and every stitch.
Variations

This bear is endlessly customizable once you've got the base pattern down. Swap the golden yellow Alize Softy for a soft brown, cream, or even dusty pink chenille-style yarn to create a whole family of bears in different colorways — brands like Bernat Baby Blanket or Comfy Cotton Blend make great substitutes if you can't find Alize Softy locally. For the sweater, try YarnArt Jeans in navy, forest green, or mustard for a completely different personality; a striped sweater using two colors of DK-weight yarn would also look adorable with this simple knit-flat construction. If you want a smaller keepsake version, work the same rounds with a lighter worsted-weight yarn and a smaller hook (try a C/2 or D/3) to shrink the overall scale while keeping all stitch counts identical — the bear will simply come out more compact and denser. For a larger, huggable version, size up to a Bulky-weight yarn throughout with a larger hook, which will naturally increase the finished size without changing a single round. Seasonal fans could add a small crocheted scarf in holiday colors, tiny knit mittens, or a fabric bow at the neckline instead of the sweater collar. You could also personalize the face with different eye colors or spacing, or embroider a little heart or star onto the sweater front with the leftover black embroidery thread or a contrasting color. Left unstuffed slightly less firmly, this same pattern also makes a lovely floppy-style bear for younger children who prefer a softer, less rigid toy.

I adore this pattern because it stretches your skills in the best way — you're not just crocheting an amigurumi, you're also knitting a tiny sweater, and that mix keeps things interesting from start to finish. The plush golden yarn works up incredibly soft, so every round of the head and body feels like you're building something you already want to hug. I love how the safety joints on the arms and legs let the finished bear actually sit and pose, which makes him feel so much more alive than a stiff stuffed shape. The little details — that rounded four-round muzzle, the simple two-round ears, and the embroidered face — are where his personality really comes through, and I find that part so satisfying. Slipping the edge stitches on the knit sweater gives it a clean, professional-looking border without much extra effort, which is a small technique that makes a big visual difference. By the time you set that final joint and pull the sweater over his head, you'll have a genuinely special, one-of-a-kind toy.

Common mistakes

  • Losing track of rounds inPlace a stitch marker in the first stitch of every round and move it up each time — this is essential since there's no join or chain to mark the round for you.
  • Stuffing too loosely, causing the plushStuff firmly and in small pieces as you go rather than all at once at the end, pushing fiberfill into the muzzle, ears, and limb tips especially well before closing.
  • Attaching the safety jointsDry-fit the joint placement on the arms and legs against the body first, and only insert the T-pin joints once the limb is stuffed to your desired firmness.
  • Working the knit sweater too tightlyKeep an even, relaxed tension throughout the sweater, and slip the edge stitches purlwise without pulling them snug — a slightly looser edge stitch helps the sweater keep its shape and stretch.
  • Mixing up the two different hook sizesKeep the B/1 (2mm) hook for all the amigurumi crochet rounds and set aside the US 2–3 (3mm) hook specifically for the knit sweater, labeling them if needed so you don't grab the wrong one mid-project.
  • Placing the safety nose or eyesInsert the eyes and nose hardware loosely and study the face from multiple angles before pushing the backs on permanently, since these pieces can't be repositioned once secured.

The pattern

Written out round by round

Materials

Yarn

  • Alize Softy (or similar plush/chenille-style yarn, 100% microfiber, Bulky weight) in golden yellow — less than one skein

Yarn

  • YarnArt Jeans (or similar cotton-acrylic blend, DK/Light Worsted weight) in red — for the sweater

Hook

  • Size B/1 (2 mm) crochet hook

Knitting needles

  • US 2–3 (3 mm)

Safety eyes

  • 9 mm, 1 pair
  • Safety nose: 1
  • T-pin joints: 2.0 x 20 mm, 4 pieces

Joint discs

  • 20 mm, 4 pieces (for legs)

Joint discs

  • 12 mm, 4 pieces (for arms)
  • Polyester fiberfill stuffing
  • Stitch markers
  • Yarn needle / tapestry needle
  • Sewing needle and black embroidery thread (for face details)
  • Scissors

Abbreviations

  • BLO = Back Loop Only
  • ch = Chain
  • dc = Double Crochet
  • dec = Decrease
  • hdc = Half Double Crochet
  • inc = Increase
  • k = Knit
  • MR = Magic Ring
  • p = Purl
  • sc = Single Crochet
  • sc3tog = Single Crochet 3 Together
  • sl st = Slip Stitch
  • st(s) = Stitch(es)
  • yo = Yarn Over

Arms (make 2)

  1. Round 16 sc in MR. (6)
  2. Round 2inc in each st around. (12)
  3. Round 3(3 sc, inc) repeat around. (15)
  4. Round 4-5sc in each st around. (15)
  5. Round 6sc3tog, sc in remaining 12 sts. (13)
  6. Round 7sc3tog, sc in remaining 10 sts. (11)Fasten off, leaving a long tail for sewing the head to the body later. Stuff firmly before closing the final round.
  7. Round 8-14sc in each st around. (11)Insert the 12 mm joint disc between Rnds 13 and 14.
  8. Round 15(dec) x5, sc. (6)Stuff lightly, cinch the opening closed, fasten off and weave in the end.

Legs (make 2)

  1. Round 1Ch 6; starting in 2nd ch from hook: inc, 3 sc, 3 sc in last ch; working down the opposite side of the foundation chain: 4 sc. (12)
  2. Round 22 inc, 3 sc, 3 inc, 3 sc, inc. (18)
  3. Round 3(2 sc, inc) repeat around. (24)
  4. Round 4-6sc in each st around. (24)Shift your marker forward 3 sts so it sits directly at the center of the heel.
  5. Round 7dec, 5 sc, (dec, sc) x3, dec, 6 sc. (19)
  6. Round 86 sc, 4 dec, 5 sc. (15)
  7. Round 9-14sc in each st around. (15)Insert the 20 mm joint disc between Rnds 13 and 14.
  8. Round 15sc, 7 dec. (8)
  9. Round 164 dec. (4)Stuff firmly, cinch the opening closed, fasten off and weave in the end.

Body

  1. Round 16 sc in MR. (6)
  2. Round 2inc in each st around. (12)
  3. Round 3(sc, inc) repeat around. (18)
  4. Round 4sc, inc, (2 sc, inc) x5, sc. (24)
  5. Round 5(3 sc, inc) repeat around. (30)
  6. Round 62 sc, inc, (4 sc, inc) x5, 2 sc. (36)
  7. Round 7(5 sc, inc) repeat around. (42)
  8. Round 810 sc, place a marker, 22 sc, place a second marker, 10 sc. (42)

Keep an eye on both markers — they should track straight up the center back as you work.

  1. Round 9-14sc in each st around. (42)Attach the legs at the marker positions from Rnd 8.
  2. Round 1514 sc, (dec, sc) x4, dec, 14 sc. (37)
  3. Round 16sc in each st around. (37)
  4. Round 1714 sc, 2 dec, sc, 2 dec, 14 sc. (33)
  5. Round 18sc in each st around. (33)
  6. Round 1915 sc, sc3tog, 15 sc. (31)
  7. Round 20-21sc in each st around. (31)Attach the arms between Rnds 20 and 21, positioned directly above the legs.
  8. Round 22(3 sc, dec) x2, 3 sc, sc3tog, (3 sc, dec) x3. (24)Stuff the body firmly before the neck closes up, then continue to the Head.

Head

  1. Round 16 sc in MR. (6)
  2. Round 2inc in each st around. (12)
  3. Round 3(sc, inc) repeat around. (18)
  4. Round 4sc, inc, (2 sc, inc) x5, sc. (24)
  5. Round 5(3 sc, inc) repeat around. (30)
  6. Round 62 sc, inc, (4 sc, inc) x5, 2 sc. (36)
  7. Round 7(5 sc, inc) repeat around. (42)
  8. Round 83 sc, inc, (6 sc, inc) x5, 3 sc. (48)
  9. Round 9-17sc in each st around. (48)
  10. Round 183 sc, dec, (6 sc, dec) x5, 3 sc. (42)
  11. Round 19(5 sc, dec) repeat around. (36)
  12. Round 202 sc, dec, (4 sc, dec) x5, 2 sc. (30)
  13. Round 21(3 sc, dec) repeat around. (30)Fasten off, leaving a long tail for sewing the head to the body later. Stuff firmly before closing the final round.

Muzzle

  1. Round 1Ch 4; starting in 2nd ch from hook: inc, sc, 4 sc in last ch; working down the opposite side of the foundation chain: sc, inc. (10)
  2. Round 22 inc, sc, 4 inc, sc, 2 inc. (18)
  3. Round 3-4sc in each st around. (18)Fasten off, leaving a tail for sewing. Attach the safety nose between Rnds 3 and 4 before sewing the muzzle in place.

Ears (make 2)

  1. Round 16 hdc in MR, ch 2, turn.
  2. Round 2inc in each of the 6 hdc around. (12)Fasten off, leaving a tail for sewing. Fold each ear in half and stitch the fold closed.

Sweater (knit)

Cast on 36 sts.

Row 1: edge st, k34, edge st.

Row 2: edge st, k5, yo, k1, yo, k5, yo, k1, yo, k10, yo, k1, yo, k5, yo, k1, yo, k5, edge st.

Row 3: edge st, p42, edge st.

Row 4: edge st, k6, yo, k1, yo, k7, yo, k1, yo, k12, yo, k1, yo, k7, yo, k1, yo, k6, edge st.

Row 5: edge st, p50, edge st.

Row 6: edge st, k7, bind off 10 sts, k14, bind off 10 sts, k7, edge st.

Row 7: edge st, p8, yo x3, p15, yo x3, p7, edge st.

Row 8: edge st, k36, edge st.

Row 9: edge st, p36, edge st.

  1. Round 10-11edge st, k36, edge st. Fasten off and weave in the end. For a removable sweater, add crocheted chain loops and sew on small buttons at the back opening; for a permanent finish, sew the sweater directly onto the body.

Assembly

Step 1

Sew the Muzzle onto the Head between Rnds 15 and 19, centering it under where the eyes will sit.

Step 2

Mark five points around the Muzzle for the eye-cinching technique: Point 1 at the bottom of the head, Points 2 and 3 to one side of the nose, Points 4 and 5 to the other side.

Step 3

Insert the needle at Point 1, bring it out at Point 2, insert at Point 3, and bring it back out at Point 1. Pull tight to sink the eye socket. Repeat on the opposite side using Points 4 and 5.

Step 4

Glue or push the 9 mm safety eyes into place at the cinched points.

Step 5

Embroider the eye whites, eyelids, eyebrows, and mouth using black embroidery thread.

Step 6

Position the Ears and sew them securely to the Head using the yarn tails.

Step 7

Attach the Head to the Body using the long tail left at the neck, using a whipstitch and adding extra stuffing to the neck as you close the gap.

Step 8

Dress the bear in the finished Sweater, then weave in any remaining ends.

Important notes

💡 Use a stitch marker in the very first stitch of each spiral round on the head, body, arms, and legs — since these parts are never joined, it's the only way to know where a round begins and ends.

💡 Keep your two hooks separate and labeled: the small B/1 (2mm) is for all crocheted amigurumi parts, while the US 2–3 (3mm) is reserved for knitting the sweater.

💡 Stuff the muzzle and ear tips firmly with small pinches of fiberfill as you close each round rather than trying to cram stuffing in after the piece is sewn shut.

💡 Since gauge isn't critical here, focus instead on working snugly enough that stitches stay closed and fiberfill doesn't show through the plush yarn.

💡 When knitting the sweater, remember to slip the first and last stitch of every row purlwise — this small detail gives you a neat, professional-looking edge without any extra finishing work.

💡 Test-fit the T-pin joints on the arms and legs against the body before final assembly so you're happy with how the bear sits and poses before locking everything in place.

More photos

Amigurumi Teddy Bear in a Red Sweater Crochet Pattern — photo 2
Amigurumi Teddy Bear in a Red Sweater Crochet Pattern — photo 3
FAQs

Frequently asked questions

Can I make this bear without the safety joints if I don't have them on hand?

Yes, you can simply sew the arms and legs directly onto the body with a yarn needle instead of using T-pin joints. You'll lose the poseable movement, but the bear will still look adorable and be even quicker to finish.

What yarn can I use if I can't find Alize Softy or YarnArt Jeans?

Any bulky-weight plush or chenille-style yarn works well for the bear's body, and any DK or light worsted cotton-acrylic blend is a fine substitute for the sweater. Just make sure your hook size matches the yarn weight you choose to keep the pieces proportional.

Do I need to know how to knit to make this pattern?

Yes, the sweater portion is knit flat with slipped edge stitches, so basic knitting knowledge is helpful. If you're new to knitting, practicing a simple flat rectangle with slip-stitch edges beforehand will make the sweater section much smoother.

How much yarn do I actually need for the bear's body?

The pattern calls for less than one full skein of the bulky plush yarn in golden yellow, so a single skein should comfortably cover the head, body, arms, legs, muzzle, and ears. The red DK-weight yarn amount needed for the sweater will depend on your gauge, but it's a small, quick knit.

Is this pattern suitable for a beginner amigurumi maker?

This pattern is best suited for someone with some amigurumi experience already, since it combines spiral crochet rounds, safety joint assembly, and flat knitting in one project. A confident beginner who has made a simpler amigurumi before and knows basic knit stitches could still tackle it successfully.

One at a time —

Get the next pattern

Tested round by round before it is sent. No spam.