Made and counted by Wren —

Amigurumi Teddy Bear Crochet Pattern (Free)

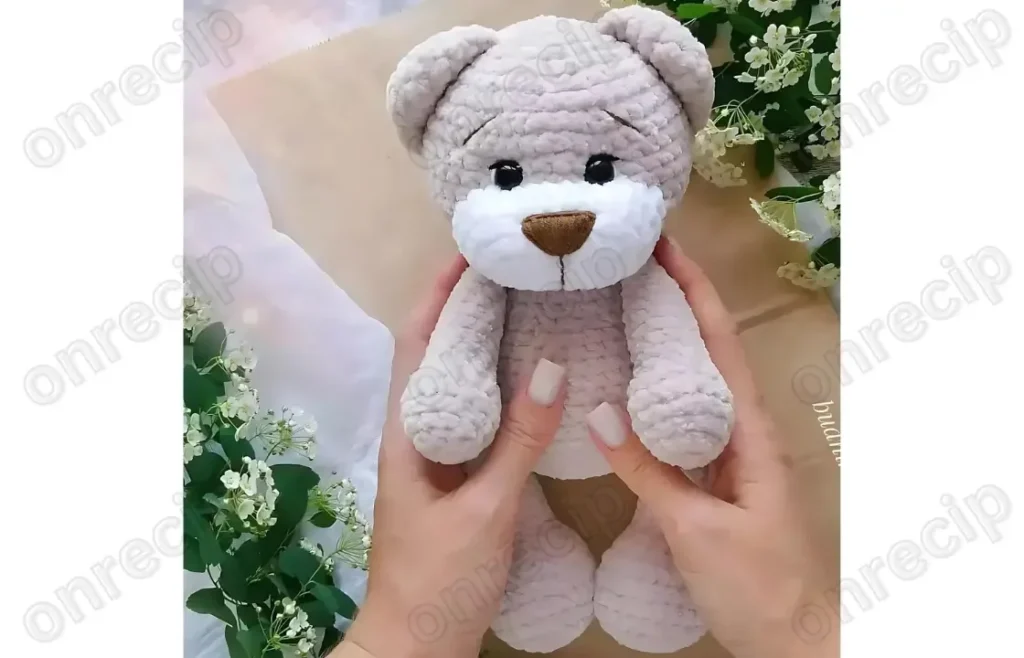
Make an adorable amigurumi teddy bear with this free crochet pattern featuring a shaped muzzle, round ears, and jointed-look arms and legs.

Amigurumi Teddy Bear Crochet Pattern (Free)
IntermediateLevel
4-6 HoursTime
WorstedYarn
Jump to the pattern

At a glance

Crochet the head first, working through the increases and decreases across nineteen rounds to shape a rounded dome.

Make the four-round ears next, keeping them small and neat so they'll sit proportionally on the head.

Shape the five-row muzzle separately, giving the bear its distinct snout before it's attached to the face.

Work the upper arms over twelve rounds, keeping them slim to match the bear's small overall scale.

Crochet the lower legs across nineteen rows, shaping them so the bear can stand or sit sturdily.

Build the body over twenty rounds, mirroring the head's shaping for a balanced, huggable torso.

Finish with the quick three-round tail, a tiny detail that adds instant personality once attached.

Follow the two assembly steps to stuff each piece and sew the head, ears, muzzle, limbs, and tail onto the body.

About this pattern

This little amigurumi bear is the kind of pattern that makes you fall in love with crochet all over again. With a round head, tiny ears, a sweet shaped muzzle, and chunky little limbs, it captures that classic teddy bear charm in stitch form. It's perfect for crocheters who want to make a thoughtful handmade gift, add a new friend to their amigurumi shelf, or simply enjoy the meditative rhythm of working in continuous rounds on a project that comes together piece by piece.

You'll build this bear from seven separate parts: the head, ears, muzzle, upper arms, lower legs, body, and a tiny tail, each worked in the round and shaped with increases and decreases to create that soft, rounded amigurumi silhouette. Expect to use magic rings to start each piece cleanly, work through nineteen rounds for the head and twenty rounds for the body, and rely on careful stitch counting to keep everything symmetrical. This is a great project for someone comfortable with the basics of amigurumi who's ready to practice assembling multiple pieces into one cohesive shape.

Once all seven pieces are stitched, stuffed, and sewn together, you'll have a compact, huggable bear with a rounded belly, a distinct muzzle for personality, and short limbs that give it a sweet, toddling stance. The finished size makes it ideal for small hands, a shelf display, or tucking into a gift box. Whether you keep it for yourself or wrap it up for someone special, this bear has that timeless, well-loved teddy quality that never goes out of style.

Variations

One of the best things about this bear is how easy it is to make it your own. For a classic look, stick with tan, caramel, or oatmeal worsted weight yarn like Vanna's Choice or With Love, but don't stop there — try a soft dove-gray or blush pink for a more modern nursery-friendly bear, or go bold with a deep chocolate brown body paired with a cream muzzle and ear centers for contrast. Adding a small contrasting oval of cream or white to the muzzle rounds instantly gives your bear a more polished, professional look. If you want a bigger bear, size up to a bulky weight yarn with a 5.0mm or 5.5mm hook, which will naturally scale every piece up without changing the round counts. For a smaller, pocket-sized version, drop to a sport weight yarn with a 3.0mm hook and use safety eyes on the smaller size to match the scale — the head, muzzle, and ear proportions will stay balanced either way. You can also experiment with fun fur or bouclé yarn for the body and head to give your bear a fuzzy, textured coat while keeping the muzzle and ears in smooth yarn for definition. Seasonal fans can have fun here too: work the body in red with a tiny scrap of white for a heart appliqué, add a knit-look scarf, or crochet a little bow tie to sew onto the neck area where the head meets the body. You could also make a whole family by repeating the pattern in graduating sizes using different hook sizes, creating a mama bear and baby bear set that share the same seven-piece structure.

I adore this pattern because every single piece has its own little personality moment — the muzzle rows are where the bear really starts to look back at you, and that's always my favorite part of any amigurumi project. Working the head over nineteen rounds gives you plenty of room to shape a nice round dome before you start decreasing, and the ears come together quickly over just four rounds so they feel like an instant reward. I love how the upper arms and lower legs are worked separately over twelve rounds and nineteen rows — it keeps the pieces manageable and lets you crochet them up while watching TV without losing your place. The tiny three-round tail is such a charming detail; it's barely any yarn but it adds so much personality once it's tacked onto the body. By the time you reach the two assembly steps, you've already done the hard part, and stitching everything together feels like the satisfying final reveal. This is the kind of make where each round builds anticipation for the next.
Common mistakes

  • Starting each piece with a loose magicPull the tail yarn firmly after your first round of single crochets and check that the center hole is fully closed before moving on — snug it up again after a round or two if needed.
  • Losing track of which round you'reUse a stitch marker in the last stitch of every round and jot down a quick tally (or use a row counter) for each piece so you never have to recount stitches from the start.
  • Over-stuffing the muzzle so it becomesStuff firmly but in small pinches, checking the shape against the head as you go, and stop before the muzzle feels rock-hard — you want it plump but still slightly squeezable.
  • Sewing the ears or muzzlePin all face pieces in place with removable stitch markers or scrap yarn first, step back to check symmetry from multiple angles, then sew permanently once you're happy with the placement.
  • Skipping invisible decrease techniqueInsert your hook through the front loops only of the next two stitches, then pull yarn through both loops together for a smooth, seamless decrease that closes cleanly.
  • Attaching the tiny one-round tailWhipstitch small pieces on using the tail end left over from crocheting them, going around the edge at least twice, and weave the end deep into the stuffing to secure it invisibly.

The pattern

Written out round by round

Materials

  • Worsted weight yarn
  • Crochet hook (size to suit your yarn)
  • Safety eyes
  • Polyester fiberfill stuffing
  • Yarn needle for sewing pieces together
  • Embroidery thread or yarn for facial features

Abbreviations

  • sc = single crochet
  • inc = increase
  • dec = decrease

Head

  1. Round 16 sc into a magic ring 2nd round: inc * 6 (12 sc) 3rd round: (sc, inc) * 6 (18 sc)
  2. Round 4(2 sc, inc) * 6 (24 sc) 5th round: (3 sc, inc) * 6 (30 sc) 6th round: (4 sc, inc) * 6 (36 sc)
  3. Round 7(5 sc, inc) * 6 (42 sc) 8th round: (6 sc, inc) * 6 (48 sc)
  4. Round 9-1448 sc Insert safety eyes between rounds 9 and 10. 15th round: (6 sc, dec) * 6 (42 sc)
  5. Round 16(5 sc, dec) * 6 (36 sc) 17th round: (4 sc, dec) * 6 (30 sc) 18th round: (3 sc, dec) * 6 (24 sc)
  6. Round 19(2 sc, dec) * 6 (18 sc) Stuff firmly so that the head has a nice, round shape.

Ears

  1. Round 18 sc into a magic ring 2nd round: inc * 8 (16 sc) 3rd round: 16 sc 4th round: (3 sc, inc) * 4 (20 sc)

Muzzle

Chain 7.

  1. Round 1Starting from the 2nd chain from the hook: 5 sc, 3 sc in one stitch, continue crocheting on the other side of the chain: 4 sc, inc (14 sc)
  2. Round 2inc, 4 sc, 3 inc, 4 sc, 2 inc (20 sc) 3rd row: inc, 5 sc, (sc, inc) * 4, 5 sc, inc (26 sc)
  3. Round 4inc, sc, (2 sc, inc) * 4, 6 sc, sc (32 sc) 5th row: 32 sc

Upper Arms

  1. Round 16 sc into a magic ring 2nd round: inc * 6 (12 sc) 3rd round: (5 sc, inc) * 2 (14 sc)
  2. Round 4(3 sc, inc) * 3, 2 sc (17 sc) 5th round: 17 sc 6th round: dec, (1 sc, dec) * 5 (11 sc)
  3. Round 7-910 sc 10th round: (1 sc, dec) * 2, 1 sc (9 sc)
  4. Round 11-129 sc Fold the arm in half and sc 5 stitches together to close. Repeat for the second arm.

Lower Legs

Chain 7.

  1. Round 1Starting from the 2nd chain from the hook, crochet 5 sc, 4 sc into the last chain, continue crocheting on the other side of the chain: 4 sc, 3 sc in the last chain.
  2. Round 2inc, 4 sc, 4 inc, 4 sc, 3 inc 3rd row: inc, sc, 4 sc, (inc, sc) * 4, 4 sc, (inc, sc) * 3
  3. Round 432 sc in the back loops 5th row: 32 sc 6th row: 7 sc, dec, 8 sc, 2 dec, 1 sc 7th row: 7 sc, dec, 1 sc
  4. Round 8-1314 sc 14th row: dec, 12 sc 15th row: 13 sc 16th row: 11 sc, dec
  5. Round 17-1912 sc Fold the leg in half and sc 6 stitches together to close. Repeat for the second leg.

Body

  1. Round 16 sc into a magic ring 2nd round: inc * 6 (12 sc) 3rd round: (sc, inc) * 6 (18 sc)
  2. Round 4(2 sc, inc) * 6 (24 sc) 5th round: (3 sc, inc) * 6 (30 sc) 6th round: (4 sc, inc) * 6 (36 sc)
  3. Round 7(5 sc, inc) * 6 (42 sc)
  4. Round 8-942 sc 10th round: 8 sc, crochet one lower leg, 14 sc, crochet the second lower leg, 8 sc (42 sc)
  5. Round 11-1442 sc 12th round: (5 sc, dec) * 6 (36 sc) 13th-14th rounds: 36 sc 15th round: (4 sc, dec) * 6 (30 sc)
  6. Round 16-1916th-17th rounds: 30 sc 18th-19th rounds: 24 sc(24)
  7. Round 20(2 sc, dec) * 6 (18 sc) Stuff the body firmly to give it the proper shape.

Tail

  1. Round 16 sc into a magic ring 2nd round: inc * 6 (12 sc) 3rd round: 12 sc Sew the tail to the body.

Assembly

Step 1

Sew the head to the body. Sew the arms to the body. Attach the ears, muzzle, and tail. Embroider the facial features. Your adorable crochet toy is now ready for hugs!

Step 2

Enjoy!

Important notes

💡 Use a hook one size smaller than the yarn label recommends (typically 3.5-4.0mm with worsted weight) to create a tight fabric that keeps stuffing from peeking through the stitches.

💡 Keep a small pile of stitch markers handy since you'll be tracking rounds across seven distinct pieces — color-code them if you're prone to losing your place.

💡 Stuff the head and body a little more firmly than the limbs so the bear can sit or stand upright without flopping over.

💡 Work the muzzle in a lighter color if you want it to stand out, and weave in that color change end securely before attaching it to avoid fraying over time.

💡 Save the tail ends from the ears, muzzle, and tail piece rather than cutting them short — they make sewing assembly so much faster since you won't need to add new strands.

💡 Lay out all seven finished pieces before you start the two assembly steps so you can confirm proportions and positioning look right before committing with permanent stitches.

FAQs

Frequently asked questions

What yarn weight works best for this amigurumi bear?

A worsted weight (medium, #4) acrylic or cotton-blend yarn is ideal for this pattern, giving the bear nice stitch definition and sturdy structure. Brands like Vanna's Choice or With Love work great and hold up well to stuffing.

How much yarn do I need to complete the whole bear?

Since the pattern uses seven small to medium pieces, one skein of your main color plus a small amount of a contrast shade for the muzzle should be more than enough. Keep a little extra on hand in case you want to add embroidered details or a bow.

Can I use safety eyes instead of embroidering the face?

Yes, safety eyes work beautifully on this bear and are inserted into the head before you finish stuffing and closing the final round. Just make sure to plan their placement relative to where the muzzle will be sewn for a balanced expression.

Why does my head or body look lumpy after stuffing?

Lumpy shaping usually means the stuffing was added in one big clump instead of small, even pieces. Pull the stuffing apart into little tufts and push them in gradually, smoothing the fabric with your fingers as you go for an even, rounded result.

How do I attach the arms and legs so they don't wobble?

Whipstitch each limb securely around its entire opening edge to the body, going through both the limb and body fabric at least twice around. For extra stability, you can also add a few straight stitches through the center of the limb into the body before finishing off.

One at a time —

Get the next pattern

Tested round by round before it is sent. No spam.