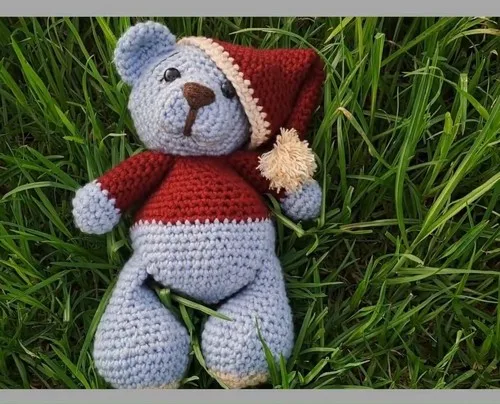
Made and counted by Wren —

Amigurumi teddy bear crochet pattern with color-block body

Worsted-weight amigurumi teddy bear pattern: 20-round head, 21-round color-block body reaching 48 stitches, plus arms, legs

Amigurumi teddy bear crochet pattern with color-block body
IntermediateLevel
4-6 hoursTime
WorstedYarn
Jump to the pattern

About this pattern

This pattern makes an amigurumi teddy bear from six crocheted pieces: a 20-round head, a 21-round body reaching 48 stitches at its widest round (round 8), a pair of 14-round arms, a pair of 18-round legs, a pair of 6-round ears, and a 5-round muzzle. Each piece opens with a 6-stitch magic ring, shapes through increase and decrease rounds, and finishes with a long tail for sewing. Assembly involves attaching head, limbs, ears, and muzzle to the body, then embroidering the face.

This amigurumi teddy bear is built from six crocheted pieces worked in continuous rounds: a 20-round head, a 21-round body that widens to 48 single crochets by round 8, a pair of 14-round arms, a pair of 18-round legs, a pair of 6-round ears, and a 5-round muzzle. Each piece starts from a 6-single-crochet magic ring and shapes through increase and decrease rounds before sewing together with the long tails left from fastening off. The 48-stitch body round sets the proportion the rest of the bear follows. Customize your bear by changing yarn colors for a color-blocked body, arms, or legs, or by adding accessories like a bowtie, scarf, or a little heart.
The pattern

Written out round by round

Materials

  • Worsted weight yarn in two or more colors (for color-blocking the body, arms, and legs)
  • Crochet hook (size to suit your yarn)
  • Polyester fiberfill (stuffing)
  • Yarn/tapestry needle, for sewing pieces together and closing holes
  • Yarn or embroidery thread, for embroidering the nose, mouth, eyebrows, and eyelashes

Abbreviations

  • ch = chain
  • st = stitch
  • sl st = slip stitch
  • sc = single crochet
  • hdc = half double crochet
  • dc = double crochet
  • inc = increase
  • dec = decrease
  • mr = magic ring
  • fo = finish off

Head Pattern

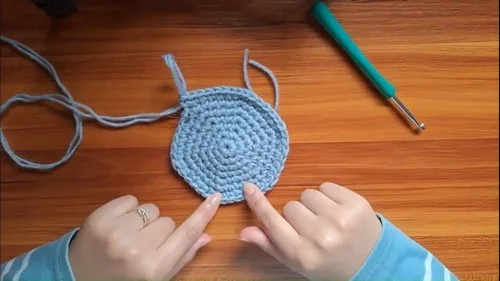
Round 1Magic ring with 6 single crochets (6)
Round 22 single crochets in each stitch (12)
Round 31 single crochet, then an increase; repeat all around (18)
Round 42 single crochets, then an increase; repeat all around (24)
Round 53 single crochets, then an increase; repeat all around (30)
Round 64 single crochets, then an increase; repeat all around (36)
Round 75 single crochets, then an increase; repeat all around (42)
Rounds 8–141 single crochet in each stitch for 7 rounds (42)
Round 155 single crochets, then a decrease; repeat all around (36)
Round 164 single crochets, then a decrease; repeat all around (30)
Round 173 single crochets, then a decrease; repeat all around (24)
Round 182 single crochets, then a decrease; repeat all around (18)Stuff with polyfill before starting Round 19
Round 191 single crochet, then a decrease; repeat all around (12)
Round 20Decrease all around (6)Finishing: Slip stitch, chain one, fasten off leaving a long tail. Close the hole using a needle by inserting it into the front loops of the remaining stitches.

Body Pattern

Rounds 1–7Follow the same increase pattern as the head (up to 5 single crochets then an increase).
Round 86 single crochets, then an increase (48).(48)
Rounds 9–121 single crochet in each stitch for 4 rounds (48). Color Change: Insert hook into the first stitch, pull the second color through, yarn over, and pull through the loop. Fasten off the old color.
Round 131 single crochet in each stitch (48).(48)
Round 146 single crochets, then a decrease; repeat all around (42).(42)
Round 151 single crochet in each stitch (42).(42)
Round 165 single crochets, then a decrease; repeat all around (36).(36)
Round 171 single crochet in each stitch (36).(36)
Round 183 single crochets, then a decrease; repeat all around (30).(30)
Round 191 single crochet in each stitch (30).(30)
Round 202 single crochets, then a decrease; repeat all around (24).(24)
Round 211 single crochet in each stitch (24).Finishing: Slip stitch, chain one, fasten off leaving a long tail for sewing to the head. Fill with polyfill stuffing.(24)

Arms Pattern (Make 2)

Round 1Magic ring with 6 single crochets (6).(6)
Round 22 single crochets in each stitch (12).(12)
Round 31 single crochet, then an increase (18).(18)
Round 41 single crochet in each stitch (18).(18)
Round 51 single crochet, then a decrease; repeat all around (12).Color Change: Bring in the second color.(12)
Rounds 6–141 single crochet in each stitch for 9 rounds (12).Finishing: Slip stitch, chain one, fasten off. Add stuffing before closing the hole. Close the hole by joining the back loops of all stitches.(12)

Legs Pattern (Make 2)

Round 1Magic ring with 6 single crochets (6).(6)
Round 22 single crochets in each stitch (12).(12)
Round 31 single crochet, then an increase (18).Color Change: Bring in the next color.(18)
Round 42 single crochets, then an increase; repeat all around (24).(24)
Round 53 single crochets, then an increase; repeat all around (30).(30)
Round 64 single crochets, then an increase; repeat all around (36).(36)
Rounds 7–81 single crochet in each stitch for 2 rounds (36).(36)
Round 93 single crochets, then a decrease; repeat all around (30).(30)
Round 102 single crochets, then a decrease; repeat all around (24).(24)
Rounds 11–121 single crochet in each stitch for 2 rounds (24).(24)
Round 131 single crochet, then a decrease; repeat all around (18).(18)
Rounds 14–181 single crochet in each stitch for 5 rounds (18).Finishing: Slip stitch, chain one, fasten off. Fill with stuffing and close the hole as done for the arms.(18)

Ears Pattern (Make 2)

Round 1Magic ring with 6 single crochets (6).(6)
Round 22 single crochets in each stitch (12).(12)
Round 31 single crochet, then an increase (18).(18)
Rounds 4–61 single crochet in each stitch for 3 rounds (18).Finishing: Close the hole by joining the back loops of the stitches.(18)

Muzzle Pattern

Round 1Magic ring (6).(6)
Round 22 single crochets in each stitch (12).(12)
Round 31 single crochet, then an increase (18).(18)
Rounds 4–51 single crochet in each stitch for 2 rounds (18).(18)

Assembly

Step 1Sew the pieces together using a needle and the long tails left from fastening off.
Step 2Attach the head to the body, the arms and legs to the body, and the ears and muzzle to the head.
Step 3Embroider the nose, mouth, eyebrows, and eyelashes to complete your teddy bear!

Tester's notes

6-stitch magic ring opens every piece (head, body, arms, legs, ears, and muzzle) - pull the tail snug on the first round so no hole shows once stuffed.

48 single crochets mark the body's widest round (round 8) - place a stitch marker there to track where the plain rounds and color change begin.

4 plain rounds (9-12) follow the body's color change - keep tension steady through these so the color block doesn't flare or cinch.

Color changes happen mid-stitch: pull the new color through on the last pull of the current stitch, then fasten off the old color and weave in separately. This applies to the body, arms, and legs.

Stuff the head, body, arms, and legs firmly before closing - underfilled pieces sag and won't hold their shape once sewn to the rest of the bear.

Work in progress

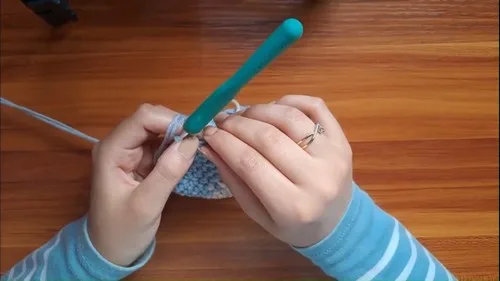
Amigurumi teddy bear crochet pattern with color-block body — photo 2
Amigurumi teddy bear crochet pattern with color-block body — photo 3

At a glance

Rounds52
Parts6
LevelIntermediate
Time4-6 hours
YarnWorsted

Gauge check

After round 2 of any piece, the stitch count should read 12 - recount before moving into round 3's increases.

If it's off, frog back to the magic ring; a tight 6-stitch ring and consistent single crochet tension keep every later round count, including the 48-stitch body round, accurate.

Stitch-count checkpoints

  • Head Pattern · Round 4: 24 sts
  • Head Pattern · Rounds 8–14: 42 sts
  • Head Pattern · Round 18: 18 sts
  • Head Pattern · Round 20: 6 sts
  • Body Pattern · Round 14: 42 sts
  • Body Pattern · Round 17: 36 sts

If something looks wrong

Head comes out pointed rather than round at the top.
Round 2's increase should land at 12 stitches before round 3 increases to 18; a miscount here carries through every later round, so recount before continuing.
Body rocks or sits unevenly instead of standing flat.
Round 8 should total 48 single crochets; if the count is off, the increases from the earlier rounds didn't land evenly, so unravel back to round 8 and recount.
A visible gap or loose hole appears
The new color was pulled through too loosely on the join stitch; tighten that first stitch and weave the tail through the inside of the piece rather than across the gap.
Arm puckers instead of narrowing
Arms Pattern Round 5's decrease (18 down to 12) is bunched instead of spaced; spread the single-crochet-then-decrease repeats evenly around the round before bringing in the second color, so the arm tapers into a smooth curve rather than a cone.

Yarn substitutions

Cotton, worsted weightProduces crisper stitch definition and less stretch than a standard worsted fiber; drop to a half-size-smaller hook to keep the fabric tight enough to hide stuffing, and expect a firmer, less squishy finished bear.
Acrylic, worsted weightClosest match to the pattern's base fiber; the same hook size and stitch counts (6, 12, 18, 48) work without adjustment, and stuffing shows through less because of the loft.
Chenille or velvet-style, worsted weightSofter surface hides stitch definition and uneven tension, which helps on the increase rounds; the fabric has more give, so stuff a little firmer and check gauge, since this fiber can run looser than standard worsted.
FAQs

Questions

How many separate pieces need crocheting for one bear?

The pattern makes six pieces: one 20-round head, one 21-round body, a pair of 14-round arms, a pair of 18-round legs, a pair of 6-round ears, and one 5-round muzzle. Assembly calls for sewing the head, arms, legs, ears, and muzzle onto the body using the long tails left from fastening off.

What stitch count signals it's time for the body's color change?

Round 8, which ends at 48 single crochets, is the point where the second color is introduced partway through round 9. The color change only sits evenly if the 48-stitch count is accurate, so double-check that total before proceeding.

One at a time —

Get the next pattern

Tested round by round before it is sent. No spam.