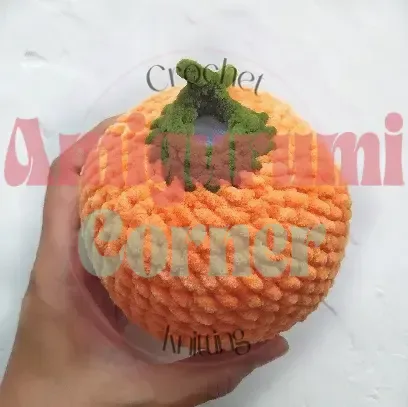
Made and counted by Wren —

Amigurumi pumpkin crochet pattern with curly tendril

F-5 hook, worsted chenille: crochet a stuffed amigurumi pumpkin with cinched ridges and a curly tendril.

Amigurumi pumpkin crochet pattern with curly tendril
IntermediateLevel
4-6 hoursTime
3.75 mmHook
WorstedYarn
Jump to the pattern

About this pattern

A worsted-weight chenille amigurumi pumpkin, built as a single continuous spiral body of 25 rounds and stuffed while working, then shaped with cinch stitches run between marked points at the bottom and at Rnd 7. A matching green Bottom Stem is sewn to the cinched base, and a separate green Curly Tendril attaches at Rnd 21 through the back loop only. Materials run to less than half a skein of orange, a small amount of green, an F-5 (3.75 mm) hook, fiberfill, and sturdy thread for cinching.

This pumpkin body works up in one continuous 25-round spiral, changing from orange to green partway through, and is stuffed as you go rather than after the fact. A matching green Bottom Stem is worked separately and sewn to the base, while a curly tendril attaches later, worked into Rnd 21 through the back loop only so the front loop stays free for texture. The number that matters most is 7: that's the round where the increase points line up, and those points get cinched later to pull the shape into pumpkin ridges.
The pattern

Written out round by round

Materials

  • Medium (worsted) weight chenille yarn in Orange (less than half a skein)
  • Medium (worsted) weight chenille yarn in Green (small amount)
  • Hook size F-5 (3.75 mm)
  • Polyester fiberfill / stuffing
  • Yarn needle (blunt tip) for weaving in ends
  • Long doll needle for cinching
  • Sturdy matching-color thread for cinching (can be used doubled)
  • Safety pins for marking cinch points and pinning pieces before sewing
  • Scissors

Abbreviations

  • BLO = Back Loop Only
  • ch = Chain
  • dec = Decrease (invisible decrease)
  • hdc = Half Double Crochet
  • inc = Increase (2 sc in same stitch)
  • sc = Single Crochet
  • sl st = Slip Stitch

Pumpkin Body

Work in orange yarn in a continuous spiral. Stuff as you go.

Round 1Ch 2, 6 sc in 2nd ch from hook. (6)
Round 2inc in each st around. (12)
Round 3sc, inc repeat around. (18)
Round 42 sc, inc repeat around. (24)
Round 53 sc, inc repeat around. (30)
Round 64 sc, inc repeat around. (36)
Round 75 sc, inc repeat around. (42)
Rounds 8–15sc in each st around. (42)

Tip When working the invisible decreases in Rnds 16–22, insert your hook under the front loops of the next two stitches only, then pull your yarn through both before finishing as a normal single crochet. This keeps the decrease line smooth instead of leaving a visible gap.

Round 165 sc, dec repeat around. (36)
Round 174 sc, dec repeat around. (30)
Round 183 sc, dec repeat around. (24)
Round 192 sc, dec repeat around. (18)Change to green yarn.
Round 204 sc, dec repeat around. (15)
Round 21Working in BLO: 3 sc, dec repeat around. (12)
Round 22dec around. (6)
Rounds 23–25sc in each st around. (6)Cut yarn, leaving a short tail. Using your hook, weave the tail through the front loops of the last round and cinch the opening closed. Secure the yarn and weave in the end, tucking it deep into the piece.

Bottom Stem

Work in green yarn.

Round 1Ch 2, 6 sc in 2nd ch from hook. (6)
Round 2inc in each st around, sl st to join at the end of the round. (12)Secure the yarn and weave in the end.

Curly Tendril

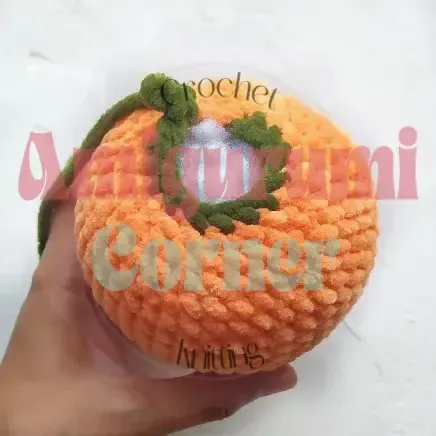
Join green yarn to Rnd 21 of the Pumpkin Body (the round worked in BLO).

Row 1Ch 12, hdc in 2nd ch from hook, then work an inc (2 hdc) in each ch across, sl st to finish.Cut yarn, secure, and weave in the end, tucking it into the piece.

Assembly

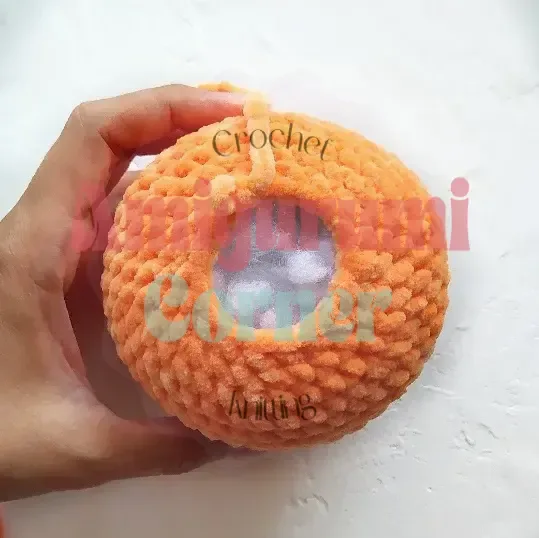
Step 1Before sewing, use safety pins to mark your cinch points on the Pumpkin Body: one point centered at the very bottom, and six points at the level of Rnd 7 — right where the increases sit.
Step 2Thread your long doll needle with sturdy matching-color thread. Starting at the bottom point, bring the needle up between Rnd 19 and Rnd 20, directly above one of the marked top points. Reinsert the needle back into the bottom point and repeat this path 2–3 times, pulling the thread taut each time to create a defined ridge. Repeat the same process at all six remaining points to form the classic pumpkin segments.
Step 3Pin the Bottom Stem to the base of the Pumpkin Body with safety pins, centering it in the cinched indentation.
Step 4Sew the Bottom Stem in place using a whipstitch, working through both layers and using the yarn tail left from the stem for attachment.
Step 5Position the Curly Tendril so it spirals naturally away from the stem, then weave in any remaining ends throughout the piece.

Tester's notes

1: Rnd 1 sets the tone for tension — 6 sc into the 2nd chain from the hook should close snugly with no visible gap at the center before moving to Rnd 2's increases.

The Pumpkin Body is a continuous spiral with no joins or turns until instructed otherwise — a stitch marker on Rnd 1's last stitch prevents losing the round count over 25 rounds.

Color change from orange to green happens at Rnd 20 of the Pumpkin Body, then again at the Curly Tendril join to Rnd 21; work the tendril join through the back loop only, leaving the front loop free.

Stuff the body continuously as rounds are worked, not at the end — waiting until Rnd 16 to add fill makes it difficult to pack the lower rounds evenly through the narrowed opening.

This pattern is written in US crochet terminology.

Unlike the continuous spiral of the Pumpkin Body, the Bottom Stem and Curly Tendril are worked as joined rounds/rows, finished with a slip stitch.

Stitch counts are given at the end of each round in parentheses, e.g. (42), so you can check your work as you go.

The pumpkin's signature ridges come from the cinching step, so don't skip marking your six Rnd 7 points and the bottom point carefully with safety pins before sewing.

Work in progress

Amigurumi pumpkin crochet pattern with curly tendril — photo 2
Amigurumi pumpkin crochet pattern with curly tendril — photo 3

At a glance

Rounds19
Parts3
LevelIntermediate
Time4-6 hours
Hook3.75 mm
YarnWorsted

Gauge check

Gauge is not critical for this project. The pattern gives no stitch or row gauge to check against a swatch.

After Rnd 1 or 2, judge tension by fabric alone: stitches should sit close enough that fiberfill does not show through, and if it peeks, drop to a smaller hook or tighten the working yarn.

Stitch-count checkpoints

  • Pumpkin Body · Round 5: 30 sts
  • Pumpkin Body · Round 17: 30 sts
  • Pumpkin Body · Round 22: 6 sts
  • Pumpkin Body · Rounds 23–25: 6 sts
  • Bottom Stem · Round 1: 6 sts
  • Bottom Stem · Round 2: 12 sts

If something looks wrong

The bottom of the pumpkin does not sit flat.
The bottom cinch point was not centered before sewing. Re-mark the center point with a safety pin and re-run the cinching thread through it before securing.
The ridges are uneven or only some sides show a dent.
One or more of the six Rnd 7 points was marked off from the actual increase stitches. Recount Rnd 7 and place pins directly at the increase stitches, not between them, before threading the cinch.
Stuffing shows through the fabric on the lower rounds.
Tension on Rnds 1-2 was too loose for chenille. Frog back to Rnd 1 and rework with a firmer pull on each stitch, or drop to a smaller hook.
The tendril curls the wrong direction
The increase (2 hdc in each ch) was worked unevenly across the 12 chains. Recheck that every chain across Row 1 received the full 2-hdc increase, since a skipped stitch flattens the curl.

Yarn substitutions

Cotton, worsted weightLoses the chenille's soft ridge blending, so cinch points show as sharper lines; stitch definition improves for anyone who wants the ribs to read more crisply. Same F-5 hook works; stuffing shows through faster if tension is loose.
Acrylic, worsted weightLighter drape than chenille and a smoother surface, so the finished pumpkin looks less plush. Hook size stays the same; fiberfill amount stays close to the original since gauge is similar.
Chenille, bulky weightProduces a larger pumpkin than the 16-round body as written, since stitch and round counts won't map directly to the same finished size. Move up to a larger hook and expect to use more stuffing to fill the wider rounds.
FAQs

Questions

What kind of yarn works best for this pumpkin?

A medium weight chenille or velvet-style yarn gives this pumpkin its soft, brushed texture and helps hide stitch definition. If you substitute a smooth cotton or acrylic yarn, the stitches will be more visible and the finished piece will feel firmer rather than plush.

What does the cinching step do?

Cinching is what creates the classic ridged pumpkin shape by pulling the fabric inward at six evenly spaced points around the body. Without it, the piece would simply look like a round ball rather than a segmented pumpkin.

Can I make this pumpkin a different size?

Yes, you can size the pumpkin up or down by using a thicker or thinner yarn along with a correspondingly larger or smaller hook. Just keep in mind that changing yarn weight will also shift how many rounds you need to reach a similar proportion between the body, stem, and tendril.

Why do I need a doll needle for cinching?

A doll needle is recommended because its length allows it to travel through the entire stuffed body in one pass, which keeps the cinch stitches neat. A long doll or soft sculpting needle from a craft store is a good substitute if you don't already own one.

One at a time —

Get the next pattern

Tested round by round before it is sent. No spam.