Made and counted by Wren —

Amigurumi cat crochet pattern with stuffed head and ears

Worsted-weight amigurumi cat: 18-round head, 10-round body, 7-round ears, stuffed as you go.

Amigurumi cat crochet pattern with stuffed head and ears
IntermediateLevel
4-6 hoursTime
WorstedYarn
Jump to the pattern

About this pattern

This pattern makes a stuffed amigurumi cat worked in five separate pieces: head (18 rounds), ears (7 rounds), arms (10 rounds), body (10 rounds), and a bow with no rounds. Every piece starts from a magic ring and builds through increase rounds to its final stitch count before stuffing with fiberfill. Blue yarn is the suggested starting color. A sewing needle closes and joins the pieces after stuffing.

This is a five-piece amigurumi cat built entirely in continuous single crochet rounds, starting each piece from a magic ring. The head carries the most rounds at 18 and sets the final proportions, since the body only runs to 10 rounds and the ears to 7. Arms work the same increase-then-straight structure as the head on a smaller scale, going from a 6-stitch ring up to 18 stitches before working flat rounds. Stuffing happens as each piece closes, not after assembly, so fiberfill gets packed before the last rounds pull tight.

The pattern

Written out round by round

Materials

  • Fiberfill for stuffing
  • Sewing needle and scissors

Abbreviations

  • ch = chain
  • st = stitch
  • sl st = slip stitch
  • sc = single crochet
  • tr = treble crochet
  • inc = increase
  • dec = decrease
  • mr = magic ring

Head

Round 1mr with 6 st [6](6)
Round 2inc x 6 [12](12)
Round 3(1 sc, inc) x 6 [18]18 sc (11 rounds) [18] Cut the yarn, hide the tail. Stuff with fiberfill. Leg 2 Make the other leg, don’t cut the yarn. Stuff with fiberfill.(18)
Round 4(2 sc, inc) x 6 [24](24)
Round 5(3 sc, inc) x 6 [30](30)
Round 6(4 sc, inc) x 6 [36](36)
Round 7(5 sc, inc) x 6 [42](42)
Round 8(6 sc, inc) x 6 [48](48)
Round 9(7 sc, inc) x 6 [54](54)
Round 10(8 sc, inc) x 6 [60](60)
Rounds 11–2060 sc (10 rounds) [60](60)
Round 21(8 sc, dec) x 6 [54](54)
Round 21(7 sc, dec) x 6 [48](48)
Round 21(6 sc, dec) x 6 [42](42)
Round 24(5 sc, dec) x 6 [36](36)
Round 25(4 sc, dec) x 6 [30](30)
Round 26(3 sc, dec) x 6 [24](24)
Round 27(2 sc, dec) x 6 [18] Sl st. Stuff with fiberfill. Cut the yarn.

Ears

Round 1mr with 4 st [4](4)
Round 2inc x 4 [8](8)
Round 3(3 sc, inc) x 2 [10](10)
Round 4(4 sc, inc) x 6 [12](12)
Round 5(5 sc, inc) x 6 [14](14)
Round 6(6 sc, inc) x 6 [16](16)
Round 7(7 sc, inc) x 6 [18] Cut the yarn, leaving a long tail for sewing.

Arms

Round 1mr with 6 st [6](6)
Round 2inc x 6 [12](12)
Round 3(3 sc, inc) x 6 [18](18)
Rounds 4–618 sc (3 rounds) [18](18)
Round 7(7 sc, dec) x 2 [16](16)
Rounds 8–916 sc (2 rounds) [16](16)
Round 10(6 sc, dec) x 2 [14](14)
Rounds 11–1214 sc [14](14)
Round 13(5 sc, dec) x 2 [12](12)
Rounds 14–2512 sc (12 rounds) [12] After about round 11 and 12 round, fill the arm with stuffing. Continue make crochet and fill with fiberfill to the end of row.Put the piece in half and connect the two edges with sc.

Body

18 sc (leg 1), 3 sc (3 stitch of chain), 18 sc (leg 2), 3 sc (3 stich in other side of chain) [42]

Rounds 2–1342 sc [42] Change to white color
Rounds 14–1842 sc (5 rounds) [42](42)
Round 19(5 sc, dec) x6 [36](36)
Rounds 20–2136 sc (2 rounds) [36](36)
Round 22(4 sc, dec) x 6 [30](30)
Rounds 23–2430 sc (2 rounds) [30](30)
Round 25(3 sc, dec) x 6 [24](24)
Rounds 26–2824 sc (3 rounds) [24](24)
Round 29(2 sc, dec) x 6 [18](18)
Rounds 30–3118 sc [18] Cut the yarn, leaving a long tail for sewing. Stuff with fiberfill

Bow

Begin with a magic circle [2 Chain , work 6 tr, 3 ch . sl st into the ring]

Repeat sequence.

Pull yarn tail to tighten the loop, leave enough yarn to wrap around the center of the bow. End off. Weave in loose ends.

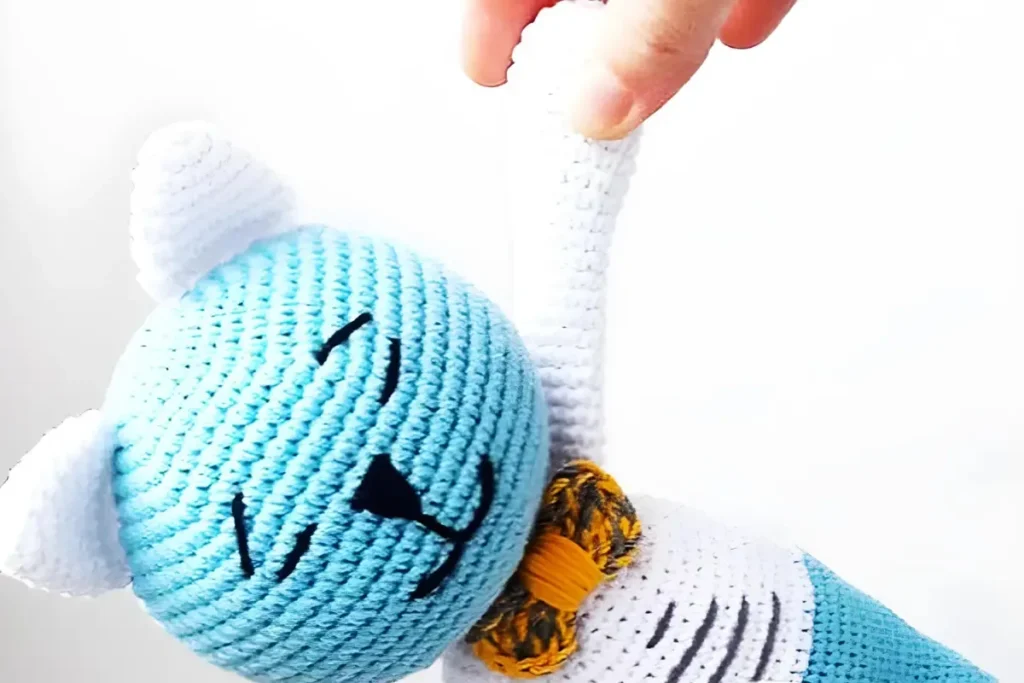
Assembly: – Sew the head to the body. – Sew the arms on the sides of the body 1 round down from the head. – Put the ears on the head and sew it. – Embroider a nose, mouth, eyes and eyesbrown (like photo)

Congrats! Your cat amigurumi doll is ready for photo session!

Pattern by: @anneyumagi Picture: @anneyumagi

Tester's notes

18 rounds build the Head, more than any other part, so keep tension consistent from round 1 through round 18 to avoid a visible size shift partway through.

Place a stitch marker in the first stitch of each round on the Head and Body; both pieces run long enough (18 and 10 rounds) that round starts get lost without one.

6-stitch magic rings start Head and Arms; pull the ring closed firmly before round 2's increases, or the center hole stays open after stuffing.

Stuff the Head and Arms before closing rounds, not after — fiberfill goes in as the opening narrows, since none of the parts list a separate stuffing step at the end.

At a glance

Rounds45
Parts5
LevelIntermediate
Time4-6 hours
YarnWorsted

Gauge check

After round 3 of the Head (18 stitches), the piece should already curve into a shallow dome rather than lying flat on the table.

If it stays flat, stitches are too loose for the hook in use — drop to a smaller hook size so fiberfill will not show through the fabric once stuffed.

Stitch-count checkpoints

  • Head · Round 5: 30 sts
  • Head · Round 10: 60 sts
  • Head · Round 24: 36 sts
  • Head · Round 26: 24 sts
  • Ears · Round 2: 8 sts
  • Ears · Round 4: 12 sts

If something looks wrong

The Head looks lumpy or uneven after stuffing, with fiberfill visible between stitches.
Stitches from the 6-stitch starting ring are too loose; work the increase rounds (2 and 3) with a firmer tension or drop to a smaller hook.
The Ears sit flat instead of curving into a cupped shape.
The 7 rounds of increases (4 to 14 stitches shown through round 5) are being worked too loosely; tighten tension on the increase stitches specifically, not the whole round.
The Arms come out noticeably shorter or longer than a matching second arm.
Round count drifted during the straight rounds 4-6 (18 sc, 3 rounds); count stitches at the end of each round to confirm 18 stays constant before starting the round 7 decreases.
Stitch count is off by one or two partway through the Body's 10 rounds.
A round start was missed without a marker; place one in the first stitch of round 1 and move it up every round to catch drift early.

Yarn substitutions

Acrylic, worsted weightMatches the stitch counts as written with no resizing; holds shape well for stuffing and keeps Head and Body rounds tight enough to hide fiberfill.
Cotton, worsted weightProduces a firmer, slightly smaller finished Head and Body than acrylic at the same stitch counts; stitches show more definition but need a touch more stuffing to round out the Arms.
Acrylic or wool-blend, DK weightShrinks the whole cat — Head, Ears, Arms, and Body all finish smaller at the same round counts; drop to a smaller hook to keep stitches dense enough to contain fiberfill.
FAQs

Questions

Why does the Head need 18 rounds when the Body only needs 10?

The Head carries the increase-and-decrease shaping that defines the cat's face, so it runs nearly double the Body's round count. The Body's 10 rounds work mostly straight once initial increases finish, needing fewer rounds to reach its finished size.

Can the Arms be made as a mirrored pair from the single part listed?

Yes. Work the same 10-round sequence twice from the 6-stitch magic ring through the round 7 decreases, matching round counts stitch-for-stitch between the two so they read as a pair once attached.

Does stuffing go in before or after closing each piece?

Before. Fiberfill packs into the Head and Arms as the final rounds narrow the opening, not after the piece is already closed, since no separate post-closure stuffing step appears in the part list.

One at a time —

Get the next pattern

Tested round by round before it is sent. No spam.