Made and counted by Wren —

Amigurumi Bunny Pattern — Cuddly Crochet Bunny in Two Sizes

Make an adorable chenille amigurumi bunny in two sizes! This crochet pattern covers legs, arms, ears, and a sweet gathered face for a huggable finish.

Amigurumi Bunny Pattern — Cuddly Crochet Bunny in Two Sizes
IntermediateLevel
4-6 HoursTime
4.5 mmHook
BulkyYarn
Jump to the pattern

At a glance

Start by crocheting the two lower legs separately, working them in continuous spiral rounds and stuffing as you finish each one.

Make the two upper arms the same way, keeping tension snug so the chenille fibers hide your stitches neatly.

Crochet a pair of ears next, working slightly more rounds than the limbs to give them their signature floppy shape.

Whip up a small tail piece to add a touch of classic bunny detail before moving to the main body.

Work the body and head as one continuous piece, shaping it with increases and decreases over its full round count.

Stuff the body and head firmly, then gather the face with strong thread to create that sweet amigurumi expression.

Attach safety eyes and nose to the head, checking placement for symmetry before locking them permanently into place.

Sew the legs, arms, ears, and tail onto the body, then add embroidered eyebrows for the finishing personality touch.

About this pattern

You'll work every piece — the lower legs, upper arms, ears, tail, and the body-and-head combo — in continuous spiral rounds, so no slip stitching or turning chains to fuss over. Expect to practice increases, decreases, and gathering a face with strong thread for that classic amigurumi look, all worked over roughly 40 rounds total across the pieces. This is a great next-step project if you've made a basic amigurumi ball before and are ready to combine several parts into one finished toy, taking most crafters a relaxed afternoon or two to complete.

The finished bunny comes together at either 8.3 inches or 6.7 inches tall, depending on which yarn and hook size you choose, with a rounded chenille body that feels almost velvety to the touch. Its plump limbs, upright ears, and little gathered face give it real personality on a shelf or tucked into a crib. Whether you keep it as a keepsake or wrap it up for a baby shower, birthday, or just-because gift, it's the kind of handmade toy people hold onto for years.

Variations

One of my favorite things about this pattern is how many directions you can take it once you've got the basic bunny down. For a spring nursery look, try a soft dusty pink or sage green chenille (Bernat Baby Velvet or Comfy Cotton Chenille both work beautifully) paired with a contrasting embroidered nose in a warm brown. If you want a more neutral, gender-open gift, oatmeal or cream chenille with pastel blue eyebrow embroidery keeps things soft and timeless. For a bolder statement piece, work the ears in a contrasting color from the body — a white bunny with lavender-lined ears is a showstopper on a gift table. Yarn-wise, if chenille isn't available locally, a bulky-weight velvet-style yarn or even a brushed acrylic can substitute, though you'll lose a bit of that signature plush texture, so size down your hook slightly to keep stitches tight and stuffing hidden. Want a tinier version for a keychain or ornament? Drop to a fingering-weight chenille with a 2.0-2.5mm hook and 4-6mm safety eyes, keeping the same round structure but expect a noticeably smaller finished piece (roughly half the size). For seasonal fun, add a tiny crocheted carrot in orange with a green leaf top to tuck into the bunny's paws, or embroider small flower stitches along one ear for a spring garden theme. You could also skip the tail entirely and add a small pom-pom instead for extra fluff and texture contrast against the smooth chenille body. Mixing two shades of the same chenille — say, a darker body with lighter cream paws — adds subtle dimension without complicating the actual stitch pattern at all.

I adore how this bunny feels the moment it comes off the hook — chenille yarn just has this irresistible, velvety squish that regular acrylic can't match. What really sold me on this pattern is how every piece stays simple on its own: six rounds for the legs, six for the arms, eight for the ears, so nothing feels overwhelming even though the finished bunny looks impressively complete. Gathering the face with strong thread is my favorite part of the whole process; it's the step where a round blob of stitches suddenly becomes a face with real expression, and that transformation gets me every single time. I also love that the pattern gives you two full size options without changing the character of the bunny at all, just the hook and yarn weight. Working in continuous spiral rounds keeps my hands moving without constant counting for joins, which makes this a genuinely relaxing, almost meditative make. By the time you're stuffing the body and head and adding those safety eyes, you can already tell this little guy is going to have serious presence on a shelf.
Common mistakes

  • Losing track of round starts inPlace a stitch marker in the first stitch of every round and move it up each time; this small habit prevents miscounted rounds on longer pieces.
  • Stuffing too loosely, which letsStuff in small pinches as you go rather than one big handful at the end, pressing firmly into the legs, arms, and head so the shape holds without stretching the stitches.
  • Working chenille yarn at too looseSince gauge isn't critical here, prioritize snug, even tension over matching a specific stitch count feel — go down a hook size if your stitches look airy.
  • Placing safety eyes and nose beforeInsert the eye posts without securing the backs first, step back and check symmetry from multiple angles, then lock them in place once you're happy with placement.
  • Rushing the face-gathering stepUse a strong, matching-color thread specifically for gathering the face, and knot it securely on the inside of the head before trimming and weaving in the tail.
  • Cutting chenille yarn endsUse a lighter to lightly singe the cut ends of your chenille yarn (carefully, away from your work), which keeps tails neat and prevents fuzzy unraveling over time.

The pattern

Written out round by round

Materials

Yarn

  • Chenille/velvet-style yarn (such as a baby chenille or velour yarn), Bulky weight, in your chosen color — less than half a skein (100g/120m) for the 8.3 in (21 cm) bunny, or about a quarter of a skein (100g/140m) in a finer chenille for the 6.7 in (17 cm) bunny

Hook

  • E-4/F-5 (3.5–4.5 mm) for the larger bunny; C-2/D-3 (2.5–3 mm) for the smaller bunny
  • Strong thread for face gathering, in a color matching your yarn
  • Embroidery thread for eyebrows
  • Lighter (optional, to seal the ends of chenille yarn so they don’t fray)

Tools

  • Safety eyes and safety nose: 12 mm for the larger bunny; 6–8 mm for the smaller bunny
  • Stuffing/fiberfill
  • Yarn needle
  • Scissors
  • Stitch marker (helpful for tracking round starts)

Abbreviations

  • ch = Chain
  • dec = Decrease (invisible decrease)
  • inc = Increase (2 sc in same stitch)
  • MR = Magic Ring
  • rnd = Round
  • sc = Single Crochet
  • sl st = Slip Stitch
  • st(s) = Stitch(es)

Lower Legs (make 2)

  1. Round 16 sc in MR. (6)
  2. Round 2inc in each st around. (12)
  3. Round 3sc in each st around. (12)
  4. Round 4sc, dec repeat around. (8)
  5. Round 5-9sc in each st around. (8)Stuff lightly — only the base of the leg needs filling.
  6. Round 10Fold the leg flat and sc through both layers. (4)Fasten off, leaving a short tail.

Upper Arms (make 2)

  1. Round 16 sc in MR. (6)
  2. Round 2sc, inc repeat around. (9)
  3. Round 3sc in each st around. (9)
  4. Round 4sc, dec repeat around. (6)
  5. Round 5-8sc in each st around. (6)Stuff lightly — only the base of the arm needs filling.
  6. Round 9Fold the arm flat and sc through both layers. (3)Fasten off, leaving a short tail.

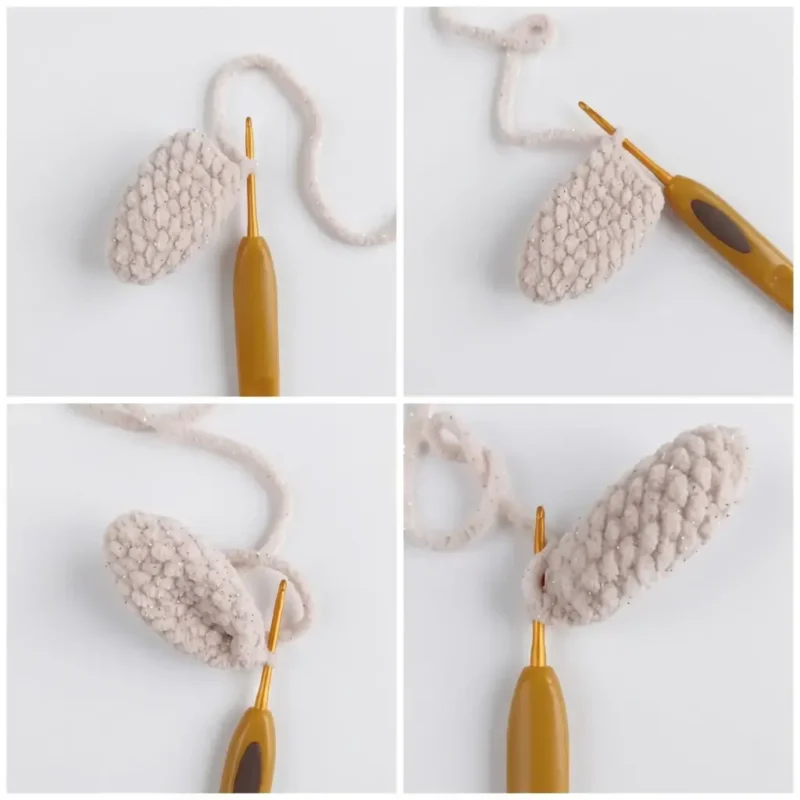
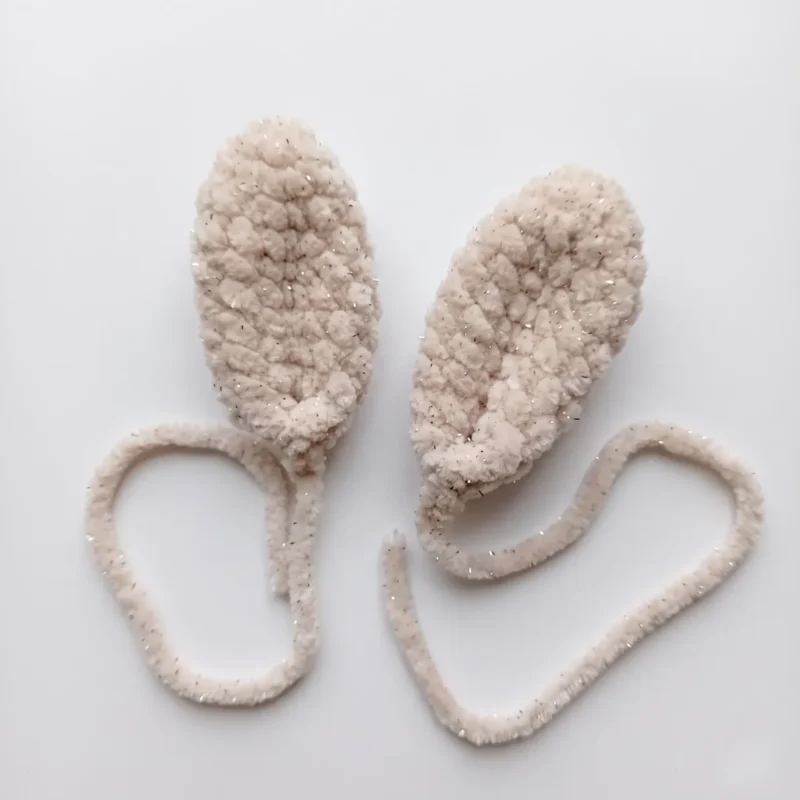
Ears (make 2)

  1. Round 16 sc in MR. (6)
  2. Round 2sc, inc repeat around. (9)
  3. Round 3sc 2, inc repeat around. (12)
  4. Round 4sc 3, inc repeat around. (15)
  5. Round 5-10sc in each st around. (15)
  6. Round 11sc 3, dec repeat around. (12)
  7. Round 12Fold the ear flat and sc through both layers. (6)
  8. Round 13Fold the ear flat again and sc through both layers. (3)Fasten off, leaving a long tail for sewing to the head.

Tail

  1. Round 16 sc in MR. (6)
  2. Round 2sc, inc repeat around. (9)
  3. Round 3sc, dec repeat around. (6)Stuff lightly.Fasten off, leaving a long tail for sewing to the body.

Body and Head

  1. Round 18 sc in MR. (8)
  2. Round 2inc in each st around. (16)
  3. Round 3sc, inc repeat around. (24)
  4. Round 4sc 11, inc, inc, sc 11. (26) These two increases shape a small rounded belly.
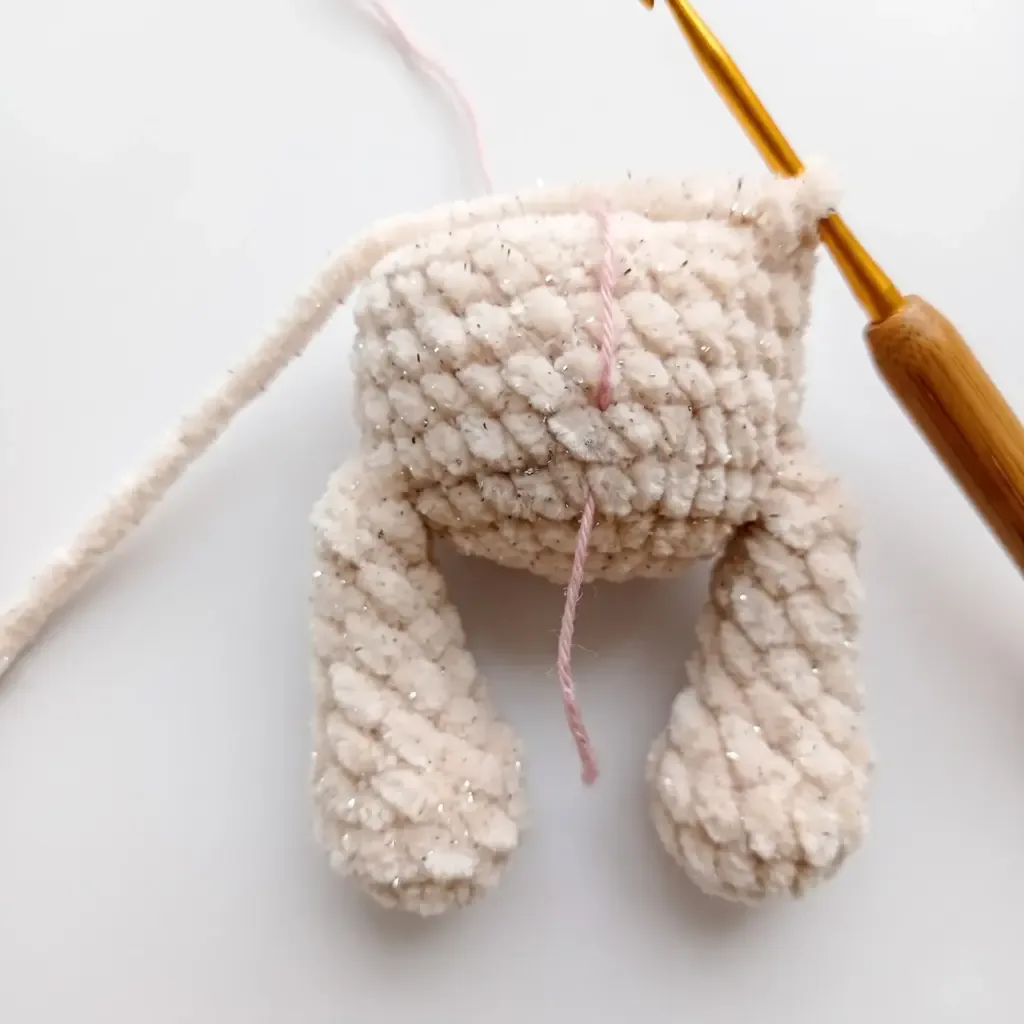
  5. Round 5sc 4, sc next st together with one stitch of a lower leg to join it, sc 10, sc next st together with one stitch of the second lower leg to join it, sc 4. (26) This round attaches both lower legs to the body.
  6. Round 6-8sc in each st around. (26)
  7. Round 9sc 10, dec, sc 1, dec, sc 11. (24) Check that your decreases sit directly above the increases from Rnd 4 — shift your round start with a stitch marker if needed to line them up.
  8. Round 10sc 2, dec repeat around. (18)
  9. Round 11sc in each st around. (18)Stuff this section firmly before continuing.
  10. Round 12sc, dec repeat around. (12)
  11. Round 13sc 2, sc next st together with one stitch of an upper arm to join it, sc 3, sc next st together with one stitch of the second upper arm to join it, sc 1. (12) This round attaches both upper arms to the body — shift your round start if needed to keep placement even.
  12. Round 14sc in each st around. (12)
  13. Round 15inc in each st around. (24)
  14. Round 16sc 3, inc repeat around. (30)
  15. Round 17-21sc in each st around. (30)
  16. Round 22sc 3, dec repeat around. (24)
  17. Round 23sc in each st around. (24)Place safety eyes between Rnds 20 and 21, spacing them 5–6 stitches apart. Place the safety nose between Rnds 19 and 20, or glue it on after assembly if it isn’t a safety-style nose.

If using a safety nose, this is a good point to add the under-nose gathering stitch: mark your nose placement, insert your needle and gathering thread there, and bring it out below the nose, roughly between Rnds 16 and 17. Pull tight, knot, and bring the thread ends out at the outer edge of the eyes — you’ll use them for the face-gathering step during assembly.

  1. Round 24sc 2, dec repeat around. (18)Stuff this section firmly.
  2. Round 25sc, dec repeat around. (12)
  3. Round 26dec around. (6)Continue decreasing until the opening closes, cinch it shut, fasten off leaving a short tail, and weave the tail inside the piece to hide it.

Assembly

Step 1

Gather the face. Take the thread tails left at the outer edge of the eyes. Bring your needle through to the inner edge of the eyes (just beneath them), then out again below the nose, around the area between Rnds 16 and 17. Pull the thread taut, tie it off, and weave in the end. This step gives your bunny its sweet, slightly shy expression.

Step 2

Alternate gathering method. If you used a glued-on nose and skipped the under-nose gathering step earlier, gather the face this way instead: insert your needle between Rnds 16 and 17, bring it out at the outer edge of the right eye, back in at the inner edge of the right eye, and out again between Rnds 16 and 17. Pull tight and knot. Repeat the same path for the left eye, then knot and weave in your ends.

Step 3

Embroider the eyebrows using your embroidery thread, placing small straight or slightly curved stitches just above each eye for a gentle, expressive look.

Step 4

Sew on the ears using their long tails and a whipstitch, attaching them to the top of the head at your preferred angle — straight up, or slightly flopped for a softer look.

Step 5

Sew on the tail using its long tail and a whipstitch, securing it to the lower back of the body.

Step 6

Weave in all remaining ends throughout the piece, and give your bunny a final shape-check before setting it down to admire.

Important notes

💡 Match your hook to your size goal from the start: E-4/F-5 (3.5-4.5mm) for the 8.3-inch bunny, or C-2/D-3 (2.5-3mm) for the 6.7-inch version — mixing them up will throw off your finished proportions.

💡 Chenille yarn hides stitch definition beautifully, but that also makes it harder to spot mistakes, so count your stitches at the end of every round using the numbers given in parentheses.

💡 Keep your stitch marker in the very first stitch of each round throughout all pieces, especially during the 20-round body and head, since spiral rounds have no natural stopping point to guide you.

💡 Stuff the lower legs and upper arms firmly before attaching them during assembly — it's much harder to add stuffing once a limb is sewn onto the body.

💡 Have your embroidery thread and yarn needle ready before you finish the head, since eyebrows are easiest to add while you still have clear access to the face area.

💡 If using a lighter to seal chenille ends, work over a heatproof surface and keep the flame brief — chenille's synthetic fibers melt quickly and a longer touch can scorch the yarn.

💡 Gauge is not critical for this project; instead, focus on a tight, even tension so stuffing doesn't peek through your stitches.

💡 This pattern is written in US crochet terminology, and all pieces are worked in continuous spiral rounds — there's no need to join or chain to turn unless a step says otherwise.

💡 Stuff firmly enough to hold shape, but avoid overstuffing, which can distort your stitch definition and make seams pucker.

More photos

Amigurumi Bunny Pattern — Cuddly Crochet Bunny in Two Sizes — photo 2
Amigurumi Bunny Pattern — Cuddly Crochet Bunny in Two Sizes — photo 3
FAQs

Frequently asked questions

Can I make this bunny in a size other than the two given?

Yes — the pattern's structure scales well with hook and yarn changes, so you can experiment with a mid-weight yarn and a hook between the two suggested sizes for an in-between result. Just know that stitch counts stay the same, so only your gauge and tension will shift the final measurements.

What yarn works best if I can't find chenille locally?

Any bulky-weight velvet-style or brushed yarn will substitute reasonably well, though the plush texture won't be quite as soft as true chenille. Just check that your stitches stay tight enough to hide stuffing, sizing down your hook if needed.

Is this pattern beginner-friendly?

It's best suited for crocheters who already know magic rings, single crochet increases and decreases, and basic amigurumi assembly, since the piece count and continuous spiral rounds move fairly quickly. If you've completed one simple amigurumi before, this bunny is a great next step.

How do I keep the safety eyes secure once placed?

Safety eyes lock in place with a washer backing that snaps onto the post from inside the head, so once pressed on firmly it won't come loose. Just be sure to finalize placement before snapping the backing on, since it's designed to be permanent.

Why does my chenille yarn look thinner or thicker than expected mid-project?

Chenille yarns can vary between brands and even between skeins in thickness and softness, which is why the pattern notes gauge isn't critical. Focus on tight, even tension throughout rather than matching an exact measurement, and your bunny will still turn out proportionate.

One at a time —

Get the next pattern

Tested round by round before it is sent. No spam.