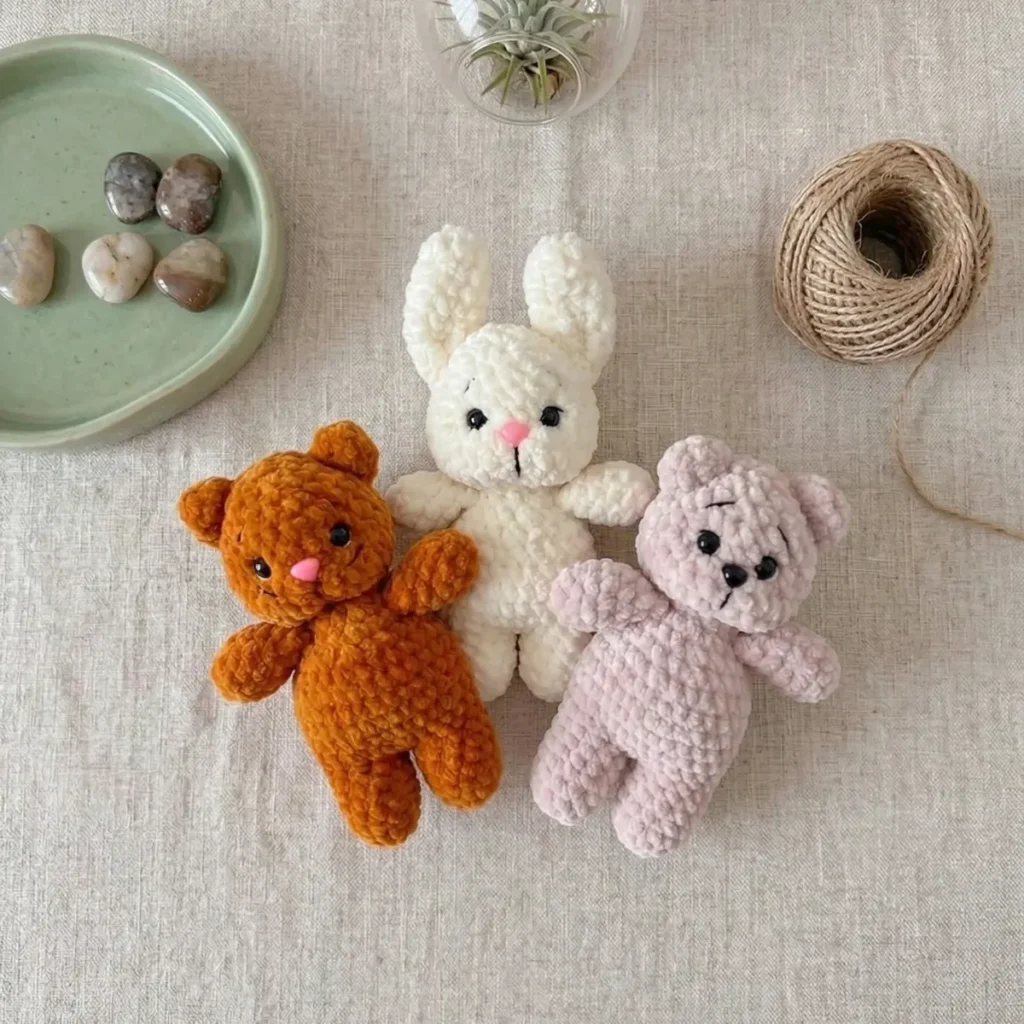
Made and counted by Wren —

Amigurumi bear, bunny, and cat: a beginner crochet pattern

3.5mm hook, worsted plush yarn: crochet a beginner amigurumi bear, bunny, or cat with swappable ears and tail.

Amigurumi bear, bunny, and cat: a beginner crochet pattern
BeginnerLevel
4-6 hoursTime
8 mmHook
WorstedYarn
Jump to the pattern

About this pattern

This is a beginner amigurumi pattern for a stuffed bear, bunny, or cat, worked with a 3.5mm hook and plush yarn in continuous spiral rounds. The Body runs 9 rounds, the Lower Legs join into it without fastening off, and it flows directly into a 29-round Head. The Upper Arms sew on between Rounds 13 and 14. Eyes are 8mm safety eyes; the nose is a 7x9mm safety nose, pink or black depending on the animal.

This amigurumi kit builds three animal variants -- bear, bunny, and cat -- from a shared Body worked in continuous spiral rounds, with swapped ear and tail pieces sewn on last. The 9-round Body joins directly from the second Lower Leg without a fasten-off, then flows straight into a Head worked in the same continuous spiral, with 8mm safety eyes inserted between Rounds 23 and 24 before the head is closed. Upper Arms attach between Rounds 13 and 14 once limbs are stuffed. A 3.5mm hook holds the plush yarn tight enough to hide the safety eyes and a 7x9mm safety nose without gaps.

The pattern

Written out round by round

Materials

  • Plush yarn (e.g., Wolans Bunny Baby, Himalaya Dolphin Baby, Lavita Yarn, etc.) – approximately 1/3 skein in your main color
  • Small amount of white YarnArt Jeans yarn (color 01) for eye detailing
  • Small amount of black YarnArt Jeans yarn (color 53) for eye detailing, eyebrows, and muzzle
  • 8mm safety eyes
  • 7x9mm safety nose (pink for bunny and cat, black for bear)
  • Fiberfill stuffing
  • Crochet hook 3.5mm
  • Stitch markers and sewing pins for placement
  • Tapestry needle with a large eye
  • Scissors

Abbreviations

  • ch = Chain
  • sl st = Slip Stitch
  • sc = Single Crochet
  • hdc = Half Double Crochet
  • inc = Increase (2 single crochet in the same stitch)
  • dec = Decrease (invisible decrease for 3D/spiral work)
  • mr = Magic Ring
  • (..) x N = Repeat instructions in parentheses N times
  • (N) = Stitch count at the end of the round/row

Upper Arms: Make 2

Round 15 sc in a mr, or ch 2, 5 sc in 2nd ch from hook (5)
Round 2Inc x 5 (10)
Rounds 3–6Sc 10 (10)Stuff the bottom of the arm lightly.Fold flat, dec x 2, sl st.Fasten off, leaving a long tail for sewing.

Lower Legs: Make 2

Round 16 sc in a mr, or ch 2, 6 sc in 2nd ch from hook (6)
Round 2Inc x 6 (12)
Rounds 3–7Sc 12 (12)

On the first leg (this will be the right leg), finish with a sl st and fasten off.

On the second leg (left leg), do not fasten off; continue to crochet the Body.

Body

Round 8Ch 2. Sc 12 around the left leg. Sc 1 in each of the 2 chs. Sc 12 around the right leg. Sc 1 in each of the 2 chs. (28)
Round 9Sc 5, inc, sc 13, inc, sc 5, (sc 1, inc) x 2. (33)

This round creates the belly shaping.

Round 10Sc 31, dec 1. (32)This round adjusts the stitch count to prepare for the decrease sequence.
Round 11(Sc 6, dec) x 4 (28)
Round 12(Sc 5, dec) x 4 (24)Begin stuffing the legs and body firmly as you go.
Round 13(Sc 4, dec) x 4 (20)
Round 14(Sc 3, dec) x 4 (16)
Round 15(Sc 2, dec) x 4 (12)
Round 16(Sc 1, dec) x 4 (8)Do not fasten off. Continue directly to crochet the Head.

Head

Round 17Inc x 8 (16)
Round 18(Sc 1, inc) x 8 (24)
Round 19(Sc 2, inc) x 8 (32)
Rounds 20–22Sc 32 (32)
Round 23(Sc 6, dec) x 4 (28)
Round 24(Sc 5, dec) x 4 (24)
Round 25(Sc 4, dec) x 4 (20)
Round 26(Sc 3, dec) x 4 (16)Step by step: Insert safety eyes between Rnds 23 and 24, with approximately 3-4 sc between them; Stuff the head firmly, paying special attention to the neck area to ensure good support.
Round 27(Sc 2, dec) x 4 (12)
Round 28(Sc 1, dec) x 4 (8)
Round 29Dec x 2 (6). Fasten off and weave in tail to close the remaining hole.(6)

Bear Ears: Make 2

Round 16 sc in a mr, or ch 2, 6 sc in 2nd ch from hook (6)
Round 2(Sc 1, inc) x 3 (9)
Round 3Sc 9 (9)Fold flat, sc 3 through both layers, sl st.Fasten off, leaving a long tail for sewing.

Bear Tail: Make 1

Round 16 sc in a mr, or ch 2, 6 sc in 2nd ch from hook (6)
Round 2Sc 6 (6)Fasten off, leaving a long tail for sewing.

Bunny Ears: Make 2

Round 15 sc in a mr, or ch 2, 5 sc in 2nd ch from hook (5)
Round 2Inc x 5 (10)
Rounds 3–7Sc 10 (10)Step by step: Fold flat, sc 5 through both layers; Fold again, sc 2 through both layers, sl st; Fasten off, leaving a long tail for sewing.

Bunny Tail: Make 1

Round 16 sc in a mr, or ch 2, 6 sc in 2nd ch from hook (6)
Round 2Sc 6 (6)Fasten off, leaving a long tail for sewing.

Cat Ears: Make 2

Round 13 sc in a mr, or ch 2, 3 sc in 2nd ch from hook (3)
Round 2Inc x 3 (6)
Round 3(Sc 1, inc) x 3 (9)Fold flat, sc 4 through both layers.Fasten off, leaving a long tail for sewing.

Cat Tail: Make 1

Round 1Ch 11. Starting in 2nd ch from hook, sc 10. (10)Fasten off, leaving a long tail for sewing.

Facial Sculpting and Detailing

Eye Sculpting Cut a long length of yarn (about 20-24 inches) in the main body color. To sculpt the eyes, insert your tapestry needle into the first round of the head from the bottom, approximately under the inner corner of the right safety eye. Bring the needle and yarn out at the outer side of the right eye. Loop the yarn around to the inner side of the eye. Reinsert the needle into the same round where you started, but one stitch over from the initial insertion point. Pull gently to sculpt the eye, creating a subtle indentation. Secure the sculpting for the right eye with a small knot. Repeat the process for the left eye.

Muzzle Sculpting You will have a long tail remaining from the previous step. Insert the needle with the yarn approximately between the eyes and bring it out again in the first round of the head, near the other yarn tail. Pull gently to sculpt the muzzle area, creating a slight indentation for the nose. Tie a secure knot with the two yarn tails, tucking them inside the head.

Nose Placement Secure the 7x9mm safety nose onto the sculpted muzzle area. For a bear, use a black nose; for a bunny or cat, use a pink nose.

Eye and Eyebrow Embroidery Using white YarnArt Jeans yarn, embroider small white highlights on the safety eyes to give them a spark. With black YarnArt Jeans yarn, embroider small eyebrows above the eyes and a delicate mouth below the nose. This adds character and expression to your animal friend.

Assembly

Step 1Attach Arms: Sew the Upper Arms to the sides of the Body between Rnds 13 and 14. Align them directly above the Lower Legs for a symmetrical appearance. Use the long tails you left earlier and securely sew them in place, weaving in any loose ends.
Step 2Attach Ears: Position the chosen ears (bear, bunny, or cat) on top of the head. Use sewing pins to secure them in place and check the alignment from all angles. Once you are happy with the placement, sew them firmly to the head using the long yarn tails.
Step 3Attach Tail: Sew the chosen tail (bear, bunny, or cat) to the lower back of the Body. Ensure it is centered and securely attached.
Step 4Final Touches: Double-check all sewn parts for security. Trim any remaining loose yarn ends and gently shape your finished amigurumi.

Tester's notes

3.5mm hook holds every plush-yarn part; sizing down keeps stitches tight enough to block stuffing show-through, as the pattern notes advise.

8mm safety eyes and the 7x9mm safety nose need to lock in before the Head is fully stuffed, while the opening is still wide enough to reach the backing washers.

Stitch markers track the first stitch of every round, since all parts work in continuous spirals with no join or turn.

Small amounts of white (color 01) and black (color 53) YarnArt Jeans yarn cover eye detailing, eyebrows, and muzzle -- keep both on hand before starting the Head.

The second Lower Leg does not get fastened off; it flows straight into the Body, so stop there rather than finishing both legs the same way.

This pattern uses US crochet terminology.

decreases (dec), use the invisible decrease method for a smoother finish: insert the hook into the front loop of the first stitch, then into the front loop of the next stitch, yarn over, pull through both front loops, yarn over, pull through both loops on the hook.

When stuffing, ensure all parts are firmly but evenly filled -- overstuffing can distort the shape, while understuffing can make the toy floppy. Leave long tails for sewing on all pieces unless instructed otherwise, so you won't need to join new yarn later.

At a glance

Rounds40
Parts11
LevelBeginner
Time4-6 hours
Hook8 mm
YarnWorsted

Gauge check

The pattern gives no swatch gauge, so check Round 1 of a Lower Leg (6 sc in a magic ring) for a closed center with no visible gap between stitches.

If the ring or early rounds gap open, drop to a smaller hook than the 3.5mm called for until the fabric feels dense enough to block stuffing from showing through.

Stitch-count checkpoints

  • Upper Arms: Make 2 · Round 1: 5 sts
  • Upper Arms: Make 2 · Round 2: 10 sts
  • Upper Arms: Make 2 · Rounds 3–6: 10 sts
  • Lower Legs: Make 2 · Round 1: 6 sts
  • Lower Legs: Make 2 · Round 2: 12 sts
  • Lower Legs: Make 2 · Rounds 3–7: 12 sts

If something looks wrong

The magic ring center on a Lower Leg or
The ring wasn't pulled fully closed before working Round 1. Tug the starting tail tight after the first round, then weave it through the last few stitches again before trimming.
Stuffing shows through the fabric on the Body or Head.
Stitches are worked too loosely for the plush yarn's stretch. Drop to a hook smaller than the 3.5mm called for, or tighten each stitch before moving to the next.
The Upper Arms sit crooked or uneven once sewn on.
They weren't aligned directly above the Lower Legs before sewing. Pin both arms level with each other and directly above the legs, and check from the front before sewing through with the long tail.
Round counts drift off by a stitch on the Bear Ears.
The first stitch of the round wasn't marked, so a stitch got skipped or doubled during the (Sc 1, inc) x 3 increase round. Place a stitch marker in the first stitch of Round 1 and move it up each round before working the increase.

Yarn substitutions

Acrylic worsted-weight yarnFirmer stitch definition than the plush yarn called for, with less stretch, so the 7x9mm nose backing may need a firmer push to sit flush. Keep the 3.5mm hook, or size down a step to hold the same tight gauge.
Cotton DK-weight yarnSmaller finished pieces than the plush original since DK is thinner, with more visible stitch texture. Stuffing needs to be firmer to avoid a lumpy look, and the hook can stay near 3.5mm since DK still needs a tight stitch.
Chenille or velvet worsted yarnClosest drape and softness match to the plush yarn called for, with a similar 3.5mm hook size, but the fuzzy strand hides stitch counts, so stitch markers matter more for tracking rounds.
FAQs

Questions

Can the same Body work for the bear, bunny, and cat variants?

Yes. The Body's 9 rounds are shared across all three animals; only the Ears and Tail swap out per variant, with Bear Ears made from two 3-round pieces folded flat and sewn on.

Why does the second Lower Leg not get fastened off?

It continues straight into the Body so the two pieces join without a seam. The first leg is fastened off and set aside as the right leg, while the second becomes the left leg and the start of the Body.

What size safety eyes and nose does this pattern need?

8mm safety eyes for both eyes and a 7x9mm safety nose, pink for the bunny and cat versions or black for the bear. Insert both before the Head is fully closed so the washers can still be reached from inside.

One at a time —

Get the next pattern

Tested round by round before it is sent. No spam.