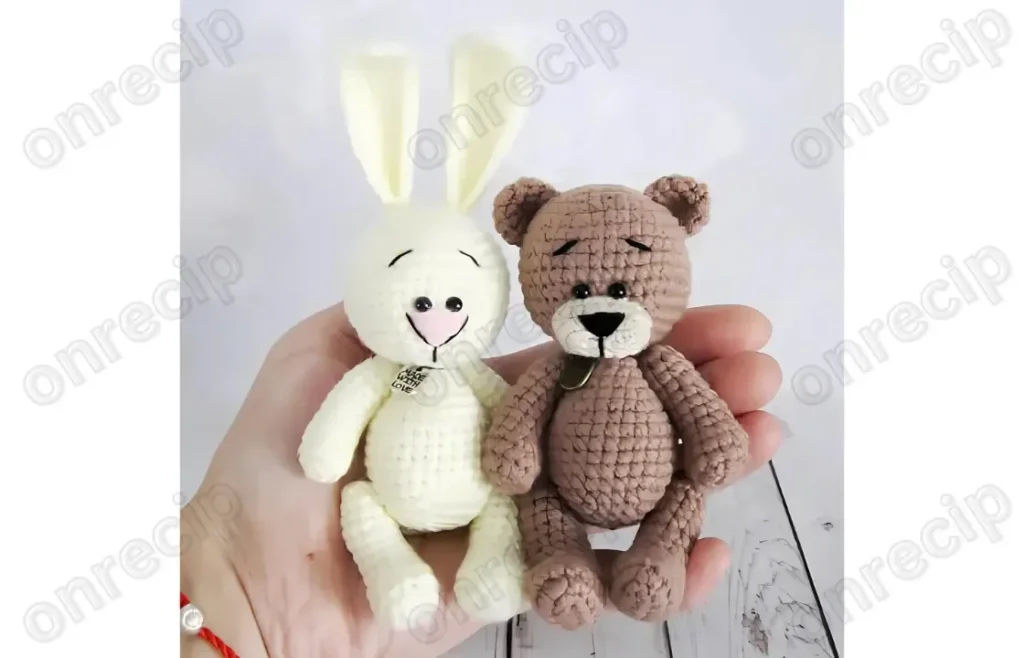
Made and counted by Wren —

Amigurumi bear and bunny pattern with movable legs

1.6mm hook, fine novelty yarn: 11 cm amigurumi bear and bunny with jointed, movable legs.

Amigurumi bear and bunny pattern with movable legs
IntermediateLevel
5-7 hoursTime
1.6 mmHook
FingeringYarn
Jump to the pattern

About this pattern

A one-piece head-and-body amigurumi (33 rounds) finishes at 11 cm without ears, worked on a 1.6mm hook in fine novelty yarn. Front legs (14 rounds, two pieces) and back legs (14 rounds, two pieces, flat-soled) are made separately, then sewn through the body for movement; ears (4 rounds, two pieces) and a 4-round tail complete assembly. The same base pattern also produces a bear.

This amigurumi works up as two toys from one shared pattern: a bear and a bunny, both built from a single head-and-body piece worked in 33 continuous rounds, with two front legs (14 rounds each), two back legs (14 rounds each) crocheted flat-soled and jointed for movement, two ears (4 rounds each), and a 4-round tail. Finished height is 11 cm without ears, on a 1.6mm hook and fine novelty yarn — small enough that stitch count discipline matters more than usual.

The pattern

Written out round by round

Materials

  • 1.6 mm crochet hook
  • Yarn of your choice, fine novelty yarn (original sample used Pehorka "Children's Novelty" yarn)
  • Bead eyes, for sewing on

Abbreviations

  • CH = chain stitch
  • SC = single crochet
  • DEC = decrease, crochet 2 SC together
  • INC = increase, crochet 2 SC into one stitch

Head and Body

Round 16 SC in a magic ring. (6)
Round 22 SC in each stitch. (12)
Round 31 SC, INC — repeat 6 times. (18)
Round 42 SC, INC — repeat 6 times. (24)
Round 53 SC, INC — repeat 6 times. (30)
Round 64 SC, INC — repeat 6 times. (36)
Round 75 SC, INC — repeat 6 times. (42)
Rounds 8–12crochet in a circle 42 stitches. (42)
Round 135 SC, DEC — repeat 6 times. (36)
Round 144 SC, DEC — repeat 6 times. (30)
Round 153 SC, DEC — repeat 6 times. (24)
Round 162 SC, DEC — repeat 6 times. (18)
Round 171 SC, DEC — repeat 6 times. (12)
Round 18crochet in a circle 12 stitches. (12)Round 19 begins the increasing for the body.
Round 191 SC, INC — repeat 6 times. (18)
Round 20crochet in a circle 18 stitches. (18)
Round 212 SC, INC — repeat 6 times. (24)
Round 22crochet in a circle 24 stitches. (24)
Round 233 SC, INC — repeat 6 times. (30)
Rounds 24–29crochet in a circle 30 stitches. (30)
Round 303 SC, DEC — repeat 6 times. (24)
Round 312 SC, DEC — repeat 6 times. (18)
Round 321 SC, DEC — repeat 6 times. (12)
Round 33DEC — repeat 6 times. (6)Cut the thread and tighten the hole; the bunny's body is done.

Front Legs

Make 2
Round 16 SC in a magic ring. (6)
Round 22 SC in each stitch. (12)
Round 3crochet in a circle 12 stitches. (12)
Round 4DEC — repeat 2 times, 10 SC. (10)
Rounds 5–13crochet in a circle 10 stitches. (10)
Round 14DEC — repeat 5 times. (5)Cut the thread, tighten the hole. Crochet the second leg the same way.

Back Legs

Make 2
Rounds 1–3For the back leg, chain 6 and crochet the sole (rounds 1-3) according to the pattern. (18)
Round 4Decrease 3 stitches on the toe; 3 SC, DEC — repeat 3 times, 9 SC. (15)
Round 5Decrease 3 stitches on the toe; 2 SC, DEC — repeat 3 times, 7 SC. (12)
Rounds 6–13crochet in a circle 12 stitches. (12)
Round 14DEC — repeat 6 times. (6)Cut the thread, tighten the hole. Crochet the second leg the same way.

Ears

Make 2

Two oval pieces are crocheted according to the pattern.

Round 16 SC in a magic ring. (6)
Round 22 SC in each stitch. (12)
Rounds 3–4crochet in a circle 12 SC.(12)

Tail

Round 16 SC in a magic ring. (6)
Round 22 SC in each stitch. (12)
Round 31 SC, INC — repeat 6 times. (18)
Round 4crochet in a circle 18 SC. (18)

Assembly

Step 1Assemble the bunny. Embroider the nose and eyebrows, sew on bead eyes, ears, legs, and tail.
Step 2For the legs to move, use a basic thread joint, i.e., sew the legs through the body.

Tester's notes

1.6mm hook is small for amigurumi; keep spare hooks in 1.4mm and 1.8mm on hand in case tension runs loose or tight across a work session.

33 rounds make up the head and body in one piece — place a stitch marker at the start of every round, since one missed decrease at this scale is hard to spot until several rounds later.

14-round front legs and 14-round back legs both need firm stuffing before the final closing rounds, not after, since dense fabric at this gauge is too tight to pack through a small opening.

4-round ears are short and flat-based; keep tension slightly looser than the body rounds so the ear edge does not curl under when sewn on.

The size of the bear and bunny is 11 cm without the ears.

To those asking for the mini bear masterclass, it's based on this bunny.

Aside from the ears and muzzle details: the muzzle is crocheted like the first 3 rows of the bunny's back leg sole.

Author – @wasilenatoys / translated by onrecip

At a glance

Rounds42
Parts5
LevelIntermediate
Time5-7 hours
Hook1.6 mm
YarnFingering

Gauge check

After round 4 of the head and body (24 SC), lay the piece flat and check that it sits without cupping or rippling — that is the sizing checkpoint for the full 11 cm finished piece.

If it does not lie flat, adjust hook size by half a step and redo the round rather than correcting later, since the whole toy scales from this ratio.

Stitch-count checkpoints

  • Head and Body · Rounds 8–12: 42 sts
  • Head and Body · Round 20: 18 sts
  • Head and Body · Round 33: 6 sts
  • Front Legs · Round 2: 12 sts
  • Front Legs · Round 4: 10 sts
  • Front Legs · Round 14: 5 sts

If something looks wrong

The head-and-body piece cups instead of
The increases are short somewhere — recount the 24 stitches; each of the 6 repeats needs exactly 2 SC plus one INC, and a skipped increase pulls the round tight and domes it.
Front legs come out wider than the back
Back legs decrease through two rounds before settling at 12 stitches, while front legs decrease once to 10 at round 4; check the leg against its own round-by-round count rather than assuming both shape the same way.
Legs do not swing after assembly; they
The thread joint needs to pass through both leg and body, not anchor flat on the surface — redo the joint pulling the needle fully through so the leg pivots instead of locking.
Stuffing shows through the fabric or
this hook gauge the stitches sit tight, so lumps usually mean stuffing went in as one bulk push; unstuff and repack a small amount per round instead.

Yarn substitutions

Fingering-weight acrylic or acrylic blendFinished toy grows past the stated 11 cm, so drop to a 2mm-2.5mm hook to hold the size down; expect a looser, more pliable fabric than the original novelty yarn.
Lace-weight cottonFabric turns stiffer and holds shape with less stuffing, size stays closer to 11 cm on a similarly small hook, but stitch definition on the ears is harder to read since cotton has less give.
Sport-weight wool or wool blendEasier stitch visibility while working, but the piece runs noticeably larger than 11 cm even on a small hook, so plan for a scaled-up final size rather than matching the original.
FAQs

Questions

Can the front legs and back legs be swapped or made identical?

No — front legs run 14 rounds with a single decrease at round 4, while back legs run 14 rounds with two decreases and a flat sole started from a 6-chain. Swapping them changes both the stance and the sole shape, so keep them separate.

Does the same pattern also make the bear version?

Yes — the bear shares the same base construction as the bunny: head-and-body, front legs, back legs, ears, and tail with the same round counts. The difference is limited to the ear shaping and muzzle detail, not the body itself.

Why does the muzzle use the back leg's sole pattern instead of its own piece?

The muzzle is worked from the first 3 rows of the back leg sole shaping, which already produces a small flattened oval. Reusing that shaping avoids writing a separate piece for a detail this small.

One at a time —

Get the next pattern

Tested round by round before it is sent. No spam.